How to Thread Plastic Pipe: A Step-by-Step Guide for DIYers
Threading plastic pipe, such as PVC, CPVC, or ABS, allows for easy, removable connections in low-pressure systems. To successfully thread plastic pipe, follow these essential steps: check the wall thickness, secure the pipe in padded jaws, use the appropriate die and lubricant, and apply consistent pressure while cutting threads, reversing periodically. After threading, deburr, clean, and seal the threads with PTFE tape or a plastic-safe sealant, then conduct a gentle pressure test. Remember to wear safety gear and ensure proper ventilation. For detailed instructions, troubleshooting tips, and testing guidelines, continue reading.
What Threading Plastic Pipe Means and When to Do It
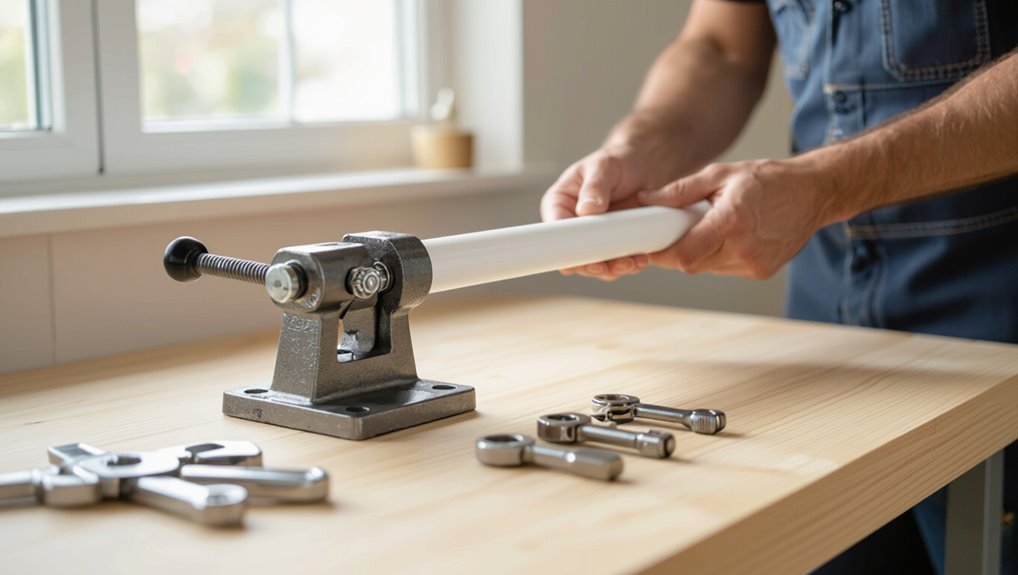
Threading plastic pipe creates screw-like ends that allow components to be joined and disassembled without solvent or permanent fittings.
It is commonly used on rigid plastics such as PVC, CPVC and ABS, occasionally on polyethylene with special tools, but generally not suitable for flexible PEX.
Typical DIY applications include temporary water lines, test setups, and repairs where future disassembly or adjustable connections are needed.
Why thread plastic pipe instead of using fittings or solvent welds
Although solvent welding and push-fit fittings are common for joining plastic pipe, threading the ends remains valuable when disassembly, adjustable alignment, or metal-to-plastic connections are required.
Threading offers reusable joints, finer alignment control, and easier future repairs. Learning how to thread plastic pipe helps installers create sealed, mechanical connections where solvent welds or fittings would impede maintenance, adjustment, or attachment to threaded hardware.
Common materials that can be threaded (PVC, CPVC, ABS, polyethylene, PEX limitations)
When choosing a plastic for threaded connections, installers should consider material composition and pipe wall thickness because not all plastics respond well to cutting threads or hold them under load.
PVC, CPVC and ABS machine reasonably and retain threads for low-pressure uses; rigid polyethylene can be threaded cautiously with special dies.
PEX is generally unsuitable due to flexibility and poor thread retention; inserts or fittings are preferred.
Typical applications for threaded plastic pipe in DIY projects
DIYers install threaded plastic pipe to join removable components, adapt metal fittings, or create temporary lines for tasks such as irrigation, greenhouse hookups, rainwater harvesting, and low-pressure compressed air or vacuum systems.
Typical uses include garden drip systems, portable wash stations, seasonal sprinkler setups, DIY filtration rigs, and workshop pneumatics.
Threading enables quick disassembly, part interchangeability, and simplified repairs in low-pressure applications.
Safety Precautions and Required Workspace Setup
Before beginning, the operator should don appropriate personal protective equipment and guarantee adequate ventilation to control dust and fumes.
The work area must be arranged with secure clamps and supports to hold the pipe without causing crush or distortion.
Finally, the pipe should be inspected for cracks, deformities, and material compatibility with the chosen threading method and fittings.
Personal protective equipment and ventilation
Put on appropriate PPE and secure adequate ventilation to minimize exposure to metal shavings, cutting fluids, and dust generated while threading plastic pipe.
Wear eye protection, cut-resistant gloves, a dust mask or respirator rated for particulates, and hearing protection when using powered tools.
Guarantee airflow via open windows, fans, or exhaust ventilation.
Replace contaminated clothing and wash hands after work.
Workspace layout, clamps, and support to prevent pipe damage
When arranging the work area, guarantee a stable, level bench with enough clear space on both sides of the vise to support the full length of pipe and tooling; this reduces leverage on the fitting and prevents bending or scoring.
Use padded clamps or soft-jaw vises to avoid surface marring, add roller supports for long runs, and position tools for unobstructed, ergonomic access to maintain steady, controlled threading.
Inspecting pipe condition and compatibility before starting
A visual and tactile inspection of the plastic pipe should be performed to verify material integrity and compatibility with the proposed fittings and application.
The inspector checks for cracks, crazing, soft spots, discoloration, and deformations.
Confirm pipe material (PVC, CPVC, ABS, PEX), pressure rating, and temperature limits match project requirements.
Reject compromised sections and document measurements before cutting or threading.
Tools and Materials You’ll Need
A clear list of hand tools and threading equipment is essential before beginning work on plastic pipe. Common items include pipe wrenches, hacksaws, reamers, files, vises, and threading tools such as hand dies, adjustable die heads, and tap-and-die sets designed for plastics.
Measurement and marking tools should also be included. Thread sealants, lubricants, replacement fittings, and recommended tool sizes matched to pipe diameters should also be on hand.
Hand tools: pipe wrench, hacksaw, reamer, file, pipe vise
Although threading plastic pipe can be done with power tools, hand tools give better control and are often sufficient for small jobs.
Essential items include a pipe wrench to hold and turn fittings, a hacksaw for clean cuts, a reamer to remove burrs, a fine file to smooth edges, and a pipe vise to secure the workpiece.
Proper tool choice prevents cracking and guarantees accurate joints.
Threading tools: hand die, adjustable die head, die stock, tap-and-die sets for plastics
Having secured and prepared the pipe with hand tools, attention shifts to the cutting and forming implements that create threads in plastic.
A hand die and matching die stock provide simple, controlled threading for short runs. Adjustable die heads fit various diameters and mount in drills or lathes.
Tap-and-die sets made for plastics include softer dies and guides to prevent cracking and overcutting.
Measurement and marking tools, thread sealants, lubricants, and replacement fittings
Several precise measuring and marking tools, along with appropriate sealants, lubricants, and spare fittings, are essential before cutting or threading plastic pipe.
A tape measure, calipers, marker, and pipe depth gauge guarantee accurate cuts and thread lengths.
Use PTFE tape or compatible liquid sealant and a plastic-safe lubricant.
Keep replacement fittings, matching thread type and material, for clean, leak-free repairs and assembly.
Recommended tool sizes by pipe diameter
A concise chart of recommended tool sizes by nominal pipe diameter helps guarantee correct cuts, clean threads, and proper fit-up for plastic piping. The chart lists recommended cutter wheel, die head, and socket sizes for common nominal diameters; users should match tools to pipe schedule and verify fit before threading.
| Nominal Diameter | Tool Size |
|---|---|
| 1/2″ | 1/2″ die |
| 1″ | 1″ die |
| 2″ | 2″ die |
Preparing the Pipe for Threading
Before threading, the pipe should be measured and marked for cut length and required thread engagement to guarantee proper fit.
The cut must be square and both the inside and outside deburred to remove burrs and sizing irregularities.
Wall thickness should be checked and brittle plastics conditioned or gently warmed as necessary to prevent cracking during threading.
Measuring and marking the cut length and thread engagement
Measure the pipe length and mark both the cut point and the required thread engagement precisely.
Using calipers or a tape measure, note wall thickness and coupling depth to determine engagement length.
Transfer measurements to the pipe with a fine-tip marker or scribe.
Mark a reference line around the circumference for alignment.
Double-check measurements against fitting specifications before proceeding to cut.
Cutting the pipe squarely and deburring the inside and outside
Having confirmed cut and engagement marks, the installer proceeds to cut the pipe squarely and remove burrs from both inside and outside edges.
Using a fine-toothed saw or plastic pipe cutter, the cut is straight and supported to prevent flexing.
A deburring tool or round file cleans the inner lip; a scraper or sandpaper smooths the outer edge, preventing thread damage and ensuring proper seating.
Checking wall thickness and heating or conditioning brittle plastics if needed
When preparing to thread plastic pipe, the installer verifies wall thickness at the cut end against the pipe’s specified minimum to guarantee sufficient material for secure threads and to prevent splitting.
If the wall is thinner than required, threading should be avoided or reinforced.
Brittle plastics are gently conditioned with controlled heat or acclimated to room temperature to reduce cracking risk, then rechecked before threading.
Step-by-Step Threading Process for Rigid Plastics (PVC, CPVC, ABS)
The threading process begins with securely clamping the pipe in a vise using soft jaws or padding to prevent crushing.
The operator then selects the correct die size, aligns it square to the pipe, applies appropriate lubricant, and starts the die with steady, controlled pressure to minimize cracking.
Threads are cut with even turns, periodically reversed to clear chips, and finished by removing burrs and cleaning the thread profile.
Securing the pipe in a vise without crushing
Clamp the pipe gently but securely to prevent movement during threading while avoiding deformation of the plastic.
Use soft jaw covers—leather, rubber, or wood strips—between the pipe and vise.
Position the pipe so the clamped area stays clear of the cut line.
Apply only enough pressure to stop rotation; test by turning the pipe by hand.
Reposition for longer lengths as needed.
Selecting and aligning the correct die size
Before cutting threads, confirm the pipe’s nominal size and wall type. Then choose a die that matches the pipe material (PVC, CPVC, ABS) and thread standard (NPT, BSP), ensuring the die’s bore snugly fits the pipe OD without crushing.
Align the die perpendicular to the pipe axis, center it visually, and use a guide or pilot to prevent offset. Verify die faces are clean and undamaged.
Applying lubricant and starting the die’ technique to avoid cracks
Apply a compatible lubricant evenly to the pipe end and die to reduce friction and heat, then seat the die squarely to begin threading with steady, controlled turns.
The operator maintains light initial pressure, ensuring the die starts cleanly without skipping.
Lubrication prevents scoring and micro-cracks; pause if resistance spikes, relubricate, and confirm die alignment before resuming to protect the plastic.
Cutting threads evenly: turns, pressure, and reversing to clear chips
With the die seated and lubrication applied, the operator proceeds to cut threads using a steady, measured rhythm: three to five full turns forward with moderate, even pressure, then a brief half- to one-turn reverse to break and clear chips.
Repeat this cycle, advancing evenly and watching alignment.
Maintain consistent feed and light additional lubricant as needed to prevent binding and minimize stress on the plastic.
Finishing threads and cleaning off burrs and chips
Once threading is complete, the operator inspects the ends and root of the threads for burrs, ragged edges, and loose chips, since these can impair fit and sealing.
Any debris is removed with a soft brush and compressed air.
Lightly deburr with a hook-style scraper or fine file, using gentle strokes along the profile.
Final wipe with a lint-free cloth readies the thread for assembly.
Inspecting thread quality and verifying fit with mating fitting
After burrs and chips have been removed and the thread face wiped clean, the operator proceeds to inspect thread geometry and verify fit with the mating fitting.
Visual and tactile checks confirm uniform crest and root profiles, consistent pitch, and absence of cracks.
A trial engagement verifies smooth start, proper depth, and no cross-threading.
If misalignment or binding occurs, rework or reject the piece.
Threading Flexible Plastics and Thermoplastics (PE, PEX) Alternatives
Flexible polyethylene (PE) and cross‑linked polyethylene (PEX) generally cannot be cut and threaded like rigid plastics because their softness and elasticity prevent reliable mating of standard threads.
Recommended alternatives include using insert or compression fittings, and brass adapters that create a mechanical seal without cutting threads into the pipe wall.
In limited cases, heat‑forming or specialty dies can shape ends for fittings, but such methods require proper tooling and validation for pressure and temperature ratings.
Why direct threading is often unsuitable for PE and PEX
Direct threading rarely works for polyethylene (PE) and cross-linked polyethylene (PEX) because their low rigidity and high ductility prevent reliable, durable male-female thread engagement.
Threads cut into these materials deform, cold-flow, or strip under torque and pressure. Temperature changes and cyclic loads accelerate loosening and leakage.
Consequently, attempts to thread PE/PEX often fail long-term, compromising joint integrity and system safety.
Recommended alternatives: insert fittings, compression fittings, brass adapters
Because male-female threads in PE and PEX lack the rigidity to hold under load, installers should use connection methods that rely on mechanical grip or a harder insert rather than cutting threads into the plastic itself.
Recommended options include plastic or metal insert fittings for secure internal support, compression fittings that clamp tubing without threads, and brass adapters that provide durable male/female interfaces where needed for fixtures or junctions.
When heat-forming or specialty dies are appropriate
When the material and application permit, heat-forming or specialty die techniques can produce stronger, more reliable threads in thermoplastics than cutting alone.
These methods suit PE, PEX, and similar thermoplastics where softened material flows to form thread profiles. They require controlled heating, matched dies, and post-process annealing.
Use when pressure ratings, longevity, or leak prevention demand superior mechanical engagement versus simple cutting or adapters.
Joining Threaded Plastic Pipe and Ensuring Leak-Free Seals
When joining threaded plastic pipe, appropriate sealing methods such as PTFE tape, plastic-compatible pipe dope, or molded O-rings are essential to prevent leaks.
Installers must follow manufacturer guidance on torque and stop short of over-tightening to avoid stress cracking in the plastic.
After assembly, perform a controlled pressure test to verify leak-free seals and to detect any compromised connections.
Thread sealing options: PTFE tape, pipe dope compatible with plastics, O-rings
Three common methods reliably seal threaded plastic pipe joints: PTFE tape, plastic-compatible pipe dope, and molded O-rings.
PTFE tape wraps clockwise over male threads for a clean, adjustable seal.
Pipe dope formulated for plastics fills minor imperfections and resists chemical attack.
Molded O-rings provide instant, reusable seals for fittings designed with grooves, preventing leaks without relying on thread deformation.
Proper torquing and avoiding over-tightening to prevent stress cracking
After selecting an appropriate sealing method—PTFE tape, plastic-safe pipe dope, or an O-ring—the final seal depends on correct tightening rather than more sealant.
Hand-tighten fully, then apply measured turns with a wrench per manufacturer torque or inch-pounds guidance. Stop when resistance increases noticeably.
Avoid excessive force: over-tightening causes thread stripping, deformation, or stress cracking in plastic.
Use backing fittings or torque-limiting tools.
Pressure testing threaded connections safely
Begin pressure testing threaded plastic connections only after joints have cured, sealant set, and fittings visually inspected for correct engagement.
Use low-pressure air or water per code, gradually increase to test pressure, and monitor for leaks and deformations.
Maintain pressure for the specified duration, record readings, and relieve slowly.
If leaks or distortion occur, drain, disassemble, repair or replace affected fittings, then retest.
Troubleshooting Common Threading Problems
Common threading problems include cracks or splits formed during cutting, poor thread engagement or cross-threading, and leaks at completed joints.
The section outlines prevention and repair for split or cracked fittings, methods to correct or rework misaligned threads, and diagnostic steps to determine whether leaks stem from sealant application or thread defects.
Practical tips and decision points guide selection of repair versus replacement.
Cracks or splits during threading and how to repair or prevent them
Cracks or splits that appear while threading plastic pipe typically result from excessive torque, improper tooling, or flaws in the material; identifying the root cause quickly helps determine whether the joint can be salvaged or must be replaced.
Small splits near the end can sometimes be repaired with solvent welds and reinforcing sleeves if pressure requirements are low; larger fractures require replacement and review of tooling, speed, and clamp methods.
Poor thread engagement or cross-threading: fixes and rework methods
Misaligned starts or uneven threading often cause poor engagement or cross-threading, leaving joints that bind, leak, or strip under load.
Inspect threads for damage, recut with correct die size and steady alignment, or chase with a thread tap/die to restore profiles. Replace severely deformed fittings.
Use lubrication, controlled speed, and proper clamping to prevent recurrence; verify engagement before final tightening.
Leaks at threaded joints: diagnosing sealant vs. thread defects
When a threaded plastic joint leaks, distinguishing between inadequate sealant application and damaged thread form is the first diagnostic step.
Inspect threads for cuts, flattened crests, or missing segments; rotate fittings dry to feel binding.
Remove old sealant, clean, and retest with proper tape or compound.
If leaks persist despite correct sealing, replace or rethread the damaged component to restore proper engagement and pressure integrity.
Maintenance, Longevity, and When to Replace Threaded Plastic Joints
Inspection should focus on visible signs of fatigue, stress cracking, and chemical attack that indicate compromised threaded plastic joints.
A concise routine checklist—covering leak checks, thread wear, torque verification, and contamination—helps determine serviceability.
Guidance on careful disassembly, use of compatible tools, and criteria for reuse versus replacement completes the maintenance protocol.
Signs of fatigue, stress cracking, and chemical attack
Several common indicators reveal that threaded plastic joints are approaching the end of their service life: hairline or radial cracks around threads, crazing or surface whitening, unexpected stiffness or brittleness, and localized deformation where loads concentrate.
Discoloration, pitting, or softening signal chemical attack.
Recurrent leaks, especially at joints with no overt mechanical damage, often indicate internal embrittlement or stress corrosion necessitating replacement.
Routine inspection checklist for threaded plastic pipes
Signs of fatigue, stress cracking, and chemical attack provide clear prompts to begin routine checks. A concise inspection checklist helps standardize maintenance for threaded plastic pipes.
Inspect threads for wear, deformation, or cross-threading; check seals and tape for brittleness or leakage; verify alignment and support to prevent strain; assess discoloration or surface pitting; document findings and schedule repairs or replacement.
Best practices for disassembly and reuse of fittings
When preparing to disassemble threaded plastic fittings, the technician should first depressurize and drain the line.
Then document the joint orientation and any sealant used so reassembly restores original alignment and sealing conditions.
Use appropriate tools to avoid rounding, clean threads gently, inspect for cracks or deformation, replace compromised parts, and reuse only undamaged seals or apply fresh compatible sealant.
Test for leaks after reassembly.
Cost, Time Estimates, and When to Hire a Professional
Typical DIY threading projects—such as repairing a short section, adding fittings, or replacing a faucet adapter—usually require basic tools and materials and can take 30 minutes to a few hours, with costs commonly ranging from $10 to $75.
Larger jobs involving long runs, complex layouts, or specialized plastics increase time and material expenses and may introduce sealing and pressure concerns.
A professional plumber is recommended for high-pressure systems, concealed piping, code-sensitive installations, or when the homeowner lacks tools or confidence.
Typical DIY time and material costs by project type
A range of common DIY plastic-pipe jobs—repairing a leaky joint, installing a new outdoor spigot, rerouting a short section of supply line, or assembling drainage runs—vary widely in required time and materials, so clear expectations help determine whether to proceed solo or call a pro. Typical estimates:
| Project | Time | Materials (approx.) |
|---|---|---|
| Leak repair | 0.5–1 hr | $5–$25 |
| Spigot install | 1–2 hr | $15–$50 |
| Reroute short run | 1–3 hr | $20–$80 |
Scenarios where professional help is recommended
Minor repairs and straightforward installs often suit a competent DIYer, but certain signs indicate that hiring a professional is more prudent: extensive corrosion or hidden damage, involvement of gas or electrical components, significant changes to a home’s water supply or pressure, recurring leaks despite repairs, or work that requires permits and inspections.
Professionals provide accurate cost and time estimates, guarantee code compliance, and reduce risk of costly failures.
Quick Reference Guides and Conversion Charts
A compact quick-reference section lists thread dimensions and common pipe sizes used for plastic fittings to help match tapers, pitches, and nominal diameters at a glance.
Accompanying conversion charts translate between imperial and metric measurements and show compatible fitting standards.
A printable step checklist summarizes tooling, lubrication, cutting depths, and inspection steps for use during a threading job.
Thread dimensions and common pipe sizes for plastic fittings
Quick reference charts list thread dimensions and corresponding nominal pipe sizes for plastic fittings, translating industry standards (NPT, BSPT, BSPP, and metric threads) into practical measurements such as major/minor diameters, pitch, and engagement length. Charts show common sizes, tolerances, and adapters for DIY selection.
| Nominal Size | Thread Type | Key Dimension |
|---|---|---|
| 1/2″ | NPT | 0.840″ OD |
| 3/4″ | BSPP | 1.038″ OD |
Step checklist to print or save for a threading job
Several clear, numbered steps help guarantee accurate, safe threading of plastic pipe and provide a concise reference for the job.
A printable checklist should include prep, measurements, tools, and safety. Include conversion charts and torque ranges. Store digitally and laminate a hard copy.
- Confirm pipe material and size
- Select correct die and lubricant
- Secure pipe and cut square
- Inspect threads and fitment
Conclusion
Like a careful gardener grafting tender branches, the DIY plumber joins plastic pipes with patience and respect for tools. Each clean cut, filed edge, and tested seal becomes a small rite that keeps water flowing and trouble at bay. When skill meets caution, threaded joints endure; when uncertainty grows, calling a pro prunes risk. In this way, the workshop becomes a quiet orchard of reliability, tended one secure connection at a time.