How to Clean a Shower Diverter Valve: Step-by-Step Guide to Restore Water Flow
To effectively clean a shower diverter valve and restore water flow, start by shutting off the water supply. Remove the trim and handle to access the diverter assembly. Inspect the ports, seals, and O-rings for any damage. Soak scaled components in vinegar or a commercial descaler, then scrub gently. Replace any worn seals and apply plumber-grade silicone grease for lubrication. Reassemble the valve and test for leaks and proper water flow. For a more detailed step-by-step guide, along with diagnostics and replacement tips, continue reading.
What a Shower Diverter Valve Is and Why It Gets Clogged
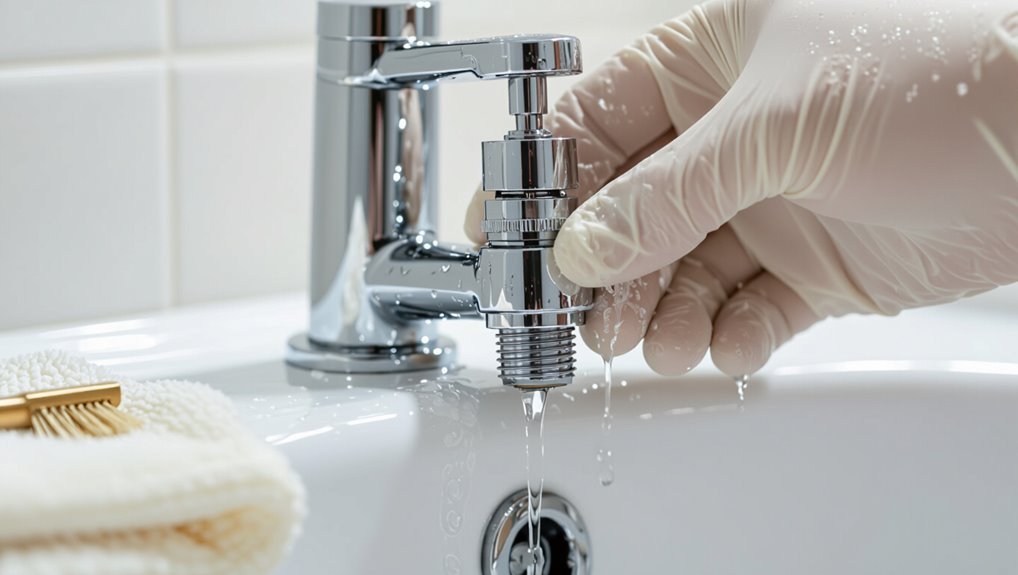
A shower diverter valve directs water between showerhead and tub spout or between multiple outlets, operating as simple 2-way, 3-way, or integrated tub/shower mechanisms.
Each type uses different internal ports or passages that can wear or become misaligned over time.
Mineral buildup, corrosion, and trapped debris are common causes of reduced flow and diverter malfunction.
How a diverter valve works in common shower setups
Diverter valves control the flow path of water in showers, directing water between the tub spout, showerhead, and sometimes a handheld wand.
In common setups, the valve reroutes pressure via internal passages or cartridges; mineral buildup or worn seals hinder redirection.
Understanding this operation helps diagnose flow issues and informs how to clean a shower diverter valve, remove deposits, and replace faulty components efficiently.
Typical types of diverter valves (2-way, 3-way, integrated tub/shower)
Although often small and hidden, shower diverter valves come in several common types—two-way, three-way, and integrated tub/shower—that differ in how they route water and how prone they are to clogging.
Two-way diverts between showerhead and handheld; three-way directs flow among three outlets.
Integrated tub/shower diverters combine spout and valve mechanisms.
Each type requires slightly different access and disassembly for cleaning.
Common causes of reduced water flow and diverter problems
Corrosion, mineral buildup, worn seals, and trapped debris are the most common reasons a shower diverter restricts flow or fails to shift water properly.
Infrequent use, sediment in supply lines, and deteriorated O-rings or springs exacerbate sticking and leaks.
Improper installation or damaged internal channels can misdirect flow.
Regular inspection and descaling prevent progressive clogging and mechanical failure.
Quick Checklist: Signs Your Diverter Valve Needs Cleaning or Repair
Signs that a shower diverter valve needs attention include reduced water flow, visible leaks, and failure to fully redirect water between shower and tub.
Minor clogs or mineral buildup often respond to cleaning and lubricant, restoring normal function.
Persistent leaks, cracked components, or continued incomplete diversion typically indicate the need for replacement.
Symptoms to look for (low flow, leaks, incomplete diversion)
Several common indicators point to a diverter valve that requires attention: reduced water flow from the showerhead, visible leaks around the valve or handle, and failure to fully divert water between spout and shower.
Additional signs include sputtering or inconsistent pressure when switching modes, continuous trickle from the tub spout during shower use, and mineral buildup visible at joints or on the stem.
When cleaning is likely enough vs. when replacement is needed
Not all flow issues or visible buildup require a full replacement; many problems respond to targeted cleaning or simple parts replacement.
Cleaning is likely when mineral deposits, slow diversion, or minor leaks are present and internal parts move.
Replacement is advised for cracked housings, corroded cartridges, persistent leaks after cleaning, or when parts are unavailable or costlier than a new diverter.
Tools, Materials, and Safety Precautions You’ll Need
A concise list of tools and replacement parts—wrenches, screwdrivers, replacement O-rings or cartridges, and plumber’s grease—prepares the reader for the job.
Appropriate protective gear and safety steps are emphasized, including eye protection, gloves, shutting off the water, and considering electrical risks in nearby fixtures.
The paragraph also explains how to locate the shutoff valve and relieve system pressure before any disassembly.
Tools and replacement parts checklist
Before beginning work on a shower diverter valve, the technician should assemble the necessary tools, replacement parts, and basic safety gear to guarantee a safe, efficient repair.
Essential items include:
- Adjustable wrench, screwdriver set, and hex keys.
- Replacement O-rings, cartridges, and diverter assembly.
- Plumber’s grease, penetrating oil, and Teflon tape.
- Clean rags and a small parts tray.
Protective gear and safety tips (water shutoff, electrical concerns)
While wearing appropriate protective gear and verifying utility shutoffs, the technician reduces risk of injury and property damage during diverter valve work.
Safety gloves, eye protection, and non-slip footwear protect against sharp edges and hot water.
Electrical hazards near fixtures require power isolation and caution with wet surfaces.
Adequate lighting, a dry workspace, and a partner for assistance further minimize risks.
How to identify the shutoff valve and relieve water pressure
How can the correct shutoff be located and pressure relieved without guesswork?
Locate the home’s main water shutoff (usually near the meter, basement, garage, or exterior wall) and turn it clockwise to close.
Open the lowest and highest fixtures to drain lines and relieve pressure.
Use a bucket and towels for residual water.
Verify no flow at the shower before starting work.
Step-by-Step Guide to Cleaning a Shower Diverter Valve
The procedure begins with preparing the work area and shutting off the water supply to prevent leaks and contamination.
Next, trim and handle components are removed to access the diverter for inspection of mineral buildup and wear.
Cleaning follows, using mild methods like vinegar soaks and brushes or stronger cleaners for heavy scale, and concludes with cleaning surrounding ports, seats, and seals.
Step 1 Prepare the work area and shut off water
Begin by clearing the shower area and gathering basic tools—towels, a bucket, an adjustable wrench, screwdrivers, and a flashlight—so everything needed is within reach.
Locate and shut off the main or local water supply to the bathroom, then open taps to relieve pressure.
Lay towels to catch drips, position the bucket, and guarantee good lighting and ventilation before proceeding.
Step 2 Remove trim, handle, and access the diverter
Remove the decorative trim and handle to expose the diverter assembly, taking care to keep fasteners and small parts organized for reassembly.
Use appropriate screwdrivers or hex keys, gently pry trim plates with a plastic tool to avoid scratching.
Note cartridge or stem orientation before removal.
Place parts in labeled containers.
Make certain the valve is accessible and lighting adequate before proceeding to the next step.
Step 3 Inspect the diverter for mineral buildup and wear
Inspect the exposed diverter closely for signs of mineral deposits, corrosion, or mechanical wear using good lighting and, if available, a magnifier.
Note pitting, flaking, deformed seals, or scoring on moving parts.
Check cartridge or spool alignment and spring tension where visible.
Document findings and determine whether components appear serviceable, require replacement, or need deeper cleaning in the next step.
Step 4 Clean the diverter: methods for mild vs. heavy scale (vinegar soak, brush, CLR)
With the diverter assessed, cleaning proceeds according to the severity of mineral buildup: mild scale typically responds to a vinegar soak and soft brushing, while heavy scale may require a commercial descaler and more aggressive scrubbing.
- Soak parts in white vinegar for 30–60 minutes.
- Gently scrub with a nylon brush.
- Apply CLR or descaler for stubborn deposits.
- Rinse thoroughly and dry before reassembly.
Step 5 Clean surrounding ports, seats, and seals
Begin by clearing any loose debris from the valve body and housing to expose the ports, seats, and seals that control flow paths.
Inspect each port for mineral buildup or nicks. Use a soft brush and cotton swab with mild descaler to remove deposits.
Check elastomeric seals and seats for wear or deformation; replace any compromised components before reassembly to guarantee a proper watertight seal.
Step 6 Lubricate moving parts and reassemble with correct torque
After cleaning and replacing any worn seals, attention shifts to lubricating the diverter’s moving parts and reassembling the unit to the correct torque.
Apply a small amount of plumber-grade silicone grease to spindles, O-rings, and sliding surfaces.
Reassemble components in reverse order, hand-tighten then use a torque-limited tool to achieve manufacturer-specified torque.
Avoid over-tightening to prevent distortion and leaks.
Step 7 Turn water back on and test flow and sealing
Open the main shutoff slowly and observe the diverter and surrounding connections for immediate leaks.
Then operate the diverter through all positions, checking showerhead, tub spout, and handheld flow rates.
Inspect for dripping, sputtering, or pressure loss.
Tighten fittings if minor leaks appear; reseat seals or disassemble again for persistent issues.
Confirm consistent, sealed operation before finishing.
Alternative Cleaning Approaches for Different Diverter Types
Different diverter designs require specific methods: cartridge-style units often need removal for cleaning or full cartridge replacement.
Ball-and-plug diverters respond well to descaling and seal replacement to restore function.
Integrated tub spout diverters may be cleaned internally if accessible, but frequently warrant complete spout replacement.
Cartridge-style diverters: removal, cleaning, and cartridge replacement
Cartridge-style diverters require a distinct approach because the working parts are enclosed in a removable cartridge that controls flow between tub spout and showerhead.
Shut water, remove trim, extract cartridge per manufacturer instructions.
Inspect O-rings and seals, soak mineral buildup in vinegar or descaler, brush gently, rinse, and lubricate silicone-safe grease.
Replace damaged cartridges or seals, reassemble, test for leaks and proper diverting.
Ball-and-plug diverters: descaling and seal replacement
After addressing cartridge-style units, attention turns to ball-and-plug diverters, which operate on simpler moving parts but are equally prone to mineral buildup and worn seals.
Descale components with vinegar or commercial descaler, brush deposits away, rinse thoroughly.
Inspect O-rings and rubber seals; replace hardened or torn pieces.
Re-lubricate with plumber’s grease, reassemble, test for smooth operation and leak-free diversion.
Integrated tub spout diverters: internal cleaning or full spout replacement
Integrated tub spout diverters require a distinct approach because the diversion mechanism is enclosed within the spout itself, often necessitating either internal cleaning or complete spout replacement.
Technicians assess access type: removable spout models allow disassembly, descaling, and seal renewal. Nonremovable or corroded spouts typically warrant full replacement.
Proper matching of inlet size and materials guarantees reliable diversion and leak-free operation.
How to Diagnose and Fix Common Problems After Cleaning
After cleaning, common issues include persistent low flow, leaks at the diverter, and difficulty operating the mechanism.
Technicians should check the showerhead, supply lines, and water pressure for flow problems; inspect seals and O‑rings for leaks; and assess whether stiffness is due to damage or needs lubrication.
Each symptom directs a specific next step to restore proper function.
Persistent low flow: checking showerhead, supply lines, and pressure
Begin by confirming whether low flow persists only at the showerhead or throughout the fixture, since that distinction directs the diagnostic steps:
If isolated, remove and inspect the showerhead for mineral buildup or clogged nozzles; soak or replace as needed.
If whole-fixture flow is weak, check supply shutoffs, visible supply lines for kinks, and test household water pressure to identify broader plumbing or municipal issues.
Leaking diverter after reassembly: seal and O-ring inspection
If low flow has been ruled out as a supply or showerhead issue and the diverter was recently removed and reassembled, a leak at the diverter often points to an improperly seated seal or a damaged O-ring.
Inspect seals for nicks, flattening, or debris; check O-rings for cracks, swelling, or compression set.
Replace worn components, lubricate with plumber’s grease, and retest for leaks.
Diverter stuck or difficult to operate: mechanical damage vs. lubrication
Diagnose whether a stiff or stuck diverter stems from mechanical damage or insufficient lubrication by first observing its movement and feeling for resistance.
If movement is rough, grinding or uneven, inspect for broken teeth, bent components, or debris; damaged parts require replacement.
If the action is smooth but stiff, clean contact surfaces and apply appropriate plumber’s grease; reassemble and test for restored operation.
When to Replace the Diverter Valve or Call a Professional
Visible damage such as cracked components, heavy corrosion, or recurrent failures indicates replacement rather than further cleaning.
The decision should weigh parts cost, required time, and the installer’s skill level against the complexity of the job.
When replacing, the safest choice is a diverter specified for the fixture’s brand or with matching connection types and dimensions.
Signs replacement is necessary (cracked parts, corrosion, repeated failures)
Several clear signs indicate a shower diverter valve needs replacement rather than repair.
Visible cracks, fractured or missing components and significant corrosion indicate structural failure.
Persistent leaks or loss of water pressure after cleaning, frequent repeated malfunctions, and internal parts that bind or crumble under inspection also justify replacement.
In such cases, replacement prevents recurrence and restores reliable function.
Cost, time, and skill factors to consider
When weighing whether to replace a shower diverter valve or call a professional, homeowners should consider cost, time, and required skill—each can tip the decision toward DIY or hiring a plumber. Minor repairs suit competent DIYers; major corrosion or complex access favors professionals.
| Factor | Consideration |
|---|---|
| Cost | Parts vs. labor |
| Time | Hours vs. appointment |
| Skill | Tools and experience |
| Risk | Leaks and damage |
How to choose a compatible replacement diverter
Choosing a compatible replacement diverter becomes the priority if inspection, cost, or complexity indicate replacement rather than repair.
The homeowner should match type (tub-spout, three-valve, cartridge), measurements, mounting style, and finish.
Verify brand compatibility, water pressure ratings, and valve material for durability.
If uncertain, consult manufacturer specifications or hire a licensed plumber to guarantee correct fit and prevent leaks.
Preventive Maintenance to Keep Your Diverter Working Smoothly
Preventive maintenance extends the life of a shower diverter and reduces the need for repairs.
A simple routine of regular cleaning and quick at-home checks helps spot wear early, while water softeners or in-line filters can minimize mineral buildup.
Seasonal inspections and a few long-term care habits keep the mechanism operating smoothly.
Routine cleaning schedule and simple at-home checks
A simple, regular schedule of basic inspections and light cleaning can prevent most diverter valve problems and extend the life of shower fixtures.
Monthly visual check for leaks, debris, and handle play.
Quarterly light disassembly for wipe-down and lubrication.
Replace worn seals annually.
Immediate minor repairs when flow changes appear.
- Visual
- Wipe
- Lubricate
- Replace
Water softening and filters to reduce mineral buildup
Routine inspections and light cleaning reduce wear, but hard water can still drive mineral buildup that jams diverter valves and shortens seal life.
Installing a whole-house water softener or point-of-use filter reduces calcium and magnesium deposits.
Choose systems rated for local water hardness, maintain resin or filter cartridges per manufacturer guidance, and monitor water quality to prolong valve function and delay descaling.
Seasonal and long-term maintenance tips
Several seasonal checks and long-term practices help keep a shower diverter operating smoothly and extend its service life.
Inspect for leaks, test operation, and clean visible mineral deposits every few months.
Replace worn seals and O-rings annually.
Flush supply lines and maintain water softeners or filters.
Document maintenance dates and address small issues promptly to prevent costly repairs.
Troubleshooting Quick Reference and Parts Identification
A concise troubleshooting reference lists common diverter components—stem, cartridge, O-rings, seals, and springs—and explains how to identify part numbers for ordering replacements.
A simple flowchart maps typical symptoms (leak, partial flow, stuck diverter) to likely faulty parts and suggested checks.
This section equips the reader to match problems to parts and obtain correct spares.
Common part names and how to order replacements
Clear identification of diverter components speeds diagnosis and guarantees correct parts are ordered for repair.
Common names, sizes, and materials should be noted before ordering.
Typical items include:
- O-ring seal (measure thickness)
- Ceramic cartridge (model number)
- Diverter spool/stem (length and spline)
- Retaining clip/spring (material type)
Provide photos and measurements to suppliers for accurate replacements.
Quick troubleshooting flowchart for typical symptoms
With parts identified and measurements documented, the next step is a concise troubleshooting flowchart that maps common symptoms to likely causes and quick checks. The flowchart guides diagnosis: low pressure, no diversion, or leaks. Follow targeted checks, clean or replace parts, reassemble, and retest. Quick reference:
| Symptom | Likely Cause | Quick Check |
|---|---|---|
| Low flow | Clogged valve | Inspect/clean |
| No divert | Worn seal | Test movement |
| Leak | Damaged O-ring | Replace and retest |
Conclusion
Like a garden gate stiff with rust, the shower diverter once jammed and silent; cleaning is the careful hand oiling the hinge so water flows again. With tools and patience the mechanism is freed, revealing that small, regular tending keeps paths open. If stubborn corrosion returns, replacement or expert help prunes the problem. Routine care preserves function, turning a balky valve back into a courteous steward of every shower’s stream.