How to Connect Flexible PVC Pipe: Step-by-Step Guide for Secure, Leak-Free Joints
To connect flexible PVC pipe securely and ensure leak-free joints, follow these straightforward steps. Begin by prepping the pipe with a square cut, deburring the edges, chamfering the end, and marking the insertion depth. If necessary, warm the pipe end slightly for easier fitting. Perform a dry fit to verify proper seating. For barbed fittings, use stainless worm or T-bolt clamps placed behind the last barb ridge, tightening them to the specified torque. For enhanced reliability, opt for compression or push-fit fittings, ensuring full insertion and intact seals. Transition to rigid pipe using appropriate adapters and sealants. Follow these techniques closely, and you’ll achieve secure connections while minimizing potential issues.
Overview of Flexible PVC Pipe and Common Applications
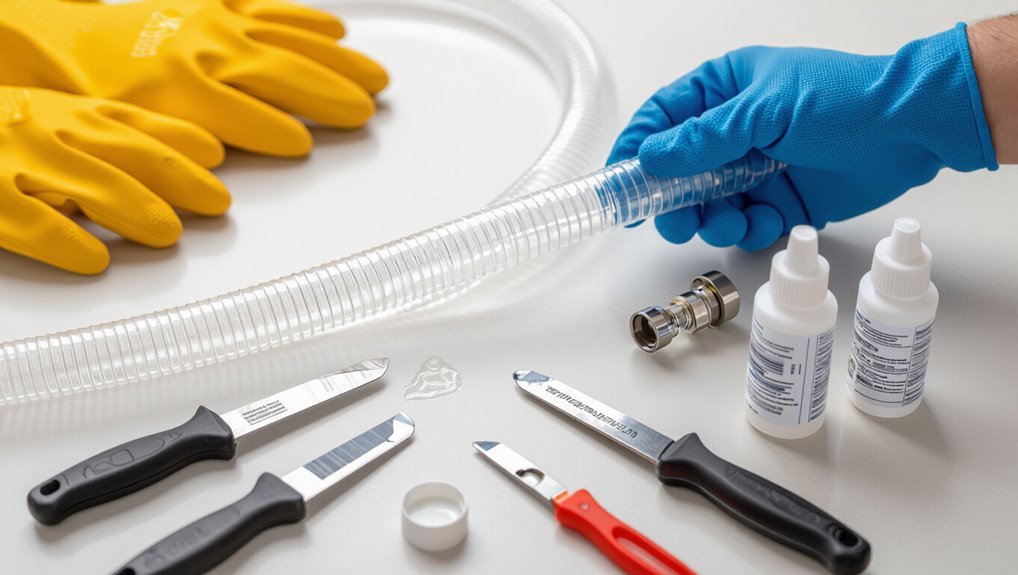
Flexible PVC pipe is a softer, more bendable alternative to rigid PVC, made with added plasticizers that permit flexing and easier routing.
It is commonly used for irrigation lines, pool and spa plumbing, drainage, and in mobile applications such as RVs and boats where vibration and movement occur.
Benefits include easier installation and vibration resistance, while limitations include lower pressure ratings, potential plasticizer migration, and reduced UV and chemical resistance compared with rigid PVC.
What is flexible PVC pipe and how it differs from rigid PVC
A pliant form of polyvinyl chloride, flexible PVC pipe combines a softer polymer composition and plasticizers to allow bending and movement without kinking, unlike rigid PVC which is formulated to remain stiff and maintain fixed shapes.
Its wall thickness, reinforcement and fittings differ, affecting pressure ratings, solvent cement compatibility and best practices for how to connect flexible PVC pipe in secure, leak-resistant assemblies.
Typical uses: irrigation, pool plumbing, drainage, RVs, boats
Having noted how flexible PVC’s softer formulation and fittings affect installation and pressure limits, its practical applications become clear.
It suits low-pressure irrigation lines, pool return and suction plumbing where bends reduce fittings, and yard or foundation drainage requiring contouring.
RV and boat plumbing benefits from vibration absorption and easier routing in tight spaces.
Applications prioritize flexibility, corrosion resistance, and ease of installation.
Advantages and limitations of flexible PVC
Combining pliability with chemical and corrosion resistance, flexible PVC offers installers a balance of ease and durability for low- to moderate-pressure systems.
It simplifies routing, reduces fittings, and resists many chemicals and UV with proper additives.
Limitations include lower maximum pressure ratings, reduced heat tolerance, potential creep under sustained load, and vulnerability to solvent welding incompatibility and certain hydrocarbons; selection should match application requirements.
Quick Guide: Choosing the Right Flexible PVC Pipe and Fittings
Selecting the correct flexible PVC pipe and fittings begins with matching pipe size and pressure ratings to the system’s requirements.
Compatible fitting types—barbed, compression, push-fit, and threaded—should be chosen based on connection method and whether solvent or mechanical joints are appropriate for the materials involved.
A concise tools-and-materials checklist (cutters, clamps, primer/solvent or fittings, tapes/seals) should be assembled before starting.
Sizing and pressure ratings to consider
Proper sizing and pressure-rating decisions guarantee a flexible PVC system performs safely and efficiently under expected loads.
Select pipe diameter based on flow rate and velocity limits to prevent excessive friction loss.
Match pressure ratings (PSI or bar) to maximum static and surge pressures, including safety margins.
Account for temperature effects on pressure capacity and choose fittings and adhesives rated equivalently to the pipe.
Types of fittings compatible with flexible PVC (barbed, compression, push-fit, threaded)
After confirming diameter and pressure requirements, attention turns to the fittings that join, seal, and terminate flexible PVC runs.
Common options include barbed fittings for hose clamps and secure hose connections; compression fittings for tool-free, watertight seals; push-fit fittings for quick, reusable joints; and threaded adapters for conversions to rigid systems.
Selection depends on access, vibration, and service conditions.
Material compatibility and solvent vs. mechanical joints
Consider chemical compatibility and joint method together: flexible PVC resins resist many common liquids but can be attacked by certain solvents, oils, and fuels.
So matching pipe and fitting materials (PVC, CPVC, polyethylene, or elastomers) to the conveyed fluid is essential.
Solvent-weld joints offer permanent, low-profile seals but require compatible plastics and cleaners.
Mechanical joints (barbed, compression, push-fit) permit disassembly and tolerate some material mismatches.
Tools and materials checklist before starting
A concise checklist of tools and materials prevents delays and errors when installing flexible PVC pipe and selecting fittings.
Essential items include pipe cutter, deburring tool, primer and solvent or mechanical clamps, compatible fittings, measuring tape, marker, and safety gear.
Confirm pipe size and pressure rating before starting.
- Safety and cutting
- Joint prep materials
- Correct fittings and clamps
Step-by-Step: Preparing Flexible PVC Pipe for Connection
Before assembly, the pipe must be measured and cut square using the proper tools to guarantee a straight end and correct length.
After cutting, the installer should deburr, chamfer, and clean the pipe ends to remove burrs and contaminants that could compromise the seal.
Finally, the insertion depth should be marked and a dry-fit test performed to confirm proper engagement before final bonding or securing.
Measuring and cutting straight: tools and techniques
Measure twice and mark once: precise measuring and straight cutting prevent leaks and fitting issues when preparing flexible PVC pipe for connection.
Use a tape measure and fine-tip marker to scribe accurate cut lines. Support the pipe on a flat surface or vice.
Cut with a sharp PVC or tubing cutter, hacksaw with guide, or oscillating tool, keeping the blade perpendicular to the pipe axis.
Deburring, chamfering, and cleaning pipe ends
Remove burrs and smooth the cut ends to guarantee a proper seal and prevent damage to fittings.
Use a deburring tool or utility knife to remove inner and outer burrs, then chamfer the outer edge slightly.
Wipe ends with a clean cloth and solvent-compatible cleaner to remove dust, grease, and moisture.
Inspect for cracks or irregularities before proceeding to insertion.
Marking insertion depth and testing fit
Determine the correct insertion depth for each fitting and mark it clearly on the pipe to guarantee a secure, leak-free joint.
Measure from the pipe end to the fitting shoulder, transfer the dimension, and scribe a visible line.
Dry-fit the pipe into the fitting to confirm alignment and depth; adjust marks if needed.
Record measurements for repeatable, consistent assemblies.
Step-by-Step: Making Secure Barbed Fitting Connections
Barbed fittings are recommended for flexible PVC runs that require quick assemblies, modest pressure ratings, and resistance to vibration.
Proper installation covers selecting the correct clamp type, positioning it just behind the barb, and tightening to the manufacturer’s torque to avoid hose damage or leaks. When needed, brief heat-softening around the pipe end eases insertion while observing basic burn-prevention precautions.
After assembly, each joint should be pressure-tested to the expected system pressure and inspected for slippage, pinholes, or seepage before putting the line into regular service.
When to use barbed fittings
A few situations call for barbed fittings: low-pressure water lines, short runs where flexibility is needed, and systems using soft-walled flexible PVC or vinyl tubing.
They suit temporary setups, irrigation drip lines, and small-diameter connections where ease of assembly and repeated disassembly matter.
Barbed fittings are less appropriate for high-pressure, long-distance, or rigid-system applications requiring threaded or solvent-welded joints.
Installing hose clamps correctly (type, placement, torque)
Choose the correct hose clamp, position it precisely, and tighten to the proper torque to guarantee a leak-free, durable connection between flexible PVC and a barbed fitting.
Use stainless steel worm-drive or T-bolt clamps sized to the hose. Seat the clamp just behind the barb’s last ridge, avoid overtightening to prevent compression damage, and use a torque driver or calibrated wrench for consistent, specified torque.
Heat-softening technique for tight fits (safety and method)
Several simple heating methods can soften flexible PVC to slip over a tight barb without damaging the hose or fitting.
The technician uses warm water, a heat gun on low, or a hair dryer to uniformly soften the pipe end. Heat is applied briefly, rotating the hose for even warmth.
Protective gloves, eye protection, and controlled distance prevent burns and material distortion.
Pressure-testing and inspecting barbed joints
Begin pressure-testing barbed joints promptly after assembly to confirm seal integrity and detect leaks before returning the system to service.
Use appropriate test pressure (per system spec), maintain for a defined hold period, and inspect all fittings and hose connections for seepage, bubbles, or deformation.
Document results, relieve pressure slowly, and correct any leaks by reseating, replacing clamps, or remaking joints before final commissioning.
Step-by-Step: Using Compression and Push-Fit Fittings
Compression fittings seal flexible PVC by compressing a ferrule or gasket against the pipe to form a watertight joint.
Push-fit (quick-connect) fittings are installed by fully inserting the pipe until it seats, then verifying the lock and any release collar for a secure hold.
Common issues — such as incomplete insertion, damaged O-rings, or debris — are checked and corrected to restore proper sealing.
How compression fittings work with flexible PVC
Installers should understand that compression fittings create a watertight seal on flexible PVC by mechanically compressing a ferrule or sleeve against the pipe wall as the nut is tightened.
Proper sizing, straight cuts, and smooth pipe ends guarantee uniform compression. Overtightening risks deformation and leaks; hand-tight plus a fraction of a turn is typical.
Inspect and test joints under pressure before finalizing.
Installing push-fit (quick-connect) fittings securely
After properly sizing and seating compression fittings, attention turns to push-fit (quick-connect) fittings as an alternative for fast, tool-free connections on flexible PVC.
The installer guarantees pipe ends are square, deburred, and clean, inserts to the marked depth, and verifies audible engagement.
Clip or secure fittings where required, support adjacent runs, and test system pressure per manufacturer recommendations for a reliable, leak-free joint.
Troubleshooting common push-fit issues
Diagnose push-fit problems by systematically checking common failure points: confirm the pipe is cut square, deburred, and free of debris; verify it is inserted to the manufacturer’s depth mark with the audible click; inspect the O-ring and sealing surface for nicks or dirt; guarantee the pipe material and diameter match the fitting rating; and confirm fittings are fully supported and not overstressed by misalignment or thermal movement.
If leakage persists, replace damaged O-rings, re-seat or trim pipe to proper depth, swap suspect fittings, and pressure-test assemblies.
Step-by-Step: Transitioning to Rigid PVC or Threaded Connections
To move from flexible PVC to rigid pipe or threaded fittings, the article reviews appropriate adapter types and how they are installed.
It explains forming threaded joints with adapters, using PTFE tape or pipe dope for sealing, and when primer and solvent cement are required for solvent-weld connections.
Guidance is also provided on choosing mechanical adapters versus solvent-weld methods based on pressure, permanence, and code requirements.
Adapters from flexible to rigid PVC
Several common adapter types bridge flexible PVC to rigid PVC or to threaded fittings, each designed for specific materials and pressures.
Barbed adapters insert into flexible pipe with hose clamps; slip adapters fit rigid PVC using solvent cement; compression adapters compress ferrules onto flexible tubing for a mechanical seal; and flared or push-fit adapters allow quick changes without heat or glue, chosen by system pressure and chemical compatibility.
Creating threaded joints with adapters and sealants
After selecting the appropriate adapter type—barbed, slip, compression, or push-fit—the next step is assembling threaded joints and applying sealants for a reliable connection to rigid PVC or threaded fittings.
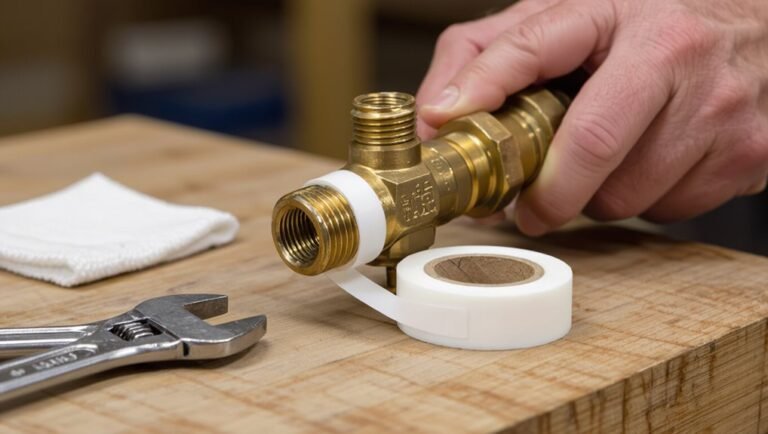
Clean threads, wrap PTFE tape clockwise three to five turns or apply pipe thread sealant, hand-start threads, then tighten with a wrench until snug.
Test under pressure for leaks and re-tighten if necessary.
When to use primer and solvent cement vs. mechanical adapters
When is solvent welding preferable over mechanical adapters?
Solvent welding suits permanent, pressure-rated joins to rigid PVC where compatibility, minimal profile, and long-term strength matter.
Mechanical adapters are preferred for temporary, adjustable, or mixed-material connections, and where disassembly or vibration tolerance is required.
Primer and cement guarantee chemical fusion; use adapters when flexibility, serviceability, or non-PVC mates dictate.
Ensuring Leak-Free Joints: Testing and Inspection
The installer performs visual checks for misalignment, solvent-weld excess, cracked fittings, and other common leak indicators before pressurizing the line.
Appropriate pressure testing—using static pressure for potable systems and pressure/flow tests for irrigation—confirms joint integrity and reveals slow leaks.
After installation, periodic monitoring and seasonal inspections catch deterioration and allow timely resealing or replacement.
Visual checks and common leak indicators
A careful visual inspection is the quickest way to detect problems at flexible PVC joints: look for dampness, mineral deposits, misaligned fittings, or visible cracks that indicate a compromised seal.
Also check for softened or brittle tubing, displaced clamps, staining on nearby surfaces, and hairline seepage trails.
Note intermittent drips after use and inspect under fittings and supports for hidden moisture accumulation.
Pressure testing methods for irrigation and potable systems
Begin pressure testing by isolating the section of flexible PVC to be evaluated and connecting a calibrated pressure source and gauge appropriate to the system type.
Gradually pressurize to recommended test pressure, hold and monitor for pressure decay.
Inspect joints and fittings for visible leaks or seepage.
For potable systems, disinfect after testing per local codes; record results and repair any failures before returning to service.
Long-term monitoring and seasonal maintenance
When seasonal shifts or prolonged use occur, regular monitoring and maintenance guarantee flexible PVC joints remain leak-free and reliable.
Inspect fittings quarterly and after extreme weather, checking for cracks, softened material, or movement.
Perform pressure checks and tighten or replace clamps and seals as needed.
Flush lines to remove sediment, document findings, and schedule preventive replacements based on wear, environmental exposure, and service history.
Common Problems and How to Fix Them
Common failures with flexible PVC are usually traceable to poor fit at fittings, physical stress, or localized damage, and each has straightforward remedies.
Simple fixes include re-seating or replacing faulty fittings, adding supports or bend restrictors to prevent kinks and sagging, and cutting out and splicing in short replacement sections for damaged runs.
The following guidance explains how to diagnose each issue and apply the appropriate repair or preventive measure.
Causes of leaks at fittings and quick fixes
Leaks at fittings most often stem from a handful of predictable issues: improper seating or insufficient tightening of connectors, damaged or misaligned pipe ends, degraded or missing o‑rings and seals, and incompatible or worn fittings.
Quick fixes include reseating and evenly tightening connectors, trimming and deburring pipe ends, replacing seals or o‑rings, and swapping mismatched or damaged fittings for proper-size, compatible replacements.
Preventing kinks, sagging, and stress on joints
Support flexible PVC to maintain flow and protect connections: gentle bends, regular supports, and correct tension keep tubing from kinking, sagging, or putting undue stress on joints.
Space clamps every 3–4 feet, use padded straps at fittings, and add gradual sweep elbows for direction changes. Anchor ends to prevent pull, allow thermal expansion, and inspect supports periodically to confirm alignment and tension remain correct.
Repairing damaged sections without replacing entire runs
When a section of flexible PVC shows cracks, punctures, or persistent seepage, it can often be repaired in place rather than replacing the entire run; targeted fixes save time and material while restoring integrity.
Common methods include clean-cutting damaged length, using repair couplings or sleeves, and applying solvent-weld patches.
Recommended steps:
- Isolate and drain.
- Cut and prepare ends.
- Install coupling and test.
Best Practices and Professional Tips for Durable Connections
Proper support and anchoring are emphasized to control movement and allow for thermal expansion without stressing joints.
Professionals recommend selecting clamps, adhesives, and seals rated for flexible PVC and the specific service conditions to maximize longevity.
Safety precautions and applicable potable water codes should be followed to guarantee healthful, compliant installations.
Proper support, anchoring, and expansion considerations
Guarantee flexible PVC runs are secured and anchored at appropriate intervals to prevent sagging, movement, and stress on joints while allowing for thermal expansion and contraction.
Supports should align with manufacturer spacing, use vibration-isolating hangers where needed, and avoid rigid restraint near fittings.
Provide slack loops or expansion joints at long runs, accommodate directional changes, and inspect anchors periodically for corrosion and loosening.
Selecting clamps, adhesives, and seals for longevity
Choose clamps, adhesives, and seals based on material compatibility, environmental exposure, and expected service loads to guarantee durable, leak-free connections for flexible PVC systems.
Specify corrosion-resistant stainless steel or nylon clamps sized to compress without deforming pipe.
Use PVC-compatible solvent cements or flexible sealants rated for plastic.
Select EPDM or silicone gaskets for temperature and chemical resilience, and inspect joints periodically for wear.
Safety precautions and code considerations for potable water
Adhere to local plumbing codes and manufacturer instructions when installing flexible PVC for potable water to verify safety, compliance, and public health protection.
Install only certified potable-grade materials, avoid lead-containing fittings, and use approved joining methods.
Ascertain proper pressure ratings, backflow prevention, and accessibility for inspection.
Follow disinfection procedures, document compliance, and consult inspectors when uncertain to prevent contamination and code violations.
Comparison of Connection Methods and When to Use Each
A concise comparison of connection methods highlights trade-offs in durability, ease of install, cost, and leak risk to guide appropriate choices. The table below frames those factors to provoke clear impressions of each method’s strengths and weaknesses.
| Method | Emotional takeaway |
|---|---|
| Solvent cement | Reliable but permanent |
| Mechanical fittings | Convenient yet potentially leaky |
| Clamps and adapters | Cheap and quick, with caution required |
Durability, ease of install, cost, and leak risk by method
Several common connection methods for flexible PVC—barbed fittings with clamps, compression fittings, solvent/welded joints, push-fit couplers, and threaded adapters—vary considerably in durability, ease of installation, cost, and leak risk.
Therefore, selecting the appropriate technique requires weighing these trade-offs against the application’s pressure, movement, and service life expectations.
Barbed/clamp: low cost, moderate durability, higher leak risk.
Compression: easy, reliable.
Solvent/welded: highest durability, permanent.
Push-fit: fastest, mid-cost.
Threaded: reusable, vibration-prone.
Example Projects and Material Lists
The section presents three concise example projects—small garden irrigation loop, pool return line repair, and RV freshwater line installation—each with a specific parts list and step sequence.
For each project, required fittings, pipe lengths, seals, and tools are itemized.
Clear step-by-step assembly and testing instructions follow so readers can match materials to the appropriate connection method.
Small garden irrigation loop: parts and step sequence
Begin by laying out a simple looped circuit of flexible PVC to water a small garden bed, listing required fittings, lengths, and tools before assembly.
Parts: flexible PVC, 1/2″ elbows, tees, barbed couplers, shutoff valve, stakes, emitters, hose clamps.
Sequence and tips:
- Measure and cut loop.
- Dry-fit fittings and stakes.
- Assemble with clamps, install emitters, pressure-test for leaks.
Pool return line repair: parts and step sequence
Repairing a pool return line requires the right materials and a clear sequence to restore circulation and prevent leaks. Necessary parts include flexible PVC return line, slip couplings or barbed fittings, solvent cement or hose clamps, and thread sealant.
Typical sequence:
- Isolate and drain the line.
- Cut damaged section and dry fit fittings.
- Cement or clamp connections, pressure test, then backfill.
RV freshwater line installation: parts and step sequence
Installers preparing an RV freshwater line gather specific parts—flexible potable-grade PEX or reinforced PVC tubing, inline shutoff valves, barbed or push-to-connect fittings, water pump fittings (if replacing or adding), hose clamps or crimp rings, thread sealant, and mounting hardware—and follow a clear step sequence to guarantee a sanitary, leak-free system.
- Plan routing and measure.
- Cut, deburr, and connect fittings.
- Secure, pressure-test, sanitize, and finalize.
Resources for Further Help
If uncertainty arises or a repair seems beyond basic skills, a professional plumber should be consulted to guarantee safety and code compliance.
Refer to recommended product standards and manufacturer guides for correct fittings, adhesives, and pressure ratings.
These resources help determine when DIY is appropriate and which products meet required specifications.
When to call a professional plumber
When persistent leaks, low water pressure, foul odors, or visible corrosion occur despite basic troubleshooting, homeowners should consider contacting a licensed plumber.
These signs often indicate underlying issues—such as hidden pipe damage, failed fittings, or system-wide faults—that exceed DIY scope and require professional diagnosis, specialized tools, and code‑compliant repairs.
A professional also handles permits, pressure testing, complex rerouting, and provides warranties for lasting, safe solutions.
Recommended product standards and manufacturer guides
Because correct materials and clear manufacturer instructions reduce failures and guarantee code compliance, homeowners and technicians should rely on products that meet recognized standards (such as ASTM, NSF, and ISO) and follow the specific installation guides provided by the pipe and fitting manufacturers.
Recommended actions:
- Verify standard certifications and label data.
- Consult manufacturer torque, solvent, and temperature limits.
- Keep installation and warranty documents for inspections and claims.
Conclusion
The guide equips readers with clear, practical steps for joining flexible PVC pipe, addressing selection, preparation, and multiple fitting methods to guarantee secure, leak‑free results. While some may worry the techniques seem technical, the concise, illustrated steps and material lists make them accessible to DIYers and professionals alike. Following the recommended best practices—proper cutting, deburring, correct fittings, and clamps—yields durable connections suitable for irrigation, drainage, and low‑pressure plumbing tasks.