
How to Find a Broken Water Line: 9 DIY Tests and When to Call a Plumber
If you suspect a broken water line, look for signs like sudden pressure loss, high water bills, wet spots, warped floors, or unusually lush patches in your yard. To diagnose the issue, start by shutting off the main water supply, checking the meter with all fixtures closed, and listening for any unusual sounds. Utilize dye tests in toilets, pressure-gauge checks, isolate specific zones, and conduct thermal imaging or visual inspections of your property. Temporary clamps can be applied if it’s safe to do so. For detailed DIY tests and clear advice on when to call a plumber, follow the steps outlined in this guide.
What a Broken Water Line Looks and Sounds Like
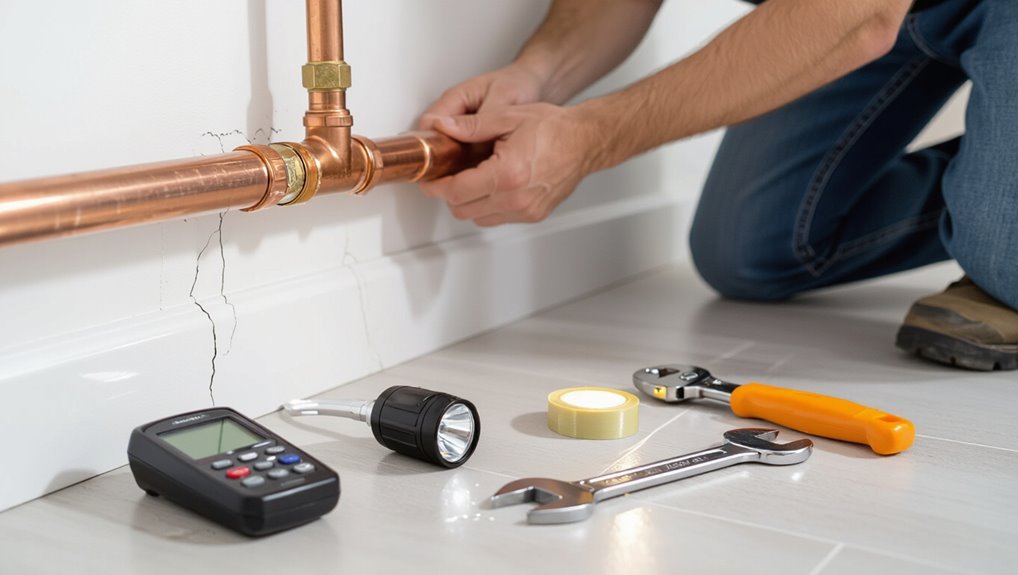
A broken water line can produce distinct visual cues indoors—stained ceilings, warped floors, or unusually high water bills—while externally it may reveal soggy patches, sinkholes, or spurting water.
Auditory signs often accompany these symptoms, from steady hissing that suggests a pressurized leak to rhythmic thumping or gurgling that points to intermittent flow or air in the line.
The following section explains how to recognize these common inside and outside indicators and interprets the different sounds they may produce.
Common visible signs inside the home
Water stains, warped flooring, and unexpected pooling are clear indoor indicators that a water line may be compromised.
Residents should notice mold growth, peeling paint, bubbling drywall, and persistent musty odors.
Warm spots on carpet, sudden high water bills, and lower water pressure also point to leaks.
Guidance on how to find a broken water line recommends inspecting under sinks, behind appliances, and along ceilings.
Common visible signs outside the home
Outside the yard often offers the clearest clues: saturated patches of grass, mud or standing pools forming where none should, and unusually lush or discolored vegetation betray an underground break.
Depressions, sinkholes, or shifting soil, wet spots near sidewalks, driveways heaving or cracking, and unexpected puddles by utility connections or meters signal a line breach.
Surface dampness clustered, not seasonal, warrants inspection.
Audible indicators and what different sounds mean
Listen closely around the property to detect leaks that manifest as sound: a persistent hissing or rushing denotes pressurized flow escaping the line, a rhythmic ticking or tapping often signals pipe movement against a hard surface, and a low, steady drumming can indicate high-volume flow under pressure.
Additional clues include intermittent gurgling suggesting air mixed with water and metallic ringing from vibration; note location and timing.
Immediate Safety and Damage-Control Steps to Take First
Upon suspecting a broken water line, the first actions should be to shut off the main water supply to stop flow and to cut electrical power to affected areas to reduce shock and fire risk.
Next, valuable electronics and appliances should be moved or elevated and covered with waterproof material.
Finally, contain visible leaks with buckets, towels, and temporary barriers to protect flooring and belongings until repairs begin.
How to shut off the main water supply quickly
At the first sign of a major leak, locate and shut off the main water supply to stop flooding and limit property damage.
Identify the house shutoff valve—typically near the water meter, foundation, or where service enters the building. Turn the valve clockwise or close the ball valve fully.
Notify occupants, open faucets to drain residual water, and record valve position for plumber reference.
Turning off electricity and protecting electronics
Cut power to affected areas immediately to reduce electrocution risk and prevent shorting of electronics as water spreads.
After shutting the main breaker or individual circuits, unplug devices if safe to reach.
Elevate or move undamaged electronics to dry locations using insulated gloves.
Document serial numbers and take photos for insurance.
Avoid using wet outlets or appliances until an electrician verifies safety.
Containing leaks and protecting flooring and belongings
Contain the leak quickly to limit water spread and protect flooring and belongings.
Place buckets beneath drips, use towels or mops to absorb water, and move rugs, furniture, and valuables to dry areas.
Elevate items on blocks or plastic sheeting.
If water soaks carpet, pull back padding and ventilate with fans.
Photograph damage for insurance before cleanup begins.
Quick Checks to Confirm a Suspected Leak
A quick set of checks helps confirm whether a leak exists before calling a professional.
First, readings from the water meter and utility reports can reveal unexplained usage spikes.
Then inspect exposed pipes and fixtures and scan walls, ceilings, and crawlspaces for dampness or stains.
Inspecting meters and utility readings
Several quick checks of the water meter and utility readings can rapidly confirm whether a suspected leak exists.
The inspector notes baseline meter numbers with all fixtures off, watches for movement, and records consumption over a known interval.
Also compares current bills to historical usage and reviews any sudden spikes.
Unusual continuous flow on the meter or unexplained billing increases indicate a likely supply-line leak needing further investigation.
Visual run-through of exposed pipes and fixtures
Having verified suspicious meter activity, the inspector proceeds to a focused visual run-through of all exposed pipes and fixtures to confirm the source and approximate location of the leak.
He scans joints, valves, hose bibs, and visible supply lines for drips, corrosion, mineral deposits, wetness, or sagging.
Fixtures are operated to reveal intermittent leaks; loose fittings are noted for repair.
Checking walls, ceilings, and crawlspaces for moisture
Next, the inspector examines walls, ceilings, and crawlspaces for signs of moisture that confirm a suspected leak.
He looks for discoloration, peeling paint, bulging plaster, and damp insulation. Musty odors indicate persistent wetness.
In crawlspaces, pooled water, wet soil, and mold growth point to underground or slab leaks.
Notes locations, severity, and progression for targeted testing or professional repair.
9 DIY Tests to Locate a Broken Water Line
The following tests offer practical ways to pinpoint a suspected broken water line using simple tools and observations. Each method targets a common source of leaks—from meter readings to toilet and pressure checks—and can quickly narrow the problem area.
Proceed methodically to avoid misdiagnosis and unnecessary repairs.
- Urgency: choose the right test quickly to stop damage.
- Confidence: clear results reduce guesswork and stress.
- Cost: inexpensive tests can save significant repair bills.
Test 1 Water meter test
When water use inside and outside the home is halted yet the meter continues to register flow, a leak is likely somewhere between the meter and the property.
The water meter test is a simple, first-line diagnostic that confirms this by observing the meter dial or digital readout while all fixtures and appliances are off.
Note the reading, wait 15–30 minutes, then recheck. Movement indicates underground or line leaks.
Test 2 Dye and food coloring test for toilets and traps
Several simple liquids, such as commercial dye tablets or common food coloring, can reveal hidden leaks by tinting water in toilets and traps without harming plumbing.
Place dye in the tank, wait thirty minutes without flushing, and inspect the bowl for color.
Add dye to sink or floor traps to check for dye migration into drains or surrounding areas, indicating leakage or siphoning.
Test 3 Toilet leak detection and diagnosis
A careful toilet inspection can quickly distinguish between a concealed broken supply line, a faulty flapper, or a leaking fill valve; diagnosing these common sources of water loss is essential before cutting into walls or floors.
Check for constant running, listen for hissing, inspect base and supply connections for moisture, test flapper seating with dye, and observe tank refill behavior to localize the fault accurately.
Test 4 Pressure drop test using a gauge
Attach a pressure gauge to the system to measure baseline and monitor for drops that indicate a leak.
Record static pressure, shut off all fixtures and isolate zones, then observe gauge for steady declines over a set interval.
Note rapid drops suggesting large breaks, slow declines indicating small leaks or intrusion.
Repeat tests after repairs to confirm stability and verify successful sealing.
Test 5 Listening test with a mechanic’s stethoscope or screwdriver
Use a mechanic’s stethoscope or a simple screwdriver to audibly trace the path of pressurized water and pinpoint leaks.
The examiner taps or presses the probe against pipes, fittings, and soil above suspected breaks, listening for hissing, rushing, or rhythmic sounds.
Work systematically along the line, compare noise intensity, and mark probable locations.
Quiet surroundings improve accuracy; verify with complementary tests before excavation.
Test 6 Thermal imaging or infrared camera basics for DIYers
When exposed to temperature differences between leaking water and surrounding soil or surfaces, a thermal imager can reveal the approximate location of an underground or within-wall break by displaying warmer or cooler patterns. The operator scans systematically along suspected runs, noting anomalies that contrast with baseline readings and environmental conditions.
Proper technique includes stabilizing the camera, comparing multiple passes, avoiding direct sunlight, and interpreting relative temperature shifts cautiously.
Test 7 Ground and soil inspection for wet spots and sinkholes
After scanning for thermal anomalies, attention shifts to visible signs on the surface: ground and soil inspection for wet spots, soft areas, and sinkholes can pinpoint where subsurface water is exiting a pipe.
Inspect for unusually lush vegetation, pooling, mushy soil, depressions, or new sinkholes.
Note odor, unusual insects, or erosion patterns; mark suspected spots for further testing or professional evaluation.
Test 8 Isolation method: shut valves to narrow down the zone
If main and branch shutoff valves are closed systematically, it becomes possible to isolate a leak to a specific section of piping.
The method requires closing one valve at a time, monitoring the meter and pressure, and noting where flow stops.
Repeat across branches until the leak zone is identified.
Record valve positions and test results before restoring normal service.
Test 9 Using smart leak detectors and mobile apps
Although traditional methods remain useful, smart leak detectors and mobile apps streamline locating hidden breaks by combining real-time sensors, leak algorithms, and user-friendly interfaces.
These devices monitor flow, pressure, and acoustics, sending alerts and visualizing anomalies on maps. Users can pinpoint likely leak locations, track trends, and export data for plumbers.
They reduce guesswork but require proper placement and occasional calibration.
How to Interpret Test Results and Narrow Down the Location
Test results should be compared to symptom patterns to distinguish supply lines from drains, since pressure loss and wet spots point to different pipe types.
Results that indicate whether the problem is inside the structure or in an underground/main line help focus where to excavate or open walls.
If tests conflict, the most conservative next step—pressure testing or isolating sections—should be chosen to avoid unnecessary damage while gathering clearer data.
Matching symptoms to likely pipe types (supply vs. drain)
How can the pattern of symptoms reveal whether a failing line is part of the supply or the drain?
Supply-line issues produce low pressure, constant wet spots, or visible leaks when valves open; water quality changes (discoloration, metallic taste) and pressure drops are common.
Drain failures cause slow drainage, gurgling, backups, foul odors, or sewage surfacing rather than pressure loss.
Pinpointing interior vs. underground/main-line breaks
Begin by isolating variables: systematic shut-offs, meter checks, and targeted fixture tests help distinguish whether a leak originates inside the building or along the buried main.
Interior leaks usually correlate with pressure loss after interior shut-off and audible or visible water near fixtures.
Persistent flow on the meter with all interior valves closed indicates a main-line or underground break; inspect yard, sidewalks, and damp soil for clues.
When tests conflict: prioritizing next steps
When results conflict, prioritization depends on likelihood, safety, and impact: start by ranking outcomes—interior leak, main-line breach, or false positive—based on observed pressure changes, meter behavior, and visible evidence.
Follow with targeted actions: verify indoor fixtures, isolate exterior zones, and recheck the meter.
Escalate to excavation or a licensed plumber when pressure loss persists, contamination risk appears, or repairs exceed safe DIY scope.
Temporary DIY Repairs and When They Are Appropriate
A homeowner may use temporary measures—pipe clamps, rubber patches with hose clamps, epoxy, tape, or sealants—to stop leaks long enough to plan a proper repair.
Small accessible sections of copper, PEX, or PVC can sometimes be cut out and replaced as a short-term solution, but each material has specific techniques and limits.
These fixes are designed as stopgaps and should be followed by a permanent repair or professional assessment to avoid recurring damage.
Applying pipe clamps, rubber and hose clamp fixes
Apply simple clamp-and-rubber repairs only as short-term measures to stop active leaks until professional service can be obtained.
A rubber patch or hose segment placed over the leak and secured with a metal pipe clamp or hose clamp can reduce flow.
Confirm system is depressurized first.
These fixes buy time for a permanent repair but are not reliable long-term solutions; schedule a qualified plumber promptly.
Using epoxy, tape, and sealants: pros and cons
Alongside clamp-and-rubber patches, epoxy compounds, plumbing tapes, and liquid sealants offer alternative short-term fixes for leaking water lines.
Epoxy provides rigid, durable seals but requires dry surfaces and cure time.
Tape and liquid sealants are quick and flexible but less reliable under pressure or temperature shifts.
All are temporary; professional repair is advised for persistent, high-pressure, or concealed leaks.
Replacing a small section of accessible copper, PEX, or PVC
When a short length of copper, PEX, or PVC is visibly damaged and fully accessible, replacing that section can restore integrity more reliably than temporary patches.
The homeowner can shut off water, cut out the damaged span, and install matched replacement using appropriate fittings, solder, crimp, or solvent cement.
Properly sized parts, basic tools, leak testing, and adherence to local codes determine suitability; otherwise call a plumber.
When a temporary fix is only a stopgap
Recognize that temporary repairs are meant only to buy time, not to permanently restore a compromised water line.
Patch kits, hose clamps, and epoxy can limit leakage briefly, allow shutting off water, or prevent immediate damage. They are appropriate for emergency containment or until professional replacement.
Temporary fixes must be followed by inspection and permanent repair to avoid corrosion, pressure failure, or contamination.
Signs You Must Call a Licensed Plumber Immediately
When a break produces high-volume leaks, active flooding, or threatens structural elements, a licensed plumber should be called immediately to manage the hazard.
Situations involving sewage contamination, proximity to gas lines, persistent pressure loss, or the inability to isolate the affected section also require professional intervention.
Additionally, jobs that may need permits, must meet code, or affect warranties are best handled by a credentialed contractor.
High-volume leaks, flooding, and structural risk
Any visible surge of water—puddles spreading rapidly, water gushing from fittings, or rooms filling within minutes—signals a high-volume leak that requires immediate professional attention.
Structural elements can weaken quickly: soaked drywall, warped floors, and compromised ceilings.
Immediate shutoff and evacuation reduce danger, but a licensed plumber must assess pipe failure, hidden damage, and necessary repairs to prevent collapse, mold, and escalating losses.
Sewage contamination or gas-line adjacency
If foul odors, visible sewage, or a strong smell of natural gas accompany a suspected break, the situation warrants immediate professional intervention.
These signs indicate contamination risks or nearby utility damage requiring licensed response. A plumber can assess cross-connections, sanitary sewer breaches, and coordinate gas utility shutoff.
Avoid entry, ventilate if safe, evacuate occupants, and contact emergency services and a qualified plumber without delay.
Repeated pressure loss or inability to isolate the problem
Detecting repeated drops in water pressure or failing to isolate a leak signals a problem beyond basic homeowner fixes and requires a licensed plumber.
Persistent pressure loss suggests hidden mainline damage, failing valves, or complex system faults.
If shutting off fixtures doesn’t stop loss or pressure cycles recur after repairs, engage a professional promptly to diagnose with pressure testing, leak location equipment, and systemic repairs to prevent property damage.
Permits, code compliance, and warranty considerations
Call a licensed plumber immediately when work on a broken water line may trigger local permit requirements, building-code obligations, or affect existing warranties.
A professional verifies permit needs, guarantees code-compliant repairs, documents inspections, and protects appliance or system warranties.
Unauthorized repairs can void coverage, incur fines, or fail inspections.
Engaging a licensed plumber preserves legal compliance, safety, and long-term protection for the property.
What to Expect When a Plumber Arrives
When the plumber arrives, they will inspect the problem and outline diagnostic tools they may use, such as pipe cameras, hydrostatic testing, and electronic locators.
They will describe typical repair options, explain the factors that influence the recommended approach, and provide a preliminary cost estimate for common fixes.
Homeowners should be prepared with key questions about scope, timeline, warranties, and any permits before work begins.
Diagnostic tools professionals use (camera, hydrostatic, locators)
A plumber arrives equipped to pinpoint a break using specialized diagnostic tools: push cameras to inspect pipe interiors, hydrostatic testing to confirm pressure loss and isolate leaks, and electronic locators to map buried lines and mark exact fault locations.
Technicians interpret camera footage for corrosion, cracks, or roots, use controlled pressure tests to verify leak presence and section, and deploy ground microphones or tracer wires to pinpoint repair coordinates.
Typical repair options and decision factors
After locating the break with cameras, pressure tests, and locators, the plumber will assess repair options based on pipe material, break severity, depth, and access.
Repairs may include spot repairs, sleeve patches, section replacement, rerouting, or full line replacement.
Trenchless techniques versus open excavation, compatibility with existing systems, future reliability, and required permits guide the chosen method and timeline.
Cost factors and estimates for common repairs
Many factors influence the cost estimate a plumber provides on arrival: pipe material and diameter, depth and accessibility of the break, extent of damage, chosen repair method (spot repair, sleeve, section replacement, trenchless versus open excavation), required permits, and local labor and disposal rates.
Typical residential fixes range from minor clamp repairs ($150–$500), partial replacements ($500–$2,000), to full line replacements ($2,000–$8,000+), excluding emergency or permit fees.
Questions to ask the plumber before work begins
What should be clarified before work begins: the scope, timeline, costs, and any disruptions expected.
The homeowner should confirm licenses, insurance, warranty terms, and permit needs.
Ask about diagnostic methods, possible outcomes, parts sourcing, and contingencies for hidden damage.
Request a written estimate, payment schedule, and cleanup plan.
Agree on communication protocol and final inspection criteria before work starts.
Preventing Future Water Line Breaks
Preventing future water line breaks focuses on routine care, material assessment, and targeted protections around the property.
Recommendations include seasonal maintenance and winterization, evaluating pipe materials and age to know when replacement is warranted, and managing landscaping and tree roots that threaten lines.
Installing permanent monitoring and automatic shutoff devices further reduces risk by catching leaks early and stopping flow before major damage occurs.
Seasonal maintenance and winterization tips
As temperatures fall and freeze-thaw cycles begin, homeowners should adopt a seasonal maintenance routine to reduce the risk of future water line breaks.
Inspect outdoor spigots, shut off and drain irrigation lines, insulate exposed pipes and meters, and seal foundation or utility-entry gaps.
Flush and test interior valves, maintain consistent thermostat settings during cold snaps, and schedule professional inspections before winter.
Pipe materials, age, and when to consider replacement
After seasonal checks and winter preparations, attention should turn to the materials and age of a home’s water lines to reduce future failures.
Older galvanized, polybutylene, and corroded iron pipes are higher risk. Inspect visible sections, review property records, and note discolored water or pressure loss.
When pipes show corrosion, repeated leaks, or exceed typical service life, plan professional evaluation and timely replacement to prevent breaks.
Landscaping and tree-root management
Careful landscaping and proactive management of tree roots greatly reduce the risk of water line damage by minimizing root intrusion and soil movement near buried pipes.
Property owners should locate mains and plant trees at safe distances, prefer shallow-root shrubs near lines, install root barriers where needed, maintain steady irrigation to avoid soil swelling, and inspect vegetation regularly to catch early root encroachment.
Installing permanent monitoring and automatic shutoff devices
Implementing permanent monitoring and automatic shutoff devices provides a reliable defense against catastrophic water line failures by detecting leaks early and isolating affected sections automatically.
Sensors measure flow, pressure, and moisture; smart valves trigger shutoffs when anomalies occur. Systems alert homeowners and integrate with home automation.
Professional installation and periodic testing guarantee reliable operation, minimizing water damage, repair costs, and undetected slow leaks over time.
Comparison of Detection and Repair Methods
Different detection and repair options are compared by accuracy, cost, time, DIY suitability, and invasiveness to guide appropriate choices for specific situations. The following table summarizes key trade-offs to aid quick evaluation. Readers can use this as a starting point for selecting methods based on priorities and constraints.
| Factor | Typical outcome |
|---|---|
| Accuracy | Varies from low (visual) to high (camera, acoustic) |
| Cost | Low for DIY fixes, high for specialized equipment |
| Time | Quick for temporary patches, longer for trenching or full replacement |
| DIY suitability | High for minor repairs, low for complex diagnostics |
| Invasiveness | Ranges from noninvasive (acoustic) to fully invasive (excavation) |
Accuracy, cost, time, DIY suitability, and invasiveness
When evaluating methods to locate and fix a broken water line, homeowners and professionals must weigh five key factors—accuracy, cost, time, DIY suitability, and invasiveness—to choose the most appropriate approach for a given situation.
High-accuracy options like video inspection cost more and require professionals but reduce excavation.
Low-cost DIY tests save money and time initially but risk missed leaks and greater invasiveness later if errors occur.
Checklist: Step-by-Step Plan to Find and Address a Broken Water Line
A concise checklist guides the responder from immediate actions through diagnostics to temporary fixes and long-term prevention.
It prioritizes shutting off water and securing the area within the first 30 minutes, then outlining diagnostic steps and temporary containment over the next 24 hours.
Clear follow-up measures and preventive tips close the loop to reduce future risk.
- Act fast, stay safe, and stop the damage.
- Inspect methodically, document findings, and choose repairs.
- Stabilize now, schedule permanent fixes, and prevent recurrence.
Immediate actions (0 to 30 minutes)
Within the first half-hour after suspecting a broken water line, the priority is to quickly stop water flow, guarantee safety, and gather basic information about the leak’s location and severity.
Turn off the main shutoff, unplug electrical appliances near wet areas, clear nearby valuables, note visible wet spots and sounds, photograph damage, and call household members.
If flooding persists, contact emergency services or a plumber immediately.
Diagnostic steps to perform (30 minutes to 3 hours)
Several focused diagnostic actions help pinpoint a broken water line and assess repair needs between 30 minutes and three hours after the initial shutoff.
Inspect exposed pipes and fittings for wetness, stains, or pooling.
Listen for underground flow with a stethoscope or screwdriver.
Check water meter for movement.
Isolate zones, pressure-test segments, and map probable break locations for professional repair or targeted excavation.
Temporary repairs and escalation (3 hours to 24 hours)
Begin implementing temporary repairs and escalation steps after confirming the shutoff and isolating the affected zone, prioritizing measures that stop active leakage, protect property, and preserve evidence for permanent repair.
Apply clamp, epoxy, or rubber/hose-patch for visible breaks; drain and dry soaked areas; document damage with photos; notify insurance.
If leak persists or structural risk exists, contact a licensed plumber or emergency services immediately.
Follow-up and prevention (after repair)
After the repair is completed, a concise follow-up routine guarantees the fix holds and reduces the risk of future breaks.
Inspect joints and exposed pipework after 24–48 hours for leaks, monitor water pressure and meter for anomalies, and document repairs and warranties.
Schedule annual inspections, flush lines seasonally, insulate vulnerable pipes, and address landscaping or frost risks to prevent recurrence.
Visual Aids and Tools to Keep Handy
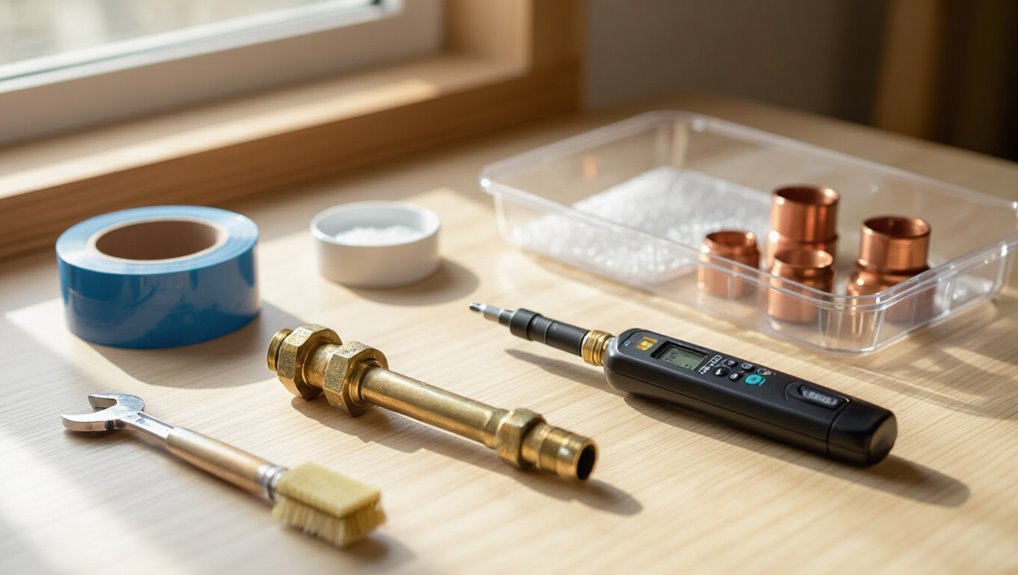
A concise list of visual aids and basic tools—such as a moisture meter, infrared camera, pipe locator, and quality flashlight—helps homeowners identify saturated areas, temperature differences, and pipe locations.
The text should explain what each tool reveals and offer simple priorities for typical residential leaks.
Guidance should also state when renting specialized equipment (like high-end thermal cameras or sewer cameras) is more economical than purchasing.
Recommended tools for homeowners and what they reveal
Several essential tools help homeowners quickly diagnose and often locate a broken water line: a pressure gauge to detect drops indicating leaks, a moisture meter for hidden damp spots, an infrared thermometer to find cold spots from escaping water, a clamp meter to monitor irregular pump current, and a basic leak detection dye or food coloring for visible fixtures.
These reveal pressure loss, wet zones, temperature anomalies, electrical signs, and flow paths.
When to rent vs. buy specialty gear
When is renting specialty leak-detection gear more practical than purchasing it outright?
Renting suits infrequent needs, one-off diagnostics, and costly items like acoustic correlators, thermal cameras, or line locators. It avoids storage and maintenance, provides access to advanced models, and lets professionals test unfamiliar tech before buying.
Purchase when use is regular, immediate availability is critical, or long-term cost favors ownership.
Conclusion
In conclusion, swift, methodical checks and the nine DIY tests help pinpoint a broken water line before damage spreads. For example, a homeowner noticed unexplained meter movement and used the listening and dye tests to locate a leak under their laundry room floor; early detection via those steps limited repairs to a short pipe section and avoided major drywall and foundation work. Prompt action, documented results, and timely professional help minimize cost and disruption.
