How to Connect Copper Pipe Without Soldering: 7 Reliable Methods for DIYers
You can connect copper pipes without soldering using several reliable methods, including push-fit connectors (like SharkBite), compression fittings, flare fittings, press/crimp connections with rings, mechanical rubber couplings, threaded adapters, and epoxy repair compounds. These methods eliminate the need for open flames, making them suitable for confined or heat-sensitive areas. Most require only basic tools such as a pipe cutter, deburrer, wrenches, and safety gear. However, be sure to check compatibility, fit, and torque requirements for long-lasting results. More detailed guidance on each method is provided below.
Quick answer best no-solder methods to join copper pipe
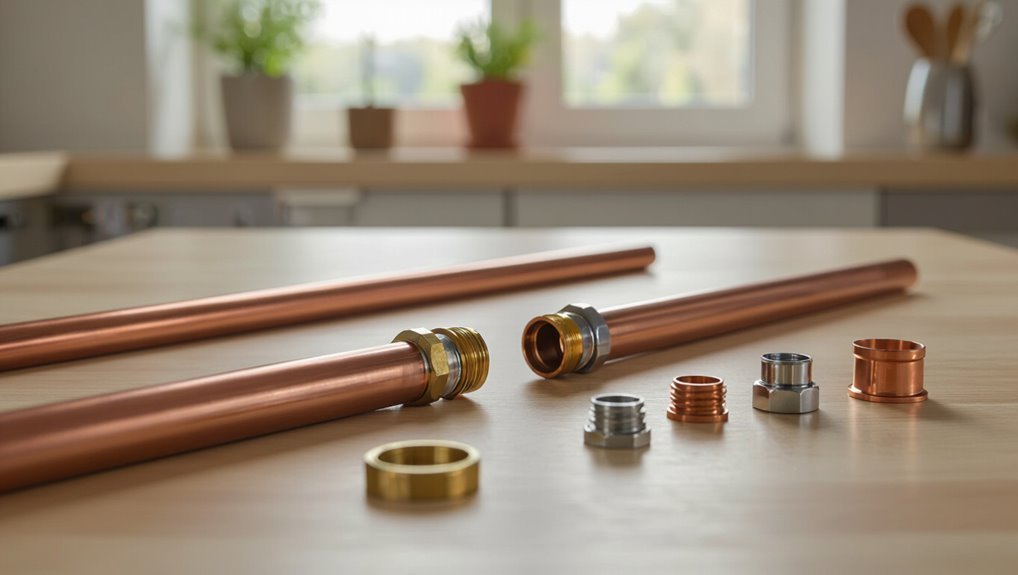
Several reliable no-solder options exist for joining copper pipe:
- push-fit fittings (e.g., SharkBite) for quick, tool-minimal connections;
- compression fittings for secure, threaded seals without heat;
- flare fittings when connecting to mechanical or gas lines;
- and brazing alternatives like epoxy or cold-weld compounds for repairs.
The summary outlines practical choices and steps for how to connect copper pipe without soldering, emphasizing speed and reliability.
When and why to avoid soldering copper pipe
Soldering is often unsuitable in confined spaces, near flammable materials, on heat-sensitive fittings, or where rapid repairs are needed.
It also carries risks such as burns, fire hazards, and toxic fumes, and can be incompatible with certain materials like plastic or previously treated pipe.
These limitations make no-solder alternatives safer and more practical in many situations.
Common situations where soldering isn’t suitable
When is soldering a poor choice for joining copper pipe?
In confined spaces, near combustible materials, or where electricity or heat-sensitive components exist, soldering proves impractical.
Temporary installations, quick repairs, or locations requiring disassembly favor mechanical fittings.
Damp, corroded, or contaminated pipes reduce solder reliability.
Situations lacking proper tools, skills, or time also justify choosing alternative connection methods.
Risks and limitations of soldering (safety, materials, accessibility)
Consider avoiding soldering copper pipe when safety hazards, material constraints, or limited access elevate risk or reduce reliability.
Open flames and high heat risk fires, burns, and toxic fumes in confined spaces. Some fittings or plating resist soldering, and nearby combustible materials complicate work.
Tight or concealed locations impede torch use. For these scenarios, mechanical or press-fit alternatives offer safer, more practical connections.
Overview of tools and materials needed for non-solder copper connections
A concise set of tools and materials is required to make reliable non-solder copper connections.
Basic hand tools such as a pipe cutter, deburring tool, wrench, and measuring instruments are essential, while method-dependent consumables include the appropriate fittings, clamps, and sealants.
Proper safety gear and surface preparation complete the list to guarantee a secure, code-compliant joint.
Essential tools (pipe cutter, deburring tool, wrench, measuring tools)
Successful non-soldered copper pipe connections depend on a small set of precise tools: a pipe cutter for clean, square cuts; a deburring tool or reamer to remove burrs and chamfer the tube; an adjustable wrench or appropriate-sized spanner for fittings; and accurate measuring tools such as a tape measure and marker.
Also useful are a square for alignment, a caliper for diameter checks, and gloves for grip and protection.
Common consumables by method (fittings, clamps, sealants)
Different applications demand specific consumables: push-fit and compression fittings, flare fittings and ferrules, shark-bite style couplers, mechanical clamps, and a range of sealants and tapes.
Each method requires compatible fittings by pipe size and material, appropriate O-rings or ferrules, stainless or brass clamps for repairs, thread sealant or PTFE tape for threaded joints, and occasional primer or lubricant for assembly.
Safety gear and preparation
Before beginning any non-solder copper work, the installer should gather protective gear and all necessary tools so tasks proceed safely and without interruption: safety glasses, gloves, ear protection, and a dust mask.
Essential tools include tubing cutter, deburring tool, reamer, adjustable wrench, pipe vise, measuring tape, marker, and method-specific fittings or compression rings.
Verify a clean, well-lit workspace and shut off water supply.
Method 1 Compression fittings
Compression fittings join copper pipe by compressing a ferrule onto the tubing with a nut to create a watertight seal.
The following section outlines a concise step-by-step installation, highlights advantages and limitations and suggests ideal use cases.
It also identifies common mistakes to avoid during installation.
How compression fittings work
A compression fitting joins two lengths of copper pipe using a nut and a metal ring (ferriule) that compresses onto the pipe when the nut is tightened, creating a watertight seal without heat.
The ferrule deforms slightly, biting into the pipe and forming a mechanical grip.
Tightening clamps joint components against a fitting body, sealing via metal-to-metal contact and controlled compression.
Step-by-step installation
With the ferrule and nut understood, the installation steps become straightforward and methodical.
- Cut pipe squarely, deburr and clean.
- Slide nut, then ferrule onto pipe.
- Insert pipe fully into fitting body.
- Hand-tighten nut, then wrench one-half to three-quarters turn.
- Test for leaks and retighten slightly if necessary; avoid overtightening.
Pros, cons, and best use cases
Although not requiring heat or specialized tools, the compression fitting method offers reliable, reusable joints suited to many domestic plumbing repairs.
Advantages include quick installation, compatibility with existing copper, and easy disassembly for maintenance.
Drawbacks are size limits, potential leaks if over- or under-tightened, and reduced suitability for concealed or high-pressure long-term installations.
Best for accessible, low-to-moderate pressure connections and temporary setups.
Common mistakes to avoid
Several common mistakes can compromise compression fittings if installers overlook basic preparation and technique.
Installers may undercut, scratch, or deform pipe ends, omit deburring, or fail to seat the ferrule properly. Overtightening crushes ferrules; undertightening leaks.
Using wrong-size components, reusing ferrules, or neglecting alignment causes failure. Proper cutting, cleaning, correct ferrule selection, and controlled tightening guarantee reliable joints.
Method 2 Push-fit (press-fit) fittings
Push-fit (also called press-fit) fittings compatible with copper include straight couplers, elbows, tees, and connector adapters for plastic or threaded connections.
Installation is typically a simple sequence of cut, deburr, mark insertion depth, and push or press the fitting until it locks, with some systems requiring a pressing tool.
The discussion will cover advantages such as speed and reusability, drawbacks like cost and tool needs, and factors affecting long-term durability and leak resistance.
Types of push-fit fittings compatible with copper
While many homeowners know of the basic push-to-connect style, press-fit systems and other push-fit variants offer distinct mechanisms and materials suited for copper pipe.
Options include standard push-to-connect (O-ring and gripping teeth), stainless steel press fittings (crimp or press sleeve), connector adapters for PEX or PVC, and compression-style push fittings.
Compatibility depends on pipe OD, temperature rating, and corrosion resistance.
Step-by-step installation
Begin by ensuring the workspace is safe and the water supply is shut off and drained; this prevents pressure or residual water from compromising the joint.
Then proceed with straightforward push-fit installation steps:
- Cut pipe squarely and deburr both ends.
- Clean pipe with a cloth; mark insertion depth.
- Push pipe firmly into fitting until stop.
- Verify alignment and secure clips if required.
- Test for leaks before restoring water.
Pros, cons, and durability considerations
Although not requiring heat or special soldering skills, press-fit fittings offer a balance of speed and reliability for many copper plumbing applications.
Advantages include quick installation, minimal training, and reusability with compatible tools.
Downsides: higher material cost, reliance on tool availability, and potential for seal failure if not fully engaged.
Durability rivals solder when installed properly but depends on quality, pipe condition, and correct press technique.
Method 3 Flare fittings
Flare fittings are introduced as an alternative to compression fittings when a stronger, vibration-resistant seal is required, particularly on gas lines and refrigeration.
The section outlines step-by-step installation of flared connections, then compares advantages, limitations, and typical applications.
Practical tips and common pitfalls are highlighted to guide proper selection and use.
When to use flare fittings vs compression
Decide between flare and compression fittings based on pressure, vibration, material hardness, and serviceability:
Flare fittings create a metal-to-metal seal suited for high-pressure refrigeration, gas, and brake lines or where repeated disassembly is likely.
Compression fittings work well for lower-pressure plumbing on softer metals and for permanent or semi-permanent installations where ease of assembly without special tooling is prioritized.
Use flare for vibration or high pressure; choose compression for simplicity.
Step-by-step installation
Begin by gathering all necessary tools and materials: tubing cutter, deburring tool or fine file, flare nut, flaring tool (single or double), and appropriate-sized flare fitting; confirm the copper tube is clean, straight, and free of corrosion.
Then perform these steps:
- Measure and mark tubing length.
- Cut squarely and deburr.
- Slide flare nut onto tube.
- Form a uniform 45° flare.
- Tighten nut to fitting, check for leaks.
Advantages, limitations, and applications
After completing the flare installation steps, Method 3—using flare fittings—offers clear benefits and some constraints that determine suitable uses.
Flare fittings provide reliable, vibration-resistant, leak-tight connections without heat, ideal for fuel, refrigeration, and high-pressure lines.
Limitations include requirement for precise flaring, thicker tubing compatibility, and reduced suitability for concealed plumbing.
Proper tools and periodic inspection guarantee long-term performance.
Method 4 Mechanical coupling with rubber gasket (pipe repair coupling)
Mechanical couplings with rubber gaskets and repair sleeves provide a solder-free option for joining or patching copper pipe.
The discussion will outline common coupling and sleeve types, give a concise step-by-step installation procedure, and compare temporary versus permanent uses with their respective advantages and limitations.
Clear guidance will help readers choose the right product and installation approach for their repair needs.
Types of repair couplings and sleeves
A pipe repair coupling with a rubber gasket offers a quick, reliable way to stop leaks without heat or adhesives.
Types include stainless steel clamp-style couplings with adjustable bolts, full-wrap repair sleeves for larger damage, and compact slip-on couplers for clean cuts.
Some feature braided rubber for pressure tolerance, others incorporate corrosion-resistant bands; size-matching and pressure rating determine appropriate selection.
Step-by-step installation
Having selected a repair coupling sized for the pipe and pressure, the installer prepares the work area and gathers tools: pipe cutters or hacksaw, emery cloth or sandpaper, a marker, socket or wrench, and a rag.
The installer then:
- Shut off water and drain the line.
- Cut out damaged section squarely.
- Deburr and clean pipe ends.
- Slide coupling and align.
- Tighten clamps to manufacturer torque.
Temporary vs permanent repairs and pros/cons
Weighing the longevity and intent of a repair helps determine whether a rubber-gasket pipe repair coupling is used temporarily or as a permanent fix.
Temporary use enables quick stoppage of leaks and minimizes downtime but may degrade under pressure, heat, or chemical exposure.
Permanent application offers simplicity and accessibility but can be vulnerable long-term; selection must match pipe conditions, pressure ratings, and local codes.
Method 5 Press tools with crimp rings (PEX-style crimps adapted for copper)
Press-style connections for copper use crimp rings originally designed for PEX and require matching ring material and fitting dimensions to guarantee a gas-tight seal.
Installation steps are straightforward—measure and cut, slide on the ring, position the fitting, and compress with the appropriate press tool—while following manufacturer torque or compression specifications.
Tools range from inexpensive manual crimpers to costly battery-powered presses, so tool choice should balance job frequency, ease of use, and budget.
Compatibility and required components
When using press tools with PEX-style crimp rings adapted for copper, compatibility depends on matching ring material, pipe OD, and tool jaw profile to the specific copper tubing standard in use.
Required components include correctly sized crimp rings (stainless or copper-plated), compatible press tool and jaws rated for copper crimps, proper ferrules or sleeves if specified, and fittings listed for the press/crimp system and local code approval.
Step-by-step installation
With compatible crimp rings, jaws, and fittings confirmed, the installation sequence for press tools using PEX-style crimp rings adapted to copper begins with careful preparation of tube and fitting.
- Cut pipe squarely and deburr both inside and outside.
- Slide ring onto pipe fully.
- Insert fitting to proper depth mark.
- Position jaws over ring evenly.
- Activate press until cycle completes and inspect connection.
Tool options (manual vs battery) and cost considerations
Several factors determine whether a manual or battery-powered press tool is more appropriate for crimp-ring installations on copper: job size, access, operator fatigue, and budget.
Manual tools cost less, are lightweight, and suit occasional small jobs.
Battery-powered tools increase speed, consistency, and reach tight spaces but carry higher upfront and maintenance costs.
Balance frequency of use against expense.
Method 6 Threaded adapters and fittings
Threaded adapters allow copper tubing to join threaded pipe or fittings by selecting the correct male or female adapter sized for the pipe’s OD or a solder-ringed ID-fitting when converting between standards.
Installation typically involves cutting and deburring the copper, fitting the adapter or bushings, and tightening with appropriate wrenches while avoiding over-torquing.
Thread sealants such as PTFE tape or pipe dope are used on metal threads to guarantee a leak-free joint.
Converting copper to threaded connections (OD/ID considerations)
Convert copper tubing to threaded pipe by matching the correct outside or inside diameter to the adapter type and using fittings designed for either compression, sweat-to-thread, or internally threaded inserts.
Accurate OD/ID measurement determines choice: OD-matched compression rings, ID-fit internal threaded inserts, or adapters converting sweat ends to NPT.
Material compatibility, pressure rating, and sealing method (PTFE or tape) guide selection.
Step-by-step installation
Begin by preparing the copper tubing and the selected threaded adapters: cut the tube square, deburr the inside and outside edges, and clean the mating surfaces with a brush or cloth to remove scale, oil, and debris.
Then follow this sequence:
- Insert tubing into adapter until full stop
- Align threads and hand-start fittings
- Tighten with appropriate wrenches
- Support piping to relieve strain
- Pressure-test and inspect for leaks
Sealing methods for threaded joints (PTFE tape, pipe dope)
When joining copper pipe with threaded adapters, reliable sealing is achieved primarily through PTFE tape or pipe dope applied to the male threads before assembly.
PTFE tape is wrapped clockwise for three to five turns, preventing cross-threading.
Pipe dope provides lubrication and fills imperfections; select a non-hardening, suitable material for potable water.
Tighten fittings to specified torque to avoid leaks or damage.
Method 7 Adhesive/epoxy bonding and cold-weld compounds
Adhesive and epoxy bonding, including cold-weld compounds, can join copper when formulated for metal and rated for potable water or HVAC use.
The discussion should cover selection of compatible products, surface preparation, step-by-step application and curing times, and clear limits on strength, temperature, and pressure.
It should also note situations—high-pressure mains, buried lines, or where codes require mechanical joints—where adhesives are inappropriate.
Suitable adhesives and epoxies for copper plumbing
Several types of adhesives and epoxies can join copper pipe without heat, each formulated for specific strengths, cure times, and exposure conditions.
Suitable options include anaerobic pipe thread sealants for metal-to-metal seals, two-part epoxies rated for potable water and high pressure, and silver-bearing cold-weld compounds for structural repairs.
Select products approved for potable use, temperature range, and pipe diameter compatibility.
Step-by-step application and curing
Having selected a product rated for the designated use and pipe size, preparation and strict adherence to manufacturer instructions determine bond success.
Clean, abrade, and degrease mating surfaces; mix per directions; apply evenly; assemble within working time; clamp or support until initial set.
Monitor cure at recommended temperature and humidity, then test gently for leaks before full service.
- Clean surfaces
- Abrade metal
- Mix accurately
- Apply and assemble
- Support during cure
Strength limits, temperature/pressure ratings, and when to avoid
Bond strength and the mechanical limits of epoxy and cold-weld compounds vary widely by formulation, and users should consult technical data sheets for specific tensile, shear, and peel values rather than assuming uniform performance.
Typical epoxies handle moderate pressure and temperatures but often fail under high thermal cycling, sustained pressures, or buried joints.
Avoid adhesives for primary potable-water mains, high-pressure systems, or where code requires brazing or mechanical fittings.
Comparison chart of no-solder methods
A concise comparison highlights how no-solder options trade ease, cost, tools, durability, leak risk, and typical uses. The table below summarizes key distinctions across common methods to help selection at a glance.
| Method | Quick summary |
|---|---|
| Compression fittings | Easy to install, moderate cost, minimal tools, reliable for potable and temporary repairs |
| Push-to-connect / SharkBite | Very easy, higher cost, minimal tools, durable and low leak risk |
Metrics: ease, cost, tools required, durability, leak risk, typical uses
Several key metrics — ease, cost, tools required, durability, leak risk, and typical uses — determine which no-solder copper-joining method is best for a given job.
Compression fittings score high on ease and low cost but can require re-tightening.
Push-to-connect offers fastest installation with moderate durability.
Mechanical couplings are durable but more expensive.
Epoxy or adhesive repairs are cheapest short-term, higher leak risk, and suited for temporary fixes.
How to choose the right method for your project
Choosing the appropriate no-solder connection begins with a concise checklist: pipe size, system pressure, desired permanence, and applicable local code requirements.
The checklist helps narrow options such as compression, press, or push-fit fittings based on performance and compliance.
If the project involves high pressure, concealed joints, or uncertain code interpretation, a professional plumber should be consulted or hired.
Decision checklist (pipe size, pressure, permanence, code requirements)
Which connection method suits the job depends on four practical factors: pipe size, operating pressure, desired permanence, and local code requirements.
Assess pipe diameter and wall type for fitting compatibility. Confirm maximum working pressure and temperature.
Decide if a removable or permanent joint is preferred. Review applicable plumbing codes and permit needs.
Match method (compression, push-fit, flare, mechanical) to these constraints.
When to consult or hire a professional
If the project involves unfamiliar fittings, high-pressure systems, concealed walls, or local code complexity, a professional should be consulted to avoid leaks, violations, or safety hazards.
A licensed plumber assesses scope, recommends compatible non-solder options, verifies code compliance, and handles permits.
Hire for multi-branch systems, emergency shutoff issues, copper-to-other-material conversions, or when warranty, insurance, or long-term reliability is required.
Preparing copper pipe for any no-solder connection
Before joining, the copper must be cut square, deburred, and cleaned to guarantee a tight, reliable fit with any no-solder connector.
The installer should verify pipe alignment and provide proper support to prevent strain on joints.
Attention to these preparatory steps reduces leaks and extends the life of the connection.
Cutting, deburring, and cleaning steps
Measure and mark the copper pipe precisely, then cut it squarely using an appropriate tubing cutter or a fine-toothed saw to guarantee a clean edge.
Afterwards, remove burrs and oxidation, ensuring smooth, bright ends before joining.
- Ream or file interior burrs
- Deburr outside edges with a knife or file
- Use emery cloth on outer surface
- Wipe with solvent or alcohol
- Inspect for nicks or deformation
Checking pipe alignment and support
Alignment and sturdy support are essential to guarantee a reliable no-solder copper joint: the pipes should be held in their final positions with consistent spacing, straight runs, and supports placed close enough to prevent sagging, rotation, or stress on the fittings.
Verify ends align flush for fittings, use clamps or hangers at recommended intervals, allow slight movement for thermal expansion, and recheck before final assembly.
Testing and finishing non-soldered connections
The installer performs a pressure test to verify joint integrity and follows manufacturer guidelines for test pressures and durations.
Visible and electronic leak detection methods are used to locate and troubleshoot any failures, with repair or replacement of the fitting as required.
Finally, connections are insulated, mechanically protected, and documented to meet local code and long-term service needs.
Pressure testing procedures
Begin pressure testing by isolating the new non-soldered connection and slowly introducing water or air at the system’s working pressure, watching gauges and joints for leaks.
Maintain pressure for the manufacturer-recommended duration, typically 15–30 minutes. Monitor for pressure loss and visual seepage.
Depressurize gradually, inspect fittings for deformation, and record results.
Proceed to final insulation or clamping only after a successful, stable test.
Leak detection tips and troubleshooting
Check each joint systematically using both visual inspection and simple pressure-change tests to locate slow or intermittent leaks in non-soldered copper connections.
Document findings, isolate sections, and address leaks promptly.
Recommended steps:
- Dry joints and watch for pinhole drips
- Apply soapy-water to spot air or water bubbles
- Tighten fittings incrementally
- Replace damaged seals or O-rings
- Re-test under normal operating pressure
Insulation, protection, and code compliance
Finish non-soldered copper connections by applying appropriate insulation, mechanical protection, and verifying compliance with local plumbing codes to guarantee durability and safety.
Use closed-cell foam or rubber sleeves on cold-water lines to prevent condensation and heat loss.
Protect exposed runs with conduit or nail guards where contact or abrasion is possible.
Document materials and methods for inspectors and retain receipts to demonstrate code-compliant installation.
Common mistakes and how to avoid them
Common errors in non-soldered copper piping include over-tightening or under-tightening fittings, inadequate surface preparation or contamination, and selecting the wrong fitting type or size.
Each mistake can cause leaks, reduced flow, or premature failure if not corrected.
The following section explains how to recognize and prevent these issues.
Over-tightening and under-tightening issues
Over- or under-tightening compression fittings and push-fit connectors can quickly turn a simple copper-pipe repair into a leak or a damaged joint.
Proper torque prevents crushed ferrules, stripped threads, or loose seals. Follow manufacturer torque specs or hand-tighten then add a specified fraction of a turn with a wrench.
Check for leaks, re-tighten cautiously, and replace any deformed components.
Improper surface prep and contamination
Neglect of proper surface preparation and contamination are frequent culprits behind leaking or failed joints: oil, dirt, oxidation, and burrs prevent seals from seating and adhesives or fittings from bonding.
Inspect and clean pipe ends with a degreaser and fine abrasive, remove burrs with a reamer, dry thoroughly, and avoid touching cleaned surfaces.
Use lint-free cloths and store components in a clean area.
Using the wrong fitting type or size
After cleaning and preparing pipe ends, attention must turn to selecting the correct fitting type and size, since a mismatched connector can defeat even the best surface prep.
Using incorrect fittings causes leaks, stress, and premature failure. Verify material compatibility, diameter, and connection style (compression, push-fit, press).
Measure twice, confirm manufacturer specifications, and test under pressure to guarantee a secure, lasting joint.
Maintenance and long-term inspection recommendations
Regular inspections focus on early signs of impending failure such as corrosion, leaks at fittings, discoloration, and reduced flow.
A simple scheduled inspection checklist—visual check, pressure test, and verification of joint tightness—helps catch issues before they escalate.
Recording findings and setting follow-up dates guarantees long-term reliability of solder-free copper connections.
Signs of impending failure
Monitor fittings and exposed runs for early indicators of failure to prevent leaks and costly repairs.
Watch for corrosion, green or white deposits, dampness, mineral buildup, pinhole weeps, or staining.
Note visible joint movement, loose compression rings, or softened seals.
Listen for persistent dripping or pressure loss.
Record gradual changes and act promptly to replace compromised fittings before full failure.
Scheduled inspection checklist
A simple, consistent inspection schedule helps catch wear and emerging faults before they become leaks; inspections should be performed at defined intervals (e.g., quarterly for exposed runs, biannually for concealed systems) and after any atypical event such as freezing, nearby renovation, or water hammer.
Routine checklist items include:
- Visual corrosion and joint checks
- Tightness of compression/fitting nuts
- Signs of moisture or staining
- Support and strap integrity
- Test pressure and valve operation
Typical project examples and step-by-step scenarios
Typical projects include replacing a short copper section under a sink and addressing a pinhole leak on a supply line.
For the sink repair, methods such as compression fittings, push-to-connect couplings, or slip fix connectors are commonly used and can be outlined step by step.
For pinhole leaks, the distinction between temporary patches (epoxy, repair sleeves) and permanent fixes (cut-and-replace with a coupling or clamp-plus-sleeve) frames a clear sequence of actions.
Replacing a short section of copper pipe under a sink (method suggestions)
Replacing a short section of copper pipe under a sink can be completed quickly with a few common no‑solder fittings and basic hand tools.
Shut off water, cut out damaged section squarely, deburr and clean pipe ends.
Fit push‑to‑connect couplings, compression fittings, or sharkbite alternatives sized to pipe.
Test by restoring water and checking for leaks; tighten or reseat fittings if needed.
Repairing a pinhole leak on a supply line (temporary vs permanent options)
After cutting out and replacing a short damaged section under a sink, attention may turn to smaller but common failures such as pinhole leaks on supply lines.
Temporary fixes: shut water off, dry area, apply epoxy putty or rubber patch with hose clamp.
Permanent options: replace the damaged flex line or copper stub with push-fit or compression fittings and new tubing, test for leaks.
Resources, codes, and product references
A concise list of recommended retailers and specific fittings and tools can help readers source parts and prepare for installations.
The article will note trusted brands and where to purchase push-fit, compression, and crimp systems, plus basic tool recommendations.
It will also summarize key plumbing codes and standards to check locally before beginning work.
Where to buy fittings and tool recommendations
Where can homeowners and tradespeople locate the fittings and tools needed to join copper pipe without soldering?
Local hardware stores, big-box retailers, plumbing supply houses, and online marketplaces stock push-fit, compression, and flared fittings.
Recommended tools include pipe cutters, deburring tools, adjustable wrenches, and torque-limited fittings wrenches.
Brands to evaluate: SharkBite, Viega, and Mueller; compare prices, warranties, and return policies.
Relevant plumbing codes and standards to check
Having identified appropriate fittings and tools, the next step is to confirm applicable plumbing codes, standards, and manufacturer instructions that govern non-soldered copper connections.
Check local plumbing codes, the International Plumbing Code (IPC), Uniform Plumbing Code (UPC), and ASTM standards (e.g., B88, F1974).
Verify manufacturer installation guides, temperature/pressure ratings, approved joint types, and any permit or inspection requirements before starting work.
Conclusion
Copper pipe need not be met with a torch; instead, hands steady as craftspeople in a quiet workshop choose alternatives—compression rings bite like a clasp, push-fit connectors slip on like a glove, and press fittings lock like a handshake. Each method, when selected with care and inspected like a lighthouse watches the shore, keeps systems flowing safely without flame. Thoughtful choice, correct tools, and routine checks guarantee lasting, leak-free service.