How to Find a Water Leak in a Commercial Building: Step-by-Step Detection & Repair Guide
To effectively find a water leak in a commercial building, start by confirming the leak through visible signs such as stains, pooled water, sudden pressure drops, or unusual meter readings. Once confirmed, promptly isolate affected zones, safeguard assets, and document any damage. Prepare for repair by obtaining necessary permits, ensuring access, reviewing building drawings, and using calibrated tools. Detection methods include visual inspections, pressure testing, acoustic listening, thermal imaging, and moisture meters. For repairs, options vary from temporary containment to trenchless or targeted pipe fixes, all coordinated with tenants and insurers. Follow the step-by-step procedures and verification checks for a thorough resolution.
How to Quickly Confirm There Is a Water Leak in a Commercial Building
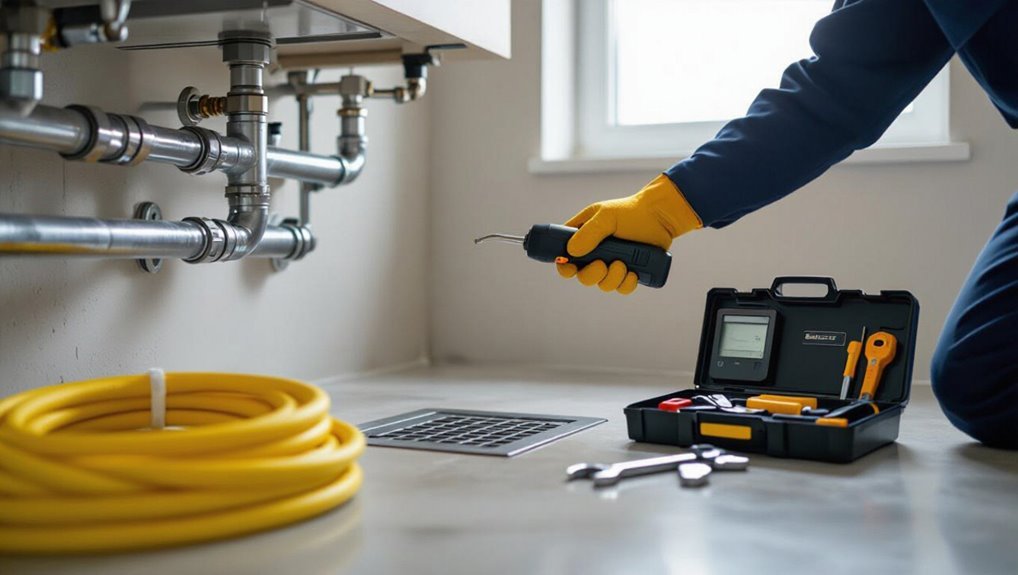
Visible stains, pooled water, sudden drops in water pressure or unexplained meter activity are common signs that indicate a commercial water leak.
Immediate steps include isolating affected zones, shutting off nonessential equipment, and protecting sensitive assets to limit damage and electrical hazards.
If flooding threatens structural safety or critical systems, occupants should be evacuated and main water or building systems shut down until professionals assess the situation.
Common signs of a commercial water leak
A sudden rise in water bills, unexplained damp patches, or persistent musty odors are clear indicators that a commercial facility may have a leak.
Other signs include visible mold, warped ceilings or flooring, persistent low water pressure, and running meters when fixtures are off.
Personnel reports of stains or pooling, sporadic electrical trips near wet areas, and unusual landscaping saturation also signal how to find a water leak in a commercial building.
Immediate safety and damage-control steps to take
When signs such as rising bills, musty odors, or damp spots suggest a leak, immediate safety and damage-control steps focus on confirming its presence and limiting harm.
Inspect accessible areas for active drips, pooled water, discoloration and meter movement with fixtures off.
Photograph findings, contain spread with towels or portable absorbents, protect electrical equipment, and notify facilities management to arrange professional assessment and temporary containment.
When to evacuate areas or shut off building systems
If strong evidence of a leak appears—rapid pooling, steady dripping from ceilings, active water flow near electrical panels, or sudden loss of pressure—occupants should be moved out of affected zones and critical systems isolated immediately.
These signs indicate an escalating hazard that can compromise structural elements and pose electrocution risks, so shutting off zone valves, main water feeds, or building HVAC and electrical circuits (per emergency protocols) prevents further damage while awaiting professional assessment.
Follow emergency plans: notify building management, call qualified plumbers and electricians, cordon off hazards, document conditions, and avoid re-energizing systems until cleared by inspectors.
Essential Preparations Before Starting Leak Detection
Before beginning leak detection, personnel should secure required permits, arrange access, and notify building stakeholders to guarantee legal compliance and minimal disruption.
A concise tools-and-equipment checklist—including acoustic detectors, thermal cameras, pressure gauges, and shut-off tools—should be prepared and verified.
Relevant zoning plans, building layouts, pipe schematics, and utility maps must be reviewed to target likely leak locations and plan safe entry.
Required permits, access, and stakeholder notifications
Securing the proper permits, arranged access, and timely stakeholder notifications forms the foundation for any commercial leak-detection operation.
These administrative steps establish legal authority, minimize business disruption, and define responsibility for consequences.
Confirm required municipal and building permits, obtain written access consent from tenants and maintenance, schedule work windows, notify occupants and emergency services, and document approvals and contact points before commencing diagnostics.
Tools and equipment checklist for commercial leak detection
With permits, access agreements, and notifications in place, the team turns attention to assembling the tools and equipment needed for commercial leak detection.
Essential items include diagnostic, safety, and repair-ready gear to enable efficient tracing and temporary containment.
- Acoustic leak correlator
- Thermal imaging camera
- Flow and pressure gauges
- Gas tracer or dye kits
- Personal protective equipment and isolation valves
Zoning building plans, pipe schematics, and utility maps to review
A clear set of zoning plans, pipe schematics, and utility maps forms the foundation for targeted leak detection by identifying building zones, pipe runs, material types, service connections, and potential access points.
Reviewing these documents reveals valve locations, isolation zones, pressurized versus drainage lines, concealed cavities, and historical modifications.
Annotate discrepancies, mark probable leak paths, and plan safe, efficient inspection and repair sequences.
Step-by-Step Leak Detection Process for Commercial Buildings
The leak detection process proceeds through a clear sequence of steps beginning with isolating zones and verifying the leak source at shutoffs.
Technicians then perform visual inspections of piping, ceilings, walls, and mechanical rooms before employing acoustic listening devices to trace hidden lines.
Thermal imaging and infrared scans are complemented by moisture meters and hygrometers for targeted follow-up readings.
Step 1 Isolate and verify the leak source using zone shutoffs
Begin by systematically isolating building zones and verifying the leak source using each area’s shutoff valves.
Technician teams close zone valves sequentially while monitoring meters and visible flow indicators. Confirm cessation of water movement to identify the affected zone.
Log valve positions, times, and meter readings. Preserve normal operations elsewhere and prepare identified zones for targeted inspection and repair.
Step 2 Visual inspection of visible piping, ceilings, walls, and mechanical rooms
Inspect visible piping, ceilings, walls, and mechanical rooms systematically, moving from the isolated zone’s accessible points toward likely leak origins.
Examine joints, valves, traps, insulation, and supports for corrosion, staining, blistering, mineral deposits, or wetness.
Note active drips, damp spots, and odor.
Photograph findings, mark locations, document times, and prepare prioritized actions for repair or further diagnostics.
Step 3 Use of acoustic and listening devices to trace hidden leaks
Having documented visible signs and prioritized problem areas, attention shifts to acoustic methods to locate leaks concealed behind walls, under slabs, or within chases.
Technicians employ listening sticks, ground microphones, and correlators to detect and triangulate pipe noise.
Systematic grid listening, pressure variation, and signal analysis distinguish leak signatures from ambient sounds, narrowing excavation or access points for targeted repairs with minimal disruption.
Step 4 Thermal imaging and infrared scanning techniques
Technicians next deploy thermal imaging and infrared scanning to reveal temperature differentials caused by moisture and escaping water beneath surfaces. Handheld IR cameras, drone-mounted sensors, and thermal scopes quickly map cooler wet areas and warmer evaporation zones across walls, ceilings, and slabs.
Images guide targeted inspection, highlighting anomalies, plumbing routes, and concealed saturation patterns. Results are documented for prioritizing investigations and coordinating noninvasive openings.
Step 5 Moisture meters, hygrometers, and infrared follow-up readings
After thermal scans pinpoint temperature anomalies, teams employ moisture meters and hygrometers to quantify moisture content and relative humidity at specific locations, corroborating and refining infrared findings.
Readings identify wet materials, map moisture gradients, and prioritize invasive inspection. Follow-up infrared scans verify drying progress after repairs.
Documentation includes instrument readings, locations, and timestamps to support remediation decisions and warranty or insurance claims.
Step 6 Pressure testing of branches and mains to pinpoint sections
Initiate systematic pressure testing to isolate leaks by dividing the building’s plumbing into manageable zones—typically mains and branch lines—and pressurizing each section while monitoring for pressure decay and audible or electronic leak indicators.
- Seal and isolate the test zone
- Apply calibrated test pressure
- Record stabilization and decay rates
- Use listening devices or ultrasonic detectors
- Mark failing sections for targeted repair
Step 7 Sewer and drain camera inspections for underground or slab leaks
Deploy sewer and drain camera inspections to visually locate underground or slab leaks that pressure testing has narrowed to a specific sewer run or drain line.
Technicians insert push or tractor cameras to inspect joints, cracks, root intrusion, and soil voids.
Record footage, note exact pipe depth and orientation, and mark access points for targeted excavation or repair.
Include measurements for contractor handoff.
Step 8 Dye testing, tracer gas, and chemical indicators for elusive leaks
Several complementary methods—dye testing, tracer gas, and chemical indicators—are employed when conventional techniques fail to reveal a leak.
Dye tracing pinpoints flow paths in drains, fixtures, and cavities.
Tracer gas (typically helium or hydrogen) detects tiny leaks via sniffer probes.
Chemical indicators reveal moisture or contaminants at otherwise hidden interfaces.
Each method is chosen based on access, materials, and risk constraints.
Step 9 Confirming leak location and documenting evidence for insurance/maintenance
After dye, tracer gas, or chemical indicators have narrowed the area, the team must verify the exact leak point and compile a clear record for insurers and facilities staff.
Technicians confirm with visual inspection, moisture meters, infrared imaging, and pressure tests. They photograph, timestamp, and geo-tag evidence, log measurements, note repairs required, obtain signatures, and produce a concise report for claims and maintenance planning.
Locating Specific Types of Leaks
The guide now turns to identifying common leak categories and their characteristic indicators.
It outlines roof and gutter checks, plumbing and tenant-suite isolation tactics, HVAC and condensate inspection points, signs and methods for underground and slab leaks, and protocols for sprinkler and fire-suppression systems.
Each category emphasizes targeted diagnostic steps and safety or access considerations.
Roof and gutter leaks: detection and diagnostic checks
How can a facility manager reliably distinguish roof and gutter leaks from interior plumbing or HVAC issues?
Inspect attic and ceiling for staining patterns, drip timing during rain, and trail marks toward exterior walls.
Check roof membrane, flashing, seams, and gutter downspouts for blockages or corrosion.
Perform controlled water tests on roof sections and monitor interior points for concurrent moisture entry locations.
Plumbing fixture and tenant-suite leaks: isolation strategies
Shifting focus from exterior-driven moisture, attention turns to leaks originating within tenant suites and from plumbing fixtures, where isolation tactics differ markedly.
Begin by isolating the suite’s water mains, inspect individual fixtures sequentially, and monitor meter changes.
Use pressure tests, dye in traps, and localized shutoffs to pinpoint sources.
Coordinate with tenants, document findings, and apply temporary containment before repairs.
Mechanical equipment and HVAC condensate leaks: inspection points
Inspect mechanical rooms and rooftop units methodically, focusing on condensate pans, drain lines, pump assemblies, and coil drain outlets where failures commonly occur.
Check for standing water, rust, corrosion, and misaligned or clogged traps.
Verify condensate pump operation, float switches, and secondary drain pans.
Inspect insulation, pipe slopes, and access panels.
Document findings, tag defects, and recommend immediate repairs or temporary containment.
Underground and slab leaks: signs and specialized detection methods
After completing mechanical-room and HVAC condensate checks, attention shifts to concealed water pathways beneath slabs and landscaping, where leaks behave differently and require specialized tools and interpretation.
Indicators include localized floor depressions, unexplained moisture patches, elevated water bills, and persistent damp odors.
Detection employs acoustic leak correlators, ground microphones, tracer gas, infrared thermography, and excavation-guided probe drilling to pinpoint and verify underground or slab breaches.
Sprinkler and fire-suppression system leaks: protocol and safety considerations
Begin by recognizing that sprinkler and fire‑suppression systems present unique leak risks and safety constraints distinct from typical plumbing: pressurized lines, isolated valves, detection devices, and integrated alarms require coordinated procedures before any diagnostic or repair work.
Personnel must notify fire authorities, isolate zones per building plans, depressurize safely, document tamper switches, avoid compromising coverage, and engage certified technicians for repairs and testing to restore system integrity.
Repair Options and Temporary Mitigation Strategies
When an active leak is discovered, immediate temporary measures—such as shutoff valves, pipe wraps, or containment pumps—are used to limit damage while a permanent solution is planned.
Permanent repairs range from spot replacement of pipes, joints, and fittings to trenchless lining or pipe-bursting techniques that minimize disruption.
Coordinating timing, tenant access, and insurance documentation is essential to guarantee repairs proceed efficiently and liabilities are managed.
Emergency temporary fixes to stop active leaks
Act quickly to minimize damage: emergency temporary fixes focus on stopping or slowing active leaks long enough to implement permanent repairs or safely evacuate affected systems.
Technicians should isolate valves, shut off affected zones, apply pipe clamps, wrap with rubber and hose clamps, use epoxy putty or repair tapes rated for pressure, deploy containment pans and portable pumps, and notify maintenance for scheduled permanent solutions.
Common permanent repair methods for pipes, joints, and fittings
After emergency measures have halted active leaks and contained water, attention turns to permanent repairs for pipes, joints, and fittings.
Typical solutions include replacing corroded pipe sections, cutting out and re-soldering or mechanically coupling joints, installing new threaded or flanged fittings, and applying epoxy or resin-based liners for localized damage.
Proper material matching and pressure testing guarantee lasting integrity and code compliance.
Trenchless and non-invasive repair technologies
Explore trenchless and non-invasive repair technologies as alternatives to open excavation that minimize disruption to building operations, reduce restoration costs, and shorten downtime.
Techniques include cured-in-place pipe lining, pipe bursting, slip lining, and robotic internal sealing for localized leaks.
These methods preserve finishes, access tight spaces, accelerate return to service, and often require only small access pits or existing service points, lowering tenant impact.
Coordinating repairs with tenants, property managers, and insurers
Coordinate repairs promptly to limit damage and restore services while balancing the needs of tenants, property managers, and insurers.
Communication protocols should define responsibilities, timelines, access, and documentation.
Temporary mitigation—shutoffs, containment, drying—must be agreed and executed quickly.
Insurance claims require timely photos, reports, and invoices.
Contracts should specify cost allocation, emergency approvals, and tenant relocation or rent adjustments if disruptions occur.
Cost, Timeframe, and Resource Planning
Estimated costs are presented by leak type and repair method to set budget expectations and prioritize fixes.
Timeframe estimates and scheduling considerations clarify expected downtime and coordination with building operations.
Guidance on when to engage specialist contractors versus in-house maintenance helps allocate resources and manage risk.
Typical cost ranges by leak type and repair method
When planning repairs, building managers and contractors must consider typical cost ranges tied to leak location and repair method, since expenses vary widely between surface-level pipe repairs, slab leaks, roof membrane patches, and concealed routing replacements. Typical ranges (materials, labor, diagnostics) are summarized below:
| Leak Type | Typical Cost | Notes |
|---|---|---|
| Surface pipe | $150–$1,200 | Minor joints to section replacement |
| Slab leak | $1,000–$10,000 | Trenching or tunneling varies |
| Roof membrane | $200–$5,000 | Patch vs full re-roof |
| Concealed routing | $500–$8,000 | Wall/ceiling access, relocation |
Expected downtime and scheduling considerations
Typically, downtime for leak repairs depends on leak type, access difficulty, and required permits. Planners should quantify expected outages, staging windows, and contingency buffers to align operations and tenant impact.
Scheduling should favor off-peak hours, coordinate with tenants, and allow time for drying and inspections.
Resource allocation must include labor shifts, equipment staging, and rapid material procurement to minimize business disruption.
When to hire specialist contractors versus in-house maintenance
Decisions about engaging specialist contractors versus using in-house maintenance hinge on cost, timeframe, and available resources after scheduling and downtime impacts have been assessed.
Complex or high-risk leaks, limited internal expertise, and strict warranty or compliance demands favor contractors. Routine diagnostics, minor repairs, and rapid response needs favor in-house teams.
Compare quotes, projected outage durations, equipment availability, and long-term maintenance costs before deciding.
Preventive Measures and Ongoing Leak Monitoring
Preventive measures center on routine inspection schedules and targeted checklists to catch early signs of deterioration.
Installing dedicated leak detection systems and networked sensors enables rapid identification of unwanted water presence.
Integrating these inputs with the building management system allows automated alerts, trend analysis, and coordinated response.
Routine inspection schedules and critical checklists
Routine inspection schedules and concise checklists form the backbone of ongoing leak monitoring in commercial buildings, ensuring consistent coverage of high-risk areas such as mechanical rooms, roof penetrations, restrooms, and tenant suites.
Inspectors follow frequency-based tasks, document findings, and prioritize repairs.
Key checklist items include:
- Visual pipe and valve inspections
- Roof and gutter condition
- Drain and trap functionality
- Meter and submeter readings
- Tenant-reported anomalies
Installing leak detection systems and building-wide sensors
Building managers often complement scheduled inspections and checklists with installed leak detection systems and networked sensors to provide continuous, automated monitoring of vulnerable spaces.
These systems include spot sensors, cable/line loops, floor mats, and ultrasonic flow monitors. Alerts notify staff of moisture, flow anomalies, or pressure changes.
Strategic placement, periodic testing, and documented response procedures guarantee early detection and rapid containment.
Integrating monitoring with building management systems (BMS)
Integration of leak-monitoring devices with a building management system (BMS) centralizes alerts, trends, and control actions so facility teams can detect anomalies and respond faster.
Integration enables automated shutdowns, valve control, and prioritized notifications while feeding historical data for analytics and predictive maintenance.
Standards-based protocols (BACnet, Modbus, MQTT) and secure authentication guarantee interoperability, scalability, and minimized false alarms across systems.
Documentation, Compliance, and Insurance Considerations
Documentation of findings, repairs, and warranties should be maintained to protect against future liability and to verify work performed.
After repairs, facilities must be inspected and records updated to guarantee continued compliance with building, safety, and fire-protection codes.
For insurance claims, assembled evidence, contractor estimates, and clear timelines expedite recovery and substantiate losses.
Recording findings, repairs, and warranties for liability protection
Establish clear records of inspection findings, repairs performed, and warranty details to create an auditable trail that supports liability protection and insurance claims.
The report should include dates, photos, technician names, serial numbers, materials used, scope of work, test results, and referenced standards.
Retain invoices, signed waivers, and manufacturer warranties; store copies securely and provide stakeholders prompt access for dispute resolution and claim substantiation.
Meeting code, safety, and fire-protection compliance after repairs
After compiling inspection records and warranty information, attention shifts to ensuring repaired systems meet applicable building codes, life-safety standards, and fire-protection requirements.
Contractors verify permit closure, update as-built drawings, and obtain required inspections or certifications. Fire suppression, alarm, and egress elements receive functional testing.
Documentation of compliance is filed with building management and authorities having jurisdiction to confirm occupancy safety and code conformance.
Preparing insurance claims: evidence, estimates, and timelines
When a leak has been located and repairs initiated, the building owner and facilities team must assemble a clear, timely insurance claim packet that balances photographic and written evidence, contractor estimates, and a documented timeline of discovery and remediation.
Include incident reports, moisture readings, repair invoices, before-and-after images, scope-of-work and cost estimates, mitigation logs, and communications with tenants and insurers to substantiate liability and expedite settlement.
Common Mistakes and How to Avoid Them
Common mistakes that lead to misdiagnosis or recurring leaks often stem from incomplete inspections, misreading pressure or moisture data, and rushing repairs.
Emphasizing systematic diagnostics and using calibrated tools reduces the chance of repeat failures.
Applying containment techniques and minimally invasive access prevents unnecessary damage during detection and repair.
Mistakes that lead to misdiagnosis or repeated leaks
Misdiagnoses and recurring leaks often stem from shortcuts, assumptions, or incomplete investigations that prioritize speed over accuracy.
Technicians who skip pressure testing, ignore systemic causes, or treat symptoms instead of sources risk repeats.
Poor documentation, inadequate isolation of zones, and using temporary fixes without follow-up perpetuate issues.
Thorough diagnostics, verified repairs, and clear records prevent misdiagnosis and reduce recurrence.
Best practices to prevent unnecessary damage during detection and repair
Start by prioritizing containment and minimal intervention to limit collateral damage during leak detection and repair.
Technicians should isolate affected zones, use noninvasive leak-locating tools, document conditions, and protect finishes with barriers.
Employ targeted, temporary fixes pending permanent repair, coordinate with building operations, and avoid unnecessary demolition.
Post-repair verification guarantees no hidden issues and prevents repeat interventions.
Real-World Scenarios and Case Examples
The section presents three concise case examples: a slab leak detected beneath a retail space, a concealed HVAC condensate leak in an office tower, and the corrective measures applied in each instance.
Each case highlights the specific detection methods, diagnostic challenges, and repair steps used.
Lessons learned demonstrate how targeted inspection protocols and documentation prevent recurrence.
Case: Detecting a slab leak under a retail space
Investigating a slab leak beneath a retail space requires rapid, coordinated assessment to prevent structural damage and business disruption.
Technicians isolate water mains, use acoustic detection and infrared scanning, and perform core probes if necessary.
Moisture mapping identifies affected flooring and inventory risk.
Repairs may involve epoxy injection, pipe rerouting, or slab cutting.
Communication with tenants and prompt remediation minimize downtime and liability.
Case: Hidden HVAC condensate leak in an office tower
A similar urgency applies when a slow HVAC condensate leak hides within an office tower’s ceiling cavity: unlike a slab leak beneath retail, condensate may migrate along joists and insulation, eluding surface detection while causing mold, ceiling stains, and corrosion over time.
Technicians traced elevated humidity, thermal imaging revealed cool pathways, and targeted access panels confirmed a clogged drain pan and compromised condensate line requiring prompt isolation and repair.
Lessons learned and applied solutions from each scenario
Consolidating findings from the case studies yields practical lessons that inform faster diagnosis and more durable repairs across diverse leak types.
Technicians prioritized systematic inspection, prioritized noninvasive testing, and documented conditions.
Preventive maintenance schedules were revised, material selections upgraded, and tenant communications standardized.
Cost-effective monitoring and clear escalation protocols reduced recurrence, expedited repairs, and improved asset longevity across commercial building systems.
Conclusion
After methodical inspection and repair, the building stands drier and safer, systems restored to expected performance. Teams documented findings, notified stakeholders, and implemented monitoring to prevent recurrence. Temporary patches held until permanent fixes were completed, while insurers and code officials were engaged as required. Could one imagine the slow drip that once threatened operations now silenced by coordinated action and routine vigilance? The result: minimized loss, regulated compliance, and greater resilience against future leaks.