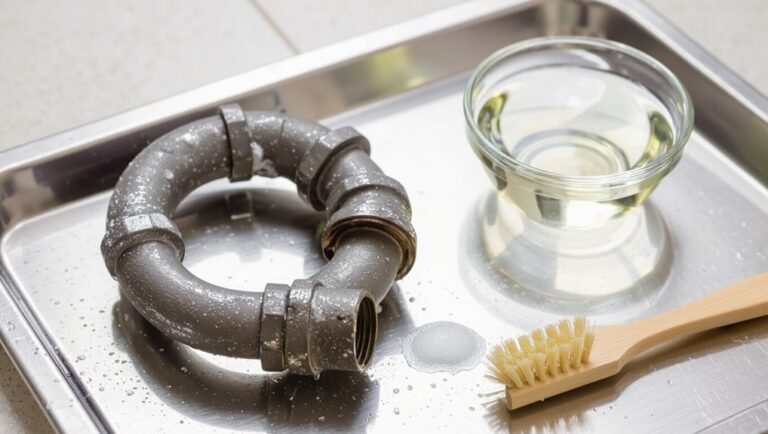
How to Safely Bypass an RV Water Heater: Expert Tips and Alternatives
To safely bypass an RV water heater, redirect fresh water around the tank during winterization, repairs, or when switching to a tankless system. Shut off the water and power, utilize a factory bypass valve or an aftermarket kit, and check valve positions and seals before pressurizing. Remember, temporary methods should only be used in emergencies. Be cautious of potential leaks, pressure buildup, and warranty issues; always inspect fittings and test at low pressure. Follow the step-by-step guidance for a safe and effective bypass, along with alternative solutions.
What Bypassing an RV Water Heater Means and When It’s Appropriate
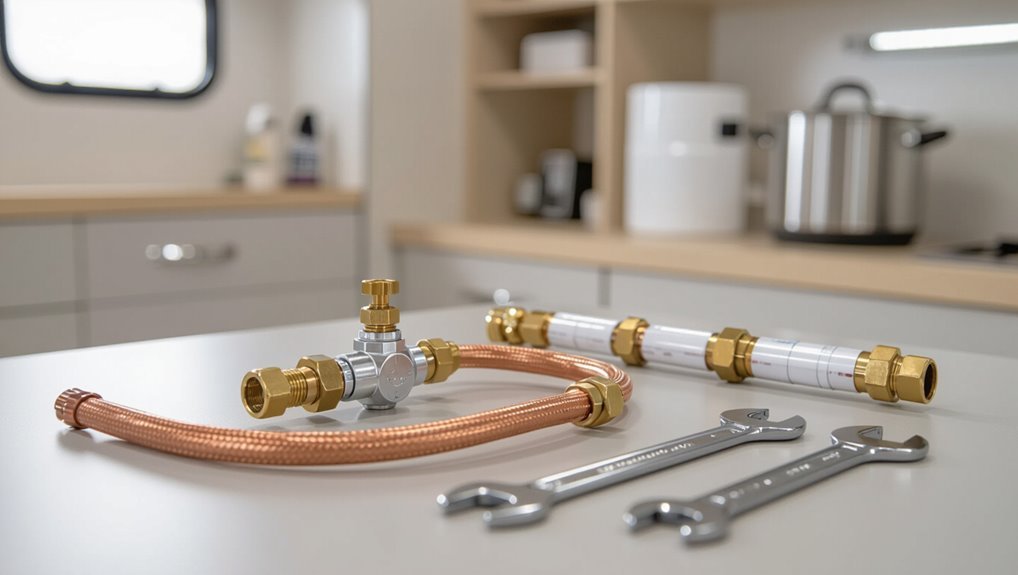
Bypassing an RV water heater redirects incoming and outgoing water around the tank so antifreeze or repairs can be performed without filling the heater.
It is commonly used during winterization, when servicing or replacing the unit, or when relying on alternative hot water sources such as onboard tankless systems.
Before performing a bypass, one should assess leak risks, follow manufacturer instructions, and confirm valves are correctly positioned to avoid accidental pressurization or contamination.
Definition of bypassing an RV water heater
A water heater bypass in an RV is a plumbing configuration that routes antifreeze or external water around the heater unit, preventing fluid from entering the tank and heating elements.
It isolates the appliance so plumbing can be protected or serviced without filling the tank.
Instructions on how to bypass RV water heater vary by model; understanding valve positions and labeled fittings is essential before proceeding.
Common scenarios that require bypassing (winterization, repairs, using onboard hot water alternatives)
When temperatures drop below freezing or the water heater requires maintenance, rerouting the plumbing around the tank prevents damage and allows targeted work without draining or filling the heater.
Common reasons to bypass include winterization to keep antifreeze out of the tank, servicing or replacing the heater, and switching to tankless or onboard electric instant-water systems.
Bypassing isolates the tank while preserving hot water access.
Risks and safety considerations before bypassing
Owners should understand what rerouting the plumbing around an RV water heater entails and under what conditions it is appropriate.
Bypassing risks include leaks, pressure buildup, contamination, and loss of temperature regulation.
Safety checks—shutting off power and water, relieving pressure, confirming valves’ integrity—and consulting manuals or professionals mitigate hazards.
Improper bypassing can void warranties and create fire, scalding, or flood dangers.
Quick Overview: Safe Bypass Options and When to Use Each
The section summarizes practical bypass methods and appropriate situations for each.
It compares factory-installed bypass valves, aftermarket bypass kits, and temporary manual workarounds for emergencies, noting installation complexity and reliability.
It also flags conditions—persistent leaks, corrosion, or failed heating elements—when repair or replacement is the safer choice than bypassing.
Bypassing with a factory-installed bypass valve
Engage the factory-installed bypass valve to reroute water around the RV water heater, allowing winterization or repairs without draining the entire unit.
The technician or owner rotates valve handles per manufacturer markings to isolate the tank and divert flow through bypass ports. This preserves antifreeze use, prevents tank damage, and simplifies servicing.
Confirm seals, test for leaks, and restore normal flow after maintenance.
Using an aftermarket bypass kit
Install an aftermarket bypass kit to create a dedicated bypass loop that diverts water around the RV water heater for winterization, repair, or seasonal shutdowns.
These kits offer durable valves, clear instructions, and minimize plumbing changes.
Professional-grade kits reduce leak risk and permit easy isolation of the tank.
Choose a kit matching pipe size and material, and confirm compatibility with existing fittings and local codes.
Temporary manual bypass methods for emergency situations
After outlining aftermarket bypass kits, attention turns to quick manual methods suitable for emergencies when a kit isn’t available.
The person isolates water and power, drains the tank, and uses a temporary connector or capped hose to reroute cold inlet to hot outlet.
This short-term fix restores flow for basic use; it must be monitored and replaced with a proper kit or repair promptly.
When not to bypass: signs you should repair or replace instead
Although bypassing an RV water heater can be a practical short-term solution, certain signs indicate the unit needs repair or replacement rather than a temporary workaround.
Persistent leaks, corrosion, sediment buildup causing poor heating, gas or electrical faults, irregular pilot or burner operation, and recurring cold water delivery signal underlying failure.
In these cases, a professional inspection and component replacement are safer and more reliable than repeated bypassing.
Tools, Parts, and Safety Gear Needed
A concise inventory of required tools and materials helps guarantee the bypass is completed efficiently and without surprises.
Recommended replacement parts and preassembled kits should be identified to match the RV’s make and model.
Personal protective equipment and basic safety checks are essential before any work begins.
List of required tools and materials
Precision and the right supplies make bypassing an RV water heater straightforward and safe.
The technician should gather basic hand tools, sealing materials, and protective gear. Essential items include properly sized wrenches, a screwdriver set, plumber’s tape, silicone sealant, hose clamps, and safety glasses.
- Hand tools and fasteners
- Sealing materials and clamps
- Personal protective equipment
Recommended replacement parts and kits
Having assembled the basic hand tools, sealing supplies, and safety gear, the technician should next select replacement parts and prepackaged kits designed specifically for RV water heater bypasses.
Recommended items include dedicated bypass valves, reinforced hoses, and tank drain assemblies. Choose corrosion-resistant materials and matched fittings for the RV model to guarantee leak-free operation.
- Bypass valve kit
- Reinforced hose set
- Drain/tank assembly kit
Personal protective equipment and safety checks
Wear chemical-resistant gloves, eye protection, and slip-resistant footwear before beginning any work on an RV water heater, and confirm that the battery and propane supply are disconnected to eliminate electrical and fuel hazards.
Additional PPE includes a respirator for confined spaces, long sleeves, and hearing protection when using power tools.
Verify gas detectors, have a fire extinguisher, and use lockout/tagout procedures for safety.
Step-by-Step: How to Bypass an RV Water Heater (Factory Bypass Valve)
Locate the water heater compartment and confirm the factory bypass valve and surrounding plumbing before beginning.
The RV should be prepared by shutting off the water supply and draining the heater or system as needed.
Follow the bypass valve operation steps, then flush and refill the plumbing.
Verify cold-water-only flow and inspect for leaks.
Locate the heater and identify the bypass valve and plumbing layout
Before any work begins, the RV water heater must be visually located and its plumbing layout assessed to find the factory bypass valve and associated fittings.
Inspect access panels, follow inlet and outlet lines, and note valve orientations, hose connections, and nearby shutoffs. Photograph the arrangement for reference.
Identify compression or threaded joints, plastic or brass components, and any additional mixing valves or check valves.
Prepare the RV (shut off water, drain system if necessary)
With the bypass valve and plumbing layout documented, the next step is to make the RV safe for work by shutting off water sources and relieving pressure.
Turn off the city water inlet and shore power to electric heaters if present.
Close the fresh-water pump breaker and open a hot faucet to bleed pressure.
Drain low points or the water heater drain if winterizing or full drainage is required.
Operating the factory bypass valve: detailed steps
Begin by identifying the factory bypass assembly on the water heater access panel and confirming the positions of its handles or levers.
Close the inlet and outlet valves to isolate the tank.
Rotate bypass handles to the bypass position, aligning ports to reroute flow around the heater.
Verify seals, tighten fittings, and test for leaks at low pressure before returning to service.
Flushing and refilling the system after bypassing
After rerouting water around the heater, flush the freshwater lines to remove debris and antifreeze before refilling; this guarantees contaminants and residual bypassed fluid are cleared from the system.
Open low-point drains and all faucets, run city water until clear, then close drains.
Repressurize slowly, check toilets and tank fill valves, and top off holding tanks per manufacturer recommendations.
Verifying cold-water-only operation and leak checks
Confirm cold-water-only operation and inspect for leaks before regular use.
The technician runs cold taps at sinks, shower and external outlets, verifying only cold flow and consistent pressure.
Visible fittings, valves and bypass connections are examined for drips while system is pressurized.
Any seepage prompts tightening or replacement of components; recheck after repairs until no leaks appear and cold-only function is confirmed.
Step-by-Step: Installing an Aftermarket Bypass Kit
The section outlines how to choose an aftermarket bypass kit compatible with the RV’s make and model, and how to prepare by removing access panels and clearing the installation area.
It then describes ideal valve placement, plumbing connections and secure joint sealing.
The walkthrough concludes with pressure testing procedures and safety checks to verify a leak-free, properly functioning system.
Selecting the right kit for your RV model
Which bypass kit fits a particular RV model depends on heater type, plumbing layout, and available clearance.
The installer should verify tank diameter, inlet/outlet spacing, and thread types or compression fittings.
Choose kits rated for the RV’s water pressure and temperature range, and prefer models with clear instructions and corrosion-resistant materials.
Confirm compatibility with existing valves to minimize modifications.
Preparing the installation area and removing panels
After verifying kit compatibility with tank diameter, inlet spacing, and fittings, preparation focuses on safe, accessible workspace and panel removal.
The technician disconnects power and water, drains residual fluid, and secures valves.
Exterior and interior access panels are unscrewed carefully, fasteners organized, insulation inspected and folded back.
Lighting and tool placement guarantee unobstructed reach to the heater housing for subsequent steps.
Plumbing connections and valve placement
Begin by identifying the existing cold and hot water lines and the hot water inlet/outlet connections on the heater housing, confirming orientation and accessibility before fitting any components.
Route bypass tubing to minimize bends and stress.
Position ball valves for clear manual access and label cold, hot, and bypass lines.
Use compatible fittings, verify correct flow direction, and secure lines to prevent vibration and chafing.
Pressure testing, sealing joints, and safety verification
Perform a controlled pressure test of the bypass assembly and hot water connections before finalizing the installation, using a calibrated pump or the RV’s water system with an inline pressure gauge set to the manufacturer’s recommended maximum (typically 40–60 psi).
Inspect joints for leaks, tighten fittings, apply approved thread sealant or tape where specified, and re‑test.
Verify valve operation, confirm no cross‑connections, and document results.
Emergency and Temporary Bypass Methods (Safe Short-Term Fixes)
In urgent situations, the text outlines how to use shut-off valves and safe hose reroutes to isolate the water heater and maintain plumbing function without permanent changes.
It notes the proper use and limitations of temporary connectors and clamps, emphasizing temperature, pressure, and leak risks.
Guidance also specifies clear signs—gas smell, persistent leaks, or electrical faults—when a professional should be contacted immediately.
Using shut-off valves and hose reroutes safely
When a water heater fails or must be isolated, using shut-off valves and rerouting hoses can provide a safe, temporary bypass that restores cold-water flow and prevents leaks.
The technician isolates the heater, closes inlet/outlet valves, and connects a pressure-rated hose between supply and downstream plumbing.
Guarantee proper fittings, secure clamps, test for leaks, and monitor pressure; restore original plumbing promptly.
Temporary connectors and clamps: precautions and limits
After isolating the heater and establishing a temporary bypass with a pressure-rated hose, attention turns to the connectors and clamps that join the improvised plumbing.
Use only rated fittings, avoid tape-only seals, and choose stainless or brass clamps sized correctly.
Inspect for leaks, limit use to emergencies, reduce system pressure, and document the repair.
Replace temporary parts with permanent fittings promptly.
When to call a professional immediately
Under what circumstances should a professional be summoned immediately: any sign of gas odor, electrical sparking, major leaks, or inability to isolate the water heater requires stopping attempts at DIY fixes and calling a licensed technician.
Immediate inspection is required for compromised gas lines, persistent water infiltration, tripped breakers with smell, or structural damage.
Temporary measures must prioritize safety; evacuate if gas is suspected.
Alternatives to Bypassing the Water Heater
Beyond bypassing, other options include repairing or replacing the onboard water heater to restore normal operation.
Owners may consider swapping to an on-demand (tankless) RV unit, using external portable water heaters or shower solutions, or employing a propane or electric instant heater for specific fixtures.
Each choice carries different costs, installation needs, and performance trade-offs that should be weighed before deciding.
Repairing or replacing the water heater
Consider repairing or replacing the water heater when bypassing it would compromise comfort or long-term system integrity.
Assess issues: leaks, faulty elements, corroded tanks, or failing thermostats.
Obtain cost estimates for repair versus replacement, prioritize OEM-compatible parts, and consult certified RV technicians.
Replacement may restore efficiency, safety, and resale value; repairs can be economical for isolated component failures.
Using an on-demand (tankless) RV water heater
Switching to an on-demand (tankless) RV water heater provides a compact, energy-efficient alternative to traditional tank units by heating water only when needed, reducing standby heat loss and freeing up interior space.
Installation requires proper propane/electric capacity, secure venting, and freeze protection.
Maintenance focuses on descaling and filter care.
Performance benefits include continuous hot water and reduced weight, though initial cost is higher.
External portable water heaters and shower solutions
Portable external water heaters and dedicated shower systems offer practical alternatives to modifying an RV’s onboard heater, providing hot water on demand without plumbing changes.
Portable units range from propane camp showers to electric 12V pumps with inline heaters; solar-heated bags and pressurized tankless kits add options.
They simplify installation, reduce risk to factory plumbing, and allow flexible placement for showers or sinks.
Running a propane or electric instant-heater for specific fixtures
Alongside external shower units and camp-style heaters, using a dedicated propane or electric tankless heater for a single fixture offers a targeted solution that keeps the RV’s onboard system intact.
Installations require proper venting, fuel or electrical capacity checks, and pressure-compatible fittings. This approach delivers on-demand hot water to sinks or showers without altering the main heater, minimizing plumbing changes and maintenance.
Troubleshooting Common Problems After Bypassing
After bypassing the RV water heater, several common issues may appear that require systematic checking.
Technicians should inspect for no flow or low pressure, tighten or replace leaking valve connections, and test for cold-to-hot crossover to locate mixing points.
They must also verify bypass valve positions before winterization to prevent freeze damage.
No water flow or reduced pressure
Check the supply lines and valves first when water flow is absent or pressure is low following a bypass: small kinked hoses, partially closed valves, or misplaced bypass fittings commonly restrict flow and are easier to spot than hidden blockages.
Inspect inline filters, sediment traps, and aerators for clogging.
Verify city or tank water source pressure.
If components are clear, test for air pockets and gently purge lines.
Leaks at valve connections and how to fix them
Inspect valve connections immediately when leaks appear after a bypass; threaded fittings, quick-connects, and hose clamps are the usual culprits.
Tighten loose threads with appropriate wrenches, replace worn O-rings in quick-connects, and swap corroded clamps for stainless steel.
Clean sealing surfaces, apply plumber’s tape to male threads, pressure-test the system, and recheck after several cycles to confirm the repair holds.
Cold water still getting to hot outlets: diagnosing crossover
When cold water continues to flow from hot taps after a bypass, a hot/cold crossover is likely allowing pressure or temperature-equalizing paths between the two lines.
Inspect mixing valves, shower cartridges, and single-lever faucets for internal leaks.
Test by isolating fixtures and monitoring pressure and flow.
Repair or replace faulty mixers or check for direct branch connections that bypass the hot line.
Winterization issues when bypass is left in wrong position
After ruling out cross-connections that allow cold water into hot lines, attention should shift to winterization errors caused by a water heater bypass left in the wrong position.
If the bypass remains open to the tank during antifreeze flushing, antifreeze can be wasted or trapped, valves can freeze, and sensors may be damaged.
Verify valve orientation, flush lines, and inspect for residual fluid to prevent freeze damage.
Maintenance and Long-Term Considerations
Routine inspections of bypass valves and surrounding plumbing can catch leaks or wear before they become serious.
A clear winter storage checklist should note the heater is bypassed and outline steps to protect pipes from freezing.
Owners should also consider how bypassing may affect manufacturer warranties and potential resale value.
Inspecting bypass valves and plumbing periodically
Regular inspections of the RV water heater bypass valves and connected plumbing help prevent leaks, frozen lines, and system failures over time.
Technicians or owners should check for corrosion, loose fittings, cracked hoses, valve stiffness, and proper alignment.
Perform leak tests, tighten connections, replace worn components, and document findings.
Schedule inspections seasonally and after heavy use or travel to maintain reliability.
Winter storage checklist with bypassed heater
When preparing an RV for winter storage with the water heater bypassed, owners should follow a concise checklist to protect the heater, plumbing, and associated valves from freeze damage and corrosion.
Drain tank and hot/cold lines, flush residual water, add non-toxic antifreeze where recommended, secure bypass valve positions, insulate exposed fittings, remove or isolate sensors, and document settings for restart to guarantee safe, efficient return to service.
How bypassing affects warranty and resale value
Having the water heater bypassed for winter storage can influence both warranty coverage and resale considerations.
Manufacturers may void warranties if modifications conflict with installation or maintenance terms; documented, reversible bypasses reduce that risk.
Prospective buyers often view permanent alterations skeptically, lowering resale value.
Clear records, OEM parts, and professional installation preserve warranty eligibility and buyer confidence, minimizing depreciation.
Safety Checklist and Best Practices Before, During, and After Bypass
Before beginning a bypass, a technician should perform pre-bypass inspections and shut off all relevant water and power sources.
During the procedure, systematic leak and pressure tests are required to confirm seals and line integrity.
After completion, post-bypass verification and clear documentation of settings and observations guarantee safe operation and future reference.
Pre-bypass inspections and shutoffs
Start by verifying that all water sources to the heater are fully isolated and that electrical and propane supplies are safely disconnected or switched off.
Inspect hose connections, fittings, and venting for damage or corrosion.
Confirm access panels and bypass valves operate smoothly.
Drain residual water per manufacturer guidance.
Tag systems as out-of-service and notify occupants.
Wear PPE and keep tools organized.
Leak and pressure tests to perform
Several key leak and pressure tests should be completed to verify integrity and safety prior to, during, and after an RV water heater bypass.
Conduct a cold-water system pressure test, inspect all fittings and bypass valves for visible leaks, and pressurize to manufacturer-recommended limits.
Monitor for pressure drop over time, check hot- and cold-side isolation, and retighten or replace faulty components immediately.
Post-bypass verification and documentation
A concise post-bypass verification and documentation routine guarantees that the bypass was completed correctly, that no new leaks or pressure issues were introduced, and that future maintenance is informed by accurate records.
The technician inspects fittings, runs pressure and flow checks, and records results with date, photos, and notes for owner reference.
- Verify seals and valves visually and under pressure.
- Log test values, part IDs, and timestamp.
- Photograph configuration and store maintenance entry.
Comparison of Bypass Methods, Costs, and Reliability
A brief comparison highlights trade-offs between factory valves, aftermarket kits, and temporary workarounds regarding cost, installation complexity, and long-term reliability. The factory valve is often the simplest and most reliable but can be more expensive to replace; aftermarket kits balance cost and function; temporary methods are cheapest upfront but risk leaks or damage. The table below summarizes key differences to guide selection.
| Method | Notes |
|---|---|
| Factory valve | Highest reliability, professional fit, higher cost |
| Aftermarket kit | Moderate cost, DIY-friendly, generally reliable |
| Temporary methods | Low cost, quick install, increased risk of failure |
Factory valve vs. aftermarket kit vs. temporary methods
When choosing between the factory-installed bypass valve, an aftermarket kit, or a temporary workaround, owners should weigh upfront cost, installation complexity, long-term reliability, and potential warranty or safety implications.
Factory valves offer OEM fit and warranty alignment but limited flexibility. Aftermarket kits cost more but provide durability and clearer instructions.
Temporary methods are cheapest and quick but risk leaks, damage, and voided warranties.
Real-World Examples and Scenarios
Practical situations illustrate why an RV water heater bypass is chosen: winterizing in subfreezing climates, managing a leaking on-board unit during travel, and switching to tankless or portable hot-water systems.
Each case presents different priorities—freeze protection, temporary repairs, or long-term conversion—affecting the chosen bypass approach.
The following examples compare steps, required parts, and trade-offs for each scenario.
Case: Winterizing an RV for cold climates
Although bypassing the water heater is a common step, winterizing an RV for consistently subfreezing climates requires a coordinated approach that goes beyond that single action.
Technicians recommend draining lines, adding non-toxic antifreeze, insulating tanks and exposed pipes, sealing vents and drafts, protecting exterior fittings, and maintaining heated storage.
Regular monitoring and a checklist guarantee systems remain protected during prolonged cold.
Case: Repairing a leaking water heater on the road
Addressing a leaking RV water heater on the road demands quick diagnosis and pragmatic repairs to prevent water damage and restore hot-water service.
The technician isolates supply, drains the tank, inspects fittings, anode, pressure relief valve and seams.
Temporary fixes include tightening connections, applying plumber’s tape, or replacing a valve.
If corrosion or tank failure appears, recommend professional replacement and minimize use until repaired.
Case: Converting to tankless or portable hot-water solutions
When a leaking onboard water heater proves repeatedly problematic or replacement is impractical on the road, many owners opt for tankless or portable hot-water solutions that eliminate a bulky tank and reduce failure points.
Examples include small electric tankless units wired to shore or inverter power, propane on-demand systems tied into existing plumbing, and countertop or shower-mounted portable heaters used temporarily during travel.
Resources, Parts Suppliers, and When to Hire a Professional
The section lists recommended brands and reliable retailers for RV water heater parts, including OEM and aftermarket options.
It outlines criteria for selecting a qualified RV technician and what certifications or experience to verify.
Typical repair or bypass installation timeframes and cost ranges are provided to help readers decide when professional help is warranted.
Recommended brands and where to buy parts
Reliable parts and reputable brands matter for a successful RV water heater bypass, both for fit and long-term performance.
Recommended manufacturers include Camco, Valterra, and Dometic for fittings, valves, and bypass kits; OEM replacements guarantee compatibility.
Parts are available from RV supply stores, online retailers, and dealer parts departments.
Consider warranty and return policies when purchasing.
- Camco
- Valterra
- Dometic
How to choose a qualified RV technician
How can an RV owner determine whether a technician is qualified to handle a water heater bypass, parts sourcing, and related repairs?
Verify certifications (ASE, RVIA), documented RV-specific experience, and customer reviews.
Confirm liability insurance and warranty on labor.
Ask about parts sources, OEM versus aftermarket options, and return policies.
Request a written estimate and clear communication regarding scope, timelines, and safety protocols before hiring.
Typical repair or installation time and cost estimates
Typical repair or installation times for RV water heater work range from under an hour for a simple bypass or element swap to several hours for full heater replacement or complex propane-to-electric conversions.
Typical costs vary: DIY parts $20–$200, professional labor $75–$150/hour, full replacement $400–$1,200.
Obtain quotes, verify warranties, and hire a certified RV technician for gas or complex electrical jobs.
Conclusion
When an RV water heater is bypassed, the vehicle’s plumbing breathes easier and winterization becomes simpler; yet the choice to bypass is a quiet pact between convenience and caution. Like choosing a detour through fog, one must weigh tools, skill, and risk before proceeding. For many, a factory valve or aftermarket kit offers a sensible path; for others, calling a professional saves worry and guarantees the journey stays safe.