How to Make a Check Valve at Home: Step-by-Step Guide for DIY Plumbing and Simple Designs
To make a check valve at home, you can create a simple swing flap or spring-loaded ball design that prevents backflow in your plumbing system. Start by gathering necessary materials like compatible fittings, a rubber flap or ball, a spring, a seat, sealant, and basic tools. Follow these steps: isolate and depressurize the line, cut a housing for the valve, fit the seat and hinge or spring assembly, seal everything properly, and test for leaks and functionality. For detailed builds, testing tips, and safety precautions, continue reading.
What a Check Valve Is and When You Need One
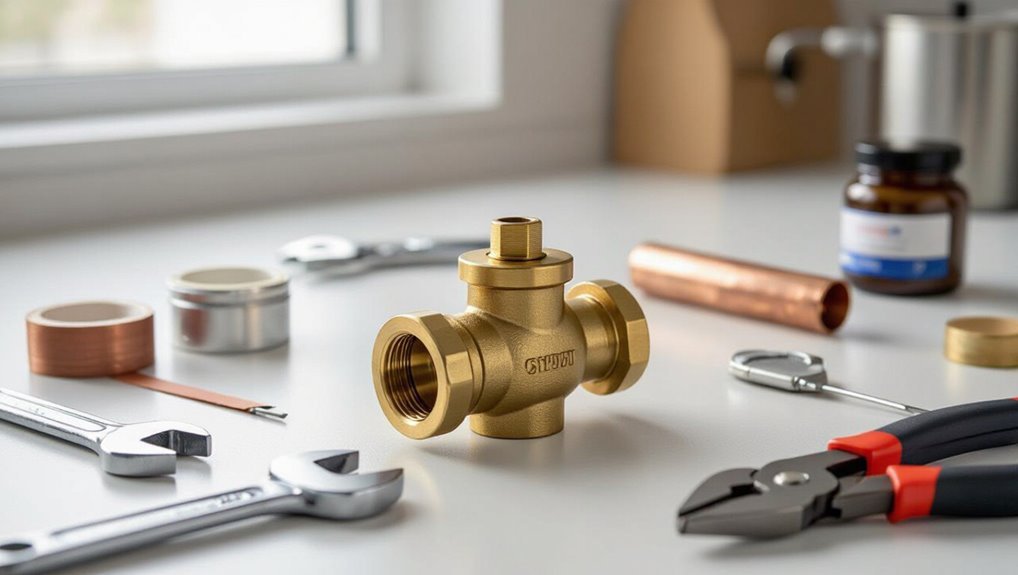
A check valve is a one-way device that allows fluid or gas to flow in a single direction and prevents backflow.
It is commonly used in residential systems—such as sump pumps, irrigation lines, and potable water setups—and in DIY projects to protect equipment and preserve system integrity.
Homemade check valves must be evaluated for safety, local code compliance, and potential legal liability before installation.
Definition and basic function of a check valve
Check valves are one-way mechanical devices that permit fluid or gas to flow in a single direction while preventing backflow. They open under forward pressure and close when flow reverses, protecting systems and maintaining pressure.
Basic types include spring, swing, and ball designs. Understanding their operating principles is essential before attempting how to make a check valve for a specific application.
Common residential and DIY situations requiring a check valve
When plumbing systems, sump pumps, or irrigation lines are at risk of reverse flow, a one-way valve prevents backflow that can cause contamination, flooding, or equipment damage.
Common residential needs include preventing sewer gas entry, protecting pumps from backspin, isolating water heaters during maintenance, and stopping irrigation line siphoning.
DIY projects often add valves to rain barrels, RVs, and temporary bypass setups.
Safety, code, and legal considerations for homemade valves
Having outlined typical scenarios that call for one-way valves, attention turns to safety, code, and legal considerations governing homemade devices.
Homemade check valves may violate local plumbing codes, void warranties, and create hazards (backflow, leaks, contamination).
Compliance with regulations, permits, certified parts, and professional installation is advised.
Liability and insurance implications favor certified components and licensed plumbers over DIY substitutes.
Types of Check Valves Suitable for DIY
Several basic check valve designs can be reproduced with common materials for home projects.
Simple flap (swing) valves, spring-loaded ball valves, and diaphragm or lift-style variants each offer different trade-offs in complexity, flow restriction, and sealing reliability.
A brief comparison of pros and cons helps the builder choose the most appropriate design for pressure, orientation, and maintenance needs.
Simple flap (swing) check valve
A simple flap (swing) check valve uses a hinged disc or plate that swings open to allow forward flow and closes under reverse flow to prevent backflow.
Its straightforward mechanism, minimal parts, and ease of construction make it one of the most DIY-friendly check valve types.
It suits low- to moderate-pressure lines, tolerates debris better than tight-seal designs, and requires basic hinges, gasket, and housing.
Spring-loaded (ball) check valve
Constructed around a spring-pressed ball that seats against a tapered chamber, the spring-loaded (ball) check valve opens when forward pressure pushes the ball away from its seat and snaps closed under reverse flow as the spring returns the ball to seal the passage.
Compact and quick-acting, it suits low-to-moderate pressures, tolerates slight debris, and allows adjustable cracking pressure by varying spring tension or ball size for DIY implementations.
Diaphragm and lift-style options for home use
When flexible membranes or flat discs replace a ball, check valves can be made using diaphragm or lift-style designs that suit simple home projects.
These valves stop backflow by sealing against a seat and open when forward pressure or manual lift moves the membrane or disc away.
Diaphragm types use flexible rubber parts for low-pressure, leak-tolerant service; lift-style uses a guided disc or flap for straightforward fabrication and inspection.
Pros and cons of each design
Having outlined diaphragm and lift-style options, the discussion now compares their advantages and drawbacks for DIY use.
Diaphragm units offer simplicity, low cost, and leak resilience but age faster; lift-style valves handle higher flow and pressure yet require precise machining.
Selection depends on materials, tools, and designated pressure.
- Diaphragm: easy, flexible, wears sooner
- Lift: robust, needs precision
- Cost: diaphragm cheaper
- Maintenance: lift harder but longer-lasting
Materials and Tools Required
The section lists readily available components such as pipes, fittings, washers, springs, balls, and rubber elements alongside recommended tools like saws, drills, files, sealant, and clamps.
It also notes the importance of choosing materials compatible with the aimed fluid—water, gas, or chemicals—to guarantee safety and longevity.
Practical selection and basic tool skills are emphasized before beginning construction.
Readily available materials (pipes, fittings, washers, springs, balls, rubber)
Essential components for a simple homemade check valve include short lengths of pipe, compatible fittings, a sealing element such as a rubber washer or O-ring, a small spring or weighted ball to provide closure force, and basic fasteners or adhesives to secure assemblies.
Common choices are PVC or copper pipe, threaded or slip fittings, neoprene or silicone washers, stainless or music wire springs, and smooth plastic or metal balls.
Recommended tools (saws, drills, files, sealant, clamps)
After listing suitable materials, attention turns to the tools that shape, join, and seal those parts into a functional check valve.
Essential tools include a hacksaw or PVC cutter, a drill with bits for pilot holes, metal and file sets for deburring, adjustable clamps, and sealants such as PTFE tape or silicone.
Proper fasteners and a vise guarantee secure assembly and alignment.
Material compatibility with water, gas, and chemicals
Several common materials—brass, stainless steel, PVC, and Buna-N or EPDM elastomers—are evaluated for compatibility with water, natural gas, and common chemicals to guarantee safe, durable check valve performance.
Choice depends on pressure, temperature, and chemical exposure.
- Brass: good for water, limited for some chemicals
- Stainless steel: high corrosion resistance
- PVC: economical for cold water
- Buna-N/EPDM: seal selection by chemical resistance
Safety Precautions Before You Start
Before beginning work on a home-made check valve, the system must be isolated and fully depressurized to prevent sudden fluid release.
Appropriate personal protective equipment should be worn and the workspace organized to reduce hazards.
If the task involves complex plumbing, high pressure, or uncertainty, a licensed plumber should be contacted.
Isolate and depressurize the system
Shut off all supply valves and relieve residual pressure to guarantee a safe working environment; this includes closing main feeds, bleeding downstream lines through designated vents, and verifying zero pressure with a calibrated gauge.
Confirm isolation by tagging valves and locking where possible, drain sections to a visible dry state, and inspect for trapped pockets.
Proceed only after repeated pressure checks show no rise.
Personal protective equipment and workspace setup
A hard hat, safety glasses, chemical-resistant gloves, and steel-toed boots form the baseline personal protective equipment.
Additional items such as a face shield, hearing protection, and a respirator should be added based on the fluids, vapors, and tools involved.
The workspace must be well-ventilated, well-lit, free of trip hazards, and fitted with spill containment, a fire extinguisher, and an accessible first-aid kit.
When to call a licensed plumber instead
When should a professional be contacted instead of attempting a DIY check valve?
A licensed plumber should be called for complex systems, gas lines, hidden leaks, backflow prevention certifications, persistent pressure issues, or when local codes require certified work.
Also contact a plumber if unfamiliar with pipe materials, fittings, or soldering, or if a failed DIY attempt risks water damage, mold, or structural harm.
Step-by-Step: Build a Simple Flap (Swing) Check Valve
The following section outlines a practical procedure for creating a flap (swing) check valve, starting with a concise design overview and the valve’s operating principle.
It then covers cutting and preparing the housing, fabricating and attaching the flap and hinge, and sealing and testing the assembled unit.
Finally, guidance is given on installing the valve into existing plumbing and performing thorough leak checks.
Design overview and working principle
Begin by identifying the basic components and their spatial arrangement: inlet, outlet, hinged flap, seat, and mounting supports.
The flap pivots on the hinge to allow flow from inlet to outlet and seals against the seat to prevent backflow.
Mounting supports maintain alignment and minimize leakage.
Proper sizing and hinge placement guarantee reliable opening under forward pressure and positive closure under reverse pressure.
Cutting and preparing the housing
Following the hinge and seat placement established earlier, attention shifts to cutting and preparing the valve housing to verify precise alignment and leak-free operation.
The housing is marked for inlet and outlet, cut squarely with a hacksaw or rotary tool, deburred, and faced to mating surfaces.
Chamfers and recesses are added for seals; dimensions are checked against the seat to confirm proper clearance.
Fabricating and attaching the flap/hinge
Fabricate the flap and hinge assembly to precise dimensions so the disc seats fully under flow pressure yet swings freely with minimal play.
Cut a disc from resilient material, drill a small central or offset hole, and fashion a stub hinge or pin from stainless steel or brass.
Secure the hinge into predrilled housing mounts, ensuring alignment and smooth rotation without binding.
Sealing and testing the assembly
With the flap and hinge aligned and secured, attention turns to sealing and testing the assembly to verify leak-free operation and reliable seating under flow.
Apply gasket material or silicone bead around the seat, cure per instructions, then perform low-pressure bench tests with water to observe sealing and flutter.
Inspect for gaps, adjust hinge tension or add shims, then repeat until consistent, bubble-free closure is achieved.
Installation into existing plumbing and leak-checking
Prepare the pipe and valve body for integration by first isolating the system, draining the affected section, and verifying zero pressure.
Cut and deburr pipe ends, fit the valve using appropriate couplings or adapters, and secure per material specifications.
Restore flow slowly, inspect joints for leaks, and operate the valve to confirm correct swing action.
Tighten or reseal any leaking connections and retest.
Step-by-Step: Build a Spring-Loaded Ball Check Valve
The section outlines a compact spring-loaded ball check valve, explaining how fluid pressure lifts the ball against spring tension to permit flow and how the spring returns the ball to seal the seat.
It covers criteria for selecting ball diameter, material, and spring rate to match expected pressures and flow.
Assembly steps describe constructing the chamber and seat, finishing with sealing methods and simple tests to verify leak-free performance.
Design overview and how the spring and ball work
When fluid pressure approaches the valve from the inlet side, it lifts a small spherical element off its seat against a compressible spring so flow passes; when pressure reverses or drops, the spring forces the ball back onto the seat, forming a seal that prevents backflow.
The assembly uses a guided chamber to align the ball, a spring to set closing force, and a seat geometry that guarantees rapid sealing.
Selecting and sizing the ball and spring
Building on the guided chamber, seat geometry, and spring action described earlier, selecting the ball and spring begins with matching their sizes and forces to the system pressure and desired cracking pressure.
Choose a ball slightly smaller than the seat bore for reliable sealing and low leakage.
Calculate spring rate so initial preload equals cracking force; account for travel, material compatibility, and corrosion resistance.
Assembling the chamber and seat
Begin by aligning the machined seat with the chamber bore, ensuring the seat face is clean and free of burrs that could prevent a leak-tight seal.
Insert the spring and ball gently, compressing the spring slightly to position the ball against the seat.
Secure the seat with specified fasteners or thread engagement, verifying concentricity and smooth movement without binding before proceeding.
Final sealing and performance testing
With the seat secured and the ball freely seating and unseating, attention turns to final sealing and performance testing.
The assembly is torqued to spec, seals coated with compatible lubricant or thread sealant, and endcaps tightened.
A pressure test at low psi checks for leaks; gradually increase to operating pressure while observing seepage, rebound response, and chatter.
Adjust spring tension or reseal as needed.
Alternative Simple Designs for Low-Pressure Systems
The section outlines a few compact check valve options suitable for low-pressure use, starting with a simple washer-and-screw one-way valve that relies on a tightened washer to block backflow.
It also covers silicone-disk or rubber-seat designs assembled from common fittings to create a soft, conforming seal.
Finally, it notes how adding small commercial components—springs, poppets, or threaded check inserts—can upgrade DIY assemblies for improved reliability.
Washer-and-screw one-way valve
A simple washer-and-screw one-way valve uses a flat rubber or silicone washer pressed against a mating seat by a screw to allow flow in one direction and block it in the reverse.
When pressure from the inlet overcomes the screw preload, the washer lifts and permits passage, while backflow reseats the washer to seal.
Construction requires a threaded plug, washer sized to seat, and modest preload adjustment.
Silicone-disk or rubber-seat check valve made from fittings
Constructing a silicone-disk or rubber-seat check valve from common fittings produces a compact, low-cost device suitable for low-pressure fluid systems.
A soft disk or molded rubber seat seals against a male fitting or cone; flow lifts the disk allowing passage, spring tension or gravity returns it.
Assembly uses threaded adapters, a retained disk, and hose clamps for a reliable, easy-to-service valve.
Using commercial components to upgrade DIY assemblies
Incorporating off-the-shelf check valves, fittings, and springs can raise reliability and simplify maintenance of homemade low-pressure assemblies without substantially increasing cost or complexity.
Using commercial parts allows predictable performance, better seals, and easy replacement.
Consider:
- Inline plastic or brass check valves for flow control
- Spring-loaded cartridges for consistent cracking pressure
- Standard O-rings and fittings for leaks
- Quick-connects for serviceability
How to Test Performance and Troubleshoot Common Issues
The guide outlines simple flow and backflow tests that can be performed with household tools to verify one-way operation and detect pressure loss.
It then describes how to identify common faults such as leaks, sticking parts, or weakened springs through visual inspection and basic stepwise checks.
Finally, it presents straightforward adjustments—altering spring tension, reshaping the seat, and applying or replacing seals—to restore reliable sealing and operation.
Flow and backflow tests you can do at home
Begin by confirming basic operation before installation: a simple flow test and a backflow check can reveal whether a homemade check valve allows forward flow while preventing reverse flow.
Use a bucket and hose to observe unimpeded forward flow, then reverse the setup or apply gentle suction to verify closure.
Note any hesitation, leakage, or delayed sealing and repeat tests under expected pressure conditions.
Diagnosing leaks, sticking parts, and pressure loss
After confirming basic forward flow and backflow prevention, attention turns to diagnosing leaks, sticking components, and pressure loss that undermine performance.
Inspect seals, joints, and seating surfaces for visible wear or gaps. Operate the valve repeatedly, noting hesitation or binding.
Use simple pressure gauges or a water column to quantify drop. Record findings, isolate faulty parts, and plan targeted repairs or replacements.
Adjustments: spring tension, seat shaping, and sealing fixes
Adjust spring tension, reshape the seat, and address sealing issues methodically to restore reliable operation and measurable performance.
Inspect spring preload and replace or compress for correct crack pressure.
Lightly lap or file the seat to remove burrs; maintain concentricity.
Use compatible elastomer or PTFE tape for seals, avoiding excess.
Reassemble, pressure-test, and repeat adjustments until leaks and chatter cease.
Durability, Maintenance, and When to Replace
This section compares expected lifespans of common DIY materials with those of commercial check valves, highlighting trade-offs in wear resistance and sealing.
It lists a concise routine maintenance checklist—inspection frequency, cleaning, lubrication, and seal checks—to prolong service life.
It then outlines clear signs that a DIY valve needs replacement, such as persistent leakage, sticking, corrosion, or decreased flow.
Expected lifespan for DIY materials versus commercial valves
Longevity depends on material choice, construction quality, and operating conditions; DIY check valves built from common household items typically last months to a few years under light use, while commercial valves rated for plumbing or industrial use are designed to function reliably for decades when installed and maintained properly.
DIY units often fail from wear, seal degradation, or poor fit; commercial valves resist corrosion, abrasion, and pressure cycles.
Routine maintenance checklist
Having established how material choice and construction affect service life, attention turns to routine upkeep that preserves function and signals when replacement is warranted.
Routine checks extend durability and reveal faults early.
- Inspect seals and seating for wear or debris.
- Clean moving parts and flush lines periodically.
- Verify spring or flap tension and realign if needed.
- Lubricate compatible components and record service dates.
Signs your DIY valve needs replacement
When does a homemade check valve cross from serviceable to compromised?
Indicators include persistent leakage, reduced flow, noisy operation, visible wear or corrosion, and failure to hold back reverse flow.
Frequent manual adjustments, trapped debris that recurs after cleaning, or warped seals also signal replacement.
If repairs become recurring or performance remains unreliable, installing a new, properly sized valve is advisable.
Cost Comparison and Sourcing Parts
A brief cost comparison evaluates estimated DIY build expenses against the price and warranty of commercial check valves to determine which option is most economical for the proposed use.
The analysis should include parts, tools, and potential failure-related costs versus ready-made units.
Recommended sources for reliable parts and spare components include plumbing suppliers, hardware stores, and reputable online retailers that provide specifications and return policies.
Estimated DIY build costs versus buying commercial valves
Although DIY check valves can save money on simple projects, a realistic cost comparison must include materials, tools, time, and potential failure risks. The maker should tally parts, tool amortization, and labor hours versus commercial valve price and warranty. Consider reliability and replacement likelihood when valuing savings.
| Item | Typical Cost |
|---|---|
| DIY parts | $5–$30 |
| Tools amortized | $2–$15 |
| Commercial valve | $10–$80 |
| Potential failures | Variable |
Where to buy reliable parts and spare components
Sourcing reliable parts and spare components requires balancing quality, price, and availability to guarantee the homemade check valve performs safely and lasts under expected conditions.
Recommended sources include plumbing supply stores for fittings, online marketplaces for diverse options and reviews, industrial suppliers for durable materials, and local hardware for fast replacements.
Verify material compatibility, pressure ratings, and return policies before purchase.
Real-World Examples and Use Cases
Practical applications for homemade check valves include garden pump and rainwater systems where backflow prevention protects pumps and stored water.
They also appear in sump pumps and basement drainage to stop re-entry of contaminated or standing water.
Non-potable irrigation setups benefit from simple check valves to maintain directional flow and prevent cross-contamination.
Garden pump and rainwater systems
When installed on a garden pump or integrated into a rainwater harvesting system, a homemade check valve prevents backflow that can damage the pump, contaminate stored water, or cause pipes to lose prime.
Simple designs—such as ball-and-seat, flap, or spring-loaded configurations—can be built from common plumbing parts to suit pressure, flow, and maintenance requirements.
Proper orientation, durable materials, and routine inspection guarantee reliable operation.
Sump pumps and basement drainage
Homeowners who rely on garden pumps and rainwater systems often face similar backflow and priming challenges in basement drainage, where a check valve on a sump pump prevents discharged water from returning to the sump pit and reactivating the pump continuously.
Properly sized, corrosion-resistant valves reduce cycling, protect seals, and maintain system prime; installation above the pump outlet with accessible unions simplifies inspection and replacement.
Non-potable and irrigation setups
Many irrigation and non-potable systems rely on check valves to prevent backflow that can contaminate storage tanks or depressurize distribution lines.
In these setups, simple homemade flap or spring check valves allow one-way flow for pumps, drip lines, rainwater harvesting, and livestock watering.
Durable materials and periodic inspection reduce failures; sizing and cracking pressure must match pump output and system requirements for reliable operation.
Common Mistakes to Avoid When Making a Check Valve
Common failures stem from selecting inappropriate materials that corrode or deform under service conditions.
Misaligned parts and inadequate seals compromise one-way flow and lead to leaks.
Overlooking pressure ratings and applicable codes can create unsafe or noncompliant installations.
Poor material choices that cause failure
Selecting inappropriate materials is a frequent cause of premature check valve failure; using plastics that soften with heat, metals prone to corrosion in the fluid environment, or seals incompatible with the media will quickly compromise performance.
DIY builders should match plastics, metals, and elastomers to temperature, pressure, and chemical exposure, avoid dissimilar metal galvanic couples, and choose rated components rather than repurposed parts with unknown durability.
Improper sealing and alignment errors
After addressing material choices, attention must turn to sealing and alignment, where small mistakes frequently undermine valve function.
Misaligned seats, uneven mating surfaces, or improperly fitted seals cause leaks, chatter, and backflow. Tightening fasteners unevenly distorts components.
Precise seat faces, uniform gasket compression, and correct axial alignment are essential; verify fit before installation and test for smooth, complete closure under expected flow conditions.
Ignoring pressure ratings and code requirements
Many DIY builders underestimate the importance of matching a check valve’s pressure rating and compliance with applicable codes, a mistake that can lead to catastrophic failure or regulatory issues.
Proper selection prevents leaks, accidents, and fines.
Consider these precautions:
- Verify system maximum pressure against valve rating
- Follow local plumbing and safety codes
- Use certified components when required
- Document compliance and test results
Quick Reference: Step Checklists for Each Design
A concise set of step-by-step checklists follows to guide assembly of common home-made check valves.
One checklist covers a simple flap check valve, listing required materials, cutting and hinge placement, sealing, and testing.
The other outlines a spring-loaded ball check valve, including seat fabrication, ball and spring sizing, alignment, and leak verification.
Flap check valve quick build checklist
This quick-build checklist outlines the essential steps and materials required to assemble a simple flap check valve using common household or workshop items.
A concise sequence lists preparation, cutting, hinge fitting, and sealing. Follow safety precautions and test under low pressure.
- Gather materials: flap, hinge, body tube, sealant
- Measure and cut inlet/outlet
- Attach hinge and flap
- Seal and test for leaks
Spring-loaded ball check valve quick build checklist
When constructing a spring-loaded ball check valve, the builder should prepare a concise set of parts and follow a strict sequence of assembly steps to guarantee reliable one-way flow.
The checklist enumerates required components, tolerances, and testing steps for safe, repeatable builds.
- Select ball, spring, seat, and body materials
- Verify spring preload and travel
- Assemble with correct orientation and seals
- Pressure-test for leak and reseat behavior
Conclusion
A homemade check valve can offer a practical, low-cost solution for simple plumbing needs, functioning like a guardian that permits flow one way while blocking reverse movement. When constructed from appropriate materials and installed correctly, DIY designs such as flap or spring types perform adequately in low-pressure applications. Safety, correct sizing, and awareness of limitations are essential to avoid leaks or system damage. For reliable operation, consider professional-grade valves where pressure, code compliance, or safety is critical.