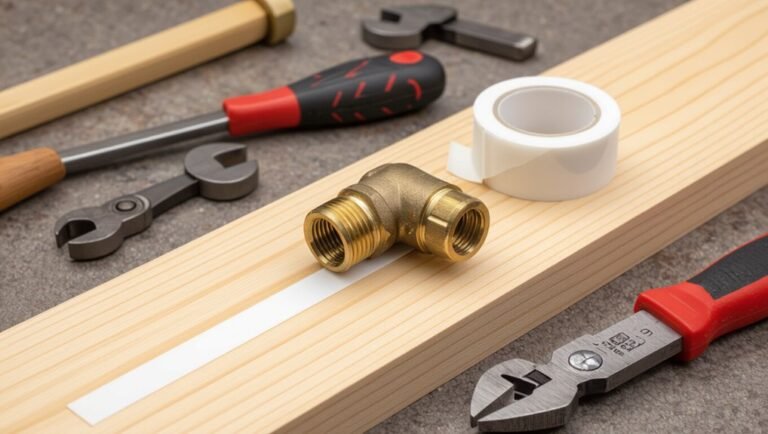
How to Run a Water Line to a Fridge Under the Floor: Step-by-Step DIY Guide
To run a water line to your fridge under the floor, you’ll need to route a small-diameter supply line from your cold-water source beneath the subfloor to the ice maker or dispenser. Follow these steps:
- Plan the Route: Determine the best path for the water line.
- Drill Access Holes: Create holes through the sill plate and subfloor.
- Fish Tubing: Navigate the tubing past the joists.
- Install Shutoff: Set up a quarter-turn shutoff valve and compatible fittings.
- Insulate the Line: Protect the tubing from freezing.
- Test for Leaks: Check all connections for leaks.
- Secure the Pipe: Use clamps to fasten the pipe in place.
Make sure you have the proper tools and necessary permits for the job. Follow this guide for a successful installation.
Overview of Running a Water Line to a Refrigerator Under the Floor

Running a water line to a refrigerator under the floor involves routing tubing from a nearby cold-water source through floor joists and up to the appliance. This method is commonly used in homes where wall or cabinet access is limited.
This approach can minimize visible piping and preserve cabinetry but may require more cutting, insulation, and attention to freeze protection compared with through-wall or in-cabinet runs.
Typical projects take a few hours to a day, and costs vary by materials and access. This usually requires moderate DIY skill plus basic plumbing tools and a drill.
What this project entails and typical use cases
Installing a water line to a refrigerator under the floor involves routing a small-diameter supply pipe from the home’s cold-water system to the appliance’s ice maker or water dispenser, typically through a crawlspace or basement.
The project entails planning the route, selecting materials, drilling access holes, securing and insulating pipe, adding valves and fittings, and testing for leaks.
Typical uses include ice makers and filtered water dispensers.
Benefits and limitations of routing under-floor vs. through-wall or cabinet
Choosing an under-floor route versus a through-wall or cabinet run involves trade-offs in accessibility, cost, and long-term maintenance.
Under-floor routing keeps lines hidden, reduces visible clutter, and can shorten runs but complicates access for repairs and leak detection.
Through-wall or cabinet runs simplify service access and inspection but may require cosmetic patching and offer less protection from foot traffic or pests.
Time, cost, skill level, and tools required
A straightforward under‑floor water line run typically takes a competent DIYer or a tradesperson between 3 and 6 hours from start to finish for a single fridge connection, though times vary with joist complexity, insulation, and access to the water source.
Essential considerations include materials, cost, skill, and tools:
- Cost: $30–$150 materials; $100–$300 labor if pro.
- Skill: Intermediate plumbing, comfort with joist drilling.
- Tools: Drill, hole saw, tubing cutter, wrench set.
- Permits: Check local codes.
Quick Step-by-Step Summary for Experienced DIYers
A compact materials checklist is provided for experienced DIYers—copper or PEX tubing, shutoff valve, fittings, drill bits, and a compression or push-fit connector.
The high-level sequence covers locating the supply, shutting water off, running and securing the line under the floor, connecting at both ends, and pressure-testing for leaks.
Brief notes on common shortcuts and safety reminders follow.
Quick materials checklist
Tools and materials are listed here for rapid reference, tailored to experienced DIYers who only need a concise checklist before beginning.
Essential items for running a water line under the floor are summarized below; verify sizes and fittings to match the fridge and house plumbing.
- 1/4″ or 3/8″ copper or braided stainless water line
- Shutoff valve and saddle or angle stop
- Compression fittings and Teflon tape
- Floor-access fittings and mounting hardware
High-level sequence of steps
Begin by confirming the shutoff is off and the refrigerator’s line requirements.
Map route, access underfloor cavity, and measure.
Cut and deburr supply pipe; install shutoff valve and fittings.
Run tubing through floor, secure with clamps, and avoid sharp edges.
Connect to fridge with compression or push-fit fitting.
Test for leaks, restore pressure, and insulate the run.
Preparing for the Job: Planning and Safety
Before any cutting or drilling, the installer confirms the refrigerator’s water line size and fittings meet manufacturer specs and local plumbing codes.
They locate the main cold-water supply and plot the most direct route under the floor, checking for joists, HVAC ducts, wiring, insulation, pest damage, and convenient shut-off points.
Finally, they shut off and test the water pressure and don appropriate PPE—gloves, eye protection, and a dust mask—while following basic job-site safety procedures.
Confirming refrigerator water line requirements and local codes
How much water, what pressure, and which fittings the refrigerator requires must be established before any cutting or tapping occurs; the installer should consult the fridge’s specification sheet and owner’s manual to determine line size, maximum and minimum pressure, and recommended connector types.
Also verify local plumbing codes, permit needs, backflow prevention, and approved materials (copper, PEX, or CPVC) to guarantee compliance.
Locating main cold-water source and best route under the floor
With the refrigerator’s pressure, line size, and connector types confirmed, the installer must identify the nearest suitable cold-water source and plan the most direct, obstruction-free route under the floor.
Locate accessible shutoff valves, main supply branches, and any convenient downstream tees. Measure distances, note elevation changes, and select valve and fitting locations for accessibility and future maintenance before cutting or drilling.
Checking for obstacles: joists, HVAC, wiring, insulation, pests
Several key obstacles—floor joists, HVAC ducts, electrical wiring, insulation, and signs of pests—should be identified and mapped from beneath the floor to guarantee a clear, safe path for the water line.
The inspector notes joist spacing, duct locations, cable runs, insulation type, and animal nesting.
Mark safe drilling zones, avoid structural members and live services, and plan alternative routing if obstructions exist.
Turn-off points, shutting off water, and testing for pressure
A home’s main shutoff and any localized supply valves must be identified and labeled before starting work; knowing their locations lets the installer isolate the correct section without disrupting the entire household.
The installer should close the relevant valve, drain lines by opening nearby faucets, and use a pressure gauge at the fridge supply point to verify system pressure and detect leaks before final connections.
Safety precautions and personal protective equipment
After locating and shutting off the correct valves and confirming pressure, attention shifts to safety precautions and personal protective equipment before any cutting or fittings begin.
Proper PPE reduces injury risk and contamination. Essential items include:
- Safety goggles to protect eyes from debris
- Cut-resistant gloves for knife and pipe handling
- Respirator or mask for dust and fumes
- Knee pads for prolonged floor work
Materials, Parts, and Tools You’ll Need
The section lists recommended tubing options—copper, PEX, and braided stainless—along with compatible fittings and the pros and cons of saddle versus tee connections.
It also covers necessary valves, adapters, a shutoff, and the sealants, insulation, and supports required for a durable run.
Essential tools such as drill bits, hole saws, crimping tools, tubing cutters, inspection camera or snake are summarized for safe, professional-quality installation.
Recommended tubing types (copper vs. PEX vs. braided stainless) and fittings
Several common tubing options—copper, PEX, and braided stainless—each offer distinct strengths for fridge water lines, and choosing the right one depends on durability, ease of installation, and local code requirements. Copper: rigid, durable. PEX: flexible, easy run. Braided stainless: flexible, high-pressure. Fittings vary: compression, crimp, or threaded—match tubing and code.
| Material | Strength | Typical Fitting |
|---|---|---|
| Copper | Durability | Compression |
| PEX | Flexibility | Crimp |
| Braided stainless | Pressure | Threaded |
Valves, adapters, shutoff, and saddle vs. tee connections
Many homeowners will need a shutoff valve, an adapter that matches the chosen tubing, and either a saddle or a tee to tap the cold-water line when running a fridge water supply.
Choose a quarter-turn ball valve for reliable shutoff. Match thread types and tubing size with compression or push-fit adapters.
Saddle clamps are noninvasive; tees require cutting but offer stronger, permanent connections.
Tools: drill bits, hole saws, crimping tools, tubing cutters, inspection camera, snake
Gather essential tools before beginning to run a fridge water line: drill bits and a hole saw sized for the tubing and grommet, a reliable tubing cutter for clean ends, crimping tools or compression wrenches for fittings, and inspection aids such as a small camera or plumber’s snake to check and clear conduit paths.
Also include adjustable pliers, a tape measure, flashlight, marker, and safety glasses for accurate, safe work.
Sealants, insulation, and support materials
Choose appropriate sealants, insulation, and supports to protect the water line from leaks, temperature loss, and movement over time.
Recommended items include plumber’s silicone or polyurethane sealant for penetrations, pipe insulation (foam sleeves or closed-cell tape) to prevent freezing and condensation, stainless steel or plastic pipe clamps, vibration-damping mounts, and corrosion-resistant screws.
Confirm materials match tubing type and local code for durability and safety.
Detailed Step-by-Step Installation (Under-Floor Route)
The under-floor route requires careful planning and sequential work, beginning with marking the route and drilling access through the sill plate or cabinet.
Next steps include creating floor access by drilling the subfloor and maneuvering joists, fishing the tubing under the floor to the fridge location, and installing a shutoff valve to tie into the water supply.
Finally, the tubing is run up into the refrigerator cabinet and threaded through the fridge connector hole for connection.
Step 1 Marking route and drilling access holes through sill plate or cabinet
Measure and plot the most direct, obstruction-free path from the refrigerator location to the water source.
Then transfer those reference points to the sill plate or cabinet face where the drill holes will be made.
Verify stud, wiring, and plumbing locations with a detector.
Mark hole centers, choose appropriate drill bit size for the tubing and grommet, then clamp a backer board and drill perpendicular to prevent splintering.
Step 2 Creating floor access: drilling through subfloor and routing past joists
With the sill plate or cabinet hole located and protected, attention shifts to gaining under‑floor access for the water line.
The installer drills a clean hole through the subfloor using an appropriate spade or hole saw, sized for the tubing and bushing.
Joists are avoided or holes placed in their centers; where necessary, short routed offsets or drillings through joist webs maintain structural integrity and code clearance.
Step 3 Fishing the line under the floor and through to refrigerator location
Begin by feeding the water line through the drilled subfloor opening and guiding it along the planned under‑floor route toward the refrigerator location, using fish tape or a flexible pull‑rod to navigate joist bays and obstacles.
Secure the tubing with clips or staple straps, maintain gentle curves to avoid kinks, and protect exposed sections with split conduit or protective board where they cross rafters or insulation.
Step 4 Connecting to the water supply: installing a shutoff valve and tie-in
Install the shutoff valve and make the tie‑in to the household supply at the nearest accessible cold water line, ensuring the service is shut off at the main before any work begins.
Mount a quarter‑turn compression or saddle valve, deburr the cut, and tighten fittings per manufacturer torque.
Pressure‑test the connection for leaks before securing piping to joists and restoring floor access.
Step 5 Running tubing up into refrigerator cabinet and through the fridge connector hole
Feed the 1/4-inch copper or braided stainless tubing upward from the under-floor chase into the refrigerator cabinet, keeping the line as straight and supported as possible to prevent kinks.
Route tubing to the fridge connector hole, secure it with clamps or adhesive clips to cabinet framing, trim excess tubing allowing service slack, deburr cut ends, and protect against sharp edges with grommets or insulating sleeves.
Step 6 Making final connections to refrigerator inlet and testing for leaks
With the tubing secured and routed into the refrigerator cabinet, the final connections to the fridge inlet can be made and the system pressure-tested for leaks.
Trim tubing squarely, insert into the inlet fitting or compression valve, and tighten per manufacturer torque.
Slowly open the shutoff, pressurize the line, inspect all joints and fittings for drips, and correct any leaks before returning refrigerator to service.
Step 7 Securing, supporting, insulating, and protecting the line under the floor
Begin by laying out the tubing along the planned under-floor route and identifying every support point, penetration, and heat or abrasion hazard.
Secure tubing with appropriate clamps or straps at regular intervals, avoiding kinks.
Insulate exposed sections with foam sleeve or tape to prevent freezing and condensation.
Protect crossings and penetrations with grommets, conduit, or metal plates.
Verify clearances from heat sources and recheck fastenings.
Alternative Routing Options and When to Use Them
The section compares routing through a wall or baseboard with under-floor runs, highlighting trade-offs in accessibility, insulation, and potential for damage.
It also considers using existing plumbing chases or cabinets to simplify installation and reduce wall or floor work.
Guidance is provided on when the complexity or risk warrants hiring a licensed plumber.
Routing through wall or baseboard vs. under-floor pros and cons
When deciding between routing a fridge water line through a wall or baseboard versus running it beneath the floor, consider access, insulation, and potential for leaks: Wall/baseboard offers easier access and faster repairs; under-floor hides lines and may need insulation and leak monitoring. Choose based on risk tolerance, aesthetics, and maintenance ability.
| Option | Feeling |
|---|---|
| Wall/baseboard | Reassured |
| Under-floor | Hidden |
| Visible repair | Relief |
| Hidden risk | Unease |
Using existing plumbing chases or cabinets
Although often overlooked, existing plumbing chases and utility cabinets provide efficient, low-impact routes for a fridge water line by leveraging pre-cut access points and shared plumbing space.
They reduce drilling, protect tubing inside framed cavities, and simplify inspections.
Choose a chase adjacent to the fridge, verify clearances and insulation, route tubing along framing with clamps, and maintain accessible shutoff and service access.
When to hire a plumber
Consider hiring a licensed plumber when routing choices become complex, risk structural damage, or require code‑compliant tie‑ins to existing water supplies.
A professional is advisable for concrete slab penetrations, gas or electrical proximity, inaccessible runs, or uncertain shutoffs.
They guarantee proper permits, pressure testing, and backflow prevention.
Hire when DIY uncertainty risks leaks, mold, or failed inspections.
Common Problems and How to Fix Them
Common problems with refrigerator water lines include leaks at fittings, kinks or clogs causing low pressure, freezing in uninsulated floor cavities, and noise or vibration.
Each issue has straightforward diagnostics and repairs—tightening or replacing connectors for leaks, inspecting and straightening lines or flushing and replacing clogged tubing for flow problems.
Preventive measures such as insulating exposed runs, securing lines to reduce movement, and checking valve operation address freezing and noise before they escalate.
Leaks at fittings and connectors diagnosis and remedies
Inspecting fittings and connectors is the first step when diagnosing fridge water line leaks, since most failures occur at these joints.
Check for visible moisture, mineral deposits, and loose nuts.
Tighten compression fittings carefully; replace damaged ferrules, O-rings, or cracked plastic connectors.
Use thread sealant on tapered threads and test under pressure.
Replace corroded valves or adapters to guarantee a watertight seal.
Kinks, clogs, or low water pressure troubleshooting steps
Check the water line for kinks, bends, or visible blockages, since physical restrictions are a primary cause of reduced flow; straighten tubing gently and replace any permanently deformed sections.
Flush the line to clear debris, inspect inline filters and replace if clogged, verify shutoff valve fully open, and test water pressure at source.
If low persists, check supply piping and fittings for obstructions or partial closures.
Freezing risk in uninsulated floor cavities and prevention
Because cold air can easily circulate through uninsulated floor cavities, water lines routed there are at high risk of freezing and bursting during cold spells.
To prevent this, insulate pipes with foam sleeves, seal gaps in the cavity, and add heat tape rated for wet locations.
Maintain slight slope for drainage, test periodically, and consider rerouting into conditioned space if exposure remains significant.
Noise or vibration issues and mitigation
Addressing noise and vibration from a fridge water line focuses on identifying the source—loose fittings, water hammer, pump vibration, or contact with framing—and applying targeted fixes such as tightening connections, adding air chambers or arrestors, isolating the line with rubber or foam mounts, and securing tubing away from studs.
Technician should also replace worn valves, add tubing clamps with vibration pads, and reroute lines to minimize resonance.
Inspection, Testing, and Final Checks
The final stage focuses on verifying the installation through pressure testing and leak detection to guarantee a watertight system.
It also covers a code compliance checklist to confirm all fittings, shutoffs, and routing meet local requirements before concealing the line.
Finally, recommended long-term maintenance practices and an inspection schedule are outlined to prevent future leaks and maintain performance.
Pressure testing and leak detection methods
Begin by verifying system integrity through controlled pressure testing and visual inspection to guarantee the new water line is leak-free before reconnecting the refrigerator.
Isolate the line, pressurize per manufacturer or local standards, monitor for pressure drop.
Use soapy water, dye, or electronic leak detectors at fittings and joints.
Repair detected leaks, retest until pressure holds and no moisture appears.
Code compliance checklist before concealing the line
Before concealing the line, validate that all inspection, testing, and final-check requirements of local codes and manufacturers have been met: verify proper materials and supports, affirm isolation valves and backflow prevention are correctly installed, document pressure-test results and any repairs, and obtain required sign-offs or permits.
- Verify material type, joints, and mounts match code
- Confirm functioning isolation valve access
- Record pressure-test duration and outcomes
- Ascertain backflow device installed and documented
Long-term maintenance tips and inspection schedule
Routine vigilance preserves system integrity: owners should establish a simple maintenance schedule that combines periodic inspections, functional tests, and prompt documentation.
Monthly visual checks for leaks, corrosion, and cold-water shutoff access; quarterly test of valve operation and ice/water dispenser flow; annual pressure and connection inspection by a qualified technician.
Record findings, repairs, and dates; address issues immediately to prevent damage.
Cost Breakdown and Time Estimates
Typical material costs for running a fridge water line—fittings, tubing, shutoff valves, and connectors—are contrasted with professional labor estimates to provide a clear budget range.
Time required is presented by skill level and project complexity, from a quick DIY install to a longer job involving drywall or difficult routing.
This section helps readers weigh cost versus time when deciding between doing the work themselves or hiring a pro.
Typical material costs vs. professional labor estimates
A straightforward comparison of material expenses versus professional labor clarifies where most of the project budget goes: materials for a DIY fridge water line—plastic tubing, a shutoff valve, fittings, and a saddle or compression connector—generally range from $15 to $75, while hiring a licensed plumber typically adds $150 to $400 in labor for a simple installation, with higher fees if access is difficult or code work (e.g., ice maker kit, backflow prevention, or new shutoff) is required.
| Item | Typical Cost |
|---|---|
| Tubing & fittings | $15–$40 |
| Shutoff valve | $5–$25 |
| Connector/saddle | $5–$20 |
| Plumber labor (simple) | $150–$400 |
| Extra code work | Varies (>$50) |
Estimated time by skill level and project complexity
Estimate time commitments based on skill level and project complexity to plan effectively: novices should allow 2–4 hours for a simple fridge water line—more if routing through cabinets or walls—while an experienced DIYer can often complete the same task in 45–90 minutes.
Professional plumbers typically allocate 30–60 minutes for straightforward installs but may need 2–4 hours when access is restricted, additional fittings or code-mandated devices are required, or unforeseen issues (corroded supply, frozen lines, or concealed obstacles) arise.
Novices should budget extra time for learning, tool setup, and troubleshooting; factor inspection or permit waits into total project time.
Mistakes to Avoid
Common DIY errors when running under-floor water lines—such as improper routing, unsecured fittings, or using the wrong materials—can lead to leaks and costly repairs.
Attention to preventing cross-connections and contamination, including proper backflow prevention and dedicated fittings, is essential for safe potable supply.
What starts as a quick fix can escalate into major water damage or health risks if shortcuts are taken.
Common DIY errors when running under-floor water lines
Begin by recognizing that under-floor water line work demands careful planning and respect for existing structures; overlooking this leads to leaks, damage, and costly repairs.
Common DIY errors include improper pipe support, inadequate insulation against freezing, careless drilling that severs wiring or joists, using incorrect fittings or materials, and failing to test pressure and joints. Each mistake increases risk and repair complexity.
How to prevent cross-connections and contamination
Prevent cross-connections by isolating the fridge water line from any potential backflow sources and installing appropriate backflow prevention devices, such as an air gap, vacuum breaker, or a code-approved check valve.
Confirm fittings are dedicated to potable service, avoid connecting to irrigation or non-potable systems, label the shutoff valve, test devices after installation, and follow local plumbing codes to prevent contamination and liability.
When a quick fix becomes a bigger problem
Ignore a rushed repair at one’s peril: temporary patches like tape-wrapped fittings, undersized tubing, or improperly seated compression nuts often fail under pressure, leading to leaks, water damage, mold growth, and costly repairs.
One should replace makeshift fixes with proper connectors, correct tubing size, and tested seals.
Periodic inspection prevents escalation and guarantees long-term reliability.
Useful Upgrades and Accessories
Practical upgrades can improve performance and reliability when running a fridge water line. Recommended additions include an inline water filter or pressure regulator, quick-connect fittings, shutoff boxes, and dedicated ice-maker kits to simplify installation and maintenance.
Insulation and rodent protection options help prevent freezes and damage, particularly in unheated or exterior runs.
Adding an inline water filter or pressure regulator
Consider installing an inline water filter or pressure regulator to protect the refrigerator’s plumbing and improve water quality. Both devices are compact, install on the supply line, and address distinct issues—filters remove contaminants and taste/odor, while regulators control excessive inlet pressure that can stress valves and fittings.
Selection depends on local water quality and supply pressure; mount accessibly for cartridge changes and pressure adjustments.
Quick-connect fittings, shutoff boxes, and ice-maker kits
While making a refrigerator water hookup, homeowners often add quick-connect fittings, recessed shutoff boxes, and dedicated ice-maker kits to simplify installation and maintenance.
These accessories improve serviceability and reduce leak risk.
Recommended options include:
- Push-to-connect (copper/PE) fittings for fast joins
- Wall-mounted recessed shutoff for access
- Complete ice-maker kit with tubing and valve
- Brass or stainless fittings for durability
Insulation and rodent protection options
After installing quick-connect fittings and a recessed shutoff, attention should turn to protecting the new line from heat loss and animal damage.
Foam pipe insulation reduces freezing and condensation; closed-cell types resist moisture.
Install steel or heavy-gauge plastic conduit and rodent collars where the line passes through joists.
Seal gaps with metal mesh and high-quality caulk to block gnawing and drafts while maintaining service access.
Final Checklist Before Finishing the Floor
Before closing the floor, the installer compiles clear documentation for future homeowners or trades, noting pipe locations, connection types, and warranty details.
Shutoff valves and any service points are labeled and left unobstructed for easy access.
These steps guarantee future maintenance and repairs can proceed quickly and safely.
Documentation for future homeowners or trades
When preparing the final checklist before finishing the floor, include a concise packet of documentation that clearly identifies the shutoff valve location, the type and size of supply tubing, connection fittings used, and any inline filters or valves installed.
This packet should also note water source pressure, installation date, and the name and contact of the installer or service professional so future homeowners or trades can make informed, safe decisions without guessing.
Include: schematic, material receipts, pressure test result, photo of connections, warranty info, and recommended maintenance intervals.
Labeling shutoffs and leaving accessible service points
With documentation complete, the next step is to clearly label shutoff valves and confirm service points remain accessible before the floor is finished.
Labels should be durable, legible, and indicate valve function and water line destination.
Ensure access panels or removable floorboards align with valve locations.
Verify clearance and unobstructed access for future maintenance, testing, or emergency shutoff without dismantling finished flooring.
Conclusion
A practiced DIYer finishes the under-floor refrigerator water line and, by coincidence, notices a tiny scratch on the baseboard that matches the drill mark—proof of careful work. The installation holds, valves shut and leak-free, and the ice maker hums to life as if rewarded for precision. With planning, correct parts, and deliberate testing, the project resolves cleanly; what began as a practical chore concludes as a quiet demonstration of methodical, cautious craftsmanship.