How to Install a Brass Tee: Step-by-Step Guide for Leak-Free Plumbing
To install a brass tee for water, gas, or HVAC systems, follow these steps for a leak-free connection. Start by gathering essential tools: wrenches, a pipe cutter, a deburring tool, flux or PTFE tape, and safety gear. Shut off and drain the line before cutting the pipe ends to a square edge and cleaning them thoroughly. Choose your preferred connection method—threaded, sweat, compression, or push-fit—and assemble the tee accordingly. Make sure to seal the joints properly and tighten them to the manufacturer’s specifications. Finally, conduct a pressure test to check for leaks. Adhering to proper torque and support guidelines will ensure a long-lasting installation. For detailed steps, continue reading.
What a Brass Tee Is and When to Use One
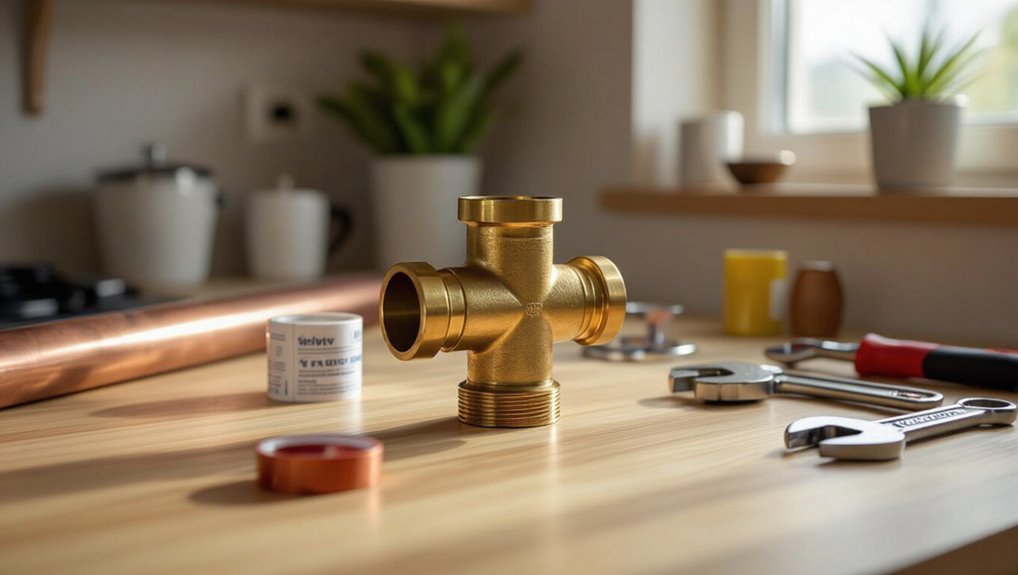
A brass tee is a T-shaped fitting that joins three pipe sections and is commonly used in water supply, gas lines, and HVAC systems.
It is often chosen for its corrosion resistance, strength, and machinability compared with PVC, copper, or stainless steel in specific applications.
Brass tees come in varieties—equal and reducing sizes, plus threaded and sweat (solder) connections—so installers can match flow requirements and joining methods.
Definition and common applications in plumbing
Brass tees are three-way fittings that join or split fluid flow within a piping system, featuring one inlet and two outlets arranged at 90-degree angles. They direct flow, branch lines, and adapt fittings for meters or valves; installers consult guides on how to install brass tee for correct orientation and sealing.
| Use | Location | Typical size |
|---|---|---|
| Branching | Kitchens | 1/2″–1″ |
| Metering | Utilities | 3/8″–3/4″ |
Advantages of brass tees versus PVC, copper, and stainless steel
When comparing materials for tees in plumbing systems, brass stands out for its balance of durability, machinability, and corrosion resistance.
It resists galvanic corrosion better than copper in mixed-metal assemblies, withstands higher pressures and temperatures than PVC, and is easier to machine and join than stainless steel.
Brass offers reliable seals, long service life, and broad compatibility with fittings and valves.
Types of brass tees (reducing, equal, threaded, sweat)
Tee fittings join three pipe runs at a single junction, and brass variants come in several specific types to suit different flow and connection needs.
Each type addresses size, thread, or joining method for varied systems and pressures.
- Reducing: different outlet size for branch flow control.
- Equal: identical bore for uniform distribution.
- Threaded: male/female threads for removable connections.
- Sweat: soldered joints for permanent, leak-resistant seals.
Tools and Materials Required for a Leak-Free Installation
For a leak-free brass tee installation, the installer requires specific hand tools—adjustable and flare wrenches, a pipe cutter and deburring tool—and, for soldered joints, a torch and soldering kit.
Necessary consumables include the brass tee and matching pipe, flux and solder for sweated connections, and thread-sealing options such as PTFE tape or pipe dope where applicable.
Appropriate safety gear (gloves, eye protection, fire-resistant cloth) and adherence to safe work practices complete the list.
Essential tools (wrenches, pipe cutter, deburring tool, torch, soldering kit)
A small set of quality tools—adjustable and pipe wrenches, a reliable pipe cutter, a deburring tool, a propane torch, and a soldering kit—forms the foundation of a leak-free brass tee installation.
Each tool’s purpose is specific: wrenches secure fittings, the cutter guarantees square ends, the deburrer removes burrs, the torch heats joints, and the soldering kit delivers controlled solder flow for durable, reliable connections.
Consumables and fittings (brass tee, pipe, flux, solder, PTFE tape, pipe dope)
With the right tools on hand, attention shifts to the consumables and fittings that actually form the joint: a correctly sized brass tee and matching pipe, flux and solder for sweat connections, and sealing compounds such as PTFE tape or pipe dope for threaded joints.
Selection prioritizes compatibility, cleanliness, and appropriate solder type for copper or brass.
- Brass tee sized to pipe
- Clean, cut pipe
- Appropriate flux and solder
- PTFE tape or pipe dope
Safety equipment and best practices
Because proper preparation reduces risk and improves results, installers should assemble personal protective equipment and follow proven safety practices before beginning a brass tee installation.
Required items include safety glasses, heat-resistant gloves, long sleeves, and a respirator for solder fumes.
Confirm a fire extinguisher, adequate ventilation, and a stable workstand.
Verify water shutoff and test joints leak-free after cooling.
Preparing the Pipes and Workspace
Before any cutting begins, the water supply should be shut off and the line drained to prevent spills and pressure.
The installer measures and marks pipe locations for proper alignment, then cuts, deburrs, and cleans the pipe ends to guarantee a secure fit.
Finally, both the brass tee and pipe sections are inspected for defects or contamination that could cause leaks.
Shutting off water and draining the line
Shut off the appropriate water supply to isolate the section of pipe where the brass tee will be installed, then relieve pressure by opening a nearby faucet or valve. Confirm isolation, drain remaining water, and protect the workspace. Use towels and a bucket; verify shutoff again before proceeding.
| Item | Action |
|---|---|
| Supply | Shut off |
| Pressure | Relieve |
| Drainage | Open faucet |
| Containment | Towels/bucket |
| Verify | Recheck valve status |
Measuring and marking pipe cuts for correct alignment
Measure twice and mark once: the installer measures the pipe runs, accounts for the tee’s branch and fitting insertion depths, and marks cut lines with a fine-tip marker or scribe to confirm the tee will align squarely with existing fixtures.
Reference points are noted on both pipes, offsets and centerlines transferred, and spacing checked against the tee to verify accurate alignment before proceeding to cutting.
Cutting, deburring, and cleaning pipe ends
Cut the pipes to the marked lines using the appropriate cutter or saw, then remove burrs and internal slag to guarantee smooth, square ends that seat fully in the brass tee.
Deburr outside and inside with a reamer or file, deburr at right angles, and wipe away metal shavings.
Clean pipe ends with a solvent or cloth to remove oil, dirt, and particles before assembly.
Inspecting the brass tee and pipes for defects
After the pipe ends have been squared and cleaned, each brass tee and mating pipe should be visually and tactilely inspected for defects that could compromise the joint.
Check for cracks, burrs, scratches, corrosion, and deformities; confirm thread integrity if applicable.
Verify inside surfaces are smooth and free of debris.
Reject or recondition any component failing inspection before assembly.
Step-by-Step Installation for Threaded Brass Tees
The installer begins by wrapping PTFE tape or applying pipe dope to the male threads to guarantee a reliable seal.
The fitting is then engaged by hand and finished with a wrench to the manufacturer’s recommended torque, avoiding over-tightening.
Finally, the joint is pressurized and inspected for leaks, with any seepage addressed immediately.
Applying PTFE tape or pipe dope to male threads
When preparing threaded brass fittings, apply either PTFE tape or pipe dope to the male threads to guarantee a reliable seal and prevent leaks; choose PTFE for clean, quick application or pipe dope for heavier sealing and compatibility with mixed metals.
Wrap tape clockwise three to five turns without overlapping the lead thread, or brush an even, thin coat of compound over threads before assembly.
Hand-tightening and final wrench-tighten torque guidance
Begin by hand-threading the brass tee into the mating fittings until resistance is felt, ensuring threads engage straight and the PTFE tape or compound remains in place; this prevents cross-threading and allows a final alignment check before applying tools.
Use a wrench to tighten one to two full turns past hand-tight for soft-seal joints, or follow manufacturer torque specs for metal-to-metal seals, avoiding over-tightening.
Testing for leaks after threaded installation
Pressure-test the assembly immediately after tightening to confirm a leak-free connection:
Close downstream valves, pressurize the system to recommended test pressure, and monitor fittings for at least 15 minutes.
Inspect threads, joints, and surrounding areas for visible drips or seepage.
If pressure drops or leaks appear, depressurize, disassemble, reapply sealant or tape, retighten, and retest until stable.
Step-by-Step Installation for Sweat (Soldered) Brass Tees
The section outlines the sweat-method installation of a brass tee, beginning with proper flux application and careful assembly of the fittings.
It then covers correct heating and soldering technique to guarantee fully bonded joints.
Finally, it describes cooling and cleaning procedures followed by an initial leak test.
Flux application and fitting assembly
Apply flux evenly to the cleaned copper surfaces of the pipe and inside the brass tee socket, ensuring a thin, continuous coat that reaches the end of the insertion depth; this promotes solder flow and minimizes voids. Assemble the fitting, fully seating the pipe, and secure with gentle twist motion to distribute flux. Verify alignment and wipe excess.
| Step | Action | Check |
|---|---|---|
| 1 | Flux | Even coat |
| 2 | Insert | Fully seated |
| 3 | Clean | No excess |
Proper heating technique and soldering joints
With the joint cleaned, fluxed, and assembled, attention turns to heating and soldering to form a reliable, leak-free bond.
Heat is applied evenly to the fitting, not directly to solder. When flux liquefies and metal reaches proper temperature, touch solder to the joint; it should flow by capillary action.
Withdraw heat gradually once solder fills the seam, avoiding overheating and smoking flux.
Cooling, cleaning, and initial leak test
Allow the joint to cool naturally to room temperature without quenching, as rapid cooling can stress the solder and weaken the seal. Once cool, remove flux residue with a damp cloth, inspect for gaps or voids, and pressurize the system for an initial leak test. Address any weeps, reheat and add solder if needed, then finalize insulation or supports.
| Step | Action | Result |
|---|---|---|
| 1 | Cool | Solidified joint |
| 2 | Clean | Flux removed |
| 3 | Inspect | Visible defects |
| 4 | Test | Pressure applied |
| 5 | Repair | Leak sealed |
Step-by-Step Installation for Compression Brass Tees
The procedure for installing a compression brass tee begins by preparing the ferrule and nut, ensuring they are clean and correctly oriented on the pipe.
The installer follows a specific tightening sequence and torque progression to seat the ferrule without over-tightening.
Finally, the joint is inspected and pressure-tested to confirm there are no leaks.
Preparing the ferrule and nut
Prepare the ferrule and nut by inspecting them for damage and matching sizes to the tubing: the ferrule should slide onto the pipe easily but still seat against the nut when pushed.
The nut threads must be clean and undamaged to guarantee a proper seal.
Remove burrs from cut tubing, deburr and lightly chamfer the pipe end, then slide ferrule and nut squarely into position.
Proper tightening sequence and avoiding over-tightening
With the ferrule and nut correctly positioned, attention turns to the tightening sequence and preventing over-tightening.
The installer hand-tightens the nut, then uses a wrench for incremental turns—typically a quarter to half turn—while holding the fitting steady.
Each connection is tightened evenly, alternating sides on multi-branch tees.
Stop when resistance increases sharply; avoid excessive force that can deform ferrules or crack fittings.
Leak-checking compression joints
Begin by pressurizing the line slowly and observing each compression joint for signs of leakage.
The installer watches fittings for drips, wetness, or hissing and notes any pressure drops on gauges.
If a leak appears, depressurize, tighten nut incrementally, reseat ferrule or replace it if damaged, then retest.
Confirm zero leaks under normal operating pressure before finishing.
Step-by-Step Installation for Push-Fit (Press) Brass Tees
The installer measures and marks the pipe to the specified insertion depth before assembling the push-fit tee.
Next, the pipe is fully inserted and either pressed with the appropriate tool or pushed home until the fitting clicks to guarantee a secure connection.
Finally, engagement is confirmed visually and by a gentle pull, followed by a pressure or leak test to verify a watertight joint.
Pipe insertion depth and marking
Measure and mark the pipe at the exact insertion depth indicated by the push-fit tee manufacturer to confirm a secure, leak-free connection.
Using a square, clean-cut end, remove burrs and deburr inside and outside. Align marker with sleeve or stop.
Verify pipe diameter and wall thickness match fitting specifications. Recheck mark after cleaning to confirm consistent, full insertion during assembly.
Using a press tool or ensuring secure push-fit connection
Prepare to secure the tee by confirming the selected method—press tool or push-fit—is compatible with the specific brass fitting and pipe material, then follow manufacturer torque/press-profile and insertion-depth guidelines precisely. Use correct jaw/profile, align pipe squarely, actuate press fully or push until audible click. Inspect visual markers and verify no debris.
| Tool | Action | Check |
|---|---|---|
| Press | Full cycle | Jaw fit |
| Push-fit | Firm push | Marker |
Verifying engagement and leak testing
After confirming proper jaw/profile fit or audible engagement and clearing debris, attention shifts to verifying engagement and performing leak testing on the installed brass tee.
The installer inspects visual markers or depth stops, gently tugs fittings, and pressurizes the system to manufacturer-recommended levels.
Observations focus on drips, pressure loss, and soft joint movement; any failure prompts depressurization, disassembly, and reinstallation.
How to Install a Reducing Brass Tee and Complex Configurations
The installer must choose the correct reducing tee and compatible adapters to match pipe diameters and thread types.
Precise alignment of multiple branches and provision of proper support or bracing are required to prevent stress at joints.
For tight or hard-to-reach locations, specialized fittings, offset techniques, and careful access planning minimize leaks and facilitate future maintenance.
Selecting correct sizes and adapters
When installing a reducing brass tee or integrating tees into complex piping runs, matching pipe diameters, thread types, and flow requirements is essential to guarantee a leak-free, functional connection.
Select adapters that convert sizes with minimal turbulence, prefer matched materials to prevent galvanic corrosion, verify NPT versus BSP threads, and choose appropriate compression, sweat, or threaded fittings.
Confirm pressure ratings and use proper seals.
Aligning multi-branch runs and support/bracing
Align branches precisely and secure the assembly before final tightening to prevent strain on the reducing brass tee and connected runs.
Verify branch alignment with a straightedge and level, then clamp or brace piping to structure to eliminate movement.
Distribute supports close to fittings and at regular intervals, ensuring weight and thermal expansion are managed.
Recheck alignment after tightening to confirm leak-free joints.
Techniques for tight or hard-to-reach locations
Accessing tight or awkward spots demands planning and the right tools: installers should visualize the final routing, measure clearances, and select compact fittings and specialized wrenches before beginning.
For reducing tees and complex layouts, employ low-profile adapters, swivel joints, and offset nipples. Use flexible connectors or sectional assembly techniques, secure temporary supports, and test joints incrementally to guarantee leak-free alignment without overworking access points.
Leak Testing and Pressure Checks
Before restoring service, the installation should undergo visual inspection and pressure testing using air or water to confirm integrity.
Tests typically specify an acceptable test pressure and holding time, with isolation of the section under test via valves or caps to prevent backflow.
Any pressure decay or visible seepage requires systematic isolation and sectional retesting to locate slow leaks for repair.
Methods: visual, air pressure, water pressure tests
Confirming a secure brass tee requires systematic leak testing and pressure checks using visual inspection, controlled air tests, and water pressure verification.
Visual inspection looks for drips, solder defects, or loose fittings.
Air testing uses regulated compressed air and soapy solution to reveal leaks.
Water pressure testing confirms integrity under service conditions, observing joints for seepage and ensuring no audible or visible failure.
Acceptable pressure/holding time and how to isolate test sections
Reasonable pressure and holding-time standards depend on the pipe material, system rating, and local codes.
However, a typical test applies 1.5 times the maximum working pressure (up to the material’s test limit) and holds it for 15–30 minutes while the section is isolated and observed for any drop in pressure or visible leakage.
Isolation uses valves, caps, or blinds to segment the tee run; record gauge readings.
How to identify and locate slow leaks
Begin leak detection by pressurizing the isolated section to the test pressure and stabilizing the system while monitoring a calibrated gauge for any pressure decay.
Inspect joints, fittings, and tee connections visually and with a soap solution or electronic leak detector.
Isolate and mark suspected areas, re-test segments to confirm, and repair or tighten fittings.
Record pressure trends and corrective actions for verification.
Common Installation Mistakes and How to Avoid Them
Common installation mistakes frequently lead to leaks or premature failure of a brass tee.
Typical errors include over‑ or under‑tightening and cross‑threading, improper soldering or inadequate flux application, and using incompatible fittings or materials.
Identifying these issues early and following correct torque, soldering, and material compatibility practices prevents most problems.
Over-tightening, under-tightening, and cross-threading
Installers must balance torque and alignment when fitting a brass tee, because over-tightening can strip threads or crack fittings. Under-tightening can cause leaks, and cross-threading can permanently damage mating parts.
Use correct-size wrenches, apply moderate, even force, and hand-start threads to guarantee proper engagement. Inspect threads for burrs, test joints under low pressure, then final-torque to manufacturer specs.
Improper soldering or insufficient flux
Soldering a brass tee with inadequate flux or poor technique often leads to weak joints, leaks, and premature failure.
Proper flux cleans and promotes capillary flow; insufficient application prevents solder from fully wicking. Cold joints result from uneven heat or rushed cooling.
To avoid issues, pre-clean fittings, apply correct flux sparingly, heat evenly until solder flows, and inspect joints for complete fillets before testing.
Using wrong materials or incompatible fittings
Selecting incompatible materials or mismatched fittings can undermine an otherwise sound brass tee installation, causing galvanic corrosion, leaks, or mechanical failure.
The installer should verify metal compatibility, thread types, and pressure ratings. Use dielectric unions where dissimilar metals meet, match pipe sizes and standards, and avoid cheap adapters.
Proper selection prevents premature failures and maintains system integrity over time.
Maintenance, Repair, and Replacement Tips
Maintenance, repair, and replacement of a brass tee require careful technique to avoid stressing or nicking adjacent pipes during removal.
Guidance should cover when to re-solder, re-tape, or fully replace a fitting based on leak severity and material condition.
Practical corrosion-prevention steps and routine inspection intervals help extend service life.
How to replace a faulty brass tee without damaging adjacent pipes
Begin by isolating the affected section and shutting off water to prevent pressure and flow while the repair is made; this protects downstream fixtures and reduces the chance of disturbing adjacent joints. Support nearby pipes with clamps, cut the tee free with minimal heat, and use fittings that match alignment. Work slowly to avoid strain and test for leaks after restoring flow.
| Tool | Purpose |
|---|---|
| Clamp | Support |
| Cutter | Remove tee |
| Alignment gauge | Positioning |
When to re-solder, re-tape, or replace the fitting
Assess the joint condition before deciding whether to re-solder, re-tape, or replace a fitting: corrosion, compromised metal, persistent leaks after multiple repairs, or visible cracks indicate replacement, while loose or leaking threaded connections without metal damage often respond to fresh tape or pipe dope.
Soldered joints that show hairline leaks or poor wetting can frequently be repaired by reheating and applying new solder.
When repairing, guarantee clean surfaces, proper flux, and correct heat; retape threads tightly and test under pressure.
Replace if repair fails or metal integrity is doubtful.
Corrosion prevention and longevity tips
Although brass resists corrosion better than many metals, proactive measures greatly extend the life of brass tees and connected piping. Regular inspections, dielectric unions where dissimilar metals meet, and protective coatings prevent galvanic corrosion. Flush systems to remove sediments; control water chemistry; replace compromised insulation. Monitor joints and apply plumber’s tape or appropriate sealants when servicing.
| Action | Frequency | Benefit |
|---|---|---|
| Inspect | Monthly | Early detection |
| Coat | Annually | Barrier protection |
| Flush | Quarterly | Sediment removal |
Cost Estimates, Time Requirements, and When to Hire a Professional
Typical DIY brass tee installations cost mainly for the fitting, pipe, sealing materials, and basic tools, and often take one to two hours for a straightforward repair.
A licensed plumber should be called if the work involves main shutoff issues, gas lines, complex soldering, or unclear leaks that could worsen.
Local plumbing codes and permit requirements can affect whether a homeowner may legally perform the work and should be checked before starting.
Typical DIY cost breakdown and time per installation
A brass tee install generally requires a small set of parts and a modest time investment: expect parts (tee fitting, pipe/adapter, solder or compression fittings, flux, tape) to run $8–$40 depending on size and material, with tools either already on hand or rented for $10–$30.
Labor for a DIYer typically adds 1–2 hours for a straightforward installation, or longer if cutting, threading, sweating, or accessing tight spaces is required.
Typical breakdown: parts $8–$40, consumables $2–$10, tool rental $0–$30. Most single tees take 30–120 minutes; plan extra time for prep, cleanup, and testing.
Signs the job requires a licensed plumber
After estimating parts, consumables, and DIY time, homeowners should also recognize when a brass tee installation exceeds amateur scope and warrants a licensed plumber.
Signs include inaccessible or corroded piping, multiple junctions or pressure issues, unknown material changes, visible water damage, malfunctioning shutoffs, or recurring leaks after repairs.
Complex rerouting, gas line proximity, or lack of confidence in skills also justify professional hire.
Local code considerations and permit requirements
Compliance with local codes and permit rules shapes both the scope and cost of a brass tee installation. Inspectors may require permits, approved materials, and pressure testing; fees and timelines vary by jurisdiction.
Estimates should include permit costs and potential rework. Hire a licensed plumber when codes demand licensed work or when inspections raise compliance issues.
- Permit fees
- Inspection timelines
- Material approvals
- Licensed labor requirements
Conclusion
Brass tees offer durable, versatile solutions for plumbing joins, but proper installation is essential to avoid leaks and failures. Homeowners who attempt DIY installations should note that 65% of household plumbing issues stem from improper fittings or poor sealing, underscoring the value of careful preparation and correct technique. With the right tools, attention to threads or soldering, and thorough leak testing, a brass tee can provide reliable service for years; otherwise, consult a professional.