How to Check an Anode Rod: Step-by-Step Guide to Inspect and Replace Your Water Heater Anode Rod
To check and replace your water heater anode rod, first ensure the power or gas is turned off, relieve pressure from the tank, and drain water below the anode port. Use the appropriate socket and a lubricant to carefully unthread the rod, then pull it straight out. Inspect it for heavy pitting or more than 50% corrosion. If it appears degraded, replace it, reseal the threads, refill the tank, and check for leaks. Follow this step-by-step guide for detailed removal instructions, measurements, and troubleshooting tips.
What an Anode Rod Is and Why It Matters for Your Water Heater
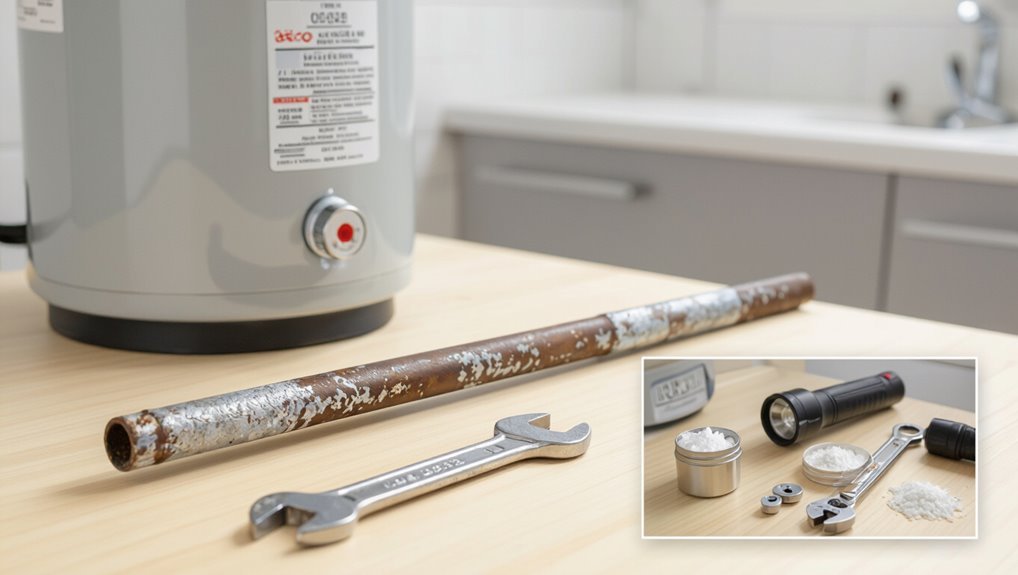
An anode rod is a sacrificial metal component installed inside a water heater to preferentially corrode and protect the steel tank from rust.
Common materials include magnesium, aluminum (often with zinc), and powered (impressed-current) rods, each with different corrosion rates and suitability for water chemistry.
The rod’s condition directly influences tank longevity and can affect water quality if it is depleted or inappropriate for the local water.
Purpose of the anode rod in corrosion protection
Because metal tanks and water create a natural electrochemical cell, the anode rod sacrifices itself to protect the heater’s steel lining from rust and pitting.
It provides a preferential corrosion site, extending tank life by diverting corrosive reactions away from steel.
Routine maintenance, including how to check anode rod condition, guarantees timely replacement before significant tank degradation occurs.
Types of anode rods (magnesium, aluminum, zinc, powered)
With the role of sacrificial corrosion protection established, attention turns to the different anode rod materials and how each performs in varied water conditions.
Magnesium offers strong protection in soft water but may corrode faster.
Aluminum alloys suit hard or mineral-rich water.
Zinc additives reduce sulfur odors.
Powered (electrolytic) anodes use impressed current for long life where sacrificial options fail.
How anode rod condition affects tank life and water quality
A corroding anode rod shortens a water heater’s lifespan and can degrade water quality by failing to protect the steel tank and by introducing metal ions and odors into the hot water.
When the rod is consumed, corrosion shifts to the tank shell, accelerating leaks and sediment formation while making water taste metallic or smell of sulfur.
Regular inspection and timely replacement restore protection, reduce sediment, and prevent premature tank failure.
Quick Assessment: How to Tell if Your Anode Rod Needs Inspection or Replacement
Signs such as rusty or discolored water, a metallic taste, or visible tank leaks indicate the anode rod may be failing and warrant inspection.
Inspection frequency should be adjusted for water chemistry and heater age—soft or aggressive water and older units need checks every 6–12 months, while typical conditions allow annual reviews.
Simple assessments and rod replacement can be DIY for competent homeowners, but persistent corrosion, heavy sediment, or uncertain fittings justify calling a professional.
Common signs of a failing anode rod (rusty water, metallic taste, tank leaks)
Inspectors and homeowners should watch for certain clear indicators that an anode rod is failing: persistent rusty-colored water, a metallic or off taste, or unexplained moisture around the tank.
Additional signs include frequent sediment buildup, reduced hot-water clarity, and corrosion visible when the rod is removed.
Addressing these promptly prevents accelerated tank corrosion, leaks, and shortened heater lifespan.
Recommended inspection frequency by water type and heater age
Typically, an anode rod’s inspection schedule should be tied to both water chemistry and the water heater’s age.
In soft or acidic water, check annually; replace if heavily corroded.
In neutral to hard water, inspect every 2–3 years.
For heaters older than 8–10 years, increase inspections to annual regardless of water type.
New tanks: first check at year three.
When to call a professional vs. DIY
When should a homeowner attempt an anode-rod check versus calling a professional?
A homeowner may inspect if comfortable with basic tools, shutoff valves, and drainage, and if the rod shows minor corrosion or slow degradation.
Call a professional when the tank is old, the rod is heavily corroded, fittings seize, leaks appear, gas/electric connections complicate access, or safety and warranty concerns exist.
Tools and Materials You’ll Need Before You Start
Before beginning, the reader should gather essential tools such as a socket wrench, breaker bar, pipe wrench, Teflon tape, and a garden hose.
They should also plan for safety: shut off power or gas, follow proper draining procedures, and guarantee adequate ventilation.
Finally, confirm the correct replacement anode rod type and length for the specific water heater model.
Essential tools (socket wrench, breaker bar, pipe wrench, Teflon tape, garden hose)
A small set of hand tools and supplies will make removing and inspecting an anode rod safe and efficient: A 1–1/16″ or 1–1/8″ socket fits common rods; a breaker bar provides leverage for stubborn fittings.
A pipe wrench helps with exposed plumbing. Teflon tape seals threads on replacement rods. A garden hose attaches to the drain valve for controlled tank draining and flushing.
Safety gear and precautions (power/gas shutoff, draining precautions, ventilation)
Because working on a water heater involves electricity, gas, and hot water, the technician must cut power or gas supply, relieve tank pressure, and guarantee adequate ventilation before beginning.
Recommended gear includes insulated gloves, safety glasses, and hearing protection.
Close the fuel source, shut the breaker or gas valve, attach a garden hose to the drain, and vent the area to prevent gas buildup and scalding.
Choosing the right replacement anode rod for your heater
Choosing the correct replacement anode rod requires matching the heater’s specifications, water chemistry, and installation constraints to guarantee effective corrosion protection.
Select between magnesium, aluminum, or zinc-aluminum rods based on hardness and odor issues; verify length, diameter, and terminal type fit the tank.
Prefer factory recommendations; consider a flexible or extended rod for hard-to-reach fittings and choose a certified corrosion-resistant option.
Step-by-Step Guide to Inspecting Your Water Heater Anode Rod
The inspection begins with safety: power or gas should be shut off and the cold water supply turned off before any work begins.
After relieving pressure and draining enough water to drop the level below the anode port, the anode rod can be located—usually at the top opening, identifiable by a hex head or sacrificial port.
Finally, the rod is carefully loosened and removed using appropriate tools to complete the inspection.
Step 1 Turn off power or gas supply
Before any inspection begins, power to the water heater must be cut and the gas supply shut off to eliminate electrical shock and combustion risks.
Verify electrical disconnect at the breaker or turn the gas valve to “off.”
Confirm absence of power with a voltage tester or ascertain pilot is out.
Record the condition before proceeding to the next safety step.
Step 2 Shut off cold water supply and relieve pressure
Shut off the cold-water inlet at the tank to stop fresh water from entering, then open a nearby hot-water faucet to relieve system pressure; this prevents a sudden surge when the anode rod is loosened and makes it easier to remove.
Verify pressure has dropped by briefly opening the tank’s pressure-relief valve if accessible.
Confirm the inlet valve is fully closed before proceeding.
Step 3 Drain a partial amount of water to lower level below anode port
Drain enough water from the tank so the water level falls below the anode rod port to prevent spillage when the rod is removed.
Attach a hose to the drain valve and direct it to a safe drain. Open a hot-water faucet to relieve vacuum, then slowly open the drain valve until the level drops below the anode port.
Close the valve and remove the hose.
Step 4 Locate the anode rod (top opening, hex head, or sacrificial port)
With the water level lowered below the anode port, attention turns to locating the anode rod itself.
Inspect the tank top for a threaded sacrificial port or hex-head plug; some models hide the rod under a metal cap or behind insulation.
Refer to the owner’s manual or schematic to confirm location.
Note fittings, electrical connections, and any corrosion evidence before proceeding to removal.
Step 5 Loosen and remove the anode rod safely
Begin by preparing tools and safety gear: a socket wrench (typically 1 1/16″ or adjustable), penetrating lubricant, gloves, eye protection, and a backup wrench or breaker bar for stubborn fittings.
Depressurize and power down the heater, drain a few gallons to lower level below the rod, apply lubricant to threads, use steady force with the wrench, and remove the rod straight to avoid breaking or damaging the port.
Step 6 Inspect the rod: visual criteria and measurements for replacement
After removal, the anode rod should be inspected immediately for wear patterns and dimensions to determine if replacement is necessary.
The inspector notes corrosion type (pitting, thinning, sulfate buildup), measures remaining core diameter and overall length, and checks for exposed steel.
Replace if more than 50% consumed, heavily pitted, fractured, or shorter than manufacturer minimum specifications; document findings and photograph damage for records.
Step 7 Reinstall or replace the anode rod and reseal connections
Reinstalling or replacing the anode rod requires confirming the correct part, applying appropriate sealant, and torquing the connection to the manufacturer’s specification to prevent leaks and guarantee proper sacrificial protection.
Clean the mounting surface, wrap threads with thread sealant or tape as specified, hand-start then tighten with a torque wrench to spec, and replace any damaged washers or gaskets.
Verify alignment and secure fitting.
Step 8 Refill tank, restore power/gas, and check for leaks
With the anode rod secured and threaded connections properly sealed and torqued, the water heater can be refilled and service restored.
Open the cold-water supply slowly until the tank fills and air vents at hot taps clear.
Inspect all fittings for drips while pressure stabilizes.
Restore power or relight the pilot per manufacturer instructions.
Recheck for leaks after initial heating cycle.
How to Replace an Anode Rod When It’s Severely Corroded or Stuck
When the anode rod is heavily corroded or refuses to turn, recommended techniques include applying penetrating oil, using localized heat, or employing a breaker bar for extra leverage.
If the rod shears off, options include extracting the remaining piece with cutting and pulling tools or fitting a flexible replacement rod designed for hard-to-reach shafts.
The choice of a new anode should consider water conditions and issues such as hard water or metallic odors, which may warrant switching anode types.
Techniques for loosening a stuck anode rod (penetrating oil, heat, breaker bar)
Loosen a stuck anode rod methodically to avoid damage to the tank or the rod itself.
Apply penetrating oil at the hex connection, allow soak time, then tap gently to work lubricant inward.
Use heat on the fitting, not the tank, to expand metal.
Attach a breaker bar or cheater pipe and apply steady, controlled torque.
Reapply lubricant and repeat until freed.
Alternatives if rod is broken inside (flexible rod options, cutting and extracting)
If the anode rod snaps or cannot be freed after penetrating oil, heat, and steady torque, there are practical alternatives for retrieval or replacement without replacing the entire tank.
Use a flexible replacement rod that threads through the existing opening, or insert a segmented rod system.
Otherwise, cut the remaining shaft near the fitting and extract fragments with internal grabbers or magnetic/coil pullers, then install a new rod.
When to replace with a different anode type (hard water, odor issues)
Why switch anode types? Homeowners should consider switching when water is very hard, causing rapid magnesium rod depletion, or when rotten-egg odors indicate sulfate-reducing bacteria reacting with the anode.
Aluminum/zinc or powered anodes resist mineral scaling and reduce odors.
Selection depends on hardness, odor tests, tank compatibility, and local water chemistry; consult specifications and replace accordingly to prolong tank life.
Comparison: Anode Rod Materials and Lifespan
Different anode materials offer trade-offs in protection strength, longevity, and suitability for water chemistry, which affects how often they must be checked or replaced. The brief table below compares common options to prompt selection and maintenance decisions. Further discussion will clarify which material best matches specific tank conditions.
| Material | Typical lifespan |
|---|---|
| Magnesium | 3–6 years |
| Aluminum/Zinc | 5–8 years |
| Powered anode | 8–15+ years (requires power) |
Magnesium vs aluminum vs zinc vs powered anode comparison
A straightforward comparison of anode rod materials—magnesium, aluminum, zinc, and powered ( impressed current) options—clarifies differences in corrosion protection, suitability for water chemistry, and expected lifespan. Magnesium offers best protection in soft water; aluminum suits hard water; zinc reduces sulfur odors; powered anodes provide adjustable, long-term protection but require power and cost more.
| Material | Key trait |
|---|---|
| Magnesium | Best protection, short life |
| Aluminum | Good for hard water |
| Zinc | Odor control |
| Powered | Longest, adjustable |
Common Problems and How to Troubleshoot Them
The guide next outlines common issues encountered after anode rod work and straightforward fixes.
It covers leaks that can occur after reinstalling the rod, situations where an anode is not visible in older or factory-sealed heaters, and remedies for lingering metallic taste or sulfur odors.
Each problem is paired with practical troubleshooting steps and when to call a professional.
Leaks after reinstallation and how to fix them
After reinstalling an anode rod, homeowners sometimes notice leaks originating from the rod’s housing or threads. Such leaks typically stem from improper seating, damaged threads, or inadequate sealing materials.
To fix, drain water below the rod, remove and inspect threads and housing. Replace or re-tape threads with plumber’s tape, apply appropriate pipe dope, reseat snugly without overtightening, then refill and test for leaks.
No visible anode rod in older or factory-sealed heaters
Why does no anode rod appear in some older or factory-sealed water heaters?
In many units the rod is welded, recessed deeply, or integrated as a sacrificial lining, so it cannot be removed from the top.
Troubleshooting includes consulting the manufacturer manual, inspecting access panels, and using a borescope to verify presence.
Replacement often requires tank-specific procedures or professional service.
Persistent metallic taste or sulfur smell after replacement and remedies
Although a new or replaced anode rod is designed to reduce corrosion, some homeowners notice a persistent metallic taste or a rotten-egg (sulfur) smell in hot water.
These symptoms typically result from increased leaching of metals, bacterial activity, or chemical reactions between the new rod, tank materials, and the water chemistry.
Remedies include flushing the tank, testing and adjusting pH, installing a carbon filter, using a different anode alloy, or shock-chlorinating to remove bacteria.
Maintenance Schedule and Tips to Maximize Tank Life
Recommended inspection and replacement intervals vary with water quality—annually in hard or acidic water, and every 3–5 years in softer, neutral conditions.
Simple tasks such as periodic tank flushing, installing a water softener or lowering thermostat settings can slow corrosion and extend anode life.
When anodes are severely depleted or the tank shows corrosion, replacing the rod is typically far less expensive than installing a new water heater.
Recommended inspection and replacement intervals by water conditions
Inspection and replacement intervals for anode rods depend primarily on water chemistry and usage: soft, highly acidic, or high-mineral-content water accelerates corrosion and warrants more frequent checks, while neutral, low-mineral water allows longer service life.
Inspect annually in aggressive conditions; every 2–3 years for moderate hardness; every 3–5 years in mild conditions.
Replace when rod is less than 50% intact or shows heavy pitting.
Simple maintenance tasks to reduce corrosion (flushing, water softeners, temperature)
Performing a few simple maintenance tasks can greatly slow tank and anode corrosion and extend water heater life.
Regularly flushing sediment every 6–12 months removes abrasive deposits.
Installing or maintaining a water softener reduces mineral buildup and galvanic attack.
Lowering thermostat settings to 120°F minimizes corrosion rate and energy use.
Periodic visual checks confirm effectiveness and prompt corrective action when needed.
Cost considerations and when replacement is more economical than a full tank
When weighing whether to replace an anode rod, repair corroded components, or install a new tank, homeowners should compare the immediate parts-and-labor costs against the expected remaining service life and future repair likelihood.
Typically, anode replacement is cost-effective if tank metal is sound and remaining life exceeds several years; replace the tank when corrosion is extensive, leaking, or repair costs approach new-tank pricing.
Safety Warnings and When to Hire a Professional
Checking an anode rod carries risks such as scalding from hot water, gas leaks on gas-fired units, and electrical hazards on electric heaters if procedures are not followed.
If the homeowner notices persistent leaks, strange odors, inability to shut off power or gas, or uncertainty about tank condition, a licensed plumber or technician should be called.
A professional inspection typically includes safe power/gas isolation, pressure relief checks, corrosion assessment, and, if needed, proper removal and replacement of the anode rod.
Risks of DIY mistakes (scalding, gas leaks, electrical hazards)
Although removing or inspecting an anode rod may seem straightforward, mistakes can cause serious hazards: hot water burns from improper draining or valve operation, gas leaks from disturbed fittings on gas water heaters, and electrical shocks when working near heating elements or live wiring.
DIYers risk scalding, fire, asphyxiation, or electrocution if procedures are rushed or tools misused; follow safety protocols and cut power/gas first.
Signs a professional plumber or technician is needed
After acknowledging the dangers of DIY mistakes like scalding, gas leaks, and electrical hazards, it is important to recognize clear signs that a professional should handle an anode rod inspection or replacement.
Persistent leaks, heavy corrosion or fused rod, unknown fitting types, gas appliance involvement, suspected tank damage, inability to access rod, or lack of proper tools and permits all warrant contacting a licensed plumber or technician.
What to expect from a professional inspection or replacement
Expect a professional inspection or replacement to follow a systematic process: the technician will shut off power and water, relieve tank pressure, inspect the access fitting and surrounding plumbing, evaluate the anode rod’s condition, and recommend either cleaning, partial repair, or full replacement based on corrosion, tank integrity, and safety concerns.
The technician documents findings, tests for leaks, replaces seals or adapters as needed, and advises on maintenance intervals and warranty implications.
Quick Reference Checklist for Inspecting and Replacing an Anode Rod
A concise checklist helps guarantee the anode rod inspection and replacement proceed safely and effectively.
It covers pre-inspection preparations, the step-by-step removal and replacement process, and post-replacement verification tasks.
The following quick-reference items summarize the essential actions to follow.
- Turn off power and water, and gather tools and replacement parts.
- Drain the tank partially and locate the anode rod.
- Loosen and remove the old rod using proper wrenches and fittings.
- Install the new rod with correct sealing and torque, then refill the tank.
- Check for leaks, restore power, and monitor for normal operation.
Pre-inspection checklist
Before beginning any work on an anode rod, the inspector should confirm basic safety and access conditions: Make sure power/gas is off, water supply isolated, and pressure relieved.
Confirm clear workspace and stable footing. Verify correct tools and replacement rod on hand.
- Shut off power/gas
- Close cold-water supply valve
- Relieve tank pressure
- Clear surrounding area
- Gather tools and replacement rod
Step-by-step action checklist for removal and replacement
With safety checks complete and tools staged, proceed to the removal and replacement steps using a concise, ordered checklist.
- Turn off power/gas and shut water supply; relieve pressure.
- Drain tank to below anode access point.
- Loosen and remove old anode with proper wrench; inspect condition.
- Prepare and thread new anode with sealant; torque to spec.
- Refill tank, restore power/gas, check for leaks.
Post-replacement verification checklist
Confirm proper operation and watertight integrity immediately after anode replacement by following a short, prioritized checklist:
- Restore water and power, then check for steady pressure and normal heating.
- Inspect the anode seal and tank fittings for visible leaks.
- Monitor drain valve and temperature-pressure relief for proper function.
- Verify no unusual noises or vibration during heat cycles.
- Record replacement date and condition for future maintenance.
Conclusion
A homeowner once found an anode rod reduced to a twisted wire—like a ship’s anchor eaten to a feather—reminding that small parts can guard big investments. Regular checks, replacing the rod when more than half gone, and addressing leaks promptly can extend a water heater’s life by years. With basic tools and attention, corrosion becomes manageable; if the rod is immovable or tank integrity is doubtful, a professional should be called to prevent costly failure.