How to Balance Radiators Quickly: Step-by-Step Guide to Even Heat and Lower Bills
Balancing radiators quickly ensures even heat distribution and can lower your heating bills by optimizing the flow to each radiator. Start by checking for cold spots and bleeding any trapped air. Open the thermostatic radiator valves (TRVs) fully, then measure the inlet and outlet temperatures with a thermometer. To direct more heat to colder radiators, partially close the lockshield valves on the hottest ones. Aim for consistent temperature differences (delta-Ts) and re-check after a short stabilization period. If some radiators remain cold or pipes are noisy, troubleshoot these issues. For the best results, follow a room-by-room approach. More practical steps and tips are provided below.
How to Balance Radiators Quickly for Even Heat and Lower Bills
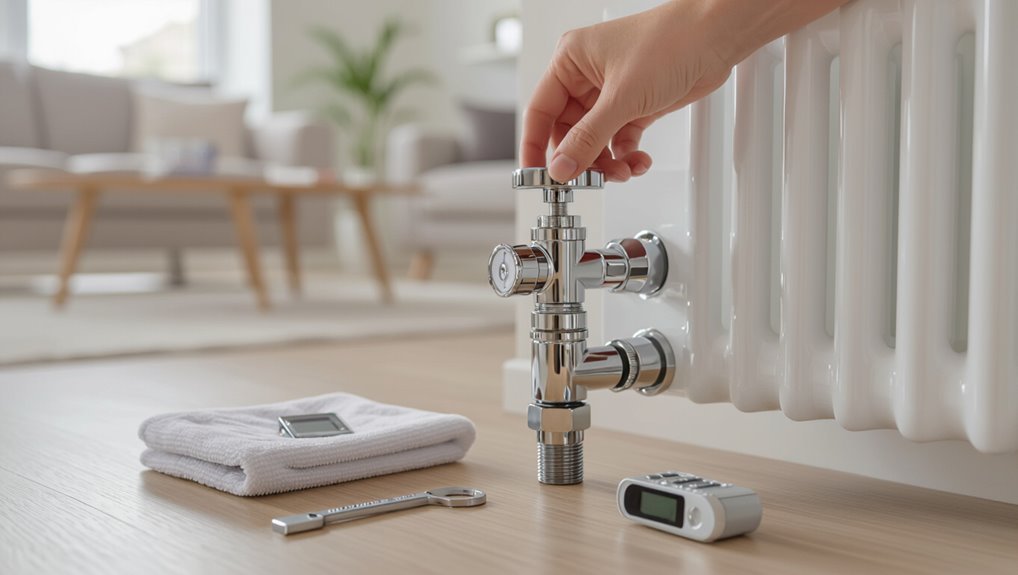
Radiator balancing is the adjustment of flow through each unit so heat is distributed evenly across a building, which prevents some rooms from overheating while others stay cold.
Proper balancing improves comfort by eliminating temperature variations and increases system efficiency.
The quick gains include more consistent warmth, lower energy use, and reduced heating bills.
What radiator balancing means and why it matters
Most homes with central heating benefit from balancing, a straightforward process that guarantees hot water is distributed evenly to each radiator so rooms reach set temperatures efficiently.
Radiator balancing, or how to balance radiators, involves adjusting valves to control flow rates so heat is proportional to room demand.
Proper balancing prevents cold spots, reduces overheating, and makes system controls reliable and predictable.
Quick benefits: comfort, efficiency, and cost savings
Having balanced valves to even out flow, homeowners quickly notice tangible rewards: steadier room temperatures, fewer cold spots, and a more predictable heating schedule.
Energy use drops as boilers run less often and at lower output. Comfort improves without constant thermostat adjustments.
Reduced wear on system components lowers maintenance and replacement costs.
How to tell if your heating system needs balancing
Signs that a heating system needs balancing include cold spots on some radiators, boilers cycling frequently, and large temperature differences between rooms.
Before starting, simple checks such as bleeding radiators, verifying thermostatic valve settings, and confirming the pump is running should be completed.
For a quick job, a radiator key, adjustable spanner, thermometer or thermal strip, and a cloth are usually sufficient.
Common signs of imbalance in radiators
Uneven heat distribution, cold spots on some radiators while others run hot, and persistent temperature differences between rooms are clear indicators that a heating system requires balancing.
Additional signs include slow warm-up of distant radiators, noisy pipes or gurgling within radiators, and visibly uneven surface temperature from top to bottom.
Higher energy bills and frequent thermostat cycling also suggest imbalance.
Simple checks to do before you start
How can a homeowner quickly determine whether radiator balancing is necessary?
Inspect each radiator once the system is warm: note temperature differences top-to-bottom and between rooms, listen for gurgling or banging, and check thermostatic valve settings and radiator valves for full opening.
Compare room comfort levels and energy use patterns.
Record inconsistencies indicating uneven flow or trapped air before proceeding.
Tools and materials you’ll need for a fast job
With temperature checks, valve positions, and room-to-room comparisons recorded, the next step is assembling the tools and materials needed to rebalance the system quickly and safely.
Required items include a radiator key, adjustable spanner, lockshield wrench or adjustable spanner with tape, thermometer or infrared gun, bleed tray, pipework cloths, and a notebook.
Optional: balancing valves and PTFE tape.
Fast, step-by-step radiator balancing (quick method)
Before starting, the operator guarantees the system is safely shut down and any trapped air is bled from each radiator.
With thermostatic valves fully open, the procedure requires locating the hottest and coldest radiators and then making measured adjustments to the lockshield valves to regulate flow.
The following quick method outlines those steps in order for an efficient balance.
Preparation: safety and system shutdown
One clear step in preparing for a quick radiator balancing is to shut down and isolate the heating system safely: turn off the boiler, close motorized pumps if present, and isolate the system via service valves.
Allow components to cool. Wear gloves and eye protection. Place drip trays beneath valves.
Notify household members and post a brief safety notice near the boiler before proceeding.
Step 1 Bleed radiators to remove trapped air
Having shut down and isolated the system and allowed components to cool, the next operative step is to bleed each radiator to expel trapped air that prevents even heating.
Using a radiator key and a cloth, open the bleed valve slowly until hissing stops and water appears.
Close securely, repeat for all units from lowest to highest, then check for leaks and proper heat circulation.
Step 2 Fully open all radiator thermostatic valves
Open every thermostatic radiator valve fully so the system can circulate at maximum flow for the balancing process.
The technician guarantees each valve head is set to maximum and confirms bodies are unobstructed.
Doing so equalizes baseline flow, exposes genuine temperature differences, and prevents automatic throttling.
Record initial valve positions for later restoration and proceed once all valves are verified open and functioning.
Step 3 Identify the hottest and coldest radiators
With all valves fully open, the technician walks the system room by room to locate the hottest and coldest radiators by touch and thermometer.
He notes temperature differences, records rooms with underperforming units, and checks for cold spots at the top or bottom of each radiator.
Findings are logged in order of extremity to prioritize subsequent flow adjustments and rechecks.
Step 4 Adjust lockshield valves to control flow (fast technique)
Begin by closing each lockshield valve on radiators identified as too hot. Then reopen them incrementally until the desired temperature balance is approached. This rapid method uses small, measured turns to throttle flow rather than trial-and-error full closures.
Use a lockshield key, count turns or mark positions, adjust opposite cold radiators less, and prioritize proportional reductions to restore even circulation quickly.
Step 5 Re-check temperatures and fine-tune
After the initial adjustments, the installer moves through the circuit re-checking each radiator’s surface temperature and noting any that remain considerably hotter or colder than the chosen target; this verification is done with the same thermometer or IR gun used previously and recorded as degree differences so subsequent tweaks are precise rather than guesswork. Adjust, wait, and re-measure until temperatures align within the acceptable range.
| Radiator | Measured °C | Action |
|---|---|---|
| Living | 45 → 42 | Slight close |
| Kitchen | 50 → 46 | Reduce flow |
| Bedroom | 39 → 42 | Increase flow |
Step 6 Final system check and restart
Perform a final system check and controlled restart to confirm balance settings under normal operating conditions.
The technician closes tools, notes valve positions, then slowly restores system pressure and power.
Observe each radiator as the pump ramps: verify even warm-up, stable flow, and expected temperature differentials.
Listen for noise, watch for leaks, and document any deviations.
Adjust minimally, then monitor for one heating cycle.
Balancing using a room-by-room flow-rate approach (more precise)
The room-by-room flow-rate approach begins by measuring inlet and outlet radiator temperatures to calculate the temperature differential for each unit.
Practitioners use a radiator key to adjust valves and a thermometer to guarantee accurate readings while balancing flow.
Target temperature differentials are then set for each radiator based on room heat load to achieve even distribution.
How to measure radiator temperatures and calculate deltas
How should radiator temperatures be measured and converted into the temperature differentials needed for precise room-by-room balancing?
Temperatures are recorded at each radiator inlet and outlet after the system stabilizes. Subtract outlet from inlet to get delta T for each unit.
Use delta T plus desired room temperatures to compute required flow adjustments, targeting manufacturer or system-specified delta ranges for efficient heat distribution.
How to use a radiator key and thermometer for accuracy
Using a radiator key and a reliable thermometer together enables precise room-by-room flow adjustments by directly controlling valve positions and confirming resulting temperature changes. The technician opens/closess valves incrementally, reads temperatures at inlet, outlet, and room, then refines flow until stable deltas are achieved. Record results for each radiator.
| Room | Inlet °C | Outlet °C |
|---|---|---|
| Hall | 65 | 48 |
| Living | 62 | 45 |
| Bedroom | 58 | 42 |
Setting target temperature differentials for each radiator
Establish clear target temperature differentials (ΔT) for each radiator based on room function, insulation and desired comfort levels, typically aiming for 10–20°C across the radiator (inlet minus outlet) with living spaces at the higher end and service areas lower.
Then calculate required flow rates using radiator heat output and ΔT, adjust lockshield valves accordingly, verify with thermometer readings, and iterate until each room meets its target.
Tools, apps, and gadgets that speed up balancing
Practical balancing is accelerated by a few key tools: accurate digital thermometers for measuring radiator and room temperatures, TRV calibration tools for setting precise valve positions, and flow meters for verifying rates.
Complementary software—mobile apps and smart thermostats—can automate temperature schedules, log sensor data, and suggest valve adjustments.
Combining hardware diagnostics with automated control reduces manual trial-and-error and shortens commissioning time.
Recommended thermometers and TRV tools
Reliable thermometers and the right TRV tools make balancing radiators faster and more accurate.
Recommended items include calibrated infrared thermometers for surface checks, digital probe thermometers for inlet/outlet readings, adjustable TRV keys for precise valve control, and a flow meter clip for system balancing.
Use quality, battery-backed devices and keep spare probes to maintain consistency and speed during the process.
Apps and smart thermostats that help automate balancing
Integrating apps and smart thermostats streamlines radiator balancing by automating temperature control, providing remote diagnostics, and collecting data for iterative adjustments.
They enable zone schedules, adaptive learning, and TRV integration to equalize heat while reducing consumption.
- Remote monitoring
- Automated scheduling
- TRV coordination
- Usage analytics
Common problems and how to troubleshoot them
Common balancing attempts can still leave a radiator cold, produce noise, or fail altogether due to underlying flow problems.
The guide outlines likely causes and straightforward fixes for a cold radiator after balancing, identifies why radiators become noisy, and explains when bleeding and balancing are insufficient because of pipework or pump faults.
Readers are guided toward practical checks and when to call a professional.
Radiator stays cold after balancing causes and fixes
When a radiator remains cold after balancing, it signals an underlying issue preventing proper hot-water flow or heat transfer. Diagnosing it requires checking for airlocks, closed or clogged valves, improper lockshield adjustment, pump problems, or hydraulic imbalances in the system.
Bleed trapped air, verify thermostatic and lockshield valves are open and unobstructed, confirm pump operation and correct flow direction, and inspect for sludge or blockage restricting circulation.
Noisy radiators and flow issues
Addressing noisy radiators and flow issues requires pinpointing sources such as trapped air, high flow velocities, failing pumps, or partial blockages that create vibration, banging, gurgling, or uneven heating; systematic troubleshooting—bleeding radiators, checking valve positions and orientation, measuring pump speed and flow direction, and inspecting for sludge or scale—quickly narrows the cause and guides appropriate fixes.
| Fear | Relief | Action |
|---|---|---|
| Bang | Warmth | Bleed |
| Gurgle | Calm | Adjust |
| Rattle | Comfort | Inspect |
When bleeding and balancing don’t work pipework and pump issues
If bleeding radiators and balancing valves fail to restore reliable heat, attention should turn to the circulation system: pipework faults and pump issues are frequent culprits that produce weak flow, noise, or uneven temperatures.
Check for trapped air in loops, collapsed or blocked pipes, closed or partially closed zone valves, and a seized or improperly sized pump.
Call a qualified engineer for repairs or replacement.
When to call a professional
If radiators remain cold after basic checks, make strange noises, or there are repeated leaks, a plumber or heating engineer should be contacted.
A professional can diagnose system-wide flow issues and recommend corrective measures such as valve adjustments, balancing, or a powerflush to remove sludge.
Homeowners can expect a systematic assessment, targeted repairs or cleaning, and a written summary of work and recommendations.
Signs you need a plumber or heating engineer
Warning signs that a radiator system needs professional attention often appear suddenly or persist despite simple adjustments.
Persistent cold spots, uneven room temperatures, noisy pipes beyond minor kettling, visible leaks or corrosion, repeated thermostat failures, significant pressure drops, or boiler cycling indicate underlying faults.
If DIY balancing and bleeding fail to restore performance, a qualified plumber or heating engineer should be contacted promptly.
What to expect from a professional balancing or powerflush
Expect a professional visit to begin with a clear diagnosis: the engineer will inspect the boiler and system controls, check radiator temperatures and flow rates, and look for leaks, corrosion or airlocks that simple bleeding did not resolve.
They may then perform hydraulic balancing, adjust valves, and, if sludge or scale persists, carry out a powerflush, followed by inhibitor dosing and a final performance check.
Energy-saving tips after balancing
After balancing is complete, attention turns to setting TRVs and the central thermostat to maximise savings while maintaining comfort.
A clear maintenance schedule for bleeding, valve checks and system flushing helps preserve balance and efficiency over time.
Regular monitoring and prompt minor adjustments prevent energy waste and extend the benefits of the initial balancing.
Setting TRVs and central thermostat for optimal savings
Once radiators are balanced, adjusting thermostatic radiator valves (TRVs) and the central thermostat fine-tunes heat distribution and maximizes savings:
1) Set TRVs lower in unused rooms to reduce flow.
2) Program the central thermostat to a lower setback at night and when away.
3) Use a single room thermostat for common areas, avoiding overheating.
4) Monitor bills and tweak settings monthly.
Maintenance schedule to keep radiators balanced and efficient
Regularly scheduled maintenance preserves radiator balance and efficiency, preventing performance drift and wasted energy.
Inspect valves, bleed radiators, and check for leaks quarterly.
Annually, flush the system, test the pump and balance settings, and replace worn components.
Record adjustments and temperatures to spot trends.
Promptly address corrosion or sludge.
Consistent upkeep sustains savings and reliable, even heating.
Quick checklist to balance radiators in under an hour
Begin by gathering basic tools: a radiator key or adjustable spanner, a thermometer or infrared gun, and a notepad for valve settings.
Then follow a focused checklist to rebalance quickly, recording temperatures and adjusting flow systematically.
- Isolate and label radiators.
- Bleed trapped air.
- Set TRV or lockshield to target differential.
- Recheck and fine-tune temperatures.
Conclusion
Balancing radiators restores home comfort and trims energy waste, and the homeowner can often complete it faster than a lightning bolt crosses the sky. By following quick and precise methods, using simple tools or helpful apps, and troubleshooting common issues, most rooms reach even warmth and lower bills. If problems persist or complex valves and pumps are involved, a professional should be engaged to guarantee system longevity and peak efficiency.