How to Restore a Clawfoot Tub: Step-by-Step Guide to Refinish, Repair, and Re-glaze
Restoring a clawfoot tub involves several essential steps: start by inspecting the tub and cleaning it thoroughly, then isolate any plumbing. Next, strip the old finish and address any rust or loose enamel. Fill small chips and hairline cracks with epoxy or acrylic, sand them smooth, and apply a corrosion-inhibiting primer. Follow up with multiple thin coats of enamel or epoxy, allowing each to cure properly. Finally, reinstall the hardware with the correct seals. Regular gentle maintenance will help preserve your work. For a detailed step-by-step guide and troubleshooting tips, continue reading.
Overview of Clawfoot Tub Restoration
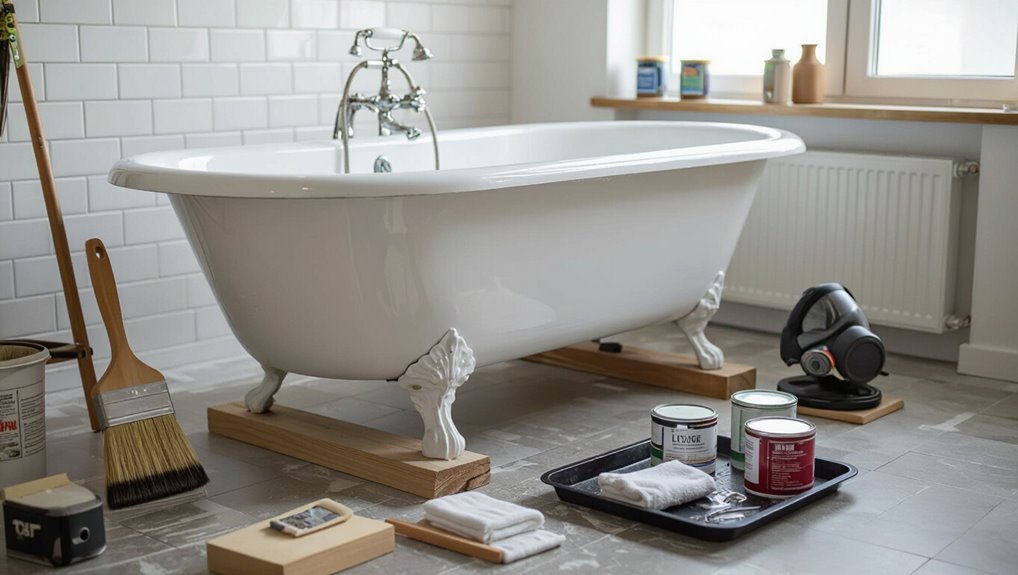
The overview compares when restoration is practical versus full replacement, considering factors like structural damage, cost, and historical value.
It summarizes typical outcomes—such as cosmetic renewal and a refinished lifespan of several to 10+ years depending on materials and care.
It also notes key safety concerns and the potential need for permits or professional inspection before work begins.
When to restore versus replace a clawfoot tub
When is a clawfoot tub worth restoring rather than replacing?
Restoration is advisable when structural integrity is sound, cast-iron or solid material remains, and damage is surface-level—chips, worn glaze, minor rust.
Historic value, unique design, or budget constraints favor refinishing.
If plumbing compatibility and cost of professional how to restore a clawfoot tub are reasonable, restoration preserves character and reduces waste.
Common restoration outcomes and expected lifespan after refinishing
Outcomes after refinishing a clawfoot tub typically range from cosmetically refreshed surfaces to near-original functionality depending on materials and methods used.
Restored tubs often show sealed enamel, improved gloss, and reduced minor chips; longevity varies: DIY kits last 3–7 years, professional reglazing 8–15+ years with proper care.
Structural repairs determine ultimate durability; maintenance influences lifespan considerably.
Safety considerations and required permits
Following cosmetic and structural restoration considerations, attention must shift to safety and permits to confirm work complies with local codes and protects occupants.
Contractors should verify required permits for plumbing, electrical, and structural changes.
Asbestos, lead paint, and chemical fume hazards demand testing and abatement.
Adequate ventilation, PPE, and waste disposal prevent exposure.
Document approvals and inspections to avoid fines and confirm liability coverage.
Tools, Materials, and Costs
This section lists the essential tools for refinishing, repairing, and reglazing a clawfoot tub and compares common materials such as epoxy, acrylic, enamel, and rust inhibitors.
It outlines typical cost differences between a DIY approach and hiring a professional, including kit prices, materials, and labor.
Guidance is provided for choosing between a DIY kit and a pro based on skill level, desired longevity, and budget.
Essential tools for refinishing, repairing, and reglazing
Gathering the right tools and materials guarantees a smoother, safer refinishing, repair, or reglazing project for a clawfoot tub.
Essential items include respirators, safety goggles, and gloves; orbital sander with assorted grits; sanding blocks and abrasive pads; chemical strippers and neutralizers; rust remover and wire brushes; epoxy filler and applicators; paint sprayer or brushes; masking supplies; drop cloths; cleaning solvents; and basic hand tools.
Materials and product options (epoxy, acrylic, enamel, rust inhibitors)
Choose materials based on the tub’s condition and the desired finish: epoxy systems deliver the most durable, chip- and stain-resistant surface for heavily worn or cast-iron bowls; acrylic repair kits work well for minor chips and thin cast or fiberglass tubs; enamel-based refinishes provide a traditional gloss but may require more prep and have shorter longevity; and dedicated rust inhibitors and metal primers are essential wherever corrosion or bare metal is exposed.
Select high-quality primers, two-part epoxies, acrylic fillers, non-sanding enamels, and corrosion inhibitors.
Match product VOC levels to ventilation constraints and follow manufacturer pot-life, curing, and application recommendations for best longevity.
Typical cost breakdown: DIY vs. professional refinishing
A clear cost comparison separates DIY refinishing from hiring a professional: DIY typically requires upfront purchases of tools (sanders, respirators, spray equipment or brushes), materials (primer, epoxy or enamel, fillers, masking supplies), and disposal supplies, totaling roughly $100–$400 depending on product quality and whether specialized equipment is rented.
Professional refinishing bundles labor, materials, surface prep, and warranty, with typical prices ranging from $400–$1,200 for standard cast-iron clawfoot tubs and higher for complex repairs or high-end coatings.
DIY saves labor but adds time, risk, and potential redo costs; professionals offer faster, guaranteed results and cover cleanup, increasing overall expense.
How to choose between DIY kits and hiring a pro
When weighing DIY kits against hiring a professional, cost, required tools, and material quality are the decisive factors.
DIY suits simple chips and budget constraints: minimal tools, epoxy or lacquer kits, lower upfront cost, but variable durability and finish.
Professionals provide specialized equipment, industrial-grade coatings, warranty, and higher labor fees—recommended for extensive damage, structural repairs, or when guaranteed longevity and flawless appearance are priorities.
Preparing the Work Area and Tub
Before any refinishing begins, the work area and tub must be readied by removing or protecting plumbing fixtures and the drain assembly and by temporarily isolating the tub from the floor and adjacent walls.
Adequate ventilation, dust control measures, and appropriate personal protective equipment should be in place to safeguard occupants and prevent contamination.
A thorough surface inspection should then identify chips, scratches, rust, cracks, and areas of porcelain loss to guide repair priorities.
How to remove or protect plumbing fixtures and drain assembly
Begin by isolating the tub from water and electricity so work proceeds safely: shut off the main water supply, open nearby faucets to relieve pressure, and switch off any electrical circuits serving bathroom lighting or heaters.
Drain lines, disconnect supply hoses at shutoffs, and remove handles and spouts. Label and bag small parts.
Protect remaining fixtures with tape and plastic; plug the drain to keep debris out.
Proper ventilation, dust control, and personal protective equipment
Make certain the work area is well-ventilated, dust is contained, and appropriate personal protective equipment (PPE) is used to minimize inhalation and contact hazards during tub restoration.
Open windows, run exhaust fans, and use a HEPA air scrubber. Seal doorways with plastic sheeting and use a shop vacuum with HEPA filter.
Wear respirator, safety goggles, gloves, and disposable coveralls.
Surface inspection: identifying chips, scratches, rust, cracks, and porcelain loss
A thorough surface inspection identifies chips, scratches, rust, hairline cracks, and areas where porcelain has been lost so the scope of repair and required materials can be accurately determined.
The rest of the process documents damage size, depth, and location with photos, marks repair priority, and distinguishes cosmetic blemishes from structural defects.
Note flaking enamel, underlying cast-iron corrosion, and seam separations.
How to temporarily remove or protect the tub from the floor and surrounding walls
Protecting the tub and surrounding surfaces starts with isolating the work area and creating stable temporary supports so the fixture can be lifted, shifted, or left in place without causing damage.
Remove trim, shut off water, and drain.
Pad floor and walls with contractors’ felt or rosin paper.
Use foam blocks, adjustable cribbing, or floor sliders to support feet.
Secure plumbing and cover exposed edges.
Surface Repair Steps
The surface repair phase begins with thorough cleaning and degreasing to guarantee adhesion and reveal underlying damage.
Rust must be removed and old finishes etched away before chips, pits, and hairline cracks are filled with appropriate fillers, epoxies, or porcelain repair compounds.
Final sanding and feathering of edges create a smooth, uniform base for priming and refinishing.
Cleaning and degreasing the tub surface
Begin by removing loose dirt, soap scum, and any residual oils with a soft-bristled brush and warm water to reveal the true condition of the enamel.
Apply a non-abrasive degreaser, allow dwell time per product instructions, then rinse thoroughly.
Repeat as needed until no film remains.
Dry completely with lint-free cloths and allow air-drying before proceeding to repair or recoat.
Removing rust and etching old finishes
With the surface fully clean and dry, attention shifts to addressing rust spots and worn finishes that compromise adhesion.
Rust is removed with wire brushes, rust converters, or abrasive pads down to bare metal.
Old glossy coatings are scuffed or chemically etched per product instructions to promote bonding.
All residues are wiped away and the area allowed to dry before primer or subsequent treatments.
Repairing chips and pits: fillers, epoxy, and porcelain repair compounds
Assess areas of chips and pits to determine size, depth, and whether the damage penetrates to bare metal. Small surface nicks call for porcelain repair compounds. Deeper gouges require epoxy or metal-filled fillers, and rusted-through spots may need patching or welding before cosmetic repairs.
Clean and de-grease, remove loose material, apply chosen filler in thin layers, sand smooth between coats, then prime and match topcoat for durable finish.
Addressing hairline cracks and structural damage
To repair hairline cracks and any underlying structural damage, first determine whether the fissures are superficial or extend into the tub’s substrate by cleaning the area, drying thoroughly, and inspecting under good light or with a magnifier.
Surface crazing limited to the glaze can usually be treated with epoxy or specialty crack-fillers, while cracks that reach the base metal, show movement, or have surrounding rust require reinforcement—such as metal patching, fiberglass backing, or welding—before cosmetic restoration.
After reinforcement, test stability, remove corrosion, apply appropriate filler and primer, then proceed to finish.
Sanding and feathering edges for a smooth base
Begin by smoothing the repaired area until the changeover between filler and surrounding surface is nearly invisible, using progressively finer abrasives to eliminate ridges and create a uniform plane.
Work outward in overlapping strokes, feathering edges to blend levels.
Inspect under directional light, rework any high or low spots, then finish with very fine grit for a satin, paint-ready surface free of scratches.
Priming, Reglazing, and Refinish Methods
This section compares common refinishing options—brush-on enamel, spray-applied epoxy, acrylic liners, and professional reglaze—and outlines how each affects durability and finish quality.
It then explains proper primer selection and application to guarantee long-lasting adhesion before describing step-by-step brush or spray topcoat techniques, recommended coat counts, drying and cure times.
Finally, it covers tips for achieving a smooth, even finish and the common defects to watch for and prevent.
Overview of refinishing methods: brush-on enamel, spray-applied epoxy, acrylic liners, and professional re-glaze
A rundown of common refinishing options helps homeowners weigh cost, durability, and skill required.
Brush-on enamel suits DIY touch-ups but fades sooner.
Spray-applied epoxy offers tougher, smoother coverage for experienced applicators.
Acrylic liners provide immediate, durable resurfacing at higher expense and altered aesthetics.
Professional re-glaze delivers best finish and longevity, costing more but minimizing DIY risk and labor.
How to apply primer correctly for long-lasting adhesion
After weighing refinishing options, attention turns to primer application, which determines how well new coatings bond and how long they last.
The surface must be cleaned, deglossed, and sanded to profile. Mix and apply a manufacturer-recommended primer evenly, avoiding runs and pooling.
Allow specified flash and cure times, control temperature and humidity, and inspect for full coverage before proceeding to topcoat preparation.
Step-by-step spray or brush application of topcoat
Begin by confirming the primed surface is fully cured, clean, and at the recommended temperature and humidity before applying the topcoat; consistent conditions and proper surface profile are essential for adhesion and an even finish.
Mask surrounding areas.
For spraying: maintain even overlap, correct nozzle and pressure, and keep wet edges.
For brushing: use quality brushes, long smooth strokes, and avoid back-brushing.
Inspect for defects.
Number of coats, drying times, and cure time recommendations
Determine the proper number of coats and adhere to specified drying and cure times for each method—priming, reglazing, or full refinish—to guarantee durability and a consistent finish; manufacturers’ instructions provide exact intervals, but typical practice is 1–2 primer coats, 2–3 topcoats for reglazing, and 3–4 coats for a complete refinish.
Tack times between coats range from 10 minutes to several hours depending on product and temperature, and full cure often requiring 24–72 hours for light use and up to 7 days for maximum hardness.
Follow ambient temperature and humidity guidance, allow recommended flash times, and avoid premature use until full cure is achieved.
How to achieve a smooth, even finish and avoid common defects
Achieve a smooth, even finish by controlling surface preparation, application technique, and environmental conditions to prevent common defects such as runs, orange peel, fisheye, and uneven gloss.
Remove contaminants, sand to specified grit, and tack‑cloth. Use proper thinning, consistent spray distance, and overlapping passes.
Maintain recommended temperature and humidity. Allow prescribed flash and cure times.
Inspect and wet‑sand between coats for uniformity.
Replacing or Repairing Hardware and Drains
Attention should turn to the tub’s hardware and drains, starting with an assessment of clawfoot feet for structural damage or worn finishes and whether they require replacement or refinishing.
Next, the drain and overflow assembly should be inspected, cleaned, and either repaired or replaced following manufacturer steps to restore proper function.
Finally, fixtures must be reinstalled with appropriate gaskets and sealant, torqued to spec, and tested for a watertight seal.
When to replace clawfoot feet and how to refinish them
Assess the condition of clawfoot feet before committing to a full restoration: loose joints, severe pitting, cracks through the casting, or irreparable plating damage indicate replacement, while superficial corrosion, worn finish, or minor dents are usually candidates for refinishing.
Remove feet, document mounting hardware, strip old plating or paint, treat corrosion, fill pits, sand, prime, and replate or apply durable metallic finish; reinstall with new fasteners.
Drain and overflow repair or replacement steps
After addressing the feet, attention turns to the drain and overflow assembly, where leaks, corrosion, and worn seals are common failure points that compromise the tub’s function.
Inspect components, remove old fittings, clean mating surfaces, replace gaskets and corroded parts, and use appropriate thread sealant.
Test for leaks before cosmetic reassembly, and document part sizes for future maintenance or replacement.
Reinstalling fixtures and ensuring a watertight seal
Begin by aligning all repaired or replacement fixtures—spouts, taps, drain assemblies, and overflow plates—with their mating surfaces to confirm correct fit and orientation before sealing.
Apply plumber’s putty or silicone uniformly, tighten fittings to manufacturer torque, and install new gaskets.
Check threaded connections with thread sealant where appropriate.
Reconnect supply lines, test for leaks under pressure, and retighten as needed until fully watertight.
Troubleshooting and Common Problems
Common restoration issues include runs, orange peel texture, and uneven gloss that require targeted sanding and recoat techniques.
Bubbling, peeling, or poor adhesion often trace back to surface contamination, improper curing conditions, or incompatible products and must be diagnosed before corrective steps.
Minor chips and scratches can be repaired without full refinishing, but attention to environmental factors like temperature and humidity is essential for proper cure and long-term finish.
Fixing runs, orange peel texture, and uneven gloss
When runs, orange-peel texture, or uneven gloss appear in a clawfoot tub’s finish, they signal application or environmental issues that require targeted correction.
Identifying whether the problem stems from improper thinning, incorrect spray technique, dust contamination, or inadequate drying time directs the appropriate fix.
Correct by sanding smooth, cleaning thoroughly, adjusting spray settings and material viscosity, then recoat under proper temperature and humidity for uniform appearance.
Dealing with bubbling, peeling, or poor adhesion
Peeling, bubbling, or poor adhesion in a clawfoot tub finish indicates a breakdown between the coating and substrate that can result from surface contamination, inadequate surface preparation, incompatible products, or trapped moisture.
Diagnosing the root cause—by noting bubble size and location, adhesion pull tests, and substrate type—guides whether the repair requires spot sanding and cleaning, complete strip and re-prep, or a different primer/topcoat system to restore lasting adhesion.
Small isolated blisters often clean and recoat; widespread lifting mandates full removal and proper etch/prime before refinishing.
Repairing later chips and scratches without full refinishing
Address small chips and scratches promptly to prevent moisture intrusion and further finish failure.
Clean area, sand edges lightly, and apply an appropriate tub touch-up epoxy or enamel filler in thin layers.
Blend with fine sanding between coats, then polish to match sheen.
For hairline cracks or exposed metal, use corrosion-inhibiting primer first.
Test in an inconspicuous spot before full application.
How environmental factors affect cure and long-term finish
Although proper materials and technique are essential, ambient conditions during cure play a decisive role in adhesion and long-term durability. High humidity, low temperatures, dust, and poor ventilation can slow or prevent proper hardening, promote blistering or tackiness, and encourage corrosion under the finish.
Controlled temperature, stable humidity, clean air, and adequate ventilation guarantee full cure, prevent contaminants, and prolong gloss, adhesion, and resistance to chipping.
Maintenance After Restoration
After restoration, routine preservation is essential and should cover recommended gentle cleaners, a regular maintenance schedule, and products compatible with the tub’s finish.
Preventive measures—such as using bath mats, avoiding abrasive tools, and controlling water chemistry—help minimize future damage.
Small blemishes can be managed promptly with appropriate touch-up kits and clear instructions for spot repair.
Recommended cleaning products and routines to preserve finish
Maintain the restored finish with a simple, consistent routine using gentle, non-abrasive cleaners and soft tools to prevent wear.
Use pH-neutral liquid cleaners, mild dish soap diluted in warm water, or dedicated tub cleaners labeled non-abrasive. Apply with microfiber cloths or soft sponges, rinse thoroughly, and dry with a soft towel.
Clean weekly; address soap scum promptly to avoid buildup.
Preventive measures to avoid future damage
Beyond regular cleaning, proactive steps will help preserve the restored finish and prevent costly repairs.
After restoration, maintain stable humidity and temperature, avoid abrasive tools and harsh chemicals, use nonstick bath mats sparingly, and guarantee proper drainage to prevent standing water.
Inspect caulking, fixtures, and plumbing periodically, tighten loose fittings, and address minor leaks immediately to prevent enamel deterioration and corrosion.
How to touch up small blemishes
Keep a small kit on hand for quick touch-ups so minor chips and scratches never worsen into larger problems.
The homeowner inspects periodically, cleans blemishes, sands lightly, applies matching enamel touch-up or epoxy with a fine brush, and smooths edges after curing.
Polish blended areas and seal with a thin clear coat.
Record materials used for future consistency.
When to Hire a Professional
When restoration reveals structural cracks, extensive rust-through, or persistent leaks, a professional assessment is recommended.
Homeowners should ask contractors about specific repair methods, licensing, references, and request detailed, itemized quotes to compare scope and cost.
Expected protections include written estimates, clear timelines, and warranties or guarantees covering workmanship and materials.
Signs the damage requires professional repair or replacement
Assess visible and functional issues to determine whether a clawfoot tub needs professional repair or replacement.
Deep rust, extensive pitting, hairline fractures, or structural cracks indicate replacement.
Persistent leaks, compromised support or floor damage, and recurring glaze failure despite refinishing require expert intervention.
When repairs exceed cosmetic scope or safety is uncertain, a professional evaluation prevents further damage and guarantees proper restoration or safe replacement.
Questions to ask contractors and how to evaluate quotes
How should a homeowner vet contractors and compare bids for a clawfoot tub restoration? A homeowner checks licenses, reviews portfolios of similar restorations, requests written itemized estimates, and verifies insurance and references.
Compare timelines, materials, and cleanup policies. Note responsiveness and professionalism; lower price isn’t always best.
- Worn enamel repair photos
- Itemized labor and materials
- Timeline calendar
- Signed contract and proof of insurance
Expected warranties and guarantees from pros
Although some homeowners tackle minor chips and refinishing with DIY kits, hiring a professional for a full clawfoot tub restoration brings clear expectations about warranties and performance guarantees.
Professionals typically offer limited warranties covering adhesion, finish durability, and color for one to five years, plus workmanship guarantees.
Written contracts should specify coverage, exclusions, repair timelines, and dispute resolution to protect homeowner investments.
Comparative Summary of Restoration Options
A brief comparison clarifies the trade-offs among DIY kits, professional reglaze, and acrylic liners across durability, cost, time, and key pros/cons. The table below summarizes the typical outcomes to help determine which route aligns with goals and budget. Further discussion will reference these points when weighing repair needs versus long-term value.
| Feature / Option | Summary |
|---|---|
| Durability | DIY: short–medium; Professional reglaze: medium–long; Acrylic liner: long |
| Cost | DIY: low; Professional reglaze: medium; Acrylic liner: high |
| Time / Pros & Cons | DIY: fastest/least durable; Reglaze: moderate time/professional finish; Liner: longer install/high durability, alters original tub feel |
DIY kits vs. professional reglaze vs. acrylic liner: durability, cost, time, pros/cons
When choosing between DIY refinishing kits, professional reglazing, and acrylic liners, homeowners must weigh trade-offs in durability, cost, and time to find the best fit for their budget and long-term goals.
DIY kits are cheapest and quick but less durable and prone to peeling.
Professional reglazing offers a durable, smooth finish at moderate cost and downtime.
Acrylic liners are most expensive, highly durable, and require precise fitting.
Project Timeline Checklist
A concise project timeline helps track each stage from surface prep through final cure and safe re-use.
It should list critical drying and wait times so the tub is not used prematurely. The checklist serves as a quick reference to keep the restoration on schedule and avoid costly mistakes.
- Surface cleaning and masking (day 1)
- Repair and filler cure times (24–48 hours)
- Primer, coating, and recommended flash times (hours between coats)
- Full chemical cure and safe first-use window (typically 48–72 hours)
Step-by-step timeline from prep to final cure and re-use
Outline the restoration as a timed sequence that maps each task to its typical duration and required drying or cure intervals.
Remove fixtures and mask areas (2–4 hours).
Strip old finish, sand and clean (1–2 days).
Repair chips and fill seams (2–12 hours plus cure).
Prime and recoat (1–2 days with between-coat drying).
Final cure before reinstallation and gentle use (several days).
Quick reference for drying and wait times before tub use
Several clear wait periods govern safe return to use after refinishing a clawfoot tub, each tied to the material and product used.
Allow 1–2 hours for tack-free surface drying.
Wait 24–48 hours before light handling.
You should wait 72 hours before filling partially, and 7 days for full water immersion after standard epoxy or acrylic recoat.
Porcelain enamel restorations may require 14 days for full cure; follow manufacturer specifics.
Conclusion
Restoring a relic like a clawfoot tub rewards patient planning and practiced precision. From prepping the porcelain to patching pits and polishing new glaze, the process pairs purpose with polish. Homeowners weigh cost, care, and craftsmanship—choosing DIY diligence or professional prowess. Routine rinsing and respectful maintenance preserve pristine porcelain. Ultimately, thoughtful techniques transform tired tubs into timeless treasures, celebrating careful conservation and confident, consistent care for decades of durable, dazzling delight.