How to Cut a Countertop for a Sink: Step-by-Step Template, Tools & Tips
To cut a countertop for a sink, start by carefully measuring the sink and using the manufacturer’s template. Secure the countertop, protect adjacent surfaces, and choose the right tools: a jigsaw or router for wood and laminate, or a wet diamond blade for stone or quartz. Follow specific cutting techniques to prevent chipping, smooth and seal the edges, install mounting hardware, and check for leaks. For detailed steps, tool recommendations, and troubleshooting tips, continue reading.
Overview of Cutting a Countertop for a Sink
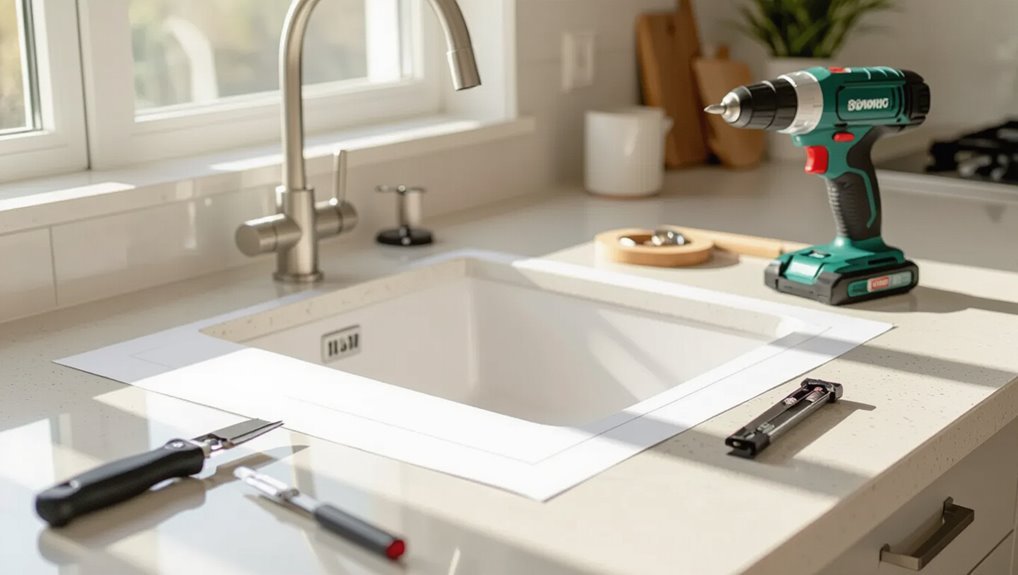
Deciding whether to cut a countertop oneself or hire a professional depends on skill level, tools available, and the material involved.
Different sink styles—drop-in, undermount, farmhouse, and integrated—require distinct cut shapes, edge treatments, and support considerations.
Countertop materials such as laminate, solid surface, quartz, granite, and butcher block vary widely in cutting difficulty and tooling, which influences the choice to DIY or call a pro.
When to cut a countertop yourself vs hiring a pro
When is a homeowner best suited to cut a countertop for a sink, and when should a professional be called?
A confident DIYer with proper tools, steady measuring skills, and experience with materials can learn how to cut countertop for sink safely.
Hire a professional for unfamiliar materials, complex templates, plumbing alterations, warranty concerns, or when precision and speed outweigh DIY cost savings.
Types of sinks and how they affect the cut (drop-in, undermount, farmhouse, integrated)
After weighing whether to tackle the cut personally or hire a pro, the next consideration is the sink type, since each style dictates different cut dimensions, edge treatments, and mounting details.
Drop-in sinks need a precise rim groove; undermounts require exact underside allowances and support; farmhouse (apron) sinks demand front overhang planning and reinforcement; integrated sinks eliminate rims but require seamless routing and precise alignment.
Typical materials and difficulty levels (laminate, solid surface, quartz, granite, butcher block)
Material choice determines both the tools required and the skill level needed for cutting a countertop for a sink.
Laminate is easiest—routers and jigs suffice.
Solid surface requires finer bits and sanding.
Quartz and granite demand wet saws, diamond blades, and professional experience.
Butcher block needs standard saws and sealing.
Each material dictates cutting speed, dust control, and finishing technique.
Quick Answer: Standard Steps to Cut a Sink Hole
A concise checklist outlines measuring and marking the cutout, cutting the opening, and finishing the edges and seal.
An estimated time for a typical DIYer is one to three hours depending on material and complexity.
The skill level ranges from basic for laminates to intermediate for stone or solid-surface countertops.
Summary checklist of the essential steps
Several clear, sequential steps guide cutting a sink hole: measure and mark the outline, select and set the appropriate blade or bit for the countertop material, drill starter holes at corners if needed, cut along the marked line with steady control, smooth edges and remove debris, and finally dry-fit the sink before sealing and securing it.
Checklist: verify measurements, choose tools, protect surrounding surfaces, clamp workpiece, wear PPE, clean up.
Estimated time and skill level for a DIYer
With the checklist completed, time and skill expectations help a DIYer plan the job: a basic laminate or solid-surface countertop typically requires 1–2 hours for layout and cutting by someone with intermediate comfort using a jigsaw and drill, while stone, quartz, or stainless-steel counters demand specialized blades, slower cutting, and may take 3–6 hours or more plus experience with wet cutting or hire of a pro-grade saw.
Experienced DIYers can handle minor adjustments; beginners should allow extra time or consult a professional.
Tools and Materials Needed
The section lists the essential tools—jigsaw, router, hole saw, template kit, drill, clamps, and tape measure—alongside material-specific equipment such as a diamond blade for stone and a cold saw for quartz.
It also covers safety gear and supplies, including safety glasses, a respirator, supports, and masking tape.
Recommended brands and quality levels are noted to help readers choose durable, appropriate tools for the job.
Mandatory tools (jigsaw, router, hole saw, template kit, drill, clamps, tape measure)
Begin by assembling the essential tools: a jigsaw for curved and relief cuts, a router for clean edge profiling and drop-in sink recesses, a hole saw for faucet and fixture holes, a template kit to guide accurate cutting, a drill for starter holes, clamps to secure the template and countertop, and a tape measure for precise layout.
Each tool guarantees accuracy, safety, and efficient workflow when marking and cutting sink openings.
Material-specific tools (diamond blade for stone, cold saw for quartz)
Select tools that match the countertop material to confirm clean, safe cuts: a diamond blade or wet saw for natural stone and a cooled, abrasive-tipped blade or industrial cold saw designed for engineered quartz.
Use blades rated for the specific stone type and thickness, verify compatibility with power tools, and plan staged passes to reduce chipping.
Proper tool selection preserves edges and speeds precise cuts.
Safety equipment and supplies (safety glasses, respirator, supports, masking tape)
Wear appropriate personal protective equipment and gather essential supplies before cutting to minimize injury and material damage.
Safety glasses shield eyes from chips; a respirator prevents inhaling dust.
Use sturdy supports or sawhorses to stabilize the countertop and prevent vibration.
Apply masking tape over cut lines to reduce chipping and mark measurements.
Keep clamps, gloves, and a first-aid kit nearby for added safety.
Recommended brands and quality levels
With safety gear and proper supports in place, attention turns to choosing the right tools and materials—brands and quality can considerably affect the ease and outcome of cutting a countertop.
Reliable options include Bosch or DeWalt saws, Diamond blades from MK Diamond or Freud, and quality laminate cutters.
Prioritize durability, warranty, and blade grit for material compatibility.
- Power tools
- Blades
- Hand tools
Preparing the Workspace and Countertop
Before cutting, the installer measures and marks the sink location and cutout lines with precision, using the manufacturer’s template or a custom one secured to the countertop.
Cabinet framing, clearances, and plumbing obstructions are checked to confirm the sink will fit and drains and supply lines clear without modification.
Finished surfaces and adjacent areas are protected with drop cloths and tape to prevent damage during cutting.
Measuring and marking the sink location and cutout lines
Accurate measurement and careful marking establish the foundation for a successful sink installation, ensuring the cutout fits the sink precisely and aligns with plumbing and cabinetry.
Measure twice: overall sink dimensions, flange offset, and required edge setbacks.
Transfer centerlines to the countertop, confirm symmetry with surrounding surfaces, and trace the template or sink outline.
Mark drill points for starter holes and double-check measurements before cutting.
Checking cabinet framing, clearances, and plumbing obstructions
Several checks confirm the countertop cutout will fit both the cabinet and existing plumbing:
Inspect cabinet framing for obstructing rails, braces, or center stiles.
Measure from front edge to face frame, verifying sink flange clearance and faucet reach.
Confirm toe-kick and shelf positions won’t interfere.
Locate drain, supply lines, and trap to guarantee adequate clearance and access before cutting.
Protecting finished surfaces and surrounding areas
With cabinet framing and plumbing confirmed, attention shifts to protecting finished surfaces and the surrounding area to prevent damage during cutting.
Cover adjacent countertops, appliances, and floors with drop cloths, cardboard, or rosin paper. Mask edges and backsplash with painter’s tape.
Clamp sacrificial strips along cut lines to reduce chipping. Keep a vacuum and damp cloth handy to collect dust and debris promptly.
Creating and securing a template (manufacturer template vs custom template)
Begin by choosing the appropriate template—either the manufacturer’s paper template that matches the sink model or a custom template sized and shaped to the actual sink and countertop opening.
Then inspect it for accuracy against the sink and cabinet layout. Center and align the template, verify cutouts for faucet and drains, clamp or tape it firmly, and transfer the outline with a fine marker before removing the template.
Step-by-Step Cutting Procedure
The procedure begins with verifying the template dimensions and confirming the sink and appliance fit.
Next, the template is transferred to the countertop—centered, aligned, and clearly marked—before drilling starter holes and making pilot cuts.
Cutting techniques vary by material, followed by smoothing, sanding, and finishing the cut edges to guarantee a proper fit and clean appearance.
Verifying template dimensions and appliance fit
Before any cutting begins, confirm the template’s dimensions against the sink and surrounding cabinetry to guarantee a precise fit.
Measurements should include rim overhang, flange width, and clearance for faucets and fixtures.
Verify appliance depth and base cabinet interior space.
Cross-check cutout size with manufacturer tolerances and mock-fit the template to detect obstructions or needed adjustments before any markings or sawing occur.
Transferring the template to the countertop (centering, alignment, marking)
Measure and center the sink template on the countertop surface using consistent reference points—typically the cabinet face, centerline, or adjacent appliance—to guarantee accurate placement.
Secure the template with non-slip tape or temporary adhesive. Verify equal overhangs and clearances.
Use a pencil to trace the cut line and secondary reference marks (front/back, left/right).
Double-check measurements before proceeding to cutting.
Drilling starter holes and making pilot cuts
Begin by drilling a starter hole inside the traced cutout at each corner using a drill bit sized to accept the jigsaw blade or hole saw for larger cuts.
Insert the jigsaw, follow the marked line steadily, keeping the base plate flush. Make short pilot cuts along tight curves, backing out to clear debris and check alignment.
Wear eye and ear protection.
Cutting techniques by material
The article now outlines specific cutting procedures for common countertop materials, noting how tools and techniques vary for laminate, plywood, solid surface, engineered stone, natural stone, and butcher block.
Each material requires distinct blades, support methods, and safety precautions to achieve clean, accurate sink cutouts.
Step‑by‑step instructions will follow to match tool choice and technique to each surface.
Cutting laminate and plywood counters
When cutting laminate-covered plywood for a sink, precise layout and the right tools prevent chipping and guarantee a clean fit. Mark the opening on the countertop face, transfer those lines to the underside, and score the laminate along the cut lines before sawing.
Use a fine-tooth carbide blade in a circular saw or jigsaw, cut slowly from the underside, support the workpiece, and clean edges with light sanding.
Cutting solid surface (acrylic/Corian)
Cutting solid surface countertops—such as acrylic or Corian—requires steady, controlled techniques and tools suited to the material’s homogeneous, non-porous composition.
Mark the sink outline and drill starter holes at corners.
Use a fine-tooth carbide or diamond-tipped blade in a plunge or circular saw, cutting slowly to prevent chipping.
Smooth edges with sanding pads and clean dust frequently for a seamless finish.
Cutting engineered stone (quartz) and natural stone (granite/soapstone)
Moving from solid surface materials to stone introduces much harder, more brittle substrates that require different tools, stronger blades, and water for dust suppression and heat control.
Use a wet saw or angle grinder with continuous-rim diamond blade, clamp work securely, mark cut lines, score and cut slowly with steady feed.
Support slabs, wear respirator, eye and hearing protection, and check blade cooling frequently.
Cutting butcher block or wood countertops
Begin by measuring and marking the sink opening and any edge profiles on the butcher block, transferring dimensions precisely and confirming layout against cabinet clearances and plumbing.
Use a straightedge and pencil; score cut lines. Cut with a circular saw and fine-tooth blade, finishing curves or internal cuts with a jigsaw.
Clamp securely, cut slowly to prevent tear-out, then sand and seal exposed end grain.
Smoothing, sanding, and finishing the cut edges
After the sink opening is removed, the exposed countertop edges require careful smoothing to guarantee a clean, durable finish.
The installer files rough spots, then sands progressively with 80→120→220 grit for wood or appropriate abrasives for stone.
Edges are chamfered or rounded slightly, dust removed, and a compatible sealer, oil, or epoxy applied to protect against moisture and wear.
Dry-fitting the sink and adjusting the cutout
With the edges finished and sealed, the sink is set into the cutout for a dry fit to verify alignment and clearances.
Inspect gaps, seating, and overlaps; mark tight spots. Remove the sink, trim or sand the countertop where necessary, recheck fit, and confirm plumbing and mounting hardware clearances.
Repeat until the sink rests flush, stable, and centered before permanent installation.
Undermount vs Drop-In Sink Installation Considerations
The choice between undermount and drop-in sinks affects how the countertop edge is finished and what support is required for the bowl.
Drop-in installations require adequate lip clearance and a reliable seal, while undermounts need reinforced substrate and precise mounting hardware locations beneath the countertop.
Proper planning for reinforcement and fastener placement prevents sagging and guarantees a watertight joint.
Edge finishing and support requirements for undermount sinks
When planning an undermount sink installation, attention must center on precision edge finishing and robust support to prevent stress on the countertop and secure a water-tight seal.
Clean, smooth cut edges, sealed seams, and properly chamfered undercuts guarantee consistent epoxy or silicone adhesion.
Support systems—mounting brackets, clips, or a plywood cleat—must distribute weight evenly and align with cabinet framing to avoid deflection.
Lip clearance and sealing for drop-in sinks
Although undermount and drop-in sinks both require a watertight interface, drop-in installations demand careful lip clearance and compression sealing to prevent leaks and countertop damage. The visible rim must sit flush without binding against cabinetry while allowing enough gap for sealant and slight movement.
Precise cut dimensions, consistent overhang, and even gasket or bead application guarantee uniform pressure, proper drainage, and long-term moisture protection.
Mounting hardware locations and reinforcement needs
Mounting hardware locations and reinforcement requirements differ markedly between undermount and drop-in sinks, affecting countertop cut layout and cabinet support.
Undermount sinks need substructure—cleats, plywood pads, or adhesive channels—and precise fastener access below the cutout.
Drop-in sinks rely on rim seating and sealant, occasional clips, and less cabinet reinforcement.
Weight, countertop material, and fixture use determine reinforcement specifics.
Common Problems and How to Fix Them
Common cutting problems include chipping, splintering, or cracking of the countertop material, holes cut too large or misaligned, and uneven or rough edges that need smoothing.
Practical fixes range from edge sealing, filler or epoxy patching, and sanding or router trimming to installing support braces or modifying overhangs and corbels.
The following discussion outlines specific repair methods and preventative tips for each issue.
Chipping, splintering, or cracking during cutting
Chipping, splintering, or cracking during countertop cutting often results from wrong blade choice, excessive feed rate, inadequate support, or improper masking.
To prevent damage, use a fine-tooth or diamond blade, secure and support the workpiece, score cut lines, and cut slowly with steady pressure.
For minor defects, sand or file edges; for larger fractures, stabilize with epoxy and clamp until cured.
Hole too large or misaligned repair and patch methods
If a cut for a sink ends up too large or slightly misaligned, the job can still be salvaged with the right patching and alignment techniques.
Small gaps can be filled with color-matched epoxy or acrylic filler; larger openings require a trimmed support strip bonded beneath the countertop and veneered to match.
Repositioning the sink with shims and sealant corrects slight misalignments before final fastening.
Uneven edges or rough cuts smoothing and cosmetic fixes
Smooth uneven edges and clean up rough cuts promptly to guarantee the sink opening looks professional and seals properly.
Use a fine-tooth file, sanding block, or oscillating tool with sanding pads to refine edges.
For laminate, trim and glue edge banding; for stone or solid surface, polish with progressively finer abrasives and sealant.
Touch-up kits and color-matched caulk hide minor chips.
Dealing with overhangs, braces, and corbels
Once edges are refined and chips concealed, attention shifts to how the countertop meets supporting elements like overhangs, braces, and corbels—areas that commonly interfere with sink placement and cabinet clearance.
Inspect and measure clearances, mark relief cuts, and trim or notch underside supports. Reinforce altered supports with brackets or blocking.
Finish exposed cuts with sealant and paint to protect against moisture and stress.
Safety and Dust Control Best Practices
Proper personal protective equipment and safe tool setup are essential before any countertop cutting begins to prevent injury.
For stone surfaces, dust extraction or wet cutting methods considerably reduce silica exposure, while good ventilation limits airborne particles in all materials.
A controlled cleanup routine and protection for surrounding finishes help preserve the workspace and occupants’ health.
Proper PPE and tool safety steps
Before cutting, establish a controlled workspace and equip each person with required personal protective equipment: a NIOSH-approved respirator or particulate mask rated for silica and wood dust, eye protection with side shields, hearing protection, cut-resistant gloves, and non-slip footwear.
Inspect tools, verify guards and blade condition, secure the countertop, disconnect power before adjustments, use proper blade types, maintain two-handed control, and keep bystanders clear.
Dust extraction and wet cutting for stone
Begin cutting only after confirming a dust control plan that prioritizes extraction and wet cutting for stone; uncontrolled silica-laden dust poses serious, long-term respiratory hazards.
Use a vacuum with a HEPA-rated shroud and maintain continuous water feed to suppress airborne particles.
Test equipment before cutting, monitor slurry containment, and avoid dry grinding.
Verify tool connections are secure and operators follow established maintenance and inspection routines.
Ventilation and cleanup tips to protect finishes and health
Adequate ventilation combined with disciplined cleanup prevents dust and slurry from damaging surrounding finishes and reduces inhalation risks for workers and occupants.
Use exhaust fans, open windows, and portable HEPA air scrubbers to maintain airflow.
Contain the work area with plastic sheeting, vacuum with HEPA filters, and promptly wipe surfaces with damp cloths.
Dispose of slurry and debris per local regulations to limit contamination.
Final Installation Steps and Sealing
The sink is set into the finished cutout, secured, and a continuous bead of appropriate sealant is applied to prevent water intrusion.
Plumbing lines are reconnected and the installation is pressure-tested for leaks and proper drainage.
Final trim and caulking are completed and any necessary countertop reinforcement is added to guarantee long-term stability.
Installing the sink and applying sealant correctly
Carefully lower the sink into the cutout, aligning it with the countertop edges and any mounting clips or brackets; visual confirmation that the sink sits flush and level prevents gaps and stress points.
Apply a uniform bead of silicone sealant around the perimeter where sink meets countertop, smooth with a tool or finger for complete contact, remove excess, allow recommended cure time before further work.
Reconnecting plumbing and testing for leaks
Once the sink and sealant have cured, reconnecting the plumbing restores functionality and provides the opportunity to verify watertight joints.
Reattach tailpiece, P-trap, supply lines, and shutoff valves hand-tight, then secure with appropriate tools.
Slowly open water, inspect all connections for drips, and tighten as needed.
Run hot and cold, operate drain, and check beneath for persistent leaks before finishing.
Final trim, caulking, and countertop reinforcement
Finish trim pieces, apply sealant, and add reinforcement to guarantee a durable, watertight installation.
Trim edges flush, fasten splash guards, and install support brackets or plywood beneath heavy sinks.
Run a continuous bead of silicone at all seams, tool it smooth, and remove excess.
Allow full cure per manufacturer.
Recheck fixture alignment and confirm no gaps remain before final cleanup.
Material-Specific Tips and Warnings
Material considerations affect cutting technique, required tools, and post-cut protection. The author briefly notes common precautions for each substrate and flags when professional help is advisable.
Below are three key focal points to guide material-specific decisions:
- Laminate and underlayment: route the backsplash and guarantee stable substrate support.
- Solid surface and wood: plan for thermoforming or edge bonding, and seal end grain to prevent moisture damage.
- Quartz/granite: use professional cutting, accurate templating, and proper dust and tooling controls.
Laminate: routing inside the backsplash and underlayment tips
When routing laminate around the backsplash and preparing the underlayment, precision is essential to prevent chipping and guarantee a watertight seal; use a laminate-specific bit with bearing, score cut edges first, and rout toward the waste.
Ascertain underlayment is flat, properly screwed, and sealed at seams with waterproof tape or silicone.
Verify fit before adhesive application and trim for consistent reveal and drainage.
Solid surface: thermoforming and edge bonding notes
Heat and bend solid surface sheets carefully: thermoforming requires even heating to the manufacturer’s specified temperature so the sheet becomes pliable without discoloration or internal stresses.
Use form blocks and controlled cooling to maintain shape.
For seams, apply manufacturer-approved adhesive and color-matched joint compounds; clamp firmly and allow full cure before sanding.
Avoid excessive sanding heat and thin edge profiles that can crack.
Quartz/Granite: professional cutting and templating recommendations
Because quartz and granite are dense, brittle materials with different internal structures than solid surface sheets, cutting and templating demand professional tools, techniques, and experience to prevent chipping, cracking, or injury.
Professionals use diamond blades, water suppression, precision templates, and CNC or bridge saws. They verify sink fit, support slabs during transport and cut, and follow manufacturer and fabricator guidelines for safe, accurate installation.
Wood: sealing end grain and preventing moisture damage
Many wooden countertops require careful sealing of end grain and exposed edges to prevent rapid moisture absorption, swelling, and eventual warping or rot.
Apply a penetrating sealer, epoxy, or polyurethane to all cut faces and underside, allowing full cure. Sand between coats for adhesion.
Maintain a beveled drip edge and re-seal periodically. Avoid prolonged water exposure and guarantee proper ventilation beneath the sink.
Tools and Techniques Comparison
The following brief comparison highlights when to choose a jigsaw, router, or circular saw and the tradeoffs between dry and wet cutting for stone, focusing on recommended uses, pros and cons, speed, finish, and safety. Below is a concise table to frame the choices before practical guidance follows. The reader is encouraged to match tool and technique to material and tolerance requirements.
| Tool/Technique | Key notes |
|---|---|
| Jigsaw | Best for curves and thin laminates; slower, less precise on thick stone. |
| Router | Precise edges and clean cutouts; requires steady control and proper bits. |
| Circular saw | Fast straight cuts; needs guide and blade selection for material. |
| Dry vs wet cutting | Dry is faster but dusty and higher risk of overheating; wet gives smoother finish and dust/safety control. |
Jigsaw vs router vs circular saw: recommended uses and pros/cons
When cutting a countertop for a sink, choosing between a jigsaw, router, or circular saw depends on the material, cut complexity, and desired edge finish:
a jigsaw excels at curves and interior cutouts,
a router produces clean, precise edges and consistent depth,
while a circular saw is best for long straight cuts and rapid removal of waste.
Jigsaw: flexible but slower and prone to tearout.
Router: precise, requires templates.
Circular saw: fast, limited to straight lines.
Dry cutting vs wet cutting for stone: speed, finish, and safety tradeoffs
Shifting focus from tool choice to cutting method, stone countertops introduce a specific decision: dry cutting or wet cutting.
Dry cutting is faster, portable, and dusty, risking silica inhalation and chip-prone edges.
Wet cutting slows progress, reduces dust, cools the blade, and yields smoother edges with less chipping.
Safety and finish favor wet methods despite setup and water management.
Cost Estimates and Time Breakdown
Typical cost ranges for DIY cutting versus hiring a professional are outlined, including materials, tool rentals, and labor.
The time required is compared across common countertop materials (laminate, wood, stone, solid surface) and sink types (drop-in, undermount, farmhouse).
This section frames realistic budgets and schedules to help readers choose the right approach.
Typical costs for DIY vs professional cutting and installation
Although cutting and installing a sink-cutout can be done by a competent homeowner, costs and time vary widely depending on material, tools, and experience.
DIY typically incurs $0–$150 for blades, jigs, sealant and occasional rentals; homeowners supply labor.
Professional services range $200–$800+ including precise cutting, cleanup, and warranty.
Choose DIY for savings; hire pros for riskier materials or tight tolerances.
Time required by material and sink type
Time estimates for cutting a countertop depend primarily on the material and sink type: softer substrates like laminate or wood typically require 30–90 minutes for layout and cutting.
Medium-hard surfaces such as solid surface or quartz take 1–3 hours (including template setup and slower blade passes).
Hard materials like granite or porcelain can require 2–6 hours when factoring in specialized tooling, multiple passes, and finishing.
Undermount and integrated sinks add time for precise template alignment and edge-finish (often an extra 30–90 minutes), while top-mount sinks usually reduce final fit time.
Skilled DIYers may match lower estimates; professionals are faster but include travel and setup.
Checklist Before Finishing Project
Before closing the project, a concise checklist guarantees measurements, tools, and inspections are all accounted for.
The crew reviews final clearances, confirms availability of troubleshooting supplies, and plans a post-installation walk-through.
Use the following quick list to verify readiness and quality:
- Final measurements and clearances checked against plans.
- Tools and materials on hand for any adjustments or fixes.
- Post-installation inspection points confirmed (seals, level, drains).
Pre-installation final measurements and clearances
A final checklist verifies all measurements and clearances match the sink, faucet, and cabinet specifications before sealing the countertop into place.
The installer confirms sink cutout dimensions, rim-to-front/back clearances, faucet hole alignment, and edge overhangs.
Verify underside clearance for mounting clips, plumbing trap space, and cabinet shelf interference.
Recheck level, squareness, and reveal consistency around cabinetry prior to final adhesion.
Tools and materials to have on hand for troubleshooting
Gather essential tools and materials so common issues can be resolved quickly during final countertop installation.
Include adhesive caulk, plumber’s putty, waterproof sealant, assorted screws, stainless clips, shims, and silicone tape.
Pack a drill with bits, jigsaw blades, clamp set, utility knife, straightedge, level, and measuring tape.
Add rags, solvent, spare sink clips, and protective gloves for safe adjustments.
Post-installation inspection points to confirm success
Once the sink and countertop are secured, the installer should methodically verify a short checklist to guarantee a watertight, level, and finished installation.
Inspect seams and caulking for continuous, proper bead; confirm drain and trap connections are tight and leak-free; check faucet and supply lines for secure, leakless operation; verify countertop is level and fasteners hidden; remove debris and test water flow.
Conclusion
The article concludes that cutting a countertop for a sink is a manageable DIY task when approached methodically. By following standard templates, using the correct tools, and respecting material-specific precautions, most hobbyists can achieve professional-looking results. Testing measurements and technique on scrap material verifies assumptions and reduces errors. Embracing careful planning and incremental cuts transforms anxiety about the job into confidence, allowing readers to enjoy both the process and the finished installation.