How to Replace Tub Faucet Diverter: Step-by-Step Repair Guide
To replace a tub faucet diverter, follow these steps: First, turn off the water supply. Next, remove the tub spout and check if the diverter is built-in or valve-mounted. If it’s removable, take out the worn cartridge or pull-up stem. Clean the faucet seat and any mineral deposits. Install new O-rings and the replacement diverter, then reseal and reattach the spout. Finally, restore the water supply and check for leaks and proper shower flow. For detailed instructions, parts lists, and troubleshooting tips, continue reading.
What a Tub Faucet Diverter Is and How It Works
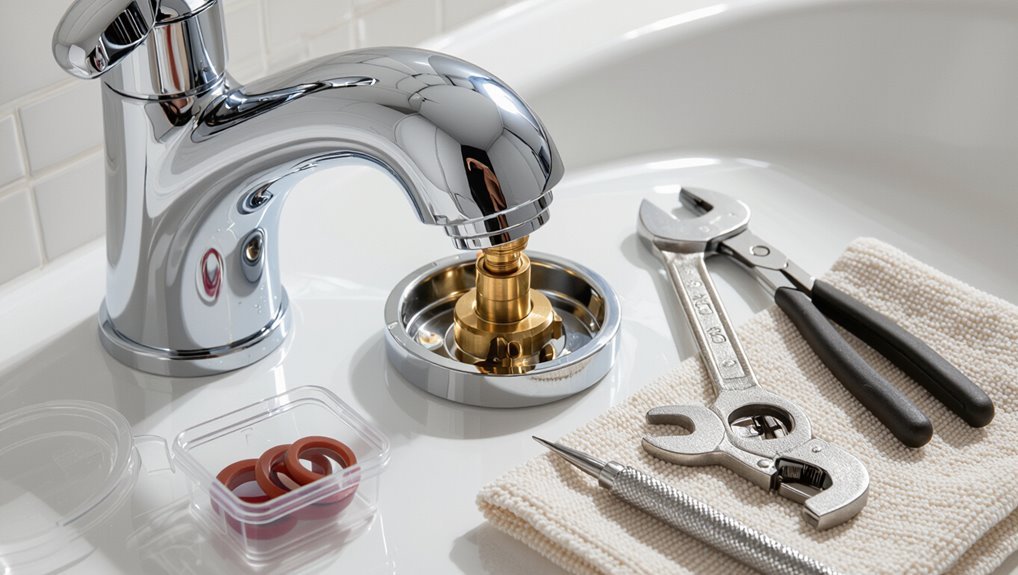
A tub faucet diverter directs water between the tub spout and the shower outlet, allowing a single plumbing set to serve both functions.
Common designs include three-handle, two-handle, single-lever, and pull-up spout diverters, each using different internal mechanisms such as rotary cartridges, sliding pistons, or pop-up stems.
Failures typically stem from worn seals, corroded cartridges, or mineral buildup that prevents proper sealing or movement.
Purpose of a tub diverter valve
Diverting water between the tub spout and showerhead, the tub diverter valve controls flow direction inside the faucet assembly.
It isolates and redirects pressurized water to the chosen outlet, prevents backflow, and maintains pressure balance.
Understanding this purpose helps homeowners decide when and why to repair or replace the part and informs steps in how to replace tub faucet diverter safely and effectively.
Common diverter types (three-handle, two-handle, single-lever, shower spout pull-up)
Having established why a tub diverter valve directs water and maintains pressure balance, it is helpful to recognize the common types encountered in household faucets.
Three-handle systems use a separate diverter knob; two-handle setups integrate diverter mechanisms between hot and cold controls.
Single-lever faucets shift internally with cartridge movement.
Shower-spout pull-up diverters raise a collar to redirect flow to the showerhead.
Basic internal components and common failure modes
Inside the diverter assembly, a few simple parts work together to reroute flow and seal off unused outlets: cartridges or poppets control the path of water, springs and O-rings provide return force and watertight seals, and cams or slots translate lever or knob motion into directional movement.
Typical failures include worn seals causing leaks, clogged passages, weakened springs preventing full diversion, and corroded or fractured cartridges.
Quick Identification: Is the Diverter the Problem?
Signs such as water that won’t switch to the shower, partial flow when diverted, or leaking around the spout point toward a bad diverter.
A quick check of water pressure, removal and inspection of the showerhead for clogs, and testing the cartridge can rule out other causes.
If the diverter is corroded or brittle a replacement is usually warranted, while occasional sticking may be fixed by cleaning or repairing the existing assembly.
Symptoms indicating a faulty diverter
A malfunctioning tub diverter often reveals itself through a small set of consistent behaviors: water that continues to flow from the tub spout when the shower is selected, a weak or sputtering shower stream, or leaking around the diverter assembly.
Additional signs include intermittent switching between spout and shower, difficulty moving the diverter handle, and visible corrosion or mineral buildup on the unit.
How to rule out other causes (low water pressure, showerhead clog, cartridge issues)
Before assuming the diverter is faulty, the simplest explanation should be checked: low water pressure, a clogged showerhead, or a failing cartridge can produce the same symptoms.
Test water pressure at other fixtures, remove and inspect the showerhead for mineral buildup, and cycle or test the cartridge for proper mixing and flow.
Eliminate these before disassembling the diverter.
When to repair vs. replace the whole faucet assembly
Determine quickly whether the diverter alone is at fault by comparing the symptom pattern and the component condition:
If water switches erratically between tub and shower but the diverter moves and shows wear or mineral buildup, repair or replace the diverter.
If multiple leaks, corroded valves, persistent pressure loss, or damaged trim exist, replacing the entire faucet assembly is more cost-effective and durable.
Tools and Parts You’ll Need
A concise list of essential tools—adjustable wrench, screwdrivers, hex keys, plumbers’ grease and replacement O-rings—prepares the reader for the job.
The section will outline common diverter types (ball, three-valve, push-button) and how to verify compatibility with existing hardware.
It will also explain where to find and how to read model numbers so the correct replacement diverter can be purchased.
Essential tools checklist
While access to the tub valves and cartridge may vary by model, the following essential tools and parts will be required to remove the old diverter and install a replacement: adjustable wrench, slip-joint pliers, Phillips and flat-head screwdrivers, Allen keys (common set), cartridge or diverter puller (if needed), plumber’s grease, Teflon tape, replacement diverter assembly and stem gasket or O-ring kit, utility knife, shop towels, and a small flashlight.
- Inspect compatibility before starting.
- Keep parts organized and labeled.
- Use proper-size tools to avoid damage.
- Replace worn gaskets and O-rings.
Replacement parts: diverter types and compatibility
After gathering the tools and confirming gasket and O‑ring sizes, attention shifts to selecting the correct diverter type and compatible replacement parts.
Diverters vary: tub spout pull‑up, three‑way cartridge, and push‑button designs. Compatibility depends on valve style, flow path, and mounting.
Replace seals and retaining clips with OEM or exact‑fit aftermarket alternatives to guarantee leak‑free operation.
- Verify valve style
- Match diverter type
- Check seal dimensions
- Use exact-fit parts
How to read model numbers and buy the correct diverter
Several clear steps guide reading model numbers and sourcing the correct diverter: locate the stamped or printed model on the valve body or faucet escutcheon, note letter‑number sequences and any prefix codes, and photograph the assembly for reference.
Cross‑reference numbers with manufacturer parts lists, measure dimensions (stem, flange, O‑ring sizes), verify finish, and purchase OEM or exact‑fit aftermarket parts from reputable suppliers.
Safety and Preparation Steps
Before beginning work, the water supply should be shut off and the lines bled to relieve pressure.
The tub and surrounding finishes must be protected with towels or drop cloths to prevent scratches and water damage.
Reference photos should be taken and removed parts labeled to guarantee accurate reassembly.
Shutting off water supply and relieving pressure
Locate and shut off the water to the tub to prevent flow while working on the diverter.
Confirm the correct valve—local shutoff or main—and close it fully.
Open the tub spout and nearby faucet to drain residual water and relieve system pressure.
Optionally, briefly open a high fixture to equalize pressure.
Verify no flow before disassembling the diverter assembly.
Protecting tub and surrounding finishes
With the water off and pressure relieved, attention turns to protecting the tub and surrounding finishes.
Lay down a thick towel or drop cloth in the tub to catch small parts and tools.
Apply painter’s tape around fixtures, grout and nearby tile edges to prevent scratches.
Remove jewelry and wear non-marking work gloves to avoid accidental nicks or surface damage.
Taking reference photos and labeling parts
Document the existing setup thoroughly by taking clear photos from multiple angles—close-ups of the diverter, handles, escutcheon plate, and any visible connections, plus wider shots showing the tub and surrounding fixtures.
Then label removed parts with tape or numbered bags, photograph each labeled group, and note fastener locations.
Store images and labels together to guarantee accurate reassembly and replacement ordering if parts are missing.
Step-by-Step: Replacing a Tub Faucet Diverter (Pull-Up Spout Type)
First, the existing spout is removed and the diverter style is inspected to determine the proper replacement parts.
Next, the old diverter mechanism is extracted, the spout and seat area are cleaned, and new O-rings and plumber’s tape are fitted to the replacement unit before installation.
Finally, the spout is reinstalled and the assembly is tested for proper operation and leaks.
Remove the existing spout and assess diverter style
Begin by unscrewing or pulling off the existing spout to gain clear access to the diverter assembly; a pull-up spout typically slides off a threaded or slip-on adapter.
Inspect the exposed adapter and housing for threads, set screws, or retention clips.
Note whether the diverter is integral to the spout or part of the valve stem, and document orientation and wear before proceeding.
Extracting the old diverter mechanism
Loosen any remaining set screws and grip the spout adapter to withdraw the diverter assembly from the pipe; if it resists, apply penetrating oil and a few gentle taps with a plastic mallet to break corrosion without damaging the finish.
Extract the cartridge or pull-up stem straight out, noting orientation and retaining clips.
Inspect for broken springs, worn seals, or mineral buildup on the mechanism.
Cleaning the spout and seat area
With the diverter assembly removed and inspected, attention shifts to the spout and seat area where mineral deposits and debris commonly prevent a proper seal.
Clean with vinegar or a lime-removal solution, scrubbing gently with a nylon brush. Remove stubborn buildup with a soft pick.
Rinse thoroughly, dry, and inspect for pitting or damage that may require part replacement before reassembly.
Installing the new diverter and sealing (O-rings, plumber’s tape)
Install the new diverter by first fitting fresh O-rings onto the stem and sliding the assembly into the spout, ensuring each ring seats evenly to prevent leaks.
Apply a thin layer of plumber’s grease to O-rings for smooth operation.
Wrap male threaded connections with plumber’s tape clockwise three times.
Align the diverter, push fully into place, and trim any excess tape.
Reinstalling the spout and testing for leaks and function
Replace the spout by sliding it back onto the newly sealed diverter stem, ensuring the O-rings remain seated and the spout aligns with any set screws or retaining clips.
Tighten screws or secure clip.
Turn water on slowly, check for leaks around base and stem, operate diverter to confirm water diverts to shower.
Recheck after several cycles and correct any seepage.
Step-by-Step: Replacing an In-line or Valve-Body Diverter (Cartridge or Three-way)
The procedure begins with removing the escutcheon and trim to expose the valve body.
The cartridge or three-way diverter is then removed, inspected for damage or mineral buildup, and replaced with a matching assembly.
Finally, trim and handles are reinstalled and the faucet is tested for proper operation and leaks.
Accessing the valve body (escutcheon and trim removal)
Begin by removing the faucet handle and escutcheon to expose the valve body, taking care to note screw and trim locations for reassembly.
Use appropriate drivers to loosen hidden set screws, then remove trim plates, escutcheon screws, and decorative sleeves.
Keep parts organized and photograph orientations.
Turn off water supply if not already done.
Clear access allows safe inspection and future cartridge removal.
Removing and inspecting the cartridge or diverter assembly
Loosen and remove the retaining clip or bonnet nut securing the cartridge or diverter, then withdraw the assembly straight out to avoid damaging seals or nearby components.
Inspect the cartridge, diverter stem, and O-rings for wear, corrosion, mineral buildup, or broken tabs.
Clean deposits with vinegar and a soft brush.
Note orientation and any damaged parts for replacement; photograph if needed for reference.
Installing the replacement cartridge/diverter
Carefully align the new cartridge or diverter with the valve body, matching any orientation marks or tabs so the ports and stem sit exactly as the original did.
Gently insert until fully seated, ensuring O-rings compress evenly. Secure retaining clip or nut per manufacturer torque guidance.
Verify smooth stem movement by rotating slightly. Remove debris, confirm seals engage, and prepare for trim reassembly.
Reassembling trim, handles, and testing operation
With the new diverter seated, reattach the trim plate and secure it with the original screws or decorative caps, aligning any indexing tabs so the face sits flush against the wall;
next install the handle(s) and any escutcheons, tightening set screws to manufacturer torque specifications to avoid over-compression.
Restore water supply, operate spout and shower selector through full range, check for leaks and smooth action, adjust if binding occurs.
Common Complications and How to Handle Them
Common complications include seized or corroded components that require penetrating oil, heat, or extraction tools for safe removal.
Stripped screws and damaged trim often call for screw-retrofit techniques, thread repair inserts, or replacement escutcheons.
Mismatched replacement parts can be resolved by retrofit adapters, universal cartridges, or sourcing aftermarket equivalents to restore proper function.
Stuck or corroded parts removal techniques
Stuck or corroded diverter components frequently complicate faucet repairs, requiring a blend of mechanical leverage, penetrating lubricants, and controlled heat to free seized parts without causing damage.
Apply penetrating oil, allow dwell time, and use gentle taps with a brass punch.
Use adjustable pliers with cloth protection, heat nearby metal briefly with a heat gun, then reapply lubricant and work slowly to avoid cracking or bending.
Stripped screws and damaged trim repair options
When screws are rounded or trim pieces cracked, repair choices range from extraction techniques to cosmetic replacement, each selected to preserve surrounding surfaces and restore function.
Use screw extractors, left‑hand bits, or careful drilling for stripped fasteners; apply epoxy or metal repair kits for minor trim damage.
Replace heavily damaged escutcheons or handles with matching parts, ensuring watertight seals and secure fastening.
Mismatched replacement parts retrofit solutions
Retrofit work often encounters mismatched replacement parts that differ in thread size, spacing, or finish, creating fit and sealing challenges.
Technicians should stock common adapters, thread converters, and neoprene or rubber gaskets. Measure dimensions before buying replacements, use anti-seize or plumbers’ tape for minor mismatches, and consider trim adapters or custom-machined bushings when standard parts won’t align.
Leak Testing and Final Adjustments
A systematic leak and pressure test should be performed after reassembly by running both low and full water pressure while inspecting all joints and the diverter for seepage.
The diverter’s tension and handle alignment can then be fine-tuned to guarantee smooth operation and a watertight seal.
Finally, periodic checks over the following days and weeks confirm that the repair holds under normal use.
How to perform a proper leak and pressure test
Begin by restoring water supply and slowly pressurizing the system to detect leaks without over-stressing fittings.
Observe all joints, cartridge area, and spout for drips while operating spout and shower functions.
Maintain pressure for several minutes, then inspect hidden areas and drain lines.
If no leaks appear, cycle the diverter several times to confirm consistent sealing before completing cleanup.
Adjusting diverter tension and handle alignment
Tighten or loosen the diverter spring tension as needed and align the handle so it operates smoothly without binding.
Rotate the valve through full travel, checking engagement and feel. Adjust set screws or reposition the cartridge/minor shims to correct misalignment.
Reassemble escutcheon and trim. Confirm smooth switching between spout and shower under normal water pressure, correcting any sticking or drift.
Long-term checks to confirm repair success
Once the mechanical adjustments are complete, perform a systematic leak test and observe the diverter over extended use to confirm repair durability.
Inspect around seals, spout, and valve for steady drips after prolonged flow and pressure changes.
Cycle the diverter repeatedly, monitor for intermittent leaks, and re-torque fittings if needed.
Document findings and schedule a follow-up check in one to two weeks.
Cost, Time Estimates, and When to Call a Professional
A basic tub diverter replacement typically takes a homeowner 30–90 minutes and costs $10–$75 for parts.
More involved repairs or cartridge swaps can require a few hours and higher-priced components.
The task should be handed to a plumber if the valve assembly is complex, the piping is corroded or original to an older home, or there are signs of hidden leaks or low water pressure.
When calling a professional, provide the faucet brand/model (if known), describe the symptoms and any visible damage, and note the age and material of the pipes to help speed diagnosis.
Typical DIY time and cost ranges
Most homeowners can expect a straightforward tub faucet diverter replacement to take between 30 minutes and two hours, depending on access, corrosion, and part compatibility. Typical parts cost $10–$60; simple tools suffice. Labor is free for DIY; expect $75–$200 if hiring.
| Item | Typical Range |
|---|---|
| Parts | $10–$60 |
| Time | 30–120 minutes |
Signs this job needs a plumber (complex valves, old piping)
When complicated internal cartridge assemblies, corroded or lead-era piping, signs of multiple prior repairs, or unclear shutoff control are present, the task should be escalated to a licensed plumber—these conditions increase the likelihood of hidden damage, nonstandard parts, or code-related issues that a DIYer cannot safely or reliably resolve.
A pro assesses valve complexity, pipe condition, code risks, estimates labor/materials, and prevents costly failures or liability.
What to tell a plumber to speed diagnosis
Several key facts given up front let a plumber diagnose a faulty tub diverter more quickly: the exact symptoms (leaking spout, weak shower flow, or failure to hold diverter position), how long the issue has been present, any recent repairs or materials used, visible corrosion or mineral buildup, and whether water shutoffs function.
Also provide model/type, estimated age, preferred appointment window, and budget expectations.
Maintenance Tips to Prevent Future Diverter Failure
Routine maintenance can extend a diverter’s life through regular cleaning to remove mineral buildup and by using descaling solutions as needed.
Seasonal inspections should catch wear on seals and springs early, with timely replacement of worn parts preventing sudden failure.
Considering more durable replacement components or cartridge-style upgrades can simplify future repairs and improve long-term reliability.
Regular cleaning and mineral deposit prevention
Inspect the diverter and surrounding fittings regularly to catch mineral buildup before it impedes operation.
Use a soft brush and vinegar or a commercial descaler to remove deposits gently.
Flush passages by running hot water after treatment. Wipe dry to prevent recurrence.
For stubborn scale, disassemble per manufacturer instructions, soak removable parts briefly, then reassemble and test for smooth shifting and watertight seals.
Seasonal checks and when to replace wear parts
When seasons change and water chemistry shifts, establish a simple checklist to catch wear before it causes failure:
Inspect seals, O‑rings, and the diverter stem for cracking or stiffness; test smooth operation and check for leaks under pressure; flush aerators and cartridges for debris.
Replace worn seals annually or at first sign of persistent leaks, and document dates for future seasonal reviews.
Upgrades to consider for durability and ease of future repairs
After seasonal checks reveal wear or recurring leaks, homeowners should consider specific upgrades that improve diverter longevity and simplify future repairs.
- Install brass or stainless steel diverters for corrosion resistance.
- Use quick-connect fittings to reduce disassembly time.
- Add isolation valves to avoid shutting main water during repairs.
- Keep a replacement cartridge and compatible seals on hand for rapid swaps.
Troubleshooting Quick Reference
A concise symptom-to-solution checklist helps identify common diverter problems and the fastest corrective steps.
Recommended parts to keep on hand—such as replacement cartridges, O-rings, and screws—are listed for quick fixes.
This reference enables efficient troubleshooting and minimizes downtime.
Symptom-to-solution checklist
Although plumbing issues can present in many ways, a concise symptom-to-solution checklist helps isolate the diverter problem quickly:
- Low or no shower flow — check for clogged or faulty diverter cartridge.
- Incomplete switch to shower — inspect diverter seal/wear; replace if worn.
- Continuous shower drainage — test for stuck diverter or broken spring.
- Leaking around handle — tighten packing or replace O-rings and reassemble.
Parts to keep on hand for common fixes
Several essential spare parts keep routine tub-faucet diverter repairs quick and predictable.
Technicians and homeowners benefit from having common replacements ready to avoid delays and reduce diagnostic time. Quality and compatibility should match the fixture brand; keep small storage labeled and accessible for efficient repairs.
- Diverter cartridge
- O-rings and seals set
- Retaining clip/screw kit
- Handle and escutcheon trim
Conclusion
In conclusion, the diverter replacement restores proper water flow and extends faucet life, completing a repair that is straightforward for most DIYers yet rewarding like fixing a small, stubborn puzzle. Proper tools, careful preparation, and methodical steps prevent leaks and save time and money. If complications arise—corrosion, inaccessible components, or persistent leaks—calling a professional is prudent. Regular maintenance keeps the diverter functioning smoothly and avoids repeat repairs.