
How to Replace Pipes in Your House: Step-by-Step Guide for DIY & When to Call a Pro
Replacing pipes in your house involves assessing their age and condition, particularly looking for leaks or discoloration. For minor repairs and fixture swaps, skilled DIYers can handle the task with the right tools and safety measures. However, more complex jobs—like fixing hidden leaks, repiping the entire house, or working on gas lines—should be left to a licensed plumber. The process includes measuring, isolating the water supply, draining the pipes, cutting, deburring, and joining them using the appropriate method. Finally, conduct a pressure test and flush the system. For detailed steps, cost estimates, and tips on hiring professionals, continue reading.
What Replacing House Pipes Entails and When It’s Necessary
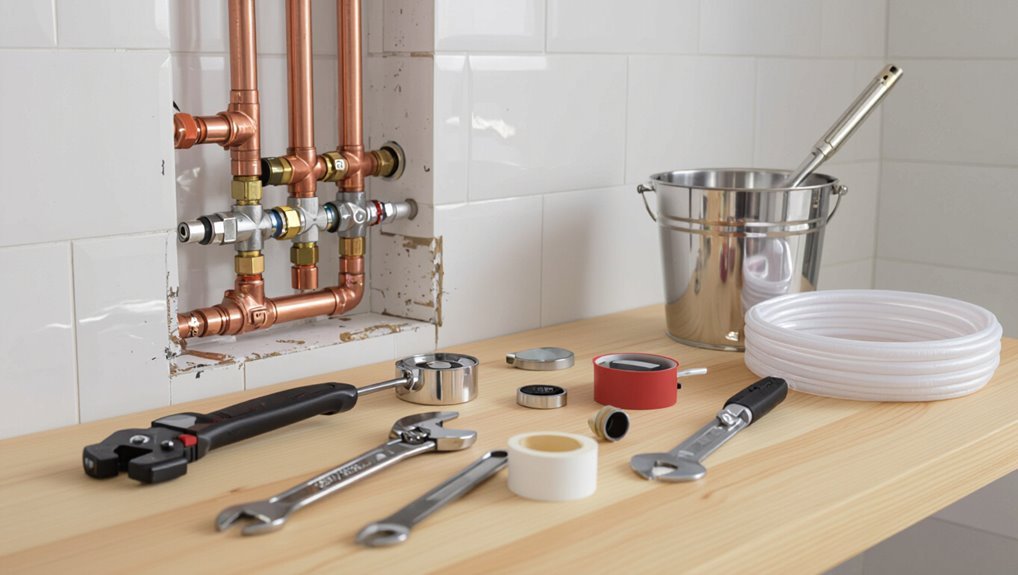
Replacing house pipes typically involves evaluating pipe age and material, locating corrosion or leaks, and planning full or partial replacement where joints or sections have failed.
Homeowners may notice reduced water pressure, discolored water, persistent drips, or visible rust as signs that replacement is needed.
Delaying replacement increases the risk of major leaks, structural water damage, mold growth, and higher repair costs.
Common reasons to replace pipes (age, corrosion, leaks, material failure)
Pipe replacement becomes necessary when pipes no longer perform reliably due to age, corrosion, persistent leaks, or material failure.
Common causes include galvanized or lead aging, rusted steel or iron, pinhole leaks from corrosion, joint failures, and polymer degradation in older plastic.
Homeowners researching how to replace pipes in house should weigh scope, material compatibility, water quality, and cost before deciding DIY or hiring a pro.
Signs your home needs full or partial pipe replacement
When visible corrosion, recurring leaks, discolored or metallic-tasting water, low pressure across multiple fixtures, or widespread mineral buildup appear, a homeowner should consider whether partial or full pipe replacement is needed; determining the extent requires evaluating affected locations, pipe materials, and the frequency and severity of failures.
Indicators also include multiple repairs clustered in time, incompatible materials, or plumbing tied to major renovations suggesting proactive replacement.
Risks of delaying pipe replacement
Delay carries tangible consequences: neglected plumbing can escalate minor drips into major failures, causing water damage, mold growth, and structural deterioration that are far costlier and more disruptive to remedial efforts.
Corrosion, pipe bursts, and hidden leaks increase repair complexity, insurance claims, and health risks. Emergency replacements and secondary damage often exceed planned upgrade costs, making timely pipe replacement economically and practically prudent.
Quick Recommendation: DIY vs. Hiring a Professional
For straightforward, accessible repairs—such as replacing a short run of exposed pipe or swapping a visible fixture line—a competent homeowner can often save on labor costs and complete the work in a few hours.
Complex situations like extensive hidden leaks, gas lines, code-sensitive installations, or connections to the main sewer should be handled by a licensed plumber to guarantee safety and compliance.
Generally, DIY saves money on labor but may take longer and carries risk, while hiring a professional increases cost but reduces time, liability, and the chance of costly mistakes.
Simple scenarios suitable for DIY
A handful of straightforward pipe replacements—such as swapping an exposed bathroom sink trap, replacing a short run of PVC under a laundry tub, or upgrading a single leaking valve on an accessible supply line—are typically suitable for a capable DIYer with basic tools and a working knowledge of local codes.
Tasks should be limited, involve accessible piping, use common materials, and include proper shutoff and leak testing.
Conditions that require a licensed plumber
Recognize situations that exceed typical DIY scope and warrant a licensed plumber: major leaks within walls or ceilings, sewer line failures, gas line work, replacing or rerouting main supply lines, installations tied to building permits, and any job involving concealed piping, complex connections, or potential structural impact.
A professional handles diagnostic imaging, code compliance, pressure testing, backflow prevention, and guarantees safe, permitted repairs that protect health, property, and resale value.
Cost and time comparison overview
While straightforward repairs like replacing a short run of visible copper or PEX can often be completed by a competent DIYer in a few hours at modest cost, the choice depends on scope, risk, and time.
| Task | DIY Cost/Time | Pro Cost/Time |
|---|---|---|
| Small run replacement | Low / hours | Moderate / hours |
| Whole-house repipe | High / days–weeks | Higher / days–weeks |
Materials, Tools, and Permits You’ll Need
The homeowner should first compare common pipe materials—copper, PEX, PVC/CPVC, and galvanized steel—to weigh durability, cost, and suitability for each application.
They must also assemble the right tools and safety gear, from pipe cutters and soldering equipment to gloves and eye protection.
Finally, permits, code requirements, and inspection triggers should be identified before work begins.
Pipe materials compared: copper, PEX, PVC/CPVC, galvanized steel
Choosing pipe material is a foundational decision that affects cost, durability, ease of installation, and long-term maintenance. Copper: durable, costly, soldering. PEX: flexible, affordable, easy connections. PVC/CPVC: rigid, best for drains and cold/hot lines respectively. Galvanized steel: durable but prone to corrosion and clogging; often replaced.
| Material | Key trait |
|---|---|
| Copper | Longevity |
| PEX | Flexibility |
| PVC/CPVC | Cost-effective |
| Galvanized | Corrodes over time |
Required tools and safety equipment
Gather the correct tools, safety gear, and permits before beginning any pipe replacement to prevent delays and reduce risk.
Essential items include cutting, joining, and measuring tools plus PPE and containment supplies. Proper selection minimizes mistakes and injury. Verify tool compatibility with chosen pipe material and planned joints.
- Pipe cutter, wrench set, deburring tool
- Safety glasses, gloves, respirator
- Flashlight, bucket, leak detector
Permits, code considerations, and when inspections are required
When are permits and inspections necessary, and which codes will govern a residential pipe replacement?
Local building codes, plumbing codes (often IPC or UPC), and municipal ordinances determine permit needs.
Permits and inspections are typically required for main, structural, or concealed pipe work and changes to water, waste, or gas systems.
Homeowners should verify local requirements, submit plans, and schedule inspections to guarantee compliance.
Step-by-Step Guide to Replacing a Section of Pipe (DIY)
The homeowner begins by preparing the workspace, shutting off the water, and draining the affected section to prevent leaks and contamination.
Next steps cover safely removing the old pipe, measuring and cutting the replacement, and dry-fitting components for proper alignment.
Finally, common joining methods—soldering, compression fittings, push-fit, and crimping—are compared to select the appropriate technique for the material and situation.
Preparing the workspace and shutting off water
Before cutting into the plumbing, clear and protect the area around the pipe to allow safe access and prevent water or debris from damaging floors or belongings.
Locate and identify the correct shutoff—main or branch—and notify household members.
Gather tools, fittings, and PPE.
Guarantee easy egress, adequate lighting, and stable workspace.
Turn off the shutoff valve firmly and confirm no taps will be used.
Draining and isolating the system
Although the main and branch valves are closed, residual water and pressure remain in the lines and must be removed and isolated to prevent leaks or injury.
Open all fixtures and drain valves lowest to highest. Use hose and bucket for safe discharge.
Depressurize by bleeding air at taps and washer inlets.
Cap or plug adjacent lines and tag valves to prevent accidental reopening.
Removing the old pipe safely
Begin by confirming the system is fully drained, depressurized, and isolated; then put on appropriate safety gear (gloves, eye protection) and lay out tools and containment such as drop cloths and a bucket to catch residual water.
Loosen fittings or cut pipe at accessible points, support adjacent piping, remove corrosion or sealant, extract the old section carefully, and dispose of debris per local regulations.
Measuring, cutting, and fitting the replacement pipe
With the old section removed and the work area cleared, the next task is to measure, cut, and fit the new pipe so it matches the existing run and maintains proper alignment.
Measure twice, accounting for fittings and overlaps. Mark cut lines, use the appropriate cutter or saw for the material, deburr ends, dry-fit components, check alignment and slope, and adjust supports before final joining.
Joining methods: soldering, compression fittings, push-fit, crimping
Select the appropriate joining method based on pipe material, accessibility, and permanence required.
Soldering suits copper where heat and a durable seal are acceptable.
Compression fittings work for limited access and dissimilar metals.
Push-fit connectors provide quick, tool-free joins for repairs.
Crimping with rings offers reliable joins on PEX using a proper crimp tool and matching fittings; follow manufacturer specifications.
Pressure testing and checking for leaks
After completing the replacement, pressure testing verifies the integrity of the new joints and reveals leaks before restoring full service.
The procedure uses water or air at recommended pressure with a calibrated gauge and a temporary cap.
Monitor pressure for the specified hold period; any drop indicates a leak.
Inspect all joints, fittings, and seals; tighten, reseal, or replace as needed until pressure remains stable.
Restoring service and final inspection checklist
One final sequence restores normal service and confirms the repair: gradually reintroduce water at low pressure, open fixtures one at a time to purge air, then bring the system to normal pressure while checking for leaks and proper flow.
Finally, inspect accessible joints, supports, and nearby finishes for signs of stress or water damage and document the outcome before fully returning the system to regular use.
- Confirm no leaks and stable pressure
- Verify fixture flow and drainage
- Record findings, photos, and date for warranty/reference
How to Replace Whole-House Water Supply Pipes
Replacing an entire house water supply requires careful planning of scope, timeline, and budget to avoid unexpected costs and delays.
Access routes—through walls, crawlspaces, basements, and attics—must be evaluated and selected to allow safe, efficient pipe runs.
Work should be sequenced to minimize downtime and coordinated with electric, HVAC, and drywall trades to prevent rework.
Planning the project: scope, timeline, and budget
Begin by defining the project’s scope, schedule, and budget before any pipes are removed.
Determine which lines require replacement, materials (copper, PEX, CPVC), permit needs, and whether sections can be phased.
Estimate labor, disposal, and contingency (typically 10–20%).
Create a realistic timeline accounting for inspections and drying times.
Compare DIY versus professional bids to decide feasibility and finalize budget allocations.
Access strategies: walls, crawlspaces, basements, and attics
With scope, timeline, and budget set, attention shifts to how the plumbing will be reached: walls, crawlspaces, basements, and attics each present distinct access challenges and advantages.
Interior walls allow direct runs but require drywall repair.
Crawlspaces offer horizontal access with limited headroom.
Basements permit easy mainline work and staging.
Attics enable overhead routing but risk insulation and freeze exposure; choose based on access, cost, and risk.
Sequencing work to minimize downtime and water disruption
A clear, staged plan reduces household disruption and limits the time plumbing is offline. Work proceeds room by room, keeping unaffected zones operational.
Prioritize main shutoff, temporary bypasses, and sequencing from supply source outward. Schedule high-impact tasks during low-use hours, preassemble segments, and test sections before restoring service.
Communicate timelines to occupants and prepare contingency water supplies to cover unavoidable outages.
Coordinating with other trades (electric, HVAC, drywall)
Several trades must be synchronized to prevent rework, delays, and safety hazards when replacing whole-house water supply pipes.
Contractors coordinate schedules, access, and shutoffs so electricians avoid live-work near damp areas, HVAC techs protect ductwork and condensate lines, and drywall crews prep openings and finish after pressure testing.
Clear scopes, timelines, and communication protocols minimize interruptions and liability.
Special Cases and Challenges
Special circumstances require different precautions and techniques than standard pipe replacement.
These include removing lead or asbestos-clad pipes, accessing hard-to-reach or concealed runs, addressing galvanized lines and water-main tie-ins, and managing mixed-material systems and junction points.
Each situation affects scope, safety requirements, and possible need for specialist contractors.
Replacing lead or asbestos-clad pipes
Handle lead or asbestos-clad pipes with strict safety protocols and professional involvement due to their health hazards and regulatory requirements.
Specialists should assess contamination, isolate work areas, and employ certified abatement or removal procedures.
Disposable containment, HEPA filtration, and proper disposal manifestly reduce exposure.
Homeowners must obtain permits, follow local codes, and prioritize licensed contractors rather than DIY to guarantee legal compliance and safety.
Dealing with hard-to-reach or concealed piping
When piping runs through confined cavities, behind finished walls, or above ceilings, replacement work becomes considerably more complex and often requires nonstandard access methods, careful mapping, and coordination with structural and finish trades.
Technicians should locate runs with cameras or probes, minimize openings, protect finishes, and plan temporary supports.
Permit, insulation, and ventilation considerations are essential; assess whether concealed sections exceed DIY skill or tool limits.
Working with galvanized piping and water main tie-ins
Concealed runs and tie-ins often lead into other complications, particularly older galvanized systems and connections to the municipal water main, which present different materials, corrosion patterns, and regulatory requirements.
Galvanized pipe often requires cutting, thread chasing, or full section replacement due to internal corrosion.
Municipal tie-ins may demand permits, backflow prevention, and utility coordination; professionals handle inspections, shutoffs, and compliance.
Handling mixed-material systems and transitions
Many homes contain sections where copper, PEX, CPVC, and older galvanized pipe meet, creating joints that require careful assessment and appropriate connection methods.
Inspect for corrosion, dissimilar metal corrosion, and pressure compatibility. Use approved connector fittings, dielectric unions, or mechanical couplers rated for the materials.
Guarantee proper support, expansion allowances, and code-compliant soldering or crimping. When uncertain, consult a licensed plumber.
Safety, Code Compliance, and Liability Considerations
The section addresses safety and liability issues that arise when replacing pipes, including precautions around electrical wiring, gas lines, and structural supports.
It also covers insurance implications, warranty considerations, and the importance of hiring properly licensed contractors.
Finally, it outlines applicable code requirements for potable water and drainage systems that must be met to avoid hazards and legal exposure.
Electrical, gas, and structural safety precautions
Before any pipe replacement work begins, assess and isolate nearby electrical and gas systems and verify that structural elements will not be compromised, since negligence in these areas creates immediate safety hazards and significant code and liability risks.
Confirm circuit shutdowns, cap and depressurize gas lines, and support or shore load-bearing members before cutting.
Document actions and follow local codes; consult qualified electricians, gas technicians, or structural engineers as needed.
Insurance, warranties, and contractor licensing
Having guaranteed electrical, gas, and structural risks are addressed, attention should turn to insurance, warranties, and contractor licensing to manage financial and legal exposure during pipe replacement.
Verify contractor licenses, ask for proof of liability and workers’ compensation insurance, and confirm coverage limits.
Obtain written warranties for materials and labor, document agreements, and retain receipts to support claims or disputes after work completion.
Code requirements for potable water and drainage systems
When replacing household pipes, compliance with potable water and drainage codes guarantees safety, prevents contamination, and limits legal liability.
The homeowner or contractor must follow local plumbing codes, approved materials, backflow prevention, proper venting, slope and trap requirements, and pressure testing.
Permits and inspections are typically required; records of compliance protect occupants and reduce risk of fines, insurance denial, or costly corrective work.
Cost Breakdown and Budgeting Tips
A clear budget helps compare typical cost ranges for DIY pipe replacement versus hiring a professional, including materials, tools, and labor.
Homeowners should account for hidden costs such as wall repairs, permit fees, and required inspections that can add substantially to the total.
Practical savings—buying quality materials in bulk, scheduling multiple jobs together, or obtaining multiple quotes—can reduce expense without sacrificing safety or code compliance.
Typical cost ranges for DIY vs. professional replacement
Every homeowner weighing pipe replacement options should expect a wide cost gap between DIY efforts and professional services: DIY typically lowers labor costs but adds time and tool expenses; professionals charge higher rates for expertise, warranties, and speed. Typical ranges:
| Option | Typical Cost |
|---|---|
| DIY (materials/tools) | $100–$1,000 |
| Partial pro help | $500–$3,000 |
| Full professional | $1,500–$7,500 |
| Emergency service | $2,000–$10,000 |
Hidden costs to watch for (wall repair, permit fees, inspections)
Although pipe replacement budgets often focus on visible materials and labor, homeowners frequently overlook secondary expenses that can push totals well beyond initial estimates.
Hidden costs include drywall or flooring repair after access cuts, disposal fees for old piping, required permit charges, mandatory inspections, and possible temporary water service or structural shoring.
Factor these into contingency planning to avoid budget overruns.
Ways to save without compromising safety or code
When planning pipe replacement, homeowners can reduce costs without risking safety or violating code by prioritizing accurate cost breakdowns, vetting multiple bids, and allocating a clear contingency for unavoidable extras.
They should buy standard materials, rent specialty tools, schedule work to avoid rush fees, confirm permit requirements, and compare contractor warranties.
Document estimates and track expenses to prevent scope creep and overspending.
Common Mistakes and How to Avoid Them
Common errors in pipe replacement often stem from choosing unsuitable materials and using poor jointing techniques that lead to leaks.
Failure to perform pressure testing and formal inspections can allow hidden faults to persist.
Insufficient planning for shutoff points and system isolation further increases the risk of damage and downtime.
Improper material selection
Choosing the wrong pipe material can lead to leaks, corrosion, reduced water quality, and premature failure, so homeowners must match materials to application, local codes, and water chemistry.
Incorrect choices include using incompatible metals, non-pressure-rated tubing, or plastics unsuitable for hot water.
Homeowners should research material properties, consult code, consider longevity and cost, and select proven options for each system.
Poor joint techniques and leak causes
Avoiding leaks starts with sound joint techniques: poor soldering, incorrect compression fittings, over- or under-tightened threaded connections, and improper use of solvent cement are frequent culprits that compromise pipe systems.
Proper preparation, clean surfaces, correct flux or primer, torque to manufacturer specs, and using the right connectors for each material prevent failures.
Inspect joints visually and by hand for alignment and secure seating during assembly.
Neglecting pressure testing and inspections
Even flawlessly assembled joints can fail under pressure if the system is not tested and inspected before use.
Skipping pressure tests and visual inspections risks hidden leaks, burst pipes, and undetected weak fittings.
Professionals and diligent DIYers perform standardized pressure testing, check supports and seals, document results, and correct defects before commissioning.
Never assume integrity without verification; testing prevents costly damage and liability.
Inadequate planning for shutoff and system isolation
Plan for shutoffs and isolation early in the project to prevent water damage, accidental system activation, and prolonged outages.
The homeowner should map main and branch shutoff valves, verify valve function, and label isolation points.
Temporary isolation fittings and caps must be ready.
Coordinate with occupants and utility providers if needed.
Failure to plan causes unnecessary leaks, delays, and costly emergency repairs.
When to Call a Professional and How to Hire One
Recognizing red flags—such as persistent leaks, discolored water, major pressure loss, or visible structural damage—signals the need to call a licensed plumber immediately.
Homeowners should ask contractors about licensing, insurance, experience with similar jobs, and request written itemized estimates that specify materials, labor, timeline, and warranty.
Bids should be compared for scope and price, and references and online reviews checked to confirm quality and reliability before hiring.
Red flags that mean call a licensed plumber immediately
When should a homeowner stop DIY attempts and call a licensed plumber immediately?
Visible major leaks, flooding, or burst pipes; persistent low water pressure after multiple fixes; discolored or odorous water suggesting contamination; gas-scent near water heaters or combined systems; sewer backup or raw sewage smell; electrical contact with plumbing; failed permits or structural damage suspected.
These warrant urgent professional intervention to prevent hazards and extensive damage.
Questions to ask contractors and what to request in estimates
After identifying situations that require immediate professional help, homeowners should prepare to vet contractors carefully to guarantee safe, code-compliant, and cost-effective repairs.
Ask for license and insurance proof, detailed scope with materials and timelines, and warranty terms. Request written, itemized estimates and change-order procedures.
- License, insurance, and permit responsibility
- Materials, brands, and substitute policy
- Payment schedule and warranty details
How to evaluate bids and check references
How should a homeowner weigh competing bids and verify a contractor’s track record before committing?
The homeowner compares scope, materials, timelines, warranties, and line-item costs.
Check licenses, insurance, and local permits.
Request three references, review recent projects, and confirm satisfaction and timeliness.
Verify online reviews and complaints with licensing boards.
Favor transparency, reasonable pricing, and clear written contracts before hiring.
Post-Work Steps and Maintenance to Prolong Pipe Life
After replacement, the homeowner should flush the system, consider appropriate water treatment, and apply corrosion-prevention measures to protect the new piping.
A routine inspection schedule—checking for leaks, discoloration, pressure changes, and loose fittings—helps catch problems early.
Copies of permits, warranties, and as-built notes should be kept in an accessible file for future maintenance and resale.
Flushing, water treatment, and corrosion prevention
Flush the system thoroughly to remove debris and confirm water quality before resuming normal use.
After flushing, test for sediments, chlorine, and pH; adjust with appropriate filters, softeners, or neutralizing media.
Apply corrosion inhibitors where compatible, maintain sacrificial anodes if present, and guarantee dielectric fittings between dissimilar metals.
Document treatments and water test results for future reference.
Routine inspection schedule and what to look for
Once the pipes are back in service, establish a regular inspection schedule to catch emerging issues early and extend service life.
Inspect visible joints, fittings, and exposed runs monthly for leaks, corrosion, or mineral buildup.
Check under sinks and around appliances quarterly for dampness or stains.
Annually, test water pressure, examine shutoff valves, and scan for hidden moisture or insulation gaps that promote freezing or deterioration.
Records to keep: permits, warranties, and as-built notes
Maintaining a clear set of records complements regular inspections by creating a reference for future repairs and warranty claims.
The homeowner should file permits, inspection reports, warranty documents, contractor contacts, material receipts, and as-built notes or drawings showing pipe routes and shutoffs.
Organized digital and physical copies speed claims, guide replacements, verify code compliance, and preserve resale value while simplifying maintenance planning.
Helpful Resources and Tools
Local building department websites and trade associations are the primary sources for local codes, permit requirements, and listings of licensed plumbers.
Trusted product brands and specific tool rental shops are recommended based on job scope and budget.
Readers are encouraged to compare license verification, warranty terms, and rental rates before hiring or purchasing.
Where to find local codes, permit information, and licensed plumbers
Where can homeowners locate reliable building codes, permit requirements, and licensed plumbers for a repiping project?
Local municipal or county building department websites publish codes and permit processes; state plumbing boards list licensing and disciplinary records.
Utility companies and permit centers can confirm inspection requirements.
For vetted tradespeople, use state license lookup tools, Better Business Bureau, and trade association directories, plus online reviews and referrals.
Recommended product brands and tool rental options
A few reliable product brands and accessible tool-rental options can simplify a repiping project and reduce costly mistakes. Recommendations favor reputable fittings and pipes (SharkBite, Viega, Mueller), quality tools (RIDGID, Milwaukee), and rental centers offering press tools or pipe-threaders.
For complex fittings, purchase; rent specialty machines to save cost. Verify compatibility with pipe materials and local codes.
- SharkBite, Viega, Mueller fittings and pipes
- RIDGID, Milwaukee tools (buy common items)
- Home Depot/Local rental shops for press machines and threaders
Conclusion
After months of reading, measuring and debating solder types, the homeowner finally appreciates pipes: rigid, noisy, and ungrateful. Ironically, the fix that promised empowerment often reveals a stubborn truth — plumbing respects either patience or a pricey pro. Whether wielding a wrench or a phone, the result is the same: quieter water, fewer leaks, and the comforting illusion that one small heroic Saturday solved decades of corrosion. Until the next drip.
