How to Replumb a House With PEX: Step-By-Step Guide for DIY and Pros
Replumbing a house with PEX is a straightforward process that involves planning, gathering the right materials, and following specific steps. Start by assessing your current plumbing and mapping out supply and drain routes. Ensure you have the appropriate type of PEX, fittings, and tools like cutters and crimpers. After securing the necessary permits, shut off and drain the existing system. Next, install main feeds, branch lines, and manifolds, then attach fixture shutoffs. Pressure-test each section, insulate the lines, and secure them before closing up walls. Always adhere to local codes and manufacturer guidelines, document your work, and keep warranties handy. This guide provides detailed procedures and helpful tips to ensure a successful replumbing project.
Overview of Replumbing a House with PEX
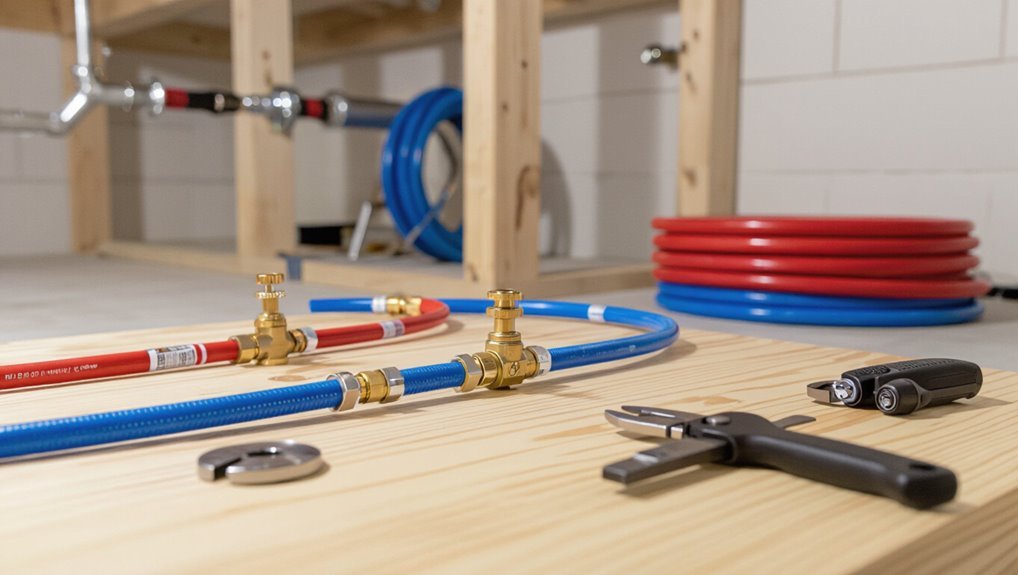
PEX (cross-linked polyethylene) is a flexible, corrosion-resistant plastic piping material commonly chosen for replumbing due to its durability, lower cost, and ease of installation.
Compared with copper and CPVC, PEX offers advantages in freeze resistance, fewer fittings, and reduced material and labor expenses, though considerations like UV sensitivity and local code must be weighed.
Repipe projects can range from targeted partial replacements to full-house repipes, with scope determined by pipe condition, layout complexity, and homeowner priorities.
What PEX piping is and why choose it for replumbing
Flexible polymer tubing has become the preferred choice for many homeowners and contractors when replumbing a house: PEX (cross-linked polyethylene) combines durability, ease of installation, and resistance to scale and corrosion, while accommodating bends that reduce fittings and potential leak points.
It is lightweight, freeze-tolerant, and compatible with common fittings. This explains why professionals and DIYers choose PEX for how to replumb a house with PEX.
Benefits of PEX vs. copper and CPVC
A modern polymer alternative outperforms traditional copper and CPVC in several practical ways: it is more forgiving to install, resists corrosion and scale, and tolerates freeze-related movement without bursting. Advantages include lower material and labor costs, flexible routing, and fewer fittings. Practical comparison:
| Metric | PEX | Copper/CPVC |
|---|---|---|
| Cost | Low | High |
| Flexibility | High | Low |
Typical project scope: whole-house vs. partial repipe
Scope decisions hinge on the home’s condition, budget, and long-term goals: a whole-house repipe replaces all supply lines from the main to fixtures for complete reliability, while a partial repipe targets only failing sections or specific problem areas to reduce cost and disruption.
Whole-house suits aging systems or renovations; partial suits localized leaks, isolated corrosion, or phased upgrades.
Consider access, fixture counts, and resale impact.
Assessing Your Home and Planning the Repipe
Before beginning a PEX repipe, a homeowner should systematically evaluate existing plumbing to locate leaks, corrosion, and branch weaknesses.
They must calculate household water demand and perform pipe sizing and zoning to guarantee adequate flow, while also confirming local codes, permit needs, and inspection timelines.
Finally, a realistic budget and schedule should be prepared and professional help engaged when complexity, code compliance, or time constraints exceed DIY capability.
How to evaluate existing plumbing and identify problems
Evaluating existing plumbing begins with a systematic inspection of visible pipes, fixtures, and access points to establish their material, condition, and layout.
Document corrosion, pinhole leaks, evidence of past repairs, water staining, low pressure areas, and inadequate supports.
Check shutoffs, valves, and water heater connections.
Map supply and drain routes, noting accessibility challenges and code noncompliances requiring correction during repipe.
Determining water demand, pipe sizing, and zoning calculations
Accurate repiping begins with quantifying the household’s peak water demand so that pipe sizes and zones match real use rather than assumptions.
Calculate fixture unit totals, convert to gallons per minute, and apply diversity factors.
Select PEX tubing diameters and manifold zoning to preserve pressure and flow.
Balance supply runs for simultaneous use, minimize long low-pressure branches, and plan zone valves or manifolds accordingly.
Local codes, permits, and inspection requirements
Having established demand, pipe sizing, and zoning, the replumbing plan must be reconciled with local codes, permit processes, and inspection schedules to guarantee legal compliance and avoid costly rework.
Research jurisdictional plumbing codes, approved PEX types, connection methods, and required backflow or seismic restraints.
File permits early, prepare clear plans, schedule inspections at rough-in and final stages, and retain documentation for resale and warranty purposes.
Budgeting, timeline, and when to hire a pro
Cost is a primary constraint that shapes decisions about scope, schedule, and whether to hire a professional. Homeowners should begin by quantifying the full repipe cost including materials, permits, labor, fixture adapters, and contingency for unexpected issues.
Estimate time by phases—demo, rough-in, inspection, finish—and compare DIY hours versus contractor rates.
Hire a pro for complex layouts, multi-story work, code compliance risks, or limited time.
Tools, Materials, and Components Needed
A clear inventory of tools and materials sets the foundation for a successful PEX repipe, distinguishing between basic DIY kits and the heavier-duty gear used by professional crews.
Key choices include the PEX type (A, B, or C), compatible fittings, and the connection system (crimp, clamp, expansion, or push‑fit) that will determine technique and tool selection.
Essential components such as shutoff valves, manifolds, pipe supports, insulation, and small accessories should be specified up front to guarantee a complete, code-compliant install.
Required tools for DIY and professional crews
Gathering the right combination of tools, fittings, and ancillary materials establishes the foundation for a successful PEX repipe.
Professionals and DIYers require durable, calibrated equipment and quality consumables to guarantee leak-free joints and efficient runs.
- PEX cutter, crimp/expander tool, and gauge
- Pipe supports, clips, and insulation
- Multi-bit drill, deburrer, and tubing mandrel
- Fittings, O-rings, and thread sealant
Types and grades of PEX (PEX-A, PEX-B, PEX-C) and fittings
After assembling the necessary tools and consumables, attention turns to selecting the appropriate PEX type and compatible fittings.
The choice of PEX-A, PEX-B, or PEX-C affects flexibility, memory, freeze-resistance, and joining method. PEX-A offers superior flexibility and kink recovery. PEX-B is stiffer and cost-effective, while PEX-C lies between.
Fittings vary by material (brass, plastic) and pressure ratings; choose certified components for potable water.
Connection systems: crimp, clamp, expansion, push-fit
Several common PEX connection systems—crimp, clamp (cinch), expansion, and push‑fit—offer distinct tradeoffs in speed, tool cost, and durability. Each method’s required tools, learning curve, and suitability for tight spaces differ; selection depends on installer preference, code acceptance, and repairability.
| System | Notes |
|---|---|
| Crimp | Inexpensive tools, reliable |
| Clamp | Faster, adjustable |
| Expansion | Best with PEX-A |
| Push‑fit | Easiest, pricier fittings |
Valves, manifolds, supports, insulation, and accessories
Having chosen a connection system, the next focus shifts to the valves, manifolds, supports, insulation, and accessories that make a PEX installation function reliably and comply with code.
Essential items include shutoff and isolation valves, manifold with labeled ports for home runs, pipe clamps and hangers to meet spacing, and foam insulation plus escutcheons and fittings to prevent heat loss and air infiltration.
- Shutoff/isolation valves
- Manifold/home-run kit
- Clamps/hangers/supports
- Insulation/escutcheons
Safety Precautions and Preparatory Steps
Before beginning any PEX work, the water supply must be shut off, systems drained, and individual appliances isolated to prevent accidental flooding.
Surfaces and nearby electrical fixtures should be protected to avoid damage and reduce shock risk.
All pipe runs and fixture locations ought to be clearly marked and mapped to guide cuts and connections.
Shutting off water, draining systems, and isolating appliances
Shut off the main water supply and relieve system pressure before cutting or disconnecting any lines: this prevents flooding and protects fixtures.
Then open faucets and drain low points, including water heater and exterior spigots.
Isolate appliances by closing dedicated valves or shutting supply stops.
Label isolated lines, cap or plug ends, and verify dry, depressurized conditions before beginning PEX work.
Protecting floors, walls, and electrical hazards
Protect floors and walls with durable, water-resistant coverings—such as rosin paper topped with reinforced plywood or contractor-grade drop cloths—and secure seams and edges with tape to prevent tripping and debris migration.
Cover baseboards and fixtures, protect finished surfaces with cardboard or foam, and ventilate enclosed spaces.
De-energize circuits near work, lockout breakers, and use GFCI-protected cords and nonconductive tools to minimize electrical risk.
Marking runs and mapping fixtures
With floors and finishes secured and electrical hazards isolated, the installer should lay out and label each PEX run and every fixture it will serve.
Create a clear map showing pipe routes, supply/return lines, shutoffs and valve locations. Note lengths, fittings, and access panels.
Verify routing avoids heat sources and structural members.
Keep the map with plans and photos for installation and future maintenance.
Step-by-Step Repipe Process (Whole-House)
The repipe process begins with a clear plan, choosing between trunk-and-branch or a home-run manifold layout and locating the main water line and service connection.
From there, installers route PEX through walls, floors, and crawlspaces, set manifolds and branch lines, and secure runs to minimize stress and kinks.
Final steps include making reliable connections to fixtures, appliances, and the water heater and pressure-testing the system before finishing walls and insulation.
Rough plan and layout: trunk-and-branch vs. home-run manifold
Choosing a layout for a PEX repipe hinges on balancing materials, labor, and fixture performance; two primary approaches dominate: trunk-and-branch, which routes a main line with lateral offshoots, and home-run manifold, which sends individual runs from a central manifold to each fixture.
Trunk-and-branch uses less tubing and simpler installation; manifold offers balanced pressure, isolation per fixture, and easier future servicing, at higher material cost.
Installing the main water line and service connection
Begin by locating and shutting off the property’s main shutoff, then relieve system pressure and tag the valve to prevent accidental reactivation.
Verify meter and utility company requirements.
Excavate to expose the service stub, cut and remove old piping, and install appropriate fittings, shutoffs, and backflow devices.
Slope and support the new PEX or copper junction assembly, pressure-test the connection, and restore backfill once approved.
Running PEX through walls, floors, and crawlspaces
Several clear routes through walls, floors, and crawlspaces must be planned before cutting or drilling to guarantee efficient, code-compliant PEX runs.
Map pathways, avoid electrical and HVAC conflicts, and locate studs, joists, and fire blocks.
Drill appropriate-size holes, protect tubing with grommets or plates where edges are sharp, secure with straps every code-specified interval, and maintain proper slope and access for future repairs.
Installing manifolds and branch lines
Place the manifold centrally to minimize branch lengths and simplify shutoff access, then lay out each branch line according to the preplanned map.
Secure manifold to solid backing, label ports for hot and cold, and size branch runs for fixture demand.
Route PEX with gentle bends, support at recommended intervals, install isolation valves on critical branches, and pressure-test the assembly before concealment.
Making connections to fixtures, appliances, and water heater
With the manifolds and branch runs established, the installer connects each PEX branch to its respective fixture, appliance, and the water heater, following the preplanned routing and labeling.
Connections use appropriate fittings—crimp, clamp, or expansion—matching pipe size and material.
Flexible tailpieces, shutoff valves, dielectric unions for water heaters, and proper support are installed to guarantee serviceability and code compliance.
Pressure testing, leak detection, and adjusting connections
Begin pressurizing the new PEX system after all fittings and shutoffs are secured to verify integrity before drywall or finishes are replaced.
Use a calibrated test gauge and pump to reach code-specified pressure, monitor for hold time, and inspect joints.
Address any drops by isolating sections, retightening or replacing fittings, then retest until stable.
Document pressures and corrective actions for final inspection.
Insulating, securing, and protecting PEX runs
Secure the routed PEX runs, apply appropriate insulation, and protect exposed sections to prevent movement, heat loss, and damage during and after installation.
Use clips, straps, and brackets at recommended intervals; avoid over-tightening.
Install foam or closed-cell insulation on hot and cold lines, freeze-protect vulnerable runs, and shield PEX where it crosses studs, edges, or heat sources with plates or conduit to guarantee longevity and code compliance.
Restoring walls and finishing touches
After all PEX runs are fastened, insulated, and protected, attention shifts to restoring walls and completing final finishes.
Drywall or access panel patches are measured, cut, and secured; seams taped and mudded. Surfaces are sanded, primed, and painted to match existing decor.
Trim, outlet covers, and fixtures are reinstalled. Final cleanup removes debris and verifies unobstructed access to valves.
Detailed Connection Methods and Techniques
The discussion turns to specific connection methods and techniques for PEX systems, including crimping procedures and the use of expansion fittings.
It will also cover when push-fit fittings are best for repairs or tight spaces and outline proper practices for shifting between PEX and copper or galvanized lines.
Clear steps, tool recommendations, and common pitfalls will be highlighted to guarantee reliable joints.
How to crimp PEX connections
Crimping PEX connections joins tubing to fittings with a metal ring compressed uniformly around the pipe, creating a watertight mechanical seal. Proper technique requires correct ring selection, precise tool alignment, and consistent squeeze force to prevent leaks or joint failure.
- Cut squarely, deburr, and slide ring fully over tubing.
- Seat fitting shoulder against tubing end.
- Position crimper jaws over ring, perpendicular.
- Squeeze until tool indicates full cycle, then inspect gap.
How to use expansion fittings
Begin by preparing the tubing and fittings to the manufacturer’s specifications: cut PEX square, deburr the end, mark insertion depth, and verify the expansion fitting and ring (if required) match the tubing size and material.
- Use the correct expander head and size-specific jaws.
- Expand tubing evenly to the marked depth.
- Insert the fitting fully before contraction.
- Allow cooling time and inspect for uniform fit and no damage.
Using push-fit fittings for repairs and tight spots
Reach into tight cavities or patch a leaking run quickly using push-fit fittings, which join PEX, copper, CPVC, and other common plumbing materials without tools or heat.
Installers should cut square, deburr, and mark insertion depth. Push firmly until the stop engages; verify by tugging.
Use only approved brands, replace O-ring–compromised fittings, and avoid prolonged UV exposure or excessive bending at the joint.
Best practices for transitions to copper or galvanized lines
When shifting PEX to copper or galvanized lines, technicians should select connection methods that match pipe materials, pressure ratings, and service conditions to confirm long-term integrity; use approved junction fittings — brass or dielectric unions, crimp-to-sweat adapters, or press-to-copper couplings.
Verify proper cleaning, deburring, and flux application where required. Employ corrosion-isolating dielectric fittings, and pressure-test junctions before concealment.
Common Problems, Troubleshooting, and Repairs
The section reviews typical PEX issues and systematic approaches for diagnosis, including identifying leaks and sources of pressure loss.
It outlines repairs for pinhole leaks, frozen or physically damaged runs, and remedies for water hammer, flow restrictions, and trapped air.
Practical long-term maintenance measures are summarized to reduce recurrence and extend system life.
Diagnosing leaks and pressure loss
Diagnosing leaks and pressure loss in a PEX system begins with systematic isolation and observation to pinpoint whether problems originate from fittings, tubing, valves, or the supply.
Shut individual branches, monitor pressure with a gauge, and inspect visible joints for moisture.
Listen for hissing, use dye or soap for small leaks, and check water meter movement when all fixtures are off to locate concealed failures.
Fixing pinhole leaks, frozen sections, and damaged PEX
Addressing pinhole leaks, frozen sections, and damaged PEX requires prompt, targeted action to prevent water loss and structural harm.
Locate leaks, depressurize the system, and cut out affected PEX segments. Use compatible fittings and crimp or expansion tools per manufacturer instructions.
For freeze-prone runs, thaw gently and insulate; replace badly compromised sections.
Test at working pressure and inspect joints for integrity.
Addressing water hammer, flow restrictions, and air in lines
Identify and resolve water hammer, flow restrictions, and air in PEX lines by systematically isolating symptoms, locating their sources, and applying the appropriate corrective measures.
For water hammer, install or replace arrestors near quick‑closing valves and secure loose piping.
For low flow, inspect fittings, debris, and undersized runs; clean or replace as needed.
Purge trapped air via high‑point vents or fixture cycling.
Long-term maintenance tips to prevent issues
Having resolved immediate causes of water hammer, flow loss, and trapped air, long-term upkeep focuses on simple, regular practices that prevent recurrence and extend the life of PEX plumbing.
Inspect fittings annually, tighten or replace corroded clamps, confirm proper support spacing, flush lines seasonally to remove sediment, maintain water pressure within recommended limits, and address chemical exposure or UV light promptly to avoid degradation.
Time-Saving Tips, Cost-Saving Strategies, and Mistakes to Avoid
Practical layout choices—such as zoning fixtures around a central manifold and minimizing long runs—can cut both material and labor costs.
Efficient routing and grouping of hot and cold lines reduce fittings and installation time, while common DIY mistakes (improper support, poor crimps, and incorrect fittings) are preventable with proper tools and inspection.
For complex reroutes, fuel-gas or structural penetrations, or any uncertain work, a licensed plumber should be engaged.
Layout strategies that reduce material and labor costs
Streamlining the PEX layout begins with planning trunk-and-branch runs and centralized manifolds to shorten tubing lengths, reduce fittings, and minimize installation time.
Consolidating fixtures near supply walls, selecting correct PEX diameter to balance flow and cost, and staging work to avoid rework cut labor.
Avoid overfitting, unnecessary bends, and scattered manifolds; verify measurements before cutting to prevent wasted materials.
Efficient routing and grouping of lines
Once trunk-and-branch runs and manifold placement are set, routing and grouping individual PEX lines determines how quickly and cleanly the system goes in.
Bundle runs by destination, keep hot and cold pairs together, and minimize crossings.
Use labels, clips, and consistent spacing to speed installation and simplify future service.
Pre-measure lengths to reduce waste and avoid unnecessary fittings.
Common DIY mistakes and how to prevent them
Many DIYers underestimate how quickly small errors multiply into time delays and extra costs during a PEX re-pipe, so recognizing common pitfalls up front saves both hours and dollars.
- Poor measurements leading to wasted pipe and fittings.
- Incorrect crimping or clamp technique causing leaks.
- Neglecting labeling or documentation, creating future confusion.
- Improper support or thermal expansion allowance causing stress and noise.
When to call a licensed plumber
When should a homeowner pause a DIY PEX re-pipe and call a licensed plumber?
Complex layouts, concealed leaks, mains tie-ins, code questions, or unfamiliar permits warrant professional help.
A plumber saves time by troubleshooting pressure issues, guarantees code-compliant installations, and prevents costly rework.
If troubleshooting, crimp failures, or suspect soldered connections appear, hiring a licensed pro avoids mistakes and protects property and warranty.
Comparative Case Examples and Typical Project Scenarios
The section presents concise comparative case examples to illustrate typical PEX replumbing scenarios and expected outcomes.
It covers a full repipe for a 1,200 sq ft bungalow with material lists, step sequence, and budget ranges.
It also includes a partial repipe focused on kitchen and bathrooms, and a retrofit strategy for a finished basement that minimizes demolition.
Readers can use these scenarios to match project scope to cost, timeline, and disruption.
Example: Replumb a 1,200 sq ft bungalow (materials, steps, budget)
A practical replumb of a 1,200 sq ft bungalow using PEX typically involves replacing outdated galvanized or copper lines with a manifold-based PEX system, outlining required materials, stepwise tasks, and an approximate budget to guide homeowners and contractors through scope and cost.
Materials: PEX tubing, manifold, fittings, shutoffs, insulation.
Steps: demo, run mains, branch to fixtures, pressure test, restore.
Budget: $2,500–6,000.
Example: Partial repipe for kitchen and bathrooms
Following the full-house replumb example, focus shifts to partial repipes that target kitchens and bathrooms—common problem areas where leaks, low pressure, or aging pipes concentrate.
This scenario outlines scope: replace branch lines from main to fixtures, install dedicated manifold, minimize drywall access, sequence shutoffs and fixture-by-fixture testing.
Materials, labor hours, permits and cost estimates are scaled to localized work versus whole-house replacement.
Example: Retrofit in finished basement without major demolition
Retrofit work in a finished basement without major demolition requires careful routing and minimal intrusion to preserve existing finishes.
The crew identifies accessible chases, uses PEX runs under joists and behind access panels, and favors push-fit or crimp fittings.
Strategic use of surface-mounted raceways, isolation valves, and soundproofing prevents disruption.
Inspection paths and permit compliance are maintained throughout the project.
Final Checklist Before Closing the Project
The team completes a pre-inspection checklist to confirm code compliance and address safety items before any concealment.
A final pressure test is conducted and fixtures are checked, with all results and as-installed product labels documented.
Warranties are issued and a concise homeowner maintenance guide is provided to close out the project.
Pre-inspection checklist for code compliance and safety
One concise checklist itemizes code compliance and safety tasks to verify before closing a PEX repiping project, ensuring inspections proceed smoothly and liability is minimized.
It includes confirming proper pipe support, correct fittings and crimps, compliance with local spacing and burial rules, accessible shutoffs, correct expansion allowances, proper labeling, electrical bonding where required, combustion air clearance, and absence of visible leaks or heat sources near PEX runs.
Final pressure test, fixture checks, and documentation
Begin final testing by pressurizing the system to the specified test pressure and holding it while visually and instrumentally verifying all connections, fittings, and runs for leaks or pressure loss.
Inspect every fixture, operate valves, and cycle washers and faucets.
Record pressure readings, observed defects, corrective actions, and test duration.
Compile signed test log and photographs for the project file before system activation.
Warranty, product labeling, and homeowner maintenance guide
With testing complete and documentation secured, attention shifts to warranty coverage, product labeling, and homeowner maintenance guidance before closing the project.
The installer compiles warranties, labels lines, and prepares a concise maintenance sheet for owners.
Provide clear contacts, material specifications, and service intervals. Confirm all labels match as‑installed diagrams and hand off digital copies.
- Warranties and contacts
- Line labeling
- Maintenance schedule
- As‑built files
Conclusion
Like a river rerouted through new channels, the house’s veins gleam with flexible promise, PEX threading warmth and resilience into every room. Each fitting, a careful handshake; each route, a chosen current guiding water toward certainty. The old copper whispers of past weather; the new lines sing of efficiency. In this quiet finishing, tools are set down, plans fulfilled, and the home breathes easier—steady, renewed, ready for years of steady flow.