
How to Vent a Gas Water Heater in a Basement Safely: Step-by-Step Guide
To safely vent a gas water heater in a basement, ensure that combustion gases exit effectively while preventing backdrafting and adhering to local codes. Start by inspecting the heater and measuring the flue size and draft. Plan the vent termination and maintain proper clearances. Use corrosion-resistant Class B or stainless venting with the correct slope and sealed joints. If ceiling height is a concern, consider power or direct vent options. Finally, verify combustion air, test the draft, and install detectors as needed. Follow additional troubleshooting steps for optimal safety and performance.
How to Vent a Gas Water Heater in a Basement Safely: Quick Overview
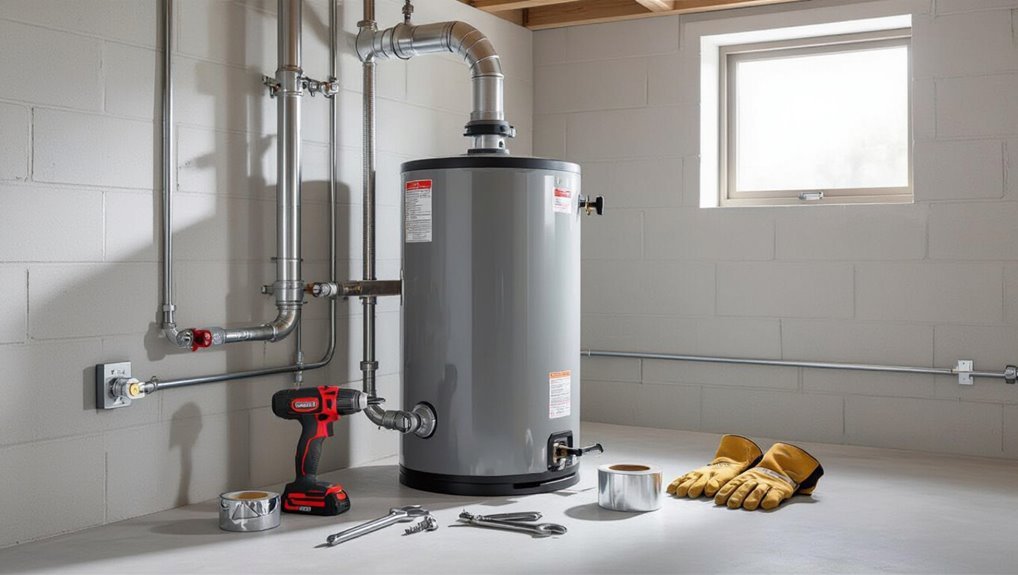
The overview summarizes key safety objectives for basement venting, including proper draft, combustion air supply, and corrosion-resistant venting to prevent carbon monoxide and backdrafting.
It outlines clear indicators when a homeowner should hire a licensed professional versus acceptable DIY tasks.
It also lists common tools, materials, and permits typically required for compliant installation and inspection.
Key safety objectives when venting a gas water heater
Guarantee combustion gases are expelled reliably, prevent backdrafting, and maintain proper clearances and materials to avoid fire, carbon monoxide, and moisture hazards.
The core objectives for how to vent gas water heater in basement include ensuring correct flue size and slope, secure sealing of joints, adequate fresh air supply, corrosion-resistant materials, termination above roofline per code, and routine inspection to detect leaks, blockages, or deterioration.
When to call a professional vs. DIY indicators
When should a homeowner attempt venting tasks and when is professional help required?
Homeowners may handle minor adjustments, replacing short vent sections, or cleaning accessible obstructions if confident in gas safety.
Call a licensed professional for draft problems, backdrafting, carbon monoxide alarms, complex chimney work, corroded flues, gas-line modifications, code compliance, or any uncertainty.
Professional assessment reduces risk and guarantees proper, legal installation.
Tools, materials, and permits commonly required
A concise list of essential tools, materials, and permits helps a homeowner determine whether a basement gas water heater venting job is feasible as a DIY task or requires a licensed contractor.
Clear requirements reduce risk and delays.
- Basic tools: drill, tin snips, level.
- Materials: Class B/B-vent or stainless chimney, sealant, brackets.
- Permits: local building and gas inspection approvals.
How Gas Water Heater Venting Works
Venting systems for gas water heaters include natural draft, power vent, direct vent, and atmospheric designs, each moving combustion products differently.
Combustion gases must be carried safely from the heater to the outdoors to prevent carbon monoxide buildup and corrosion of the appliance.
Local codes and manufacturer instructions specify materials, clearances, and installation methods that determine which vent type is appropriate and how it must be installed.
Types of venting systems (natural draft, power vent, direct vent, atmospheric)
Gas water heaters rely on several distinct venting methods—natural draft, atmospheric, power vent, and direct vent—each using different means to remove combustion gases and prevent backdrafting.
Choices depend on installation, clearance, and combustion-air source. Consider performance, noise, and electrical dependence.
- Natural draft: relies on buoyancy.
- Power vent: uses a fan.
- Direct vent: sealed intake/exhaust.
How combustion gases travel and why proper venting matters
Different venting methods determine how combustion products move from the burner to the outdoors: buoyant hot gases rise through chimneys in natural-draft systems, while power-vent units force exhaust through small ducts with a fan, and direct-vent designs push and pull through sealed coaxial pipes.
Proper venting guarantees removal of carbon monoxide, prevents backdrafting, controls moisture and corrosion, and maintains combustion efficiency and safe indoor air quality.
Code and manufacturer requirements that govern venting
Because improper installation can create serious hazards, venting is strictly governed by both national and local codes plus manufacturer instructions that together set mandatory requirements for clearances, vent materials, termination locations, draft control, and combustion air provisions.
Inspectors enforce codes (e.g., IRC, NFPA), while manufacturers specify vent type, connector length, and altitude adjustments.
Compliance guarantees safe draft, prevents backdrafting, and maintains warranty.
Pre-Installation Assessment and Planning
Before beginning work, a thorough assessment of the existing heater, flue, and surrounding space verifies suitability and highlights needed repairs.
Calculations for vent diameter, effective length, and draft, plus identification of an appropriate termination point with required clearances, determine the system layout.
Common basement issues—low ceilings, nearby rooms, and windows—are noted so routing or component choices avoid code violations and performance problems.
Inspecting the existing heater and flue for suitability
Begin by visually and mechanically evaluating the existing gas water heater and its flue to determine whether they meet current safety and venting requirements.
Verify manufacturer labels, age, corrosion, rust, leaks, and proper clearances.
Inspect flue pipe condition, joints, pitch, supports, and termination.
Note combustible proximity, combustion air sources, and any previous modifications needing correction before venting work proceeds.
Calculating vent size, length, and draft requirements
Determine vent size, length, and draft requirements by matching the water heater’s flue gas volume and temperature to the venting system’s capacity and configuration.
Calculate required vent diameter from appliance input and chimney tables or manufacturer data.
Account for equivalent length: straight sections, fittings, and offsets.
Guarantee draft-producing conditions: minimum vertical rise, termination pressure, and adequate combustion air.
Verify with draft test procedures.
Determining termination location and clearances
When planning a vent termination, the installer must identify a location that satisfies manufacturer specifications, local codes, and site-specific constraints while minimizing risks to occupants and nearby structures.
They must confirm required clearances from doors, windows, property lines, and ventilation openings; maintain specified vertical and horizontal offsets; guarantee condensate and flue discharge won’t create hazards; and document chosen location for inspection and compliance.
Identifying common obstacles in basements (low ceiling, adjacent rooms, windows)
Because basements often combine confined vertical space with nearby living areas, installers must first catalog physical constraints—low ceilings, adjacent rooms and partitions, and basement windows—that can restrict vent routing and termination options.
They evaluate ceiling height, soffits, joist runs, and obstruction locations; inspect walls and window placements for code-required clearances; and plan alternate routes, offsets, or powered venting to meet safety and exhaust dispersion requirements.
Step-by-Step Guide to Installing a Safe Vent System
Before beginning, the installer prepares the workspace, shuts off gas and power, and assesses how the existing flue must be removed or modified.
The procedure then splits by vent type: for natural-draft chimneys the correct materials and installation sequence are followed, while power-vent or direct-vent units require proper mounting, electrical hookup, and careful vent routing.
All installations finish with sealed joints, supported vent runs, and verification of required slope and clearances.
Preparing the work area and shutting off gas and power
A clear, unobstructed work area and the complete shutdown of all gas and electrical sources are essential prerequisites to any venting project.
Personnel should ventilate the basement, remove tripping hazards, and position lighting and tools safely.
Locate and close the gas shutoff valve, lock or tag it out if possible, and switch off the water heater’s electrical supply at the circuit breaker before proceeding.
Removing or adapting the existing flue
With gas and power secured and the area cleared, attention turns to the existing flue.
The installer inspects condition, clearances, and termination point. Corroded or undersized sections are removed; remaining shaft is measured for proper offset and draft.
Any penetrations are sealed, supports added, and combustible clearances maintained. All work complies with codes and awaits final vent connection verification.
Installing natural-draft chimney venting: materials and sequence
Several essential components and a clear sequence are required to install natural-draft chimney venting safely: properly sized single-wall or class-A chimney sections, storm collars, flashing, a draft hood or adapter, support brackets, high-temperature sealant, and a termination cap, all selected to match the heater’s flue diameter and local code.
- Measure and assemble chimney sections.
- Install draft hood and adapter.
- Seal, support, flash, and cap.
Installing a power-vent or direct-vent unit: mounting, electrical, and vent routing
After completing chimney-based venting, attention shifts to power-vent and direct-vent designs, which call for different mounting, electrical, and routing practices.
Install robust mounting brackets, guarantee level placement, and secure to framing.
Follow electrical codes: dedicated circuit, GFCI where required, and hardwired or plug per manual.
Route vent through shortest path with approved pipe and termination per manufacturer.
- Mounting
- Electrical
- Routing
Sealing joints, supporting vent pipes, and maintaining proper slope
Begin by preparing each joint and run so the vent system remains gas-tight, well-supported, and pitched for proper drainage.
Use code-approved sealants, proper gaskets, and approved screws or clamps at seams.
Install pipe supports at manufacturer spacing, secure hangers to solid structure, and slope horizontal runs slightly toward the appliance for condensate drainage.
Inspect and test for leaks before concealing.
Connecting to the flue or terminating through roof/wall safely
With joints sealed, supports installed, and horizontal runs pitched, the installer proceeds to connect the vent to the appliance flue or to terminate it through the roof or wall.
Appropriate adapter pieces and gasketed connections are used, clearances to combustibles maintained, and flashing or wall thimbles fitted.
Penetrations are weatherproofed, fasteners secured, and the system aligned for unobstructed draft and inspection access.
Reconnecting gas, testing for leaks, and initial startup checks
Restore the gas supply only after the venting system is fully assembled and inspected for proper clearances and seals.
Reconnect the gas valve and piping per code, using approved fittings and thread sealant.
Perform a soap-bubble or electronic leak test on all joints.
Ignite the pilot or electronic ignition, observe proper flame and vent draft, check for exhaust spillage, and verify carbon monoxide alarm operation.
Basement-Specific Venting Solutions and Considerations
Basement installations require different venting approaches than those in conditioned living spaces, including horizontal wall-termination techniques that minimize backdraft and maintain clearance.
Options such as power vents can eliminate roof penetrations but necessitate planned condensate drains and careful routing of combustion air for enclosed basements.
Attention to condensate management, dedicated drain provisions, and compliance with combustion air and termination clearances guarantees safe, code-compliant basement venting.
Horizontal wall-termination best practices for basements
Several critical factors govern safe horizontal wall termination of a gas water heater in below-grade spaces, including clearances, termination height, wind and downdraft exposure, and combustion-air provisions.
Install termination above expected snow or splash levels, maintain manufacturer and code minimum clearances from openings and combustibles, use sealed, listed vent kits, slope vent runs slightly toward outdoors, and provide dedicated combustion and dilution air per code.
Using a power vent to avoid roof penetrations
Consider a power vent when roof penetration is impractical or undesirable: it uses a fan-assisted blower to push flue gases through a short horizontal run to an exterior wall termination, allowing the water heater to remain in a below-grade space without cutting the roof.
Installation requires proper manufacturer-specified vent materials, condensate drainage, electrical supply, and sealed wall termination; follow local codes and obtain permits.
Combustion air requirements for enclosed basement spaces
When a gas water heater is located in an enclosed basement space, adequate combustion air must be provided to guarantee safe, efficient operation and prevent backdrafting of flue gases.
The installer must assess room volume, existing openings, and appliance BTU input.
Provide direct and/or indirect air per code: two permanent louvers or ducts sized per manufacturer or local code, ensuring unobstructed airflow and separation from contaminants.
Condensation management and drain provisions for power vents
After ensuring adequate combustion air in an enclosed basement, attention must turn to condensation control for power-vented water heaters.
Since forced flue discharge and cooler basement temperatures increase condensate production, install a corrosion-resistant condensate trap and drain.
Slope vent termination downward away from the building, route condensate to an approved floor drain or condensate pump, and use neutralizer pans where required by code.
Code Compliance, Permits, and Inspection Checklist
Compliance with local building codes dictates clearances, approved vent materials, and proper termination heights for safe operation.
Homeowners and installers should obtain required permits, keep documentation, and expect inspections at key stages of installation.
Manufacturer instructions must be retained and followed to guarantee the installation meets both safety standards and code requirements.
Typical code requirements (clearances, materials, termination heights)
Several jurisdictions adopt specific code requirements for gas water heater venting that address clearances, acceptable materials, and termination heights to guarantee safe combustion venting and prevent exhaust hazards.
Codes typically require specific clearances from combustibles, listed vent materials and connectors, and minimum termination heights above openings.
Typical points:
- Clearance distances per label/manufacturer.
- Approved vent types (B-vent, chimney liner).
- Termination above windows/air intakes.
Permits, documentation, and inspection steps
Permits and documented approvals are essential steps before modifying or installing a gas water heater venting system to guarantee work meets local codes and safety standards.
Obtain required permits from the local authority, submit plans or diagrams, schedule inspections at designated stages, and retain approval certificates.
Keep copies of permits, inspection reports, and any corrective actions for future reference and resale documentation.
Manufacturer instructions to retain and follow
One clear requirement is that the manufacturer’s installation and operation manual be retained on-site and consulted throughout installation, testing, and any future maintenance.
Installers must follow specified venting clearances, materials, termination heights, drafting tests, and combustion air requirements.
Retaining the manual guarantees code compliance, supports permit inspections, and documents approved adjustments.
Deviations require manufacturer approval and written justification for inspector review.
Common Problems, How to Troubleshoot, and When to Repair
The section outlines common venting problems such as backdrafting and carbon monoxide hazards, noting key warning signs like unusual drafts, soot buildup, or corrosion.
It describes basic troubleshooting steps for vent damage and for power‑vent systems with electrical or fan failures, and when to call a qualified technician.
Guidance is given on evaluating repair versus replacement, emphasizing safety, cost, and the age/condition of the unit.
Signs of backdrafting or carbon monoxide issues
Several clear indicators can signal backdrafting or carbon monoxide problems with a gas water heater, and recognizing them early prevents dangerous exposure.
Warning signs include persistent soot around the appliance, a yellow or flickering pilot flame, unexplained illness (headaches, nausea, dizziness) among occupants, excessive condensation or odors near vents, and a CO alarm activation.
Immediate inspection and professional repair are advised.
Draft, soot, and vent corrosion causes and fixes
Inspecting draft behavior, soot deposits, and vent corrosion reveals common failure modes that impair a gas water heater’s exhaust system and pose safety risks.
Causes include improper chimney size, blocked flues, moisture condensation, and combustion inefficiency.
Troubleshoot by checking draft with a smoke test, clearing obstructions, and inspecting joints.
Repair or replace corroded venting and adjust combustion; consult a professional for extensive damage.
Electrical or fan malfunctions in power-vent systems
Power-vent systems rely on electrically driven fans and control electronics that, when faulty, can interrupt exhaust flow and shut down the water heater.
Common issues include fan motor failure, capacitor or wiring faults, and control-board errors.
Troubleshooting: verify power, check fuses, listen for fan operation, test voltage, inspect connections.
Repair when components are serviceable; consult a licensed technician for electrical diagnostics and safe fan replacement.
When replacement is safer than repair
After addressing fan and control failures, decisions must be made about whether to repair individual components or replace the entire power-vent assembly or water heater.
Replacement is safer when corrosion, repeated failures, obsolete parts, compromised combustion chambers, or chronic leaks exist.
Prioritize safety codes, long-term cost, and reliable venting integrity; consult a licensed technician to assess risks and document reasons for replacement.
Safety Measures and Carbon Monoxide Prevention
The section covers essential safety measures and carbon monoxide prevention for gas water heaters, beginning with proper placement and installation of CO and combustion-safety detectors.
It outlines a concise routine maintenance schedule with key inspection points for venting, burners, and seals.
It also specifies emergency shutoff steps and clear evacuation procedures in the event of suspected CO exposure.
Installing and locating CO and combustion-safety detectors
When combustion appliances are present, properly placed carbon monoxide (CO) and combustion-safety detectors are essential to detect leaks and unsafe draft conditions before they become life-threatening.
Install UL-listed CO alarms near sleeping areas, one on each level, and a combustion-safety sensor in the basement near the water heater.
Follow manufacturer placement: avoid dead-air corners and direct exhaust paths.
- Bedroom level
- Basement proximity
- Clearance rules
Routine maintenance schedule and inspection points
Regular monthly checks and an annual professional inspection keep a gas water heater operating safely and reduce carbon monoxide risk.
Inspect vent connectors, flue, and chimney for corrosion, obstructions, or loose joints.
Verify proper draft and burner flame color.
Test pressure relief valve, look for leaks, and confirm combustion air openings are unobstructed.
Record findings and schedule repairs promptly.
Emergency shutoff and evacuation procedures
Shut off the gas supply immediately at the appliance valve and the home’s main gas shutoff if a leak, strong odor, or symptoms of carbon monoxide exposure are suspected.
Evacuate all occupants and pets to fresh air, call emergency services and the gas utility from outside, and do not re-enter until responders declare it safe.
Document events and arrange professional inspection before restoring service.
Cost, Timeframe, and Material Options
Typical cost ranges for venting work vary considerably between DIY projects and hiring a professional, and readers are reminded to weigh equipment, permits, and labor when budgeting.
Material choices—galvanized or stainless steel, B-vent, and PVC for approved units—affect durability, code compliance, and price.
Estimated time and labor for common basement venting jobs normally span a few hours for simple fixes to a full day or more for complex reroutes or permit-required installations.
Typical cost ranges for DIY vs. professional vent installation
A homeowner weighing options for venting a gas water heater will usually find a clear cost divide between DIY projects and hiring a professional: DIY installations commonly run from about $50 to $400 for materials and basic tools, while professional labor and parts typically push total costs into the $300–$1,200 range depending on complexity. Typical timeframe, risks, and budget tiers:
| Option | Typical Cost | Typical Time |
|---|---|---|
| DIY | $50–$400 | 2–8 hours |
| Pro | $300–$1,200 | 2–6 hours |
Material comparisons: galvanized steel, stainless steel, B-vent, PVC (for approved units)
With budget and labor considerations established, material choice becomes the next determinant affecting both price and installation time. Options vary by durability, code, and ease of installation: galvanized (cheapest, prone to corrosion), stainless (costly, long-lasting), B-vent (common for atmospheric draft), PVC (allowed for some sealed systems).
| Material | Cost | Notes |
|---|---|---|
| Galvanized | Low | Corrodes |
| Stainless | High | Durable |
| B-vent | Medium | Conventional |
| PVC | Low-Med | Only approved units |
Estimated time and labor for common basement venting projects
While project scope and material choice determine exact requirements, common basement venting jobs—such as replacing a short run of B-vent, swapping galvanized for stainless, or installing PVC for an approved sealed unit—generally fall into predictable cost and time ranges.
Simple replacements often require 1–3 hours and minimal tools. Moderate jobs (adding offsets, roof/sidewall terminations) take a half- to full-day. Complex reroutes or code-driven upgrades (firestopping, chase construction, or liner installation) can consume one to two full days plus inspections.
Typical labor rates, material costs, permit fees, and inspection timelines vary regionally; budget accordingly and obtain written estimates before starting.
Best Practices, Tips, and Mistakes to Avoid
Experienced installers recommend specific practices for durable, code-compliant venting, such as correct pitch, secure fittings, and appropriate materials.
Common DIY errors that compromise safety include improper clearances, incorrect vent sizing, and loose connections.
Clear documentation of the installation, including photos, permits, and a parts list, simplifies resale and inspection.
Top installer tips for durable, code-compliant venting
Installers should prioritize clear planning, correct material selection, and strict adherence to code to guarantee vent systems remain durable and safe over time.
Follow manufacturer specs, use listed vent components, and confirm clearances.
Verify joints, supports, and slope. Test for proper draft and combustion air.
- Document plan and approvals.
- Use labeled, code-approved materials.
- Inspect and test before concealment.
Common DIY mistakes that compromise safety
Recognize that common DIY shortcuts—improper vent sizing, unsecured joints, inadequate clearances, and rerouted or damaged flue piping—can quickly turn a routine water heater job into a serious safety hazard.
Other frequent mistakes include using wrong materials, omitting draft stops, poor sealing at roof or wall penetrations, and neglecting support for vertical runs.
Each error increases carbon monoxide and fire risks; correct procedures are essential.
How to document the installation for resale or inspection
After correcting common DIY venting errors, attention should turn to documenting the installation for resale or inspection.
Photographs, labeled diagrams, manufacturer manuals, and receipts should be compiled. Include permits, inspection reports, and contractor contact information.
Note materials, vent routing, clearances, and termination details. Store both physical and digital copies; provide a concise summary for buyers or inspectors.
Avoid omitting permits or unclear photos.
Resources and Further Reading
For specific requirements and permit procedures, readers are directed to their local building department or municipal code office.
Manufacturer manuals and installation guides should be consulted for model-specific venting details and clearances.
Trusted industry resources — such as national plumbing and gas safety organizations — provide standards and additional guidance.
Where to find local code requirements and permit offices
When planning venting work, homeowners and contractors should consult local building codes and permit offices to guarantee compliance with safety, inspection, and installation requirements.
Contact the municipal building department or county permitting office for code summaries and permit fees.
Verify state plumbing/mechanical codes online.
Use licensed inspector contacts for scheduling reviews.
- Municipal building department
- County permit office
- State code websites
Manufacturer manuals and trusted industry references
Although manufacturer manuals and recognized industry references can vary in format, they remain the primary sources for safe venting practices.
These resources offer model-specific installation steps, clearances, venting distances, and maintenance schedules that must be followed to guarantee warranty coverage and code compliance.
Recommended resources include:
- Manufacturer installation and service manuals.
- National Fuel Gas Code (NFPA 54/ANSI Z223.1).
- Local building and utility authority publications.
Conclusion
In summary, homeowners should treat basement gas water heater venting as a safety priority rather than a convenience. Proper venting prevents lethal carbon monoxide buildup and guarantees appliance efficiency. Significantly, the U.S. Consumer Product Safety Commission reports CO poisoning causes about 400 deaths annually—underscoring that even small lapses can have fatal consequences. Following codes, using approved materials, and consulting professionals reduces risk, preserves health, and extends the life of the heater.
