How to Fix No Hot Water Pressure in Shower: Quick DIY Checks and Solutions
If you’re experiencing low hot water pressure in your shower, it often stems from a clogged showerhead, partially closed valves, or scale buildup in the water heater. To resolve this issue, start by testing other hot water taps in your home. If they work fine, remove and descale the showerhead, check the supply shutoff valves, and inspect the mixing cartridge. If sediment is suspected in your water heater, flushing it may help. Remember to use basic tools, turn off power or gas to the heater before servicing, and wear eye protection. Continue reading for step-by-step solutions, necessary parts, and guidance on when to call a professional.
Why Your Shower Has No Hot Water Pressure Right Now
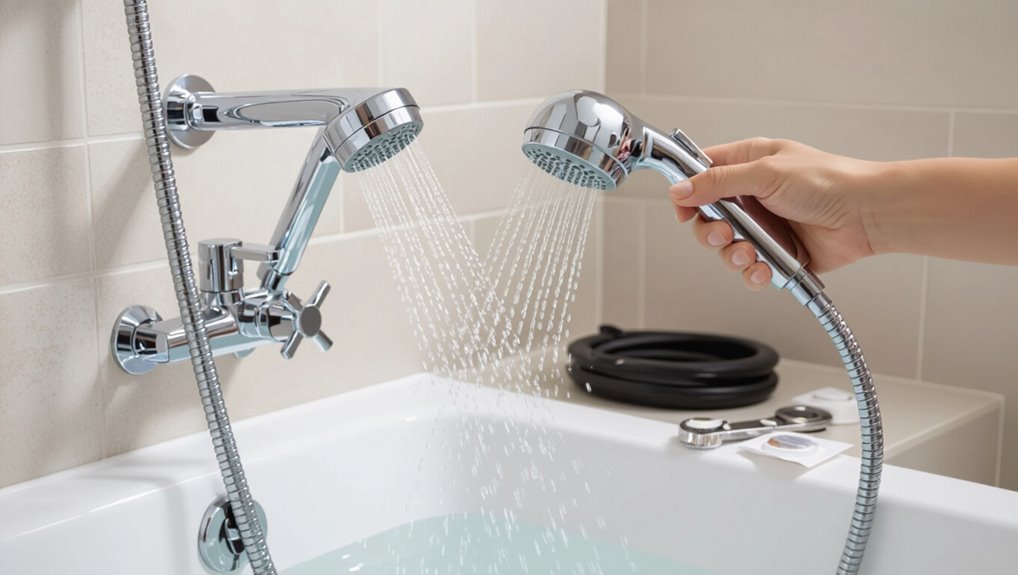
Common causes of low or no hot water pressure include sediment-clogged fixtures, a failing water heater, closed or corroded valves, and issues with supply lines.
A quick check compares flow at cold taps and other hot fixtures to determine if the problem is isolated to the shower or affects the whole house.
Before inspecting the shower or water heater, the person should gather basic tools (adjustable wrench, screwdriver, bucket) and follow safety precautions such as shutting off power or gas to the heater and closing the main water supply.
Common overall causes of low or no hot water pressure
Investigate several typical system-wide issues that can reduce or eliminate hot water pressure, since the problem often stems from plumbing components or supply rather than the showerhead itself.
Common causes include corroded or clogged pipes, a failing water heater, partially closed supply valves, sediment buildup in tanks, pressure-reducing valve faults, and municipal supply interruptions.
Homeowners searching how to fix no hot water pressure in shower should inspect these.
How to quickly check whether the problem is hot water only or whole-house
Want to know if the issue is confined to the shower or affects the whole house?
The person tests other hot-water taps—kitchen, bathroom sink, laundry—observing flow and temperature.
If multiple fixtures show weak or no hot flow, the problem is house-wide.
If only the shower is affected, attention shifts to the shower valve, head, or local plumbing before checking the water heater.
Tools and safety precautions before inspecting plumbing or water heater
Before touching the shower valve or water heater, gather the right tools and follow basic safety steps to prevent injury and damage.
Essentials include adjustable wrench, pliers, screwdriver set, flashlight, bucket, towels, and a multimeter for electrical checks.
Shut off power to electric heaters or gas supply for gas units, close cold-water feed, wear gloves and eye protection, and ventilate the area before beginning.
Quick Diagnostic Checklist You Can Do in Minutes
A quick, focused checklist helps pinpoint whether the issue is localized to the shower or indicates a broader plumbing or water-heater problem.
Within minutes one can rule out common causes by testing other fixtures, inspecting visible components, and noting sounds or timing patterns that suggest heater or valve issues. The following three checks prioritize the fastest, most informative actions.
- Run a nearby sink or appliance to confirm whether hot water is available elsewhere.
- Remove and inspect the shower head/aerator for blockages and check visible valves or pipes for leaks or partial closures.
- Measure temperature and pressure at different times and listen at the heater for unusual noises.
Verify other taps and appliances for hot water
Where else in the house is hot water low or absent? A quick survey checks sinks, tubs, dishwasher, and washing machine.
Note which fixtures have weak or no hot flow and whether cold pressure is normal. Patterns indicate localized blockage, a single mixer valve, or a broader supply/heater issue.
Record findings before adjusting valves or contacting a plumber.
Check shower head and faucet aerator for blockages
Having noted which fixtures show weak or no hot flow, the next quick check is the shower head and any faucet aerators.
Remove and inspect for mineral buildup, sediment, or debris. Soak parts in vinegar to dissolve scale, brush nozzles, and rinse. Reinstall and retest.
Clogged screens often reduce pressure; cleaning usually restores normal flow without tools or a plumber.
Test temperature and pressure at different times of day
When did the problem first appear and does it vary with household routines?
The homeowner measures hot-water temperature and flow at morning, midday and evening, noting differences during peak demand. They record readings at the shower and nearby taps, comparing consistency.
Short trials reveal whether pressure drops coincide with appliance use or utility schedules, guiding next steps or professional consultation.
Inspect visible pipes and valves for leaks or partially closed valves
Begin by visually scanning all exposed hot-water pipes, shutoff valves and fittings from the water heater to the bathroom, looking for drips, corrosion, wet spots, mineral buildup or valves that are not fully open.
Note any dampness, white crusting or green corrosion.
Tighten loose fittings, gently open partially closed valves, and mark or replace visibly damaged sections.
Report significant leaks to a plumber.
Listen for unusual noises from the water heater
After checking visible pipes and valves, attention should shift to sounds coming from the water heater, since unusual noises often signal internal problems that affect hot-water pressure.
Listen for banging, rumbling, popping, or hissing while a hot tap runs. These indicate sediment buildup, thermal expansion, or failing components.
Note noise timing and intensity; record or describe findings for technician guidance or targeted DIY flushing and maintenance.
Step-by-Step Fixes for Shower Hot Water Pressure Problems
A systematic approach addresses the most common causes of weak hot water pressure in showers. Technicians or homeowners can work from simple cleaning tasks to valve adjustments and component replacement to restore flow.
The following list highlights key, practical fixes to try in sequence.
- Clean or replace the shower head and internal screens; remove and descale the shower arm and valve components.
- Adjust and fully open the hot water supply valves; flush the water heater to remove sediment.
- Check the pressure-reducing valve (PRV) and replace it if faulty.
Clean or replace shower head and internal screens
Remove and inspect the shower head and its internal screens to determine whether mineral buildup or debris is restricting flow.
If clogged, soak components in vinegar or a descaler per manufacturer guidance, scrub with a soft brush, rinse, and reassemble.
Replace worn or corroded screens or the entire head if cleaning fails.
Test hot water pressure and guarantee proper sealing to prevent leaks.
Remove and descale shower arm and valve components
If cleaning or replacing the shower head and screens did not restore flow, attention should shift to the shower arm and valve assembly where mineral deposits and debris often accumulate.
Turn off water supply, remove trim and escutcheon, unscrew shower arm, inspect and extract visible scale.
Soak metal parts and cartridge in vinegar or descaler, gently scrub, rinse, reassemble, and test for improved hot water pressure.
Adjust and fully open hot water supply valves to the shower
Locate and verify the position of shutoff and balancing valves that control hot water to the shower before assuming internal parts are at fault.
Confirm each valve is fully open—turn counterclockwise until it stops.
Inspect for partially closed gate or ball valves and correct their position.
Note any damaged handles, leaks, or corroded stems and replace or tighten fittings to restore proper hot flow.
Flush the water heater to remove sediment buildup
Flushing the water heater addresses sediment that settles in the tank and restricts hot water flow and pressure at fixtures.
To flush: turn off power/gas and cold-water feed, attach a hose to the drain valve, open a nearby hot faucet, and drain until clear.
Close valve, refill the tank, restore power/gas, and check shower pressure.
Repeat annually if sediment recurrence occurs.
Check and replace faulty pressure-reducing valve (PRV)
After addressing sediment in the water heater, attention should turn to the pressure-reducing valve (PRV), a common cause of low hot-water pressure when it sticks or fails.
Inspect the PRV near the main supply for leaks, noise, or visible damage.
Test inlet and outlet pressures with a gauge, adjust per manufacturer, and replace the PRV if readings remain abnormal or flow does not improve.
Inspect and repair or replace the mixing/thermostatic valve
Begin by examining the shower’s mixing or thermostatic valve, a frequent source of uneven or weak hot-water flow when cartridges, seats, or thermostatic elements wear or clog.
Isolate water, remove trim, inspect cartridge and seals for mineral buildup or damage.
Clean or replace cartridges, seats, and springs as needed.
Reassemble, test for balanced hot flow, and replace valve body if persistent failure exists.
Restore proper water heater temperature and check dip tube
If inspecting the mixing or thermostatic valve does not restore hot flow, attention should shift to the water heater settings and the dip tube, which commonly affect overall hot-water availability and pressure at the shower.
Verify thermostat setpoint (120–130°F), check for tripped high-limit switch, drain a few gallons to flush sediment, and inspect the dip tube for cracks or separation; replace if damaged.
Repair or replace corroded or clogged hot water pipes
Address corroded or clogged hot water pipes promptly, since deterioration or mineral buildup can greatly reduce shower pressure and eventually cause leaks.
Inspect accessible sections for rust, pinholes, sediment, or reduced diameter.
Flush lines, use vinegar or a descaler for mineral clogs, and replace severely corroded copper, galvanized, or PEX sections.
Consider professional plumbing when corrosion is extensive or joint integrity is compromised.
When the Water Heater Is the Culprit
If low hot water pressure appears only on the hot side, the water heater should be considered a possible source, indicated by reduced flow at the unit’s outlet, unusual noises, or fluctuating temperatures.
Technicians or homeowners can check inlet and outlet flow, flush a tank-style heater to remove sediment, and perform prescribed maintenance on tankless units to restore proper throughput.
If inspections reveal damaged components, persistent poor flow, or uncertainty about safe procedures, a professional repair or replacement is recommended.
Signs the water heater is causing low hot water pressure
Recognize that a malfunctioning water heater can reduce hot water flow even when cold-water pressure remains normal.
Indicators include consistent weak hot output across fixtures, fluctuating temperature with low flow, unusual noises from the tank, rusty or discolored hot water, and frequent need to relight or reset a pilot or breaker.
These signs point toward internal clogs, sediment buildup, or failing components.
How to check the water heater’s inlet/outlet flow
When the water heater is suspected of restricting hot-water flow, the quickest way to confirm it is to observe and measure flow at the unit’s cold-water inlet and hot-water outlet.
Shut nearby valves, run a bucket test: measure liters or gallons per minute from each connection.
Compare rates; significant outlet reduction versus inlet indicates internal blockage, dip tube failure, or valve issue needing repair.
Steps to flush a tank-style water heater safely
Begin by shutting off the water heater’s power source—turn off the circuit breaker for electric units or set the gas control to the “pilot” position—then close the cold-water supply valve to prevent additional water from entering the tank.
Attach a hose to the drain valve, route to a safe drain, open a hot faucet to vent, open the drain valve, flush until clear, then close and refill before restoring power.
Maintenance for tankless water heaters affecting flow
After outlining safe flushing for tank heaters, attention should shift to tankless units, which require different upkeep to preserve flow.
Inspect inlet strainers, clean air intake and exhaust vents, and descale heat exchangers periodically to prevent mineral buildup.
Check water and gas filters, confirm proper flow rates on the control panel, and guarantee manufacturer-recommended maintenance intervals are followed to restore steady hot-water pressure.
When to call a professional for water heater repair or replacement
How can a homeowner tell if the water heater itself demands professional attention rather than simple DIY fixes?
Persistent low hot water pressure despite cleared fixtures, unusual noises (popping, banging), discolored water, leaks, frequent temperature fluctuations, or an aged unit (over 10–15 years) indicate internal failure.
In these cases, a licensed plumber or HVAC technician should inspect for repairs, sediment removal, or replacement.
Parts and Products That Often Fix Pressure Issues
A quick survey of parts and products can often identify simple fixes for low hot-water pressure in the shower. Key options include replacement shower heads and flow-efficient models, different mixing valves and thermostatic cartridges, and inline filters or strainers to catch sediment; more involved solutions include pipe upgrades or booster pumps when components aren’t enough.
The following highlights practical choices to evaluate for common pressure problems.
- High-flow and aerating replacement shower heads designed for low-pressure systems
- Pressure-balancing vs. thermostatic mixing valves and compatible cartridge options
- Sediment filters, inline strainers/cleaners, and when to upgrade piping or add a booster pump
Recommended replacement shower heads and flow-friendly models
Choosing the right replacement shower head can restore perceived pressure even when household water pressure is unchanged.
Models designed to concentrate flow, use pressure-compensating regulators, or reduce internal restriction often deliver stronger spray without increasing water use.
Recommended options include high-efficiency aerating heads, laminar-flow multi-stream models, and compact single-spray designs with larger nozzles.
Look for anti-clog silicone nozzles and a 1.5–2.5 GPM rating.
Types of mixing valves and thermostatic cartridges to consider
While replacing the shower head can improve spray feel, underlying valve components often determine actual flow and temperature stability.
Common options include single-handle ceramic cartridge mixers, pressure-balancing valves that prevent temperature swings, and thermostatic mixing valves (TMVs) offering precise temperature control.
High-flow replacement cartridges and balanced pressure thermostatic cartridges can restore consistent hot water delivery; match size and brand for compatibility.
Sediment filters, strainers, and inline cleaners
Several common clog sources—mineral scale, sand, and rust particles—are effectively intercepted by sediment filters, strainers, and inline cleaners before they reach shower valves and cartridges.
These devices, installed on supply lines or at fixture inlets, protect cartridges and restrictor screens, restoring flow.
Routine inspection, simple cartridge replacement, and periodic backflushing or filter element swaps prevent recurrence and extend valve life.
When to upgrade pipes or install a booster pump
If low hot water pressure persists after clearing fixture clogs and servicing valves, homeowners should evaluate the supply infrastructure and consider either repiping or adding a booster pump.
Repiping addresses chronic restriction from undersized or corroded lines; a booster pump increases flow when mains supply is adequate but pressure is low.
Decisions depend on cost, disruption, water demand, and long-term reliability; consult a plumber for assessment.
Troubleshooting Specific Scenarios
The guide now turns to targeted troubleshooting for common patterns: a single shower with weak hot flow while cold is normal, housewide low hot pressure, intermittent drops, and sudden loss after plumbing or heater service.
Each scenario points to different likely causes—local fixture blockage or valve issues, a systemic supply or heater problem, air or debris in the lines, or disturbed fittings and trapped sediment.
Practical checks and corrective steps for each case follow.
Low hot pressure only in one shower but cold is fine
When only the hot-water pressure is weak in a single shower while the cold side flows normally, the problem is likely localized to that fixture or its hot supply line rather than the main system.
Check the shower cartridge, diverter and supply shutoff for partial closure or mineral buildup.
Inspect flexible hose and supply valve for kinks or debris.
Replace or clean components as needed.
Low hot pressure throughout the house
Although localized fixture issues are common, widespread low hot-water pressure indicates a problem affecting the house’s hot supply as a whole—such as a failing water heater, closed or corroded shutoff valves, scale buildup in the heater or main hot piping, a partially blocked mixing valve or tempering device, or a shared supply obstruction.
Troubleshooting should consequently proceed from the heater outward to identify whether mechanical failure, sediment accumulation, valve restriction, or a system-wide pressure regulator issue is responsible.
Inspect heater performance, verify inlet/outlet valves, flush sediment, check expansion tank and mixing valves, and test pressures at the heater and multiple fixtures to isolate the fault before replacing components.
Intermittent hot water pressure drops
Having ruled out a persistent, system-wide restriction, attention shifts to intermittent hot water pressure drops that occur sporadically or under specific conditions.
Causes often include partially clogged cartridge or showerhead, thermal expansion cycling in tank systems, failing pressure-balancing valves, or intermittent supply issues from mixing valves.
Diagnose by observing timing, isolating fixtures, checking aerators/cartridges, and testing with alternative faucets to pinpoint transient failures.
Sudden loss of hot water pressure after plumbing work or heater service
Inspect immediately after any plumbing work or heater service, because a sudden loss of hot water pressure often stems from installation errors, debris dislodged into lines, closed or partially closed valves, or air trapped in the system.
Check valve positions, inspect fittings for leaks or misalignment, flush lines to clear debris, and bleed trapped air.
If pressure remains low, contact the installer to correct workmanship or replace clogged components.
DIY Mistakes to Avoid and Safety Warnings
Common DIY errors—like over-torquing fittings, misaligning cartridges, or using incorrect replacement parts—can further reduce hot water pressure.
Turning off the wrong valves or closing both supply lines without isolating the correct section may create air locks or interrupt system balance.
Work near water heaters requires caution around electrical connections and gas lines; if there is any uncertainty, a qualified technician should be called.
Common repair mistakes that make pressure worse
One frequent DIY misstep is tightening or replacing fittings without shutting off the main water supply, which can worsen pressure issues and cause leaks or floods. Always isolate the water first and release system pressure before working.
Other errors include over-tightening valves, using wrong-sized parts, neglecting debris in lines, improper reassembly of aerators and cartridges, and skipping flow tests after repairs.
When shutting off valves can cause more problems
After warning about mistakes like working on live fittings, attention must turn to valve shutoffs themselves—incorrect use of shutoff valves can create as many problems as neglecting to close them.
Forcibly turning stuck valves can shear stems or damage seals, causing leaks or loss of control. Always use appropriate tools, apply penetrating lubricant, and call a plumber if a valve resists movement.
Electrical and gas safety around water heaters
Several critical safety rules govern electrical and gas work around water heaters because mistakes can produce shocks, fires, or carbon monoxide poisoning.
Only qualified electricians or gas technicians should handle wiring, pilot lights, burners, or gas lines. Power and gas must be shut off before any inspection.
Ascertain proper ventilation, use correct parts, test for leaks, and never ignore warning signs; call a professional for uncertain issues.
Cost, Time Estimates, and When to Hire a Pro
Typical DIY fixes for low hot-water pressure usually take 30 minutes to a few hours and range from low-cost parts to moderate expenses, while complex issues can require a pro. Clear signs to call a licensed plumber include persistent low pressure after basic fixes, leaks, or problems affecting multiple fixtures. Before hiring, owners should ask about licensing, estimated total cost, and warranty on work.
| Task/Issue | Typical DIY Time & Cost | When to Call a Plumber |
|---|---|---|
| Replace showerhead/clean aerator | 30–60 min; $5–$50 | If clog recurs after cleaning |
| Replace pressure-balancing valve | 1–3 hours; $50–$200 parts | If unfamiliar with valve work or improper hot/cold balance persists |
| Check/replace water heater parts | 1–4 hours; $20–$300 | If no hot water, visible corrosion, or gas/electrical concerns |
| Diagnose whole-house pressure issues | 1–4 hours; $0–$150 diagnostic | If multiple fixtures affected or repeat problems |
Typical DIY time and cost for common fixes
A short overview helps readers weigh DIY repairs against professional help by outlining expected costs and time for the most common causes of low hot-water pressure.
Typical tasks:
- clean showerhead (15–30 minutes, $0–$10)
- replace cartridge/valve (1–2 hours, $20–$80)
- flush water heater (30–60 minutes, $0–20)
- tighten/minor pipe fix (30–90 minutes, $0–50).
Complex leaks or systemic issues may need a pro.
Signs it’s time to call a licensed plumber
When should a homeowner stop troubleshooting and call a licensed plumber?
Persistent low hot water pressure after DIY checks, sudden complete loss, visible leaks, rusty water, or pressure fluctuations indicate professional help.
Expect licensed plumbers to quote diagnostic fees and hourly or flat repair rates; minor jobs often take 1–3 hours, major repairs or replacements may take a day or more.
Hire a pro for safety, permits, and complex plumbing.
Questions to ask a plumber before hiring
After deciding a professional is needed, homeowners should prepare a short list of questions to clarify cost, expected timeline, and the scope that warrants professional intervention.
Ask for an itemized estimate, hourly versus flat rates, required parts, and permit needs.
Request a projected start and completion date, warranty on labor and parts, proof of licensing and insurance, and references for similar shower pressure repairs.
Preventive Maintenance to Keep Hot Water Pressure Steady
Preventive maintenance helps sustain consistent hot water pressure and prevents common causes of reduced flow.
Simple, regular tasks—such as flushing the water heater, inspecting valves and aerators, and monitoring water quality—can catch issues before they affect performance. Homeowners who follow a maintenance routine are less likely to face sudden pressure losses or costly repairs.
- Flush the water heater on a regular schedule to remove sediment buildup.
- Routinely check valves, shower aerators, and mixing cartridges for blockages or wear.
- Test water quality and treat hard water to reduce mineral accumulation.
Regular water heater flushing schedule
A regular flushing schedule for a water heater—typically once or twice yearly depending on local water hardness and tank type—helps remove sediment that restricts hot water flow and reduces pressure.
Flushing clears mineral buildup, improves heat transfer and efficiency, and prolongs tank life.
Homeowners should follow manufacturer guidance or hire a technician for thorough flushing, especially in hard-water areas.
Routine checks for valves, aerators, and mixing cartridges
Inspect valves, aerators, and mixing cartridges regularly to guarantee steady hot water pressure and preempt small issues before they escalate.
Check shutoff and balancing valves for full travel and leaks, clean or replace aerators to remove debris, and test thermostatic or pressure-balancing cartridges for smooth operation.
Lubricate moving parts, tighten fittings, and document any resistance or irregular flow for prompt repair or replacement.
Water quality testing and treatment to reduce buildup
Water quality testing identifies minerals, sediments, and chemical contaminants that foster scale and corrosion, which in turn reduce hot water pressure over time.
Regular testing pinpoints hard water, iron, and sediment levels.
Targeted treatments—water softeners, sediment filters, and corrosion inhibitors—prevent buildup in pipes, heaters, and fixtures.
Implement periodic monitoring and maintenance to sustain ideal flow and extend system lifespan.
Quick Reference Flowchart for Diagnosing No Hot Water Pressure
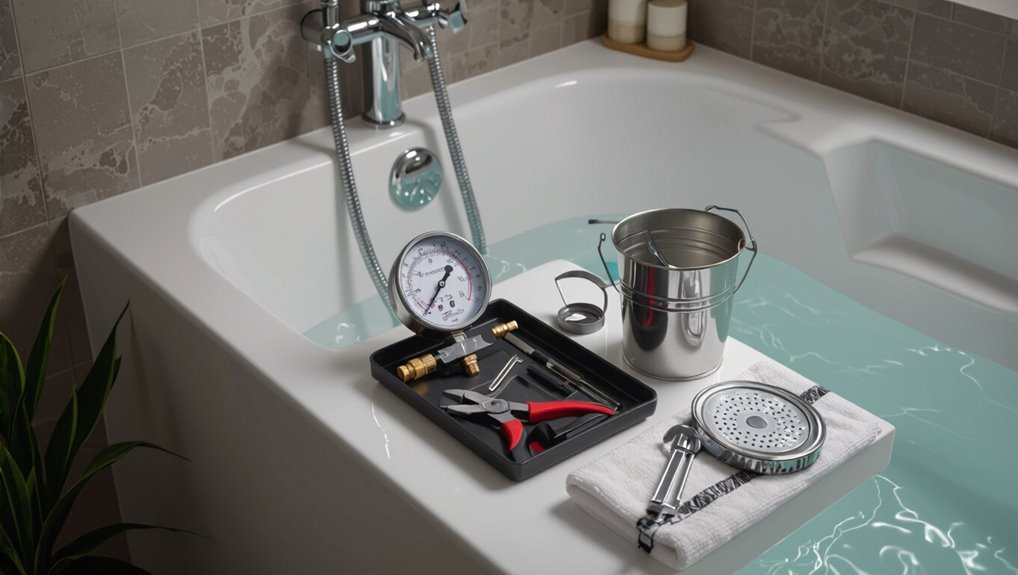
Start at the valve: a concise flowchart guides the user through sequential checks—hot-only fixture isolation, supply shutoff positions, mixer cartridge or showerhead blockage, and water heater output—so the root cause is identified quickly and safely.
Next steps: verify pressure at other taps, inspect shutoffs, test bypass or alternate showerhead, flush heater and check temp/flow, replace cartridge or clear aerator, document results and escalate to a plumber if unresolved.
Conclusion
When hot water pressure wanes, homeowners are gently reminded that small nuisances often whisper of larger needs. A few quick checks—valve positions, aerators, supply lines—can restore normalcy; sometimes the water heater quietly requests attention or a skilled hand. Addressing the issue promptly prevents escalation and preserves comfort. If the problem persists beyond simple remedies, consulting a professional avoids awkward surprises and guarantees the shower’s performance returns to its former reliability.