How to Replace a Mercury Thermostat: Step-by-Step Guide for Safe Upgrade
To replace a mercury thermostat safely, follow these essential steps: First, turn off the power to avoid any electrical hazards. Next, take a photo of the existing wiring for reference, and wear gloves and eye protection throughout the process. Carefully remove the old thermostat, ensuring you contain any mercury according to local hazardous-waste guidelines. Clean the cavity gently before installing the new thermostat base level. Connect the labeled wires to their corresponding terminals (R, C, W, Y, G), restore power, and test the heating, cooling, and fan functions. Finally, keep documentation of the disposal and receipts for compliance. For detailed steps, testing tips, and legal guidance, continue reading.
Overview of Replacing a Mercury Thermostat
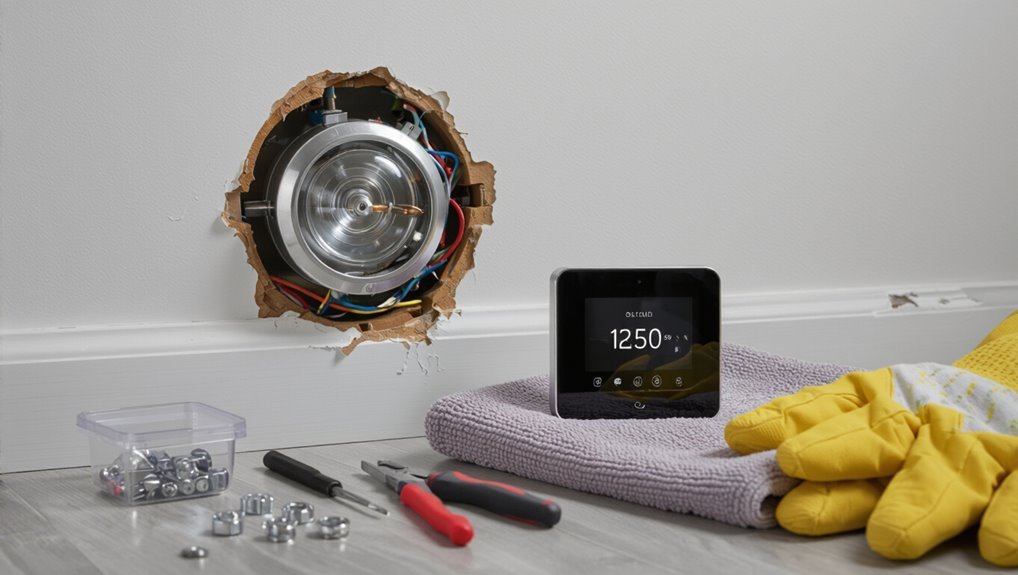
Many homeowners are replacing mercury thermostats now because aging units can fail and mercury poses a spill hazard.
Switching to a digital or programmable thermostat improves accuracy, energy savings, and convenience.
Replacements must follow safety and legal guidelines for handling and disposing of mercury-containing devices.
Why replace a mercury thermostat now
Why act now to replace a mercury thermostat? Many jurisdictions phase out mercury devices; liability and disposal rules tighten.
Mercury poses spill and contamination risks during removal or breakage. Replacing promptly reduces exposure and legal complications.
Homeowners seeking guidance on how to replace a mercury thermostat should prioritize safe procedures, proper containment, and certified recycling to meet regulations and protect occupants.
Benefits of switching to a digital or programmable thermostat
Replacing a mercury thermostat not only eliminates a contamination hazard and regulatory headache but also opens the door to modern digital and programmable controls that improve comfort and efficiency.
Digital models provide precise temperature control, reduce energy use via scheduling and setback features, offer remote adjustment and learning algorithms, and display clearer diagnostics.
Upgrading yields measurable savings, more consistent indoor climates, and easier system monitoring without complexity.
Safety and legal considerations for mercury devices
A mercury thermostat presents both health and regulatory risks that must be addressed before removal: elemental mercury is toxic if spilled or vaporized, and local, state, or federal laws often govern its handling, transport, and disposal.
Professionals should follow spill protocols, use appropriate PPE, and store removed thermostats in sealed, labeled containers.
Verify disposal options with local hazardous waste authorities and document compliance.
What You’ll Need Before Starting
A concise list of tools and materials is provided to guarantee the replacement proceeds safely and efficiently.
Basic compatibility considerations for selecting a non-mercury replacement—such as system type, wiring, and power requirements—are outlined.
Guidance is included on situations that warrant calling a professional rather than attempting a DIY swap.
Tools and materials checklist
Before beginning work on a mercury thermostat, gather a compact set of tools and safety items so the job proceeds smoothly and without unnecessary trips to the hardware store.
Essential items include protective gear, basic hand tools, and containment supplies for mercury cleanup.
Recommended checklist:
- Safety gloves, goggles, and disposable mask
- Screwdrivers (flat and Phillips) and small wrench
- Wire stripper and voltage tester
- Small container, absorbent pads, and sealable bag for mercury debris
Choosing the right replacement thermostat (compatibility basics)
When selecting a replacement for a mercury thermostat, homeowners should verify compatibility with the HVAC system type, control voltage, and existing wiring to secure safe operation and proper functionality.
Confirm whether the system is single-stage, multi-stage, heat pump, or millivolt.
Match 24VAC or line-voltage controls, check for common (C) wire needs, and ascertain the new thermostat supports fan and equipment configurations.
When to call a professional instead of DIY
After confirming a compatible replacement thermostat and understanding the system’s wiring and voltage, homeowners should assess whether the job is appropriate for DIY.
Call a professional if the system uses line-voltage or multi-stage equipment, if wiring colors or terminals are unclear, if local code requires licensed work, or if safety concerns (old knob-and-tube, asbestos, mold) exist.
Complex controls or lack of confidence also warrant pro help.
Preparing for a Safe Replacement
Before beginning work, power to the HVAC system should be switched off at the thermostat and at the main service to prevent electrical hazards.
The furnace or air handler must be located and its corresponding circuit breakers turned off to guarantee the unit is fully de-energized.
Surfaces should be protected and a small container prepared to hold screws and other parts removed during the replacement.
Turning off power to the HVAC system
Cut power to the HVAC system to eliminate electrical and mechanical hazards during a thermostat replacement.
Before handling the thermostat, guarantee all HVAC components are de-energized by switching off the system at the thermostat and at its primary power source.
Verify power is off using a non-contact voltage tester.
Wait a few minutes for capacitors to discharge before proceeding with removal.
Identifying furnace/air handler and turning off breakers
One clear step is locating the furnace or air handler to identify its dedicated circuit breaker and any service switches.
The person inspects the unit, finds labeled panels, and traces the breaker in the main panel. They switch the breaker off and use the service switch if present.
A non-contact voltage tester can confirm power is removed before proceeding.
Protecting surfaces and collecting small parts
Protect surfaces around the thermostat and furnace with painter’s drop cloths or cardboard to catch debris and protect finishes; use low-tack painter’s tape to secure coverings without leaving residue.
Place a magnetic tray or small labeled containers for screws, jumper bars, and wire nuts.
Keep a flashlight and tweezers handy to retrieve tiny parts.
Dispose of mercury beads per local hazardous-waste guidelines.
How to Remove a Mercury Thermostat Step-by-Step
The procedure begins with photographing and labeling the existing wiring and mounting to guarantee accurate reassembly.
Next, the thermostat housing is opened and the mercury switch is handled with protective gloves and a sealed container to prevent spillage.
Finally, any mercury is contained and disposed of per local regulations before the old mounting plate is removed and the wall surface cleaned.
Documenting the existing setup and wiring
Before disconnecting anything, photograph the thermostat and note each wire color, terminal label, and any jumper connections so the original configuration can be replicated during installation.
Record the HVAC system type, power source (battery or 24V), and which wire corresponds to heat, cool, fan, and common.
Label wires with tape and number them to match photos and written notes for reassembly.
Safely opening the thermostat and handling the mercury switch
Begin by switching off power to the thermostat at the breaker or by removing batteries. Then confirm no voltage is present with a multimeter to prevent shocks or short circuits.
Remove the cover and mounting plate carefully. Locate the sealed mercury capsule; do not tilt or puncture it.
Stabilize the device, detach wiring labels, and place the thermostat on a protected, stable surface for later containment.
Containing and disposing of mercury (local rules and emergency steps)
If a mercury thermostat is removed, it must be contained and disposed of according to local hazardous-waste rules to prevent contamination and legal penalties.
The bulb or switch should be placed in a sealed, labeled rigid container; spilled droplets require immediate isolation, ventilating the area and using mercury-specific cleanup kits.
Contact local waste authorities for drop-off, follow emergency reporting requirements, and never discard mercury in regular trash.
Detaching the old mounting plate and cleaning the wall
Loosen the mounting plate screws and lift the plate away from the wall, taking care not to disturb any exposed wiring or residual mercury.
Inspect the cavity for debris or contamination.
Use a damp paper towel to gently wipe surfaces, avoiding abrasive scrubbing.
Collect waste in a sealed bag for hazardous disposal.
Allow the area to dry before installing the new thermostat plate.
Installing the New Thermostat Step-by-Step
The installer begins by mounting the new thermostat base, ensuring it is level and secure.
Next, wires are identified, labeled against the wiring diagram, and connected according to common terminal functions.
Finally, the device is configured for the system type, power is restored, and basic operational tests are performed.
Mounting the new thermostat base and leveling
Begin by positioning the new thermostat base against the wall over the existing wiring, aligning it so the wires pass cleanly through the cable entry and the base sits flat against the surface.
Use a small level to verify horizontal alignment, mark mounting holes, then pre-drill if needed.
Secure with screws, recheck level, and tighten evenly so the base remains flush and stable.
Connecting wires: labeling, wiring diagrams, and common wire functions
With the base secured and level, attention shifts to the wiring: each conductor must be identified, labeled, and matched to the new thermostat’s terminals according to the manufacturer’s diagram. Document colors and functions (R, C, W, Y, G), snap into screw or push terminals, and secure strain relief. Verify continuity and power off before finalizing.
| Wire | Color | Function |
|---|---|---|
| R | Red | 24V power |
| C | Blue | Common |
Configuring settings for common system types (single-stage, heat pump, multi-stage)
Configure the thermostat to match the HVAC system type before sealing the installation: select single-stage for simple heat/cool units, enable heat pump mode for reversing-valve systems, or specify multi-stage settings when compressors or furnaces have staged outputs.
Set fan control, cycle rate, and temperature differential per manufacturer guidelines. Assign equipment terminals and confirm mode labels.
Save configuration and document settings for future reference.
Restoring power and initial system tests
Power is restored to the HVAC system once the breaker or switch is turned back on, and the thermostat should power up within a minute displaying its startup screen or logo.
The technician confirms correct wiring by checking terminals, sets basic parameters, then runs heat and cool calls to verify system response.
Fan operation and temperature swings are observed; error indicators are noted and addressed.
Testing and Verifying Proper Operation
Once the new thermostat is installed, the technician verifies that the system responds correctly to both heating and cooling setpoints.
They confirm the fan control and observe system cycles for proper timing and duration.
If the system fails to start or behaves erratically, common startup issues are checked and basic troubleshooting steps are performed.
Verifying heating and cooling response
Cycle the system to confirm the thermostat commands heating and cooling correctly and that the HVAC responds as expected.
Observe furnace ignition for heat call and compressor start for cooling, noting any delays, unusual noises, or error indicators.
Verify temperature change at vents and thermostat readout matches setpoints.
Record response times and abnormalities for technician review or further troubleshooting.
Checking fan control and system cycles
Begin by placing the thermostat in the fan-on position and observing the blower to confirm continuous operation independent of heating or cooling cycles.
Then cycle fan to auto and run heating and cooling setpoints while noting blower start/stop timing and delays.
Verify outdoor unit and furnace respond appropriately to calls, and confirm multiple short cycles do not occur under normal setpoint changes.
Troubleshooting common startup issues
After verifying fan behavior and system response to setpoint changes, attention turns to diagnosing common startup faults to guarantee reliable operation.
The installer observes ignition sequences, compressor engagement, and proper delay intervals. Check for error codes, incorrect wiring, weak batteries, or loose sensors.
Verify thermostat mode, anticipator settings, and appropriate deadband. Record anomalies, correct faults, then retest until stable startup is confirmed.
Disposal and Cleanup After Replacement
After replacement, proper disposal of the old mercury thermostat and any contaminated materials should follow local hazardous-waste regulations and available recycling programs.
The procedure for cleaning spills, required spill-kit contents, and safe handling of waste must be documented and followed to prevent exposure.
Records of disposal, cleanup actions, and recycling receipts should be kept for compliance and future reference.
Proper disposal options for mercury thermostats and waste handling
Dispose mercury thermostats through approved channels to prevent contamination and comply with regulations.
Local hazardous waste facilities, household collection events, and certified recycling centers accept thermostats; some retailers participate in take-back programs.
Securely package devices, label contents, and avoid regular trash. Document disposal according to municipal or state requirements.
Contact local environmental agencies for guidance on transport, paperwork, and legal obligations.
Cleaning contaminated areas and spill kit checklist
Several small actions taken immediately following removal minimize mercury exposure and environmental release:
- Wear disposable gloves and use stiff paper to collect beads; never use a vacuum.
- Place debris in a sealed, labeled, rigid container.
- Wipe area with damp disposable wipes; double-bag and seal used wipes.
- Include spare gloves, tweezers, labeled container, and disposal instructions in the spill kit.
Documentation and recycling programs
Proper documentation and use of certified recycling programs guarantee regulatory compliance and reduce environmental risk following thermostat replacement.
The installer records model, serial, removal date, and spill report; retains receipts and manifests.
Devices and contaminated materials are packaged per local hazardous waste rules and sent to EPA-approved recyclers.
Timely submission of forms and proof of recycling completes legal obligations and supports safe disposal tracking.
Common Problems and How to Fix Them
The section outlines typical issues homeowners encounter after replacing a mercury thermostat and how to address them.
It covers a dead thermostat that won’t power on, systems that short-cycle or fail to call for heat or cooling, and incorrect temperature readings with basic calibration steps.
Each problem is paired with concise troubleshooting steps and safety reminders.
Thermostat won’t power on
Check whether the thermostat has any power before assuming a wiring or unit failure.
Inspect circuit breaker and replace blown fuse, verify HVAC switch is on, and confirm batteries (if applicable).
Test for 24VAC at the thermostat terminals with a multimeter.
If no voltage, trace transformer at the furnace/air handler.
Repair loose connections or replace a faulty transformer or thermostat as needed.
System short-cycling or not calling for heat/cool
Addressing short-cycling or a thermostat that fails to call for heat or cooling begins with isolating whether the issue originates at the thermostat, the control wiring, or the HVAC equipment itself.
Check loose or corroded R, W, Y, G, C connections, verify jumper/settings for heat pump vs. conventional systems, inspect relay/contactor operation, and confirm compressor and furnace safety limits.
Replace faulty wiring or controls as needed.
Incorrect temperature readings and calibration steps
Problems with short-cycling or control faults can sometimes mask a simpler issue: the thermostat reading room temperature incorrectly.
The device may be affected by drafts, direct sunlight, nearby heat sources, or improper mounting height.
Recommend verifying temperature with a calibrated thermometer, relocating or releveling the thermostat, and adjusting calibration per manufacturer instructions.
Replace if calibration adjustments fail or readings remain inconsistent.
Energy and Performance Tips After Upgrading
After replacing a mercury thermostat, attention turns to settings and features that improve efficiency and comfort.
Recommended temperature setpoints and setback schedules can cut energy use, while geofencing and learning modes automate adjustments based on occupancy.
Integration with smart home systems and remote access further enhance control and allow monitoring of performance.
Recommended thermostat settings for energy savings
Set the thermostat to conservative setpoints to maximize savings: 68°F (20°C) for heating and 78°F (26°C) for cooling are common baselines that balance comfort and efficiency.
Further recommendations include lowering heating setbacks during absence or sleep by about 7–10°F (4–6°C) and raising cooling setpoints similarly.
Maintain gradual adjustments, avoid extreme swings, and use fan settings strategically to circulate air without extra conditioning.
Using scheduling, geofencing, and learning features
Enable scheduling, geofencing, and learning modes to let the thermostat automate temperature changes based on routine, occupancy, and observed patterns, reducing wasted conditioning without constant manual input.
Configure clear weekday/weekend schedules, set geofence radius to detect occupants reliably, and allow learning to adapt gradually.
Monitor performance for a week, adjust setpoints or sensitivity, and disable features if comfort or efficiency worsens.
Integration with smart home systems and remote access
While integrating the new thermostat with smart home platforms and remote access services, users gain centralized control and the ability to optimize energy use from anywhere.
Compatibility with hubs, voice assistants, and automation routines enables scene-based adjustments and remote scheduling.
Secure cloud accounts, two-factor authentication, and firmware updates preserve privacy.
Monitor usage reports and adjust integrations to balance comfort, savings, and system responsiveness.
Frequently Overlooked Safety and Compliance Issues
Local regulations governing the disposal and handling of mercury-containing devices can vary and must be checked before removal.
Responsibility and liability issues, including landlord/tenant obligations and disclosure requirements, should be clarified in writing.
Maintaining records of the replacement, disposal receipts, and any notifications helps demonstrate compliance and limit future disputes.
Local regulations for mercury-containing devices
Because mercury thermostats are classified differently across jurisdictions, installers and homeowners must verify applicable rules before disposal or replacement.
Local ordinances may require recycling, hazardous-waste drop-off, or certified contractor handling. Some areas ban mercury-containing devices outright or mandate specific labeling and transport.
Failure to follow local regulations can result in fines and environmental harm; confirm requirements with municipal or state environmental agencies.
Liability and landlord/tenant considerations
After confirming disposal rules with municipal or state agencies, responsibility questions arise that affect both landlords and tenants when replacing a mercury thermostat.
Landlords must guarantee safe removal, compliant disposal, and proper notification; tenants should report hazards promptly.
Lease terms, local codes, and liability for cleanup or damages determine financial responsibility.
Insurance coverage and written agreements help allocate obligations and reduce disputes.
Records to keep after replacement
When a mercury thermostat is replaced, maintaining concise, accessible records protects occupants and property owners and supports compliance with disposal rules.
Documentation should note replacement date, installer identity and license, thermostat model numbers, photos of removal and wiring, mercury containment and disposal receipts, and any notifications to tenants or authorities.
Retain records for recommended regulatory retention periods and for future resale or inspection needs.
Quick Reference Checklists
A concise pre-replacement checklist guarantees all safety steps, tools, and required permits are confirmed before work begins.
A post-installation test checklist verifies correct wiring, thermostat operation, and proper disposal of the removed mercury device.
Together, these quick references reduce errors and support compliance.
Pre-replacement checklist
Before beginning any work, the technician confirms power to the HVAC system is fully shut off and posts a visible lockout/tagout to prevent accidental re-energization; this reduces risk and protects both personnel and equipment.
The pre-replacement checklist includes:
- Verify correct replacement thermostat model and compatibility.
- Gather insulated tools, voltage tester, and safety gear.
- Photograph wiring labels and terminal layout.
- Prepare containment for mercury disposal and local disposal paperwork.
Post-installation test checklist
Begin verification by restoring power under lockout/tagout control and observing the thermostat for proper startup indications (display illumination, correct mode icon, and absence of fault codes).
Then perform these quick checks:
- Confirm heating and cooling call response by raising and lowering setpoints.
- Verify fan-on and auto modes.
- Inspect wiring terminals for tightness and correct labeling.
- Record baseline temperatures and system cycle times.
Conclusion
Like a careful gardener transplanting a delicate sapling, the homeowner replaces the old mercury thermostat with a modern, safer model—roots (wiring) inspected, soil (mounting) firmed, and warning signs removed. The garden thrives when attention to labels, local rules, and safe disposal is observed. In this small ritual, risk yields to reliability: routine becomes stewardship, and a quieter, cleaner climate control takes root in the steady hands of mindful care.