How to Clean a Gas Furnace Burner Safely: Step-by-Step Guide for Homeowners
To clean a gas furnace burner safely, first shut off the gas and power, ensure proper ventilation, and check for any gas odor. Equip yourself with safety glasses, gloves, and a dust mask. Remove the access panels, document the orientation of parts, and detach the burner assembly. Use soft brushes, vacuum attachments, and a non-residue cleaner to eliminate soot and blockages. Inspect orifices and electrodes for any damage. Reassemble everything according to the manufacturer’s specifications, restore gas and power, and then check the flame color and stability. Follow up with further troubleshooting if necessary.
What a Gas Furnace Burner Is and Why Cleaning Matters
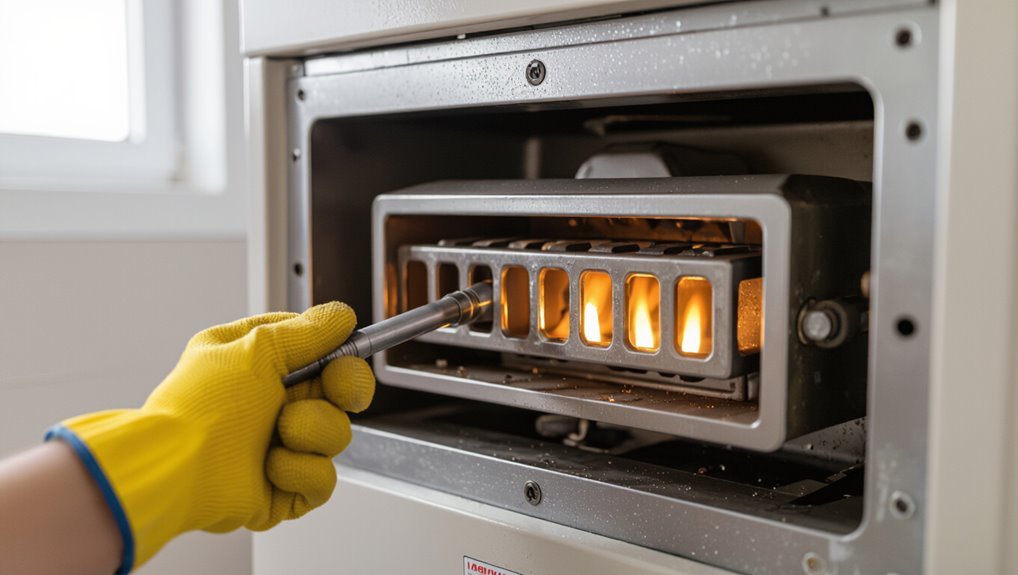
The gas furnace burner is the component that mixes gas and air to produce the flame that heats the home. It connects directly to the gas valve, heat exchanger, and venting system.
Visible signs that the burner needs cleaning include yellow or irregular flames, soot buildup, frequent pilot or ignition failures, and unusual odors. A dirty burner reduces efficiency and can cause incomplete combustion, increasing the risk of carbon monoxide release and fire hazards.
How the burner fits into the furnace system
Because it serves as the ignition and combustion center for the heat-producing cycle, a gas furnace burner directly links the fuel supply, ignition system, and heat exchanger so the appliance can convert gas into usable heat.
Understanding this placement helps homeowners prioritize maintenance and follow instructions on how to clean a gas furnace burner safely, preserving airflow, combustion efficiency, and heat-transfer integrity within the system.
Common signs your burner needs cleaning
Recognizing when a burner requires cleaning helps homeowners schedule maintenance before performance or safety problems arise.
Signs include uneven or yellowish flame color, soot or black residue on burner surfaces, visible debris or insect nests, reduced heat output despite normal thermostat settings, frequent cycling, and unusual odors during startup.
Regular inspection reveals these indicators early, prompting timely cleaning or professional service.
Risks of a dirty burner (safety, efficiency, carbon monoxide)
Neglected burners compromise both safety and performance by disrupting proper combustion: accumulated soot, dust, or insect debris can alter flame shape and temperature, lowering efficiency and increasing fuel use while raising the risk of incomplete combustion.
This can produce elevated carbon monoxide levels, cause pilot failures, increase wear on heat exchangers, raise repair costs, and create fire or explosion hazards if leaks or blockages persist.
Tools, Materials, and Safety Equipment Needed
A concise list of the specific tools and supplies required—such as screwdrivers, soft brushes, a vacuum with a crevice tool, and appropriate cleaning solvents—prepares the task.
Equally important are personal protective equipment and ventilation measures, including gloves, safety glasses, and adequate fresh-air flow to prevent inhalation of dust and fumes.
Guidance also notes conditions that warrant calling a licensed technician rather than attempting a DIY cleaning.
List of tools and supplies
Several essential tools, materials, and safety items are required before servicing a gas furnace burner:
- Phillips and flathead screwdrivers, nut driver set.
- Soft-bristle brush, vacuum with brush attachment, cans of compressed air.
- Replacement burner orifices, gasket material, non-residue burner cleaner.
- Multimeter, spark tester, flashlight, small mirror.
All items guarantee safe, effective cleaning and basic diagnostics.
Personal protective equipment and ventilation requirements
Wear appropriate personal protective equipment and secure adequate ventilation before servicing a gas furnace burner.
Protective gear includes safety glasses, chemical-resistant gloves, a dust mask or N95 respirator, and long sleeves.
Ensure good airflow by opening nearby windows and doors and running exhaust fans.
Avoid confined spaces; use a portable fan if necessary.
Verify no gas odor before beginning work.
When to call a professional instead of DIY
When should a homeowner stop and call a professional?
If ignition problems, persistent carbon monoxide alarms, gas odors, corroded or damaged burner components, pilot assembly failure, complex electrical issues, or unclear diagnosis occur, a licensed HVAC technician should be contacted.
Professionals handle gas line repairs, combustion testing, regulator replacement, and safety certification; DIY attempts risk injury, property damage, or voiding warranties.
Pre-Cleaning Preparations and Safety Checks
Before any cleaning begins, the technician systematically shuts off electrical power and the gas supply following manufacturer procedures and site shutoff points.
They confirm the furnace has fully cooled and verify gas isolation with a meter or visual checks before proceeding.
Original control settings and component positions are recorded and photographed to guarantee accurate reassembly.
Shutting down power and gas supply step-by-step
Several clear steps are required to shut down a gas furnace safely before any cleaning begins. The technician or homeowner should turn off the thermostat, switch off electrical power at the furnace and breaker, and close the gas valve at the appliance. Confirm indicators are off before proceeding.
| Step | Action |
|---|---|
| 1 | Set thermostat to OFF |
| 2 | Turn furnace switch off |
| 3 | Flip circuit breaker |
| 4 | Close gas valve at furnace |
Verifying cool-down and gas isolation
A technician’s priority is confirming the furnace and surrounding components are cold and isolated from the gas supply before touching any burners.
After shutdown, wait until surfaces register ambient temperature with a contact thermometer.
Verify gas valve is closed and lockout tagged.
Inspect flexible connectors for residual pressure; bleed per manufacturer if required.
Confirm absence of gas odor and recheck with a combustible gas detector.
Documenting original settings and taking photos for reassembly
Why document settings and photos now? A homeowner records burner positions, wire connections, and label placements to guarantee accurate reassembly. Photographs capture orientation and sequence; notes log measurements and torque hints. These records reduce error, speed restoration, and improve safety.
| Item | Example |
|---|---|
| Burner alignment | Photo with ruler |
| Wiring layout | Labeled close-up |
| Valve setting | Note and timestamp |
Step-by-Step Burner Cleaning Procedure
The following procedure outlines how to access the burner assembly, remove the burner and related components safely, and address common contaminants.
It covers techniques for removing soot, rust, and debris, plus cleaning or replacing the flame sensor and igniter.
Finally, it describes inspection and cleaning of burner ports and orifices to restore proper combustion.
Accessing the burner assembly
Before beginning, verify the furnace is fully powered down and gas is shut off; only then should someone proceed to remove access panels and reach the burner assembly.
Using appropriate tools, loosen screws and lift panels carefully, noting panel orientation and fasteners.
Observe clearance around the assembly, avoid disturbing wiring or control components, and use a flashlight to inspect for soot, corrosion, or loose parts prior to cleaning.
Removing the burner and related components safely
Begin by confirming all power and gas supplies remain off and that any residual pressure in gas lines has been relieved; only then should one proceed to remove the burner and related components.
Wear gloves and eye protection.
Label and photograph connections.
Unscrew mounting hardware, detach the burner assembly, manifold, and igniter carefully.
Place parts on a clean surface, keeping fasteners and gaskets organized for reassembly.
Cleaning burners: techniques for soot, rust, and debris
Start by evaluating each burner for soot, rust, and loose debris, noting severity to determine whether light brushing, gentle scraping, or more intensive cleaning is required. Use a soft brush, compressed air, and a plastic scraper; avoid metal abrasion. Reassemble carefully, inspecting ports for alignment and testing operation.
| Calm | Relief |
|---|---|
| Tidy | Warmth |
| Safe | Confidence |
| Clean | Comfort |
| Steady | Trust |
Cleaning or replacing the flame sensor and igniter
Inspect the flame sensor and igniter next, since both components directly affect reliable ignition and efficient combustion. A fouled sensor can prevent a sustained flame while a cracked or worn igniter may fail to light the burners.
Turn off power and gas, remove sensor and igniter, clean sensor gently with fine emery cloth, inspect igniter for cracks, replace if damaged, reinstall and test system.
Inspecting and cleaning burner ports and orifices
With the flame sensor and igniter addressed, attention moves to the burner assembly where ports and orifices control gas flow and flame pattern.
The technician inspects ports for soot, corrosion, or blockages. Using a soft brush, compressed air at low pressure, or a wire probe sized for the orifice, debris is removed carefully.
Confirm uniform port openings and no damage before proceeding.
Reassembling components and restoring power and gas
After cleaning and verifying the burner assembly, the technician carefully reassembles components in reverse order, ensuring each part seats correctly and fasteners follow manufacturer torque or hand-tightening specifications; gaskets and seals are replaced if compromised and wiring harnesses are routed without pinches or sharp bends. Power and gas are restored only after leak checks and correct ignition sequence confirmation.
| Step | Action |
|---|---|
| 1 | Replace panels |
| 2 | Restore power |
| 3 | Leak test and ignite |
Testing After Cleaning
After reassembling the burner, the technician follows an initial startup checklist to restore power and gas and confirm proper system controls.
Observations focus on flame pattern, color, and stability to guarantee efficient combustion.
Finally, the technician inspects fittings and connections for gas leaks and listens for any unusual noises before returning the system to regular operation.
Initial startup checklist
One concise initial checklist guarantees the burner is safe and operating before regular use: verify fuel supply and shutoff valve positions, confirm all access panels and combustion air openings are secured, restore power and set the thermostat to call for heat, observe the ignition sequence and flame characteristics, and monitor for unusual sounds, odors, or leaks.
Record any abnormalities, shut down if unsafe, and consult a professional.
Verifying flame pattern, color, and stability
Start the furnace and observe the burner closely to verify flame pattern, color, and stability following cleaning.
The flames should be steady, mostly blue with minimal yellow tips, and uniformly distributed across all ports.
Flickering, lifting, or excessive yellow indicates soot, blockage, or improper combustion.
If irregularities persist, shut down and consult a qualified technician before resuming normal operation.
Checking for gas leaks and unusual noises
Bring the furnace to operating temperature and listen and inspect for signs of gas leakage or abnormal sounds before declaring the system safe.
Check joints, fittings, and connections with a leak detector solution or electronic sniffer.
Observe for hissing, rattling, or popping during cycles.
If any leak or unusual noise appears, shut off gas, ventilate, and contact a qualified technician immediately for repair and testing.
Troubleshooting Common Post-Cleaning Problems
After testing, attention turns to common issues that may appear following burner cleaning.
Typical problems include ignition failures or weak flames, persistent soot or yellow flames, and unusual odors that could indicate leaks.
Each symptom requires prompt, specific checks to confirm safe and proper furnace operation.
Ignition failures and weak flames
Inspecting ignition failures and weak flames begins by recognizing their common signs—delayed spark, repeated attempts to light, a yellow or lifting flame, or a burner that only partially ignites. The technician checks electrode gap, wiring, gas valve operation, and airflow. Replace corroded igniters, clean ports, and verify manifold pressure; test after each adjustment.
| Issue | Quick check |
|---|---|
| No spark | Electrode/wiring |
| Weak flame | Gas pressure |
| Sporadic ignition | Valve cycling |
| Soot near burner | Port blockage |
| Clicking only | Igniter fault |
Persistent soot or yellow flames
Persistent soot or yellow flames after cleaning indicate incomplete combustion or ongoing airflow issues that require targeted troubleshooting.
The technician or homeowner should inspect burner alignment, orifice cleanliness, and proper air shutter settings.
Check for clogged venting, restricted return ducts, or a dirty air filter.
If adjustments don’t restore steady blue flames, schedule a professional combustion analysis to confirm mixture and safe operation.
Strange odors or suspected leaks
A few distinct odors or any smell of gas after cleaning signal potential leaks or combustion issues that demand immediate attention. The homeowner should evacuate, avoid switches or flames, and contact the gas company or a licensed technician. Do not restart the furnace. Ventilate if safe. The technician will perform leak detection and combustion analysis.
| Action | Priority |
|---|---|
| Evacuate | Immediate |
| Call pros | Immediate |
Maintenance Schedule and Tips to Prevent Future Buildup
Maintenance recommendations vary by furnace type and usage, with high-demand and older units generally requiring more frequent attention.
Simple monthly and seasonal checks—such as inspecting the burner area, testing ignition and safety controls, and replacing filters—help catch issues early.
Regularly maintaining air filters, keeping vents clear, and ensuring adequate combustion air prevents soot and debris buildup that can impair performance and safety.
Recommended cleaning frequency by furnace type and usage
Because burner condition and usage vary, cleaning frequency should be tailored to furnace type and operating patterns.
Condensing furnaces and high-efficiency models often require annual inspection and cleaning.
Older, standard-efficiency units may need cleaning every 6–12 months.
Homes with pets, smokers, or heavy dust benefit from more frequent checks—typically every 3–6 months.
Commercial or continuous-run systems demand professional schedules.
Easy monthly and seasonal checks
Following the cleaning-frequency guidelines above, simple monthly and seasonal checks help catch buildup before it affects performance or safety.
Inspect burner area for debris, listen for irregular ignition, and note soot or yellow flames. Schedule light brushing and vacuuming when cool. Replace worn parts promptly.
- Visual burner inspection
- Ignition and flame check
- Surface cleaning
- Parts and seal review
Air filter, venting, and combustion air maintenance
Check and replace air filters regularly, and inspect venting and combustion-air pathways on a scheduled basis to prevent soot buildup, restricted airflow, and dangerous CO production.
Establish monthly filter checks, replace disposable filters every 1–3 months, and clean reusable filters per manufacturer instructions.
Inspect flues, exhaust vents, and intake openings seasonally for obstructions, corrosion, or loose seals; address issues promptly and document maintenance dates.
When Cleaning Is Not Enough: Repair and Replacement Signs
When visible corrosion, warped burners, or otherwise irreparable components are found, cleaning will not restore safe operation.
Evaluating repair costs against the price and reliability of professional replacement helps determine the practical next step.
Any signs of gas leaks, persistent pilot problems, or unsafe combustion require immediate professional service.
Corrosion, warped burners, and irreparable components
A few visible signs indicate that cleaning alone will not restore a gas furnace burner: extensive rust pitting, warped or cracked burner tubes, and components fused by heat or corrosion.
Such damage compromises combustion stability and safety. Burners with deformed ports, separated seams, or brittle metal require replacement.
Attempting repairs on irreparably degraded parts risks leaks, inefficiency, and hazardous operation; professional evaluation is advised.
Cost-benefit signs for repair vs. professional replacement
Several key indicators help determine whether repair is cost-effective or replacement by a professional is warranted.
Age, frequency of failures, repair costs relative to replacement, and deteriorated efficiency guide decisions.
If cumulative repairs approach half the value of a new unit, or safety-related components fail repeatedly, professional replacement typically yields better long-term reliability, efficiency, and warranty coverage.
Safety conditions that require immediate service
Why is immediate professional attention necessary for certain furnace issues?
Visible gas leaks, persistent pilot outages, strong soot or burning odors, carbon monoxide detector alarms, and flame irregularities indicate imminent danger.
These conditions exceed routine cleaning; they require trained technicians to diagnose gas pathways, combustion, and ventilation, and to perform secure repairs or safe shutdowns to prevent fire, explosion, or poisoning.
Additional Resources and Safety Standards
Relevant building codes, appliance manufacturer instructions, and local regulations determine safe cleaning and maintenance practices for gas furnace burners.
The article recommends consulting those documents before any work and keeping manufacturer manuals on hand.
It also explains how to locate a licensed HVAC technician and which questions—certification, insurance, experience with gas furnaces, and written estimates—to ask when hiring one.
Relevant codes, manufacturer instructions, and local regulations
Compliance with applicable codes, manufacturer instructions, and local regulations is essential before attempting any furnace burner maintenance.
Homeowners should verify legal requirements, follow the appliance manual, and document compliance.
Key considerations include:
- Local building and gas codes
- Manufacturer service and warranty provisions
- Permit and inspection requirements
- Safety and environmental disposal rules
How to find a licensed HVAC technician and what to ask them
After confirming applicable codes and manufacturer instructions, homeowners should know how to locate a licensed HVAC technician qualified to perform furnace burner work and answer permit or warranty questions.
Verify license, insurance, and references; request written estimate and scope; confirm warranty and permits; insist on safety checklist.
- License verification
- Insurance proof
- Written estimate
- Warranty and permits
Conclusion
Regular cleaning of a gas furnace burner helps maintain efficiency, safety, and longevity. Homeowners following proper precautions can remove soot and debris, but persistent corrosion, warped components, or recurring combustion issues signal the need for professional repair or replacement. Routine inspections and light maintenance prevent most buildup, turning a difficult chore into a simple rhythm of care. When in doubt, consult a certified technician—ignoring problems can be like inviting a tiny volcano into the home.