How to Repair PEX Water Lines: Step-by-Step Fixes for Leaks, Cracks, and Joints
To effectively repair PEX water lines, first ensure that the lines are shut off, drained, inspected, and isolated. For small punctures, use temporary rubber patches, epoxy, or repair clamps. If a section needs to be cut out, employ crimp, cinch, or push-fit couplers for replacement. For expansion systems, ensure you use the correct tools and fittings as specified by the manufacturer. Utilize a PEX cutter, crimp/cinch tools, or an expansion tool, and always test the repair under pressure before restoring insulation. Remember to wear eye protection and gloves during the process. If you encounter complex failures or hidden damage, it’s advisable to consult a professional for a thorough assessment. Detailed step-by-step guidance will follow.
Overview of PEX Water Lines and Common Problems
PEX (cross-linked polyethylene) is a flexible plastic tubing commonly used for residential and commercial potable water and radiant-heating systems.
Typical failure modes include pinhole leaks, cracks or burst sections from freezing or impact, and problems at fittings such as loosening or corrosion-driven failure.
When evaluating a problem, the responder should assess leak severity and potential water damage, shut off supply if needed, and consider electrical hazards before attempting repairs.
What PEX piping is and where it’s used
Cross-linked polyethylene (PEX) is a flexible, durable plastic tubing commonly used for residential and commercial potable water distribution, radiant heating, and hydronic systems.
It resists corrosion, chemical exposure, and freeze-related damage compared with metal pipes. Installers favor PEX for ease of routing and fewer fittings.
Guides on how to repair PEX water lines focus on compatible connectors, proper tools, and correct installation practices.
Typical failure modes: leaks, cracks, burst lines, loose fittings
Although its flexibility and corrosion resistance reduce many traditional failure causes, PEX piping can still develop problems over time that require repair.
Common failure modes include pinhole leaks from abrasion or UV exposure, longitudinal cracks from freezing or aging, sudden bursts under extreme freeze or pressure spikes, and loose or failing fittings due to improper installation, thermal cycling, or degraded O-rings and crimps.
How to assess severity and safety considerations (shutoff, water damage, electrical)
Several key steps determine whether a leak or crack requires immediate action or can wait for scheduled repair.
Inspect flow rate, location, and pressure; classify as slow drip, active leak, or burst.
Shut off main or zone valves immediately for active leaks.
Assess nearby electricals and drywall, remove standing water, document damage for remediation, and call a licensed plumber for structural or electrical risk.
Tools, Materials, and Safety Gear Needed
A concise inventory of tools and parts helps guarantee a smooth PEX repair.
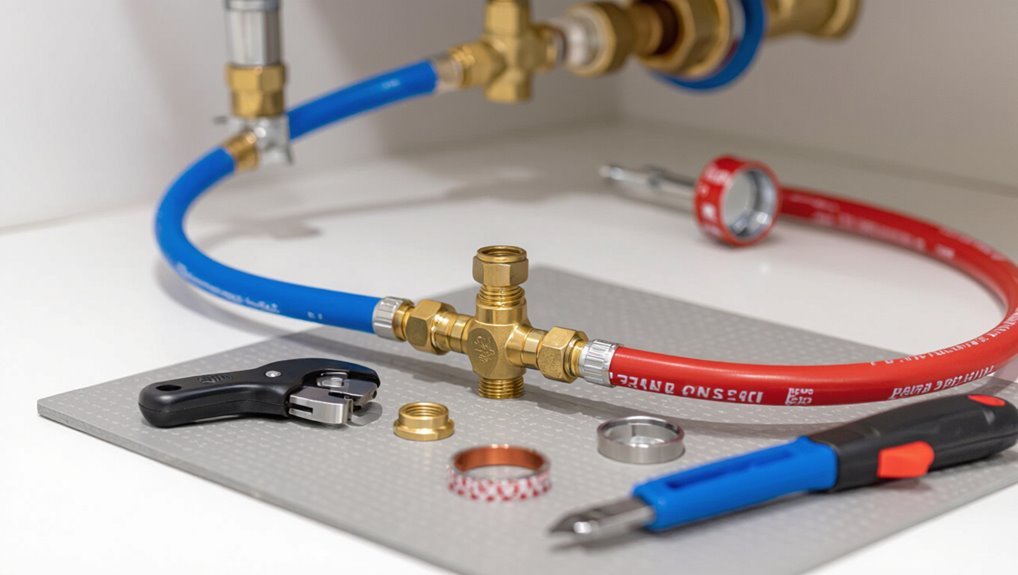
Typical tools include a crimp tool, cinch tool, PEX cutter, and expansion tool, while commonly used replacement parts are crimp rings, cinch clamps, push-fit fittings, couplers, and elbows.
Appropriate safety gear and water containment supplies—gloves, eye protection, buckets, and towels—round out the necessary items.
Essential tools for PEX repair (crimp tool, cinch tool, PEX cutter, expansion tool)
Proper tools are the foundation of reliable PEX repairs: a crimp or cinch tool for secure fittings, a dedicated PEX cutter for clean ends, and an expansion tool where applicable.
Each tool must match PEX type and ring system. Quality jaws, calibrated dies, and a sharp blade guarantee leak-free connections.
Inspect tools before use, maintain clean surfaces, and follow manufacturer instructions for safe, consistent results.
Common replacement parts and fittings (crimp rings, cinch clamps, push-fit fittings, couplers, elbows)
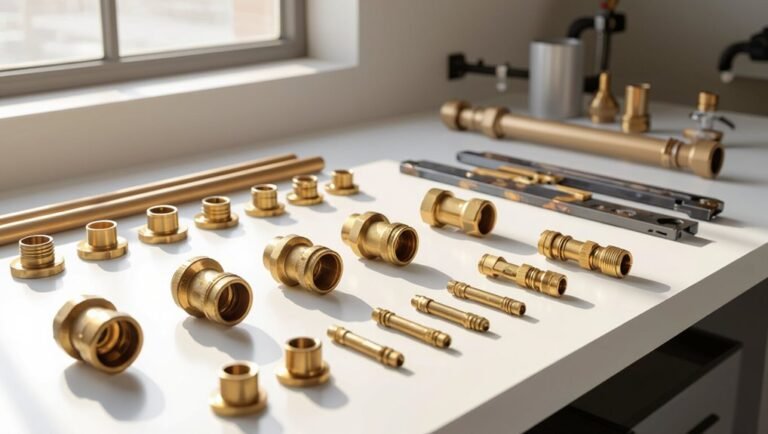
Many common repairs require a small stock of replacement parts and fittings: crimp rings and cinch clamps for secured connections, push-fit fittings for quick repairs, and couplers and elbows to restore or reroute runs.
Also include PEX-specific O-rings, straight and reducing couplers, 90° and 45° elbows, and connection adapters to copper or threaded fittings.
Select sizes matching tubing (½”, ¾”, 1″).
Safety equipment and water containment supplies
After assembling the necessary fittings and matching tube sizes, attention turns to safety equipment and water containment supplies needed to work on PEX lines.
Protective gear, shutoff tools, and containment prevent injury and water damage during repairs.
- Safety glasses, gloves, knee pads
- Adjustable wrenches, pipe cutter
- Collapsible drain bucket, absorbent towels
- Temporary plugs, shutoff valve keys
How to Locate and Diagnose a Leak
A systematic inspection begins with visible signs of moisture and mapping wet areas to trace the leak’s path.
Next, pressure testing and isolating sections narrow the source by observing pressure loss and testing individual runs.
Finally, the technician distinguishes whether the failure is at a joint, fitting, or the pipe body to determine the appropriate repair method.
Visual inspection and moisture mapping
Before any repairs begin, a systematic visual inspection and moisture mapping should be conducted to locate the leak and define its extent.
Technicians examine exposed PEX, fittings, clamps, and surrounding structures for corrosion, discoloration, or warping.
Moisture meters and infrared imaging trace damp zones through finishes.
Document findings, mark affected areas, and photograph conditions to guide targeted repairs and estimate material removal.
Pressure testing and isolation techniques
With the leak location roughly mapped from visual inspection and moisture imaging, pressure testing and isolation techniques narrow the source and confirm failure points.
Technicians isolate sections with valves or caps, apply regulated air or water pressure, and monitor gauges and soap or electronic detectors for escaping fluid.
Sequential isolation localizes leaks without disturbing intact runs, enabling targeted repairs and minimizing downtime.
Distinguishing joint, fitting, and pipe body failures
Different failure modes—loose or corroded joints, faulty fittings, and compromised pipe bodies—produce distinct signs that guide diagnosis.
Joints leak at connections, often when stressed or after movement; fittings show visible deformation, cracking, or failed crimps; pipe body failures appear as pinholes, abrasions, or long cracks along runs.
Inspect, pressure test sections, and isolate to confirm the source before repair.
Step-by-Step Repair: Fixing Leaks at Joints and Fittings
Before beginning any joint repair, the water supply is shut off and the lines are drained to prevent further damage.
The discussion proceeds through common repair methods—crimp or cinch fittings, push-fit (SharkBite-style) fittings, and the expansion method for expansion-style PEX—explaining required tools and installation steps for each.
It concludes with procedures for pressurizing and testing the repaired joint to confirm a watertight seal.
Turn off water and drain the system
Shut the main supply and confirm all downstream fixtures are closed so pressure is fully relieved before any disassembly.
The technician then opens a lowest drain and nearby taps to purge water. After waiting for flow to stop, trapped pockets are bled and appliance valves isolated.
Towels and a bucket are positioned to catch residual water before cutting or loosening fittings.
Repair using crimp or cinch fittings
Begin by locating the faulty joint, cutting out the damaged section of PEX with a straight, clean cut, and deburring the pipe end to guarantee a proper seal.
Then slide the appropriate-sized crimp ring or cinch clamp onto the pipe, insert the fitting fully, and position the ring 1/8–1/4 inch from the pipe end before compressing with the correct tool to form a secure, leak-free connection.
After crimping, trim excess, inspect ring placement, and verify with a go/no-go gauge or visual indicator.
Repressurize gradually and check for leaks.
Repair using push-fit (SharkBite-style) fittings
Use a push-fit (SharkBite-style) fitting to replace a leaking joint quickly and without soldering or specialized crimp tools.
The installer cuts pipe square, deburrs, and verifies pipe is clean and fully inserted to the fitting’s stop. Push until audible click.
Test by turning water on and inspecting for leaks.
Suitable for copper, CPVC, and PEX; removable with a release sleeve.
Repair using expansion method (for expansion-style PEX)
For expansion-style PEX systems, repairs rely on temporarily enlarging the pipe so a compression-style fitting can be inserted and the tubing then contracts to form a leakproof joint.
The technician cuts back to sound tubing, uses the expansion tool to flare the end, inserts the compatible expansion fitting, then allows the pipe to return.
Trim and deburr, then secure the assembly per manufacturer instructions.
Testing repaired joint for leaks
Pressurize the repaired section and observe the joint closely for at least several minutes to confirm a watertight seal.
Then run water at normal and elevated pressure cycles while inspecting for seepage, pinholes, or sweating.
Check surrounding fittings and connections.
If dry, monitor periodically over 24 hours under typical usage.
Any sign of moisture requires depressurizing and rework or replacement of the fitting.
Step-by-Step Repair: Fixing Holes, Cracks, and Small Punctures in Pipe Body
When small holes, cracks, or punctures appear in a PEX pipe body, the immediate options include temporary emergency fixes such as repair tape, epoxy putty, or a repair clamp to stop leaks until a permanent solution can be made.
For a lasting repair, a splice using an approved coupling or cutting out the damaged section and installing a replacement piece is recommended.
The choice between patching and replacing depends on damage size, location, and the pipe’s condition, with full-section replacement preferred for larger, multiple, or recurring failures.
Temporary emergency fixes (repair tape, epoxy, repair clamps)
Temporary emergency fixes provide a quick way to stop leaks in PEX lines until a permanent repair can be made.
A concise description follows: repair tape wrapped tightly over a clean dry area; epoxy applied to fill small punctures; rubber patch under a hose clamp; commercial repair clamp tightened over damaged section.
- Wrapped tape
- Cured epoxy
- Rubber patch
- Clamp tightened
Permanent splice using coupling or replacement section
Begin by isolating and draining the damaged PEX run. Then cut out the compromised section squarely to prepare for a splice using a coupling or a replacement piece.
Deburr ends, slide on fittings (crimp, clamp, or push-fit) per manufacturer specs, ensuring correct insertion depth and secure connections.
Test under pressure, inspect for leaks, and restore insulation and supports before returning system to service.
When to replace a full section vs. patch
If a breach is limited to a small puncture, superficial abrasion, or a hairline crack, a localized patch or repair sleeve is typically sufficient; however, extensive gouging, multiple failures, deformity from freezing, or damage near fittings and bends usually necessitates replacing the entire section to secure long-term integrity.
Replacement is preferred when repair compromises flexibility, risks hidden corrosion, or when inspection reveals adjacent weakening; it assures predictable performance.
Replacing a Damaged PEX Run or Section
The section outlines how to plan the replacement route and gather the correct PEX, fittings, and tools before work begins.
It then covers cutting out the damaged run, preparing clean pipe ends, and installing the appropriate couplers or a replacement manifold to restore service.
Finally, it discusses performing a pressure test and adding insulation or protection where needed.
Planning the replacement path and acquiring materials
Map the most direct, accessible route for the replacement PEX run, taking into account existing framing, insulation, and fixtures to minimize cutting and restore full functionality.
Identify required fittings, connectors, clamps, and length with spare allowance.
Select compatible PEX type and connection method (crimp, clamp, push-fit).
Purchase corrosion-resistant valves and mounting straps.
Verify local code requirements and obtain permits or inspections if required.
Cutting out damaged section and preparing pipe ends
Begin by shutting off water to the affected circuit and relieving pressure by opening downstream fixtures.
Mark the damaged section, allow access, then use a PEX cutter to make square, burr-free cuts beyond compromised areas.
Deburr and clean pipe ends, inspect for scoring or deformation, and measure replacement length with allowance for fittings.
Verify alignment and support before proceeding to coupling and installation.
Installing couplers or manifolds and restoring service
Install the chosen coupler or manifold by verifying compatibility with the pipe material and existing fittings.
Then position the replacement section so joints align without forcing.
Secure connections using the appropriate crimp, clamp, or push-fit method per manufacturer instructions.
Trim excess, deburr if needed, and check that supports keep runs straight.
Restore shutoff valves, open downstream fixtures, and slowly reintroduce water to inspect for leaks.
Pressure test and insulation considerations after replacement
After water is restored and the new coupler or manifold has been secured, the repaired section should undergo a pressure test to verify integrity before final insulation.
Use recommended test pressure and hold times, monitor for drops and visible leaks, and isolate the repaired run.
Once confirmed leak-free, apply appropriate insulation and vapor barrier, securing fittings and ensuring freeze protection and accessibility for future inspection.
Repairing Specific Scenarios
Repair strategies vary by location and cause, from tightening connections at appliances, heaters, or manifolds to choosing an access method for walls, ceilings, or concrete.
Frozen or burst lines require different isolation and thawing protocols and may need section replacement or insulation upgrades.
Multi-family or large systems demand coordinated shutoffs, capacity-aware repairs, and attention to shared-system codes and liability.
Leaks near appliances, water heaters, or manifolds
When leaks occur near appliances, water heaters, or manifolds, the source is often a failed connection, deteriorated seal, or mechanical stress on the PEX line.
Diagnosing these situations requires isolating the affected fixture, inspecting fittings and nearby components, and confirming whether the problem is in the PEX tubing, a crimp/clamp ring, a threaded adapter, or the appliance coupling itself.
Repair options include replacing fittings, tightening or replacing clamps, cutting out damaged PEX and installing new sections with compatible fittings, and ensuring proper support and clearance to prevent future strain.
Repairs in walls, ceilings, or under concrete (access options)
Moving from appliance- and manifold-area fixes, addressing leaks inside walls, ceilings, or beneath concrete requires different access strategies and risk considerations.
Options include cutting minimal drywall or ceiling sections, using inspection cameras to locate runs, and pulling PEX from accessible cavities.
For concrete, consider core drilling or saw-cut trenches and installing isolation valves, conduits, or localized sleeve repairs to minimize demolition and restore access.
Dealing with freezing-related bursts
Addressing PEX bursts caused by freezing requires quickly isolating the damaged section, evaluating pipe integrity, and choosing a repair method suited to the location and extent of failure.
Thaw frozen pipe safely, drain lines, inspect for fractures or split fittings, then cut out damaged length.
Use compatible couplings or replace segments, secure supports, pressure-test, and insulate vulnerable runs to prevent recurrence.
Multi-family or large-system considerations
Larger buildings and multi-unit systems introduce complexities not present in single-family repairs: multiple risers, interconnected manifolds, shared common areas, and varied tenant access all affect diagnosis, isolation, and repair strategy.
Technicians must coordinate with management, map plumbing zones, use sectional shutoffs, schedule repairs to minimize disruption, verify pressure balancing, and guarantee code compliance, backflow prevention, and tenant notification procedures.
Tools and Methods Comparison
Different joining systems and repair approaches are compared here to clarify trade-offs in cost, reliability, and required skill. The table summarizes relative strengths of crimp, cinch, push‑fit, and expansion methods and contrasts temporary versus permanent fixes. Readers can use this at-a-glance comparison to choose the appropriate tool and method for their situation.
| Method / Aspect | Cost & Skill | Reliability & Use-case |
|---|---|---|
| Crimp | Low cost, moderate skill | Reliable for permanent joints with proper tooling |
| Cinch (clamp) | Low cost, lower skill | Good for repairs, less tidy than crimp |
| Push-fit | Higher cost, minimal skill | Quick, reliable for repairs and permanent use |
| Expansion | Moderate cost, higher skill | High reliability for permanent installations |
Crimp vs. cinch vs. push-fit vs. expansion (cost, reliability, required skill)
When choosing a connection method for PEX repairs, homeowners and technicians must weigh cost, reliability, and required skill to match the job and budget.
Crimp and cinch rings are low-cost, reliable with proper tooling and moderate skill.
Push-fit offers fastest installation, higher material cost, minimal skill.
Expansion provides durable, professional-grade joints but demands specialized tools and training, increasing upfront expense.
Temporary vs. permanent repair methods (pros and cons)
How should one decide between a temporary patch and a permanent fix for a damaged PEX line?
A temporary patch—hose clamps, repair sleeves, epoxy—stops leaks fast, minimizes water damage, and suits emergencies but may fail under pressure or cold.
Permanent fixes—replace sections, use proper fittings—require time and skill, cost more, but restore long-term reliability and code compliance.
Common Mistakes and How to Avoid Them
Common errors in PEX repairs include incorrect ring or clamp placement and uneven crimps that compromise joint integrity.
Using incompatible fittings or mixing pipe types can cause leaks or corrosion over time.
Failure to perform a pressure test and to properly support runs often reveals problems only after installation.
Incorrect ring/clamp placement and uneven crimps
Misplaced rings or clamps and uneven crimping compromise PEX connections by preventing proper sealing and creating stress points that lead to leaks or premature failure.
Install rings/clamps squarely over fittings, maintaining specified distance from the pipe end. Use calibrated crimping tools, inspect crimps for uniform compression, and retest connections.
Replace any distorted fittings or compromised tubing promptly to guarantee long-term integrity.
Using incompatible fittings or pipe types
After addressing ring and crimp issues that can physically compromise connections, attention must turn to material compatibility: pairing the wrong fittings or mixing pipe types can create chemical reactions, galvanic corrosion, or poor mechanical seals.
Installers should match PEX to approved fittings, avoid direct metal-to-PEX joins without dielectric unions or approved adapters, and follow manufacturer and code specifications to guarantee long-term integrity.
Neglecting system pressure test and proper support
Failing to perform a thorough pressure test and to install adequate supports is a frequent oversight that leaves PEX systems vulnerable to leaks, pipe sagging, and accelerated wear at fittings.
Technicians should pressure-test to specified PSI for an appropriate duration, secure runs with clamps and hangers per spacing guidelines, and correct unsupported spans.
Proper verification prevents hidden failures and costly rework.
Maintenance, Prevention, and Longevity Tips
Routine inspections and targeted leak-detection strategies help catch problems early and reduce water damage.
Protecting PEX from UV light, harsh chemicals, and excessive heat preserves material integrity and prevents premature failure.
Following installation best practices—proper support, correct fittings, and avoiding kinks—minimizes the need for future repairs.
Routine inspections and leak detection strategies
Because small issues often present before they become major failures, regular inspections and prompt leak detection are essential for preserving PEX water lines.
Visual checks, moisture sensing, pressure monitoring, and odor detection reduce surprises. Inspect fittings, hangers, and bends monthly; use electronic leak locators when needed. Promptly isolate and repair any anomaly to prevent damage.
- Probe joints for dampness
- Scan walls for stains
- Monitor pressure drops
- Use acoustic tools
Protecting PEX from UV, chemicals, and high temperatures
While PEX is durable, exposure to ultraviolet light, harsh chemicals, and sustained high temperatures can degrade its integrity over time; consequently, preventive measures are essential to preserve system longevity.
Shield tubing from sunlight with opaque coverings, store components indoors, avoid contact with solvents and petroleum-based products, and limit continuous operating temperatures by routing away from heat sources.
Periodic checks detect early deterioration.
Best practices for installation to minimize future repairs
Shielding PEX from sunlight, chemicals, and excessive heat reduces one set of failure modes, but proper installation further minimizes the likelihood of leaks, pinholes, and premature wear.
Install with correct support spacing, avoid sharp bends and abrasion, use compatible fittings and crimp tools, maintain proper expansion allowances, pressure-test after installation, and document layout.
Follow local codes and manufacturer instructions for longevity.
When to Call a Professional Plumber
When leaks, corrosion, widespread fittings failure, or complex routing make a DIY fix impractical or hazardous, a professional plumber should be contacted.
The homeowner can expect a qualified estimate that outlines repair versus re-pipe options, materials, timeline, and cost.
Before the visit, gather pipe age and layout information, recent trouble history, and any access constraints.
Be prepared to ask about licensing, warranty, and references.
Signs a DIY repair is insufficient or unsafe
Although many minor PEX issues can be handled by a competent homeowner, certain situations clearly require a professional plumber. Persistent leaks, widespread damage, compromised fittings near structural elements, inadequate water pressure after repair, or visible corrosion and contamination signs indicate risks beyond typical DIY scope.
Additional red flags include recurring joint failures, frozen or burst sections, gas-line proximity, mould or structural rot, and inability to isolate or restore safe water flow.
What to expect from a professional repair or re-pipe estimate
If the homeowner recognizes any of the red flags listed above, a professional estimate will clarify whether a focused repair or a full re-pipe is required.
The plumber inspects visible damage, pressure loss, and routing, then provides scope, materials, timeline, permits, and cost breakdown.
Recommendations include temporary measures, warranty terms, and contingency for hidden issues before work begins.
Questions to ask and information to prepare before the service
Why call a professional now rather than later?
A homeowner should list symptoms, note leak location, pipe type, water pressure issues, recent repairs, and visible damage.
Ask about licensing, estimate breakdown, materials used, warranty, timeline, permits, and cleanup.
Provide access points, shutoff valve location, and photos.
Clear communication and documentation streamline diagnosis, cost estimates, and timely, durable repairs.
Quick Reference Checklist for PEX Repairs
A concise checklist lets a technician quickly assess and execute common PEX repairs without overlooking critical steps.
The technician follows a brief sequence to diagnose, isolate, prepare, and complete repairs efficiently. Common items include shutoff confirmation, leak source identification, correct fitting selection, and pressure testing.
- Confirm shutoff and relieve pressure
- Locate and mark leak
- Select and prepare fittings/tools
- Restore supply and pressure test
Conclusion
Hands steady as a metronome, the guide closes on PEX care: tides of advice mapped for leaks, joints, and hairline wounds. Readers leave armed with tools and cautions, rhythms of inspection and maintenance stitched into daily practice. Small fixes hum like well-tuned gears; stubborn failures point to professional doors. With vigilance and the right touch, water’s mischief can be tamed, and pipelines will sing steadier, season after season.