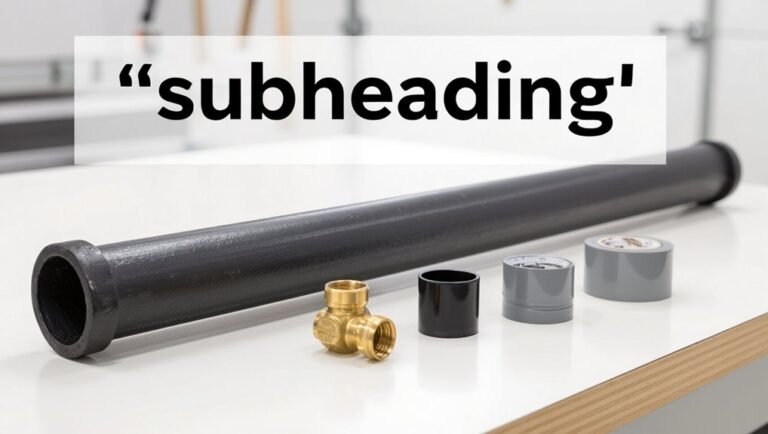
How to Install Vent Pipe Flashing on an Existing Roof: Step-by-Step Guide for DIY Success
To install vent pipe flashing on an existing roof, follow these steps to effectively prevent leaks:
- Gather Materials: You’ll need a boot or metal flashing sized for your pipe, roofing cement, nails, sealant, and safety gear.
- Remove Old Flashing: Carefully take off any existing flashing around the vent pipe.
- Clean the Area: Ensure the surface is clear of debris for a proper seal.
- Install New Flashing: Slide the new flashing over the pipe and tuck the top edge under the upper shingles.
- Secure the Flashing: Fasten the upper flange with nails.
- Seal Seams: Apply sealant to all seams and fasteners to prevent leaks.
- Trim Collar if Necessary: Adjust the collar of the flashing to fit appropriately.
- Test for Leaks: After installation, check for any leaks to ensure a watertight seal.
For additional troubleshooting tips and a detailed step-by-step guide, continue reading.
What Vent Pipe Flashing Is and Why It Matters

Vent pipe flashing is a roof component installed around plumbing vents to channel water away from the penetration and protect the roof deck.
It is commonly made from materials such as galvanized steel, aluminum, copper, or flexible rubber and comes in stepped, cone, and adjustable styles.
Properly installed flashing prevents leaks, reduces water damage, and extends roof life by keeping moisture out of vulnerable roof intersections.
Purpose of vent pipe flashing
A small but critical component of a roof system, vent pipe flashing seals the junction where plumbing vents penetrate the roofing surface to prevent water intrusion.
It directs runoff away from seams, protects against rot and mold, preserves insulation and structural integrity, and maintains indoor air quality.
Understanding its purpose is essential when learning how to install vent pipe flashing on existing roof.
Common materials and styles of flashing
Having established why flashing prevents leaks and protects roof assemblies, the discussion now turns to the common materials and styles used to accomplish that protection.
Common materials include PVC, EPDM rubber, neoprene, aluminum, and lead-coated copper.
Styles range from one-piece molded boots and telescoping metal collars to adjustable multi-component systems.
Choice depends on pipe diameter, roof slope, and climate compatibility.
How flashing prevents leaks and extends roof life
Shields around roof penetrations create a continuous, water-resistant barrier that diverts rain and melting snow away from vulnerable seams and joints.
Properly installed flashing prevents water intrusion, reducing rot, mold, and structural damage to decking and rafters.
Tools, Materials, and Safety Gear You’ll Need
A concise list of the tools required—such as a utility knife, roofing cement, caulk gun, roofing nails, drill, and tin snips—sets the foundation for the job.
Recommended materials and flashing sizes should match the vent pipe diameter (e.g., 1¼”, 2″, 3″, or larger) and include compatible boot or metal flashing plus sealant.
Appropriate safety equipment—gloves, eye protection, non-slip footwear—and ladder and roof safety practices are essential before beginning work.
Required tools list
Before beginning work on vent pipe flashing, assemble a concise set of tools, materials, and safety gear to guarantee the job proceeds efficiently and safely.
- Tape measure, marker, and utility knife for cutting and layout
- Pry bar and roofing hammer for shingle removal and nail setting
- Caulk gun and roofing sealant for watertight seals
- Ladder, harness, and non-slip shoes for safe roof access
Recommended materials and sizing for different pipe diameters
Select materials and sizes that match the vent pipe diameter and roof type to guarantee a durable, watertight installation. Recommended choices depend on pipe size and flashing type: metal, rubber, or neoprene boots.
Match skirt diameter to pipe plus siding clearance. Use corrosion-resistant fasteners and appropriate sealant.
- 1–2″ pipes: rubber boot
- 3–4″ pipes: stainless or lead flashing
- 5″+ pipes: custom metal collar
- Insulation/adapter rings as needed
Safety equipment and ladder/roof safety tips
With materials and flashing sizes chosen to suit the pipe and roof, attention shifts to safety equipment and proper ladder/roof practices to protect the installer and the work.
Essential items and precautions include:
- Sturdy ladder with level footing and ladder stabilizer
- Non-slip footwear and a safety harness tied to an anchor
- Eye protection, gloves, and hard hat
- Weather check; avoid wet or windy conditions
Assessing Your Roof and Vent Pipe Before Starting
Before beginning the installation, the roof and vent pipe should be inspected for existing flashing condition, damaged shingles or corroded metal, and any signs of leaks.
The installer must note the roofing material—asphalt shingle, metal, or tile—to choose a compatible flashing type and attachment method.
Accurate measurements of the pipe diameter and the roof pitch are required to select the correct flashing size and guarantee a proper watertight fit.
Inspecting existing flashing and roof condition
A thorough inspection of the existing vent pipe flashing and surrounding roof surface is essential to identify corrosion, cracks, lifted shingles, and gaps that could allow water intrusion.
The inspector notes loose or missing fasteners, sealant deterioration, and roof decking sag. Photographs document issues.
Minor defects may be repaired; extensive damage or rot requires replacement before flashing installation to guarantee a watertight result.
Identifying roofing material compatibility (asphalt shingle, metal, tile)
When evaluating compatibility, the roofer compares the vent pipe flashing style and materials to the existing roof covering—whether asphalt shingle, metal, or tile—to guarantee proper sealing, fit, and fastener type.
Asphalt uses flange flashings sized for shingles; metal roofs often require clamp-on or tapered flashings and non-corrosive fasteners; tile roofs need stepped or saddle flashings and mortar or specialized tile straps to maintain watertightness.
Measuring pipe diameter and roof pitch
Measure the vent pipe diameter and roof pitch accurately to confirm the flashing fits snugly and sits correctly on the roof plane.
Use calipers or tape to record outside pipe diameter; round up to nearest flashing size.
Determine pitch by measuring rise over run or using a pitch gauge.
Record both values before purchasing flashing to confirm proper fit and seal.
Step-by-Step Preparation
Preparation begins with choosing a dry, calm day and scheduling work to avoid rain or high winds.
The work area is cleared of debris and shingles near the vent are protected or temporarily lifted to prevent damage.
Old flashing is removed and the surrounding roof surface is cleaned and inspected to guarantee a sound base for the new installation.
Weather and timing considerations
Although roof flashing can be installed any time the roof is accessible, ideal results depend on selecting dry, mild conditions and scheduling work to avoid imminent storms or temperature extremes.
Work during calm, low-wind periods to manage materials and maintain sealant integrity. Avoid freezing or scorching temperatures that impede adhesive curing.
Plan for daylight hours and monitor forecasts for at least 48 hours.
Clearing the work area and protecting shingles
Clear the immediate work area of loose debris, leaves, and tools, and lay down waterproof drop cloths or tarps on the roof and in gutters to catch removed shingles and flashing components.
Next, protect surrounding shingles with adhesive roof tape or foam pads to prevent scratches and wind lift.
Secure tarps with weighted sandbags, avoid stepping on fragile areas, and keep a clear path for material removal.
Removing old flashing and prepping the roof surface
With the work area secured and surrounding shingles protected, the next task is removing the old flashing and preparing the roof surface for the new installation.
Carefully pry up nails and lift the old flashing without damaging shingles. Clean residual sealant, rust, and debris.
Inspect the pipe boot and surrounding decking for rot or damage. Replace any compromised materials and guarantee a dry, smooth surface before installing new flashing.
Installing New Vent Pipe Flashing: Detailed Steps
The installer fits the flashing over the vent pipe, aligns it with the roof pitch and surrounding shingles, and checks that the base sits flush against the roof.
Underlayment is placed and the flashing base is sealed before fasteners are driven in at recommended locations to secure it.
Finally, roofing cement or approved sealant is applied to fastener heads and seams to guarantee a watertight finish.
Fitting the flashing over the vent pipe
Begin by sliding the flashing down over the vent pipe until its base sits flat on the roof surface and the pipe protrudes through the center opening.
Confirm the rubber or neoprene collar snugly embraces the pipe, trimming if necessary for a tight fit.
Align the flashing so its base conforms to roofing contours, then press firmly to seat it before securing with appropriate fasteners and sealant.
Positioning flashing relative to shingles and roof pitch
Position the flashing so its top edge tucks beneath the shingle course above the pipe while the lower edge rests atop the shingles below, ensuring water sheds over the flashing rather than into it; on steep pitches, allow a slightly greater overlap under the upper shingles, and on low slopes increase sealant coverage and fastener spacing to compensate for reduced runoff.
Align flange contours with shingle laps and roof angle for snug fit.
Sealing the flashing base and underlayment placement
With the flashing seated and aligned to the shingles and roof angle, attention turns to creating a waterproof seal at the base and correctly placing underlayment to protect against capillary action and wind-driven rain.
A bead of compatible sealant is applied where flashing meets pipe and shingles; underlayment is trimmed and slid under upper shingles, overlapped over lower flashing edge, ensuring continuous water shedding.
Nailing or fastening technique and placement
Secure the flashing using fasteners appropriate for the roof material and flashing type, placing nails or screws through the upper flange only to avoid compromising the watertight seal below.
Fasteners should be corrosion‑resistant and sized to engage decking without overdriving. Space them evenly along the flange, typically every 6–8 inches, and avoid penetrating the lower skirt; countersink heads slightly for a flush fit.
Applying roofing cement or sealant properly
Apply a bead of roofing cement or compatible sealant around the upper flange and any fastener heads, taking care to keep the lower skirt and vent opening clear.
Use a caulking gun for controlled application and a putty knife or gloved finger to smooth the compound into a thin, continuous seal that bridges the flange-to-shingle interface.
Allow recommended cure time, remove excess, and inspect for gaps or voids before finalizing.
Special Instructions for Different Roof Types
Different roof materials require specific flashing techniques to guarantee a watertight seal.
For asphalt shingle roofs, flashing must be integrated under and over shingles.
Metal roofs demand specialized sealants and fasteners to accommodate movement and seams.
Tile roofs often need mortar or boot-style flashing to conform to uneven surfaces and prevent leaks.
Asphalt shingle roofs: integration with shingles
When installing vent pipe flashing on asphalt shingle roofs, the flashing must be integrated beneath the surrounding shingles’ upper edges and over the lower course to create a stepped, water-shedding overlap.
The base flange should sit flat on the roof deck, and shingles cut to fit should maintain their weather lap while preserving the manufacturer’s exposure recommendations.
Fasteners go above the flange, sealant at laps only, and neat shingle trimming guarantees proper drainage.
Metal roofs: sealing and fastening differences
Shifting from asphalt shingle installations, metal roofs require distinct sealing and fastening practices because their smooth, rigid panels and pronounced seams change how flashing seats and resists water.
Installers must use neoprene-sealed flashings, compressive rather than penetrating fasteners where possible, and seal seam overlaps with approved sealants.
Avoid piercing high ribs; attach at flats or use panel-compatible clamps to prevent leaks and corrosion.
Tile roofs: mortar and boot-style flashing considerations
Tile roofs demand specific flashing methods because their uneven profiles and fragile tiles affect how vent stacks are sealed and supported.
Mortar collars are traditional: set beneath and around tiles, packed to hold flashing and prevent water entry.
Boot-style neoprene or metal flashings fit under adjacent tiles with back-dressing mortar or sealant for stability.
Avoid cracking tiles; use gentle fastening and flexible sealants only.
Common Problems and How to Fix Them
Common failures of vent pipe flashing are indicated by water stains, loose or corroded collars, and cracked or missing shingles nearby.
Repairs typically involve resealing or replacing the pipe collar, replacing damaged shingles, and patching small flashing defects.
Decisions to patch versus replace are based on the extent of corrosion, deformation, and recurring leaks.
Signs of a failing vent pipe flashing
Inspecting vent pipe flashing for failure typically begins with identifying clear, observable signs: water stains on ceilings, damp insulation in the attic, or peeling paint and warped shingles around the pipe base.
Additional indicators include rusted or cracked flashing, loose or missing sealant, gaps where flashing meets pipe, mold growth, musty odors, and granular loss from nearby shingles indicating accelerated deterioration.
Fixing leaks around the pipe collar
After identifying the typical signs of a failing vent pipe flashing, attention turns to the pipe collar where most leaks originate. Water often tracks down the pipe past deteriorated or improperly seated collars.
The remedy involves removing old sealant, inspecting the collar for cracks or gaps, replacing or reseating it, and applying appropriate roofing-grade sealant and flashing cement to create a watertight seal.
Repairing damaged shingles near flashing
Damaged shingles adjacent to vent flashing accelerate leaks and compromise roof integrity, so prompt repair is essential.
The technician removes broken or curled shingles, inspects underlayment and flashing seal, then replaces shingles with matching pieces, ensuring proper overlap and nail placement clear of the flashing flange.
Sealant is applied sparingly at edges to restore watertightness and prevent future uplift.
When to replace vs. patch flashing
Repairing nearby shingles often reveals the condition of the vent flashing itself, and the decision to patch or replace hinges on the extent of corrosion, deformation, and seal failure.
Minor cracks, loose sealant, or small gaps can be patched with compatible sealant and flashing cement.
Extensive rust, warped metal, split collars, or recurring leaks require full flashing replacement to guarantee a durable, watertight repair.
Prevention and Maintenance
A regular inspection schedule should be established to check seals, flashing edges, and surrounding shingles for signs of wear or movement.
Seasonal maintenance—clearing debris, resealing exposed fasteners, and checking after freeze‑thaw or storm events—helps prevent leaks.
Selecting durable, corrosion‑resistant flashing materials and installing them correctly will extend service life and reduce future repairs.
Routine inspection schedule and what to look for
Regular inspections of vent pipe flashing should be scheduled at least twice a year—preferably in spring and fall—and after any severe weather event to catch emerging issues early.
Inspect for cracked, lifted, or corroded flashing; deteriorated sealant; loose or missing fasteners; gaps between pipe and flashing; water stains or mold in the attic; and shingle damage adjacent to the flashing that could permit leaks.
Seasonal maintenance tips to prevent leaks
Inspect roofs each season to address small issues before they become leaks: focus on clearing debris around vent pipes, checking and resealing cracked or shrunken caulk, tightening or replacing loose fasteners, and trimming overhanging branches that can damage flashing or shingles.
Additionally, inspect for rust or corrosion, guarantee proper drainage around vents, replace damaged boots promptly, and document repairs for future reference.
Extending lifespan with proper flashing material choices
When choosing vent pipe flashing, material selection directly influences resistance to corrosion, flexibility under temperature changes, and overall service life; therefore, selecting metals or polymers suited to the roof environment and pipe type helps prevent premature failure.
Durable options include stainless steel, lead-coated copper, and EPDM or silicone boots.
Match compatibility with roofing materials, consider UV and chemical exposure, and prioritize secure seals and proper installation.
Cost, Time Estimate, and When to Hire a Pro
Typical DIY costs are outlined, including flashing, sealant, and basic tools, to help estimate the outlay.
Time estimates for simple replacements versus full roof access are provided to set realistic expectations.
Clear red flags—extensive roof damage, complex vent configurations, or safety concerns—indicate when a professional should be called.
Typical DIY cost breakdown
A handful of factors determine the DIY cost and time for installing vent pipe flashing: materials chosen (rubber boot, metal flashing, sealant), roof type and pitch, existing shingle condition, and whether old flashing must be removed. Typical costs: materials $15–$75, tools rental $0–$30, contingencies $20–$100. Hire a pro for steep roofs, complex repairs, or safety concerns.
| Item | Low | High |
|---|---|---|
| Materials | $15 | $75 |
| Tools | $0 | $30 |
| Contingency | $20 | $100 |
Estimated time for common scenarios
Frequently, estimated time and cost for installing vent pipe flashing vary with roof complexity and the scope of work; a straightforward rubber-boot replacement on a moderate-pitch asphalt roof typically takes 30–90 minutes and $15–$50 in materials.
While removing old flashing, repairing decking, or fitting metal flashing on steep or multi-layer roofs can extend the job to several hours and raise costs into the $75–$250 range.
Additional scenarios: simple shingle adjustments 45–120 minutes, small decking repair 1–3 hours, full metal flashing install 2–6 hours.
Time depends on experience, weather, and access.
Red flags that indicate you should call a professional
Beyond the basic time and cost estimates for common vent-flashing jobs, certain warning signs mean the project exceeds DIY scope and warrants a professional.
Significant roof damage, extensive rot, active leaks, complex roof geometry, unsafe steep pitches, lack of proper tools, repeated failures after repairs, or unfamiliar local code requirements all justify hiring a licensed roofer.
Obtain written estimates and timelines before contracting.
Troubleshooting Checklist Before Finishing
Before closing the roof, a thorough troubleshooting checklist guarantees the vent pipe flashing is watertight and secure.
The checklist should include water-test and leak-check methods, verification of all fastenings and sealant beads, and a final cleanup for clear documentation.
Photographs and notes are recommended to support warranty claims and future inspections.
Water-test and leak-check methods
Perform a systematic water-test and leak-check around the vent flashing to verify a watertight seal before finishing the roof.
Using a hose, soak the flashing area in sections while an assistant watches the attic or interior for drips.
Inspect seams, boot edges, and underlayment for wetness.
Mark any leaks, retest after repairs, and document results to guarantee complete remediation.
Final fastening and seal check
Complete a final fastening and seal check to guarantee every fastener is secure and all sealing materials are intact before closing the roof.
Inspect each screw and nail for proper depth and corrosion, confirm flashing sits flush with shingles, and press sealant beads for adhesion.
Re-torque screws if needed, replace compromised sealant, and verify no gaps remain around the vent collar or under flashing edges.
Clean-up and documenting the work for warranties
Gather tools and materials used during the installation and document key details for the warranty file before leaving the site.
Remove debris, leftover sealant, and unused flashing components; sweep affected roof areas and clear gutters.
Photograph completed flashing from multiple angles, record product serial numbers, sealant type and batch, installation date, and installer name.
Store receipts and photos in the warranty folder for future claims.
Quick Tips and Common Mistakes to Avoid
Keep flashing snug, aligned, and sealed to prevent leaks and future repair work. Best practices and pitfalls are noted concisely to aid reliable installation:
- Verify pipe fit and vent collar sizing before sealing.
- Use compatible sealant; avoid roofing cement that cracks.
- Don’t nail through the seal; fasten to shingles only.
- Inspect flashing after heavy rain and reseal small gaps promptly.
Conclusion
In the grand theater of roof repair, installing vent pipe flashing is portrayed as nothing less than a heroic quest; a single misstep can summon torrents and dramatic leaks, while a precise seal banishes future drama. When done correctly, this small metal collar performs like an unsung guardian, imperceptibly defending the home for years. With care, correct materials, and methodical steps, the humble flashing transforms into an almost mythic shield—quiet, steadfast, and utterly indispensable.