How to Repair Gas Water Heater: Step-by-Step DIY Guide for Troubleshooting & Fixes
To repair a gas water heater, begin by ensuring safety: shut off the gas and power, and ventilate the area. Then, systematically check components such as the pilot light, thermocouple, burner, thermostat, dip tube, and valves for sediment or leaks. Relight the standing pilot according to the manufacturer’s instructions, replace any faulty thermocouples or valves, flush out sediment, and test for proper ignition and leaks. Always adhere to safety protocols, and if issues with the gas line, corrosion, or persistent failures arise, consult a professional for comprehensive repair guidance.
How a Gas Water Heater Works: Key Components and Safety Features
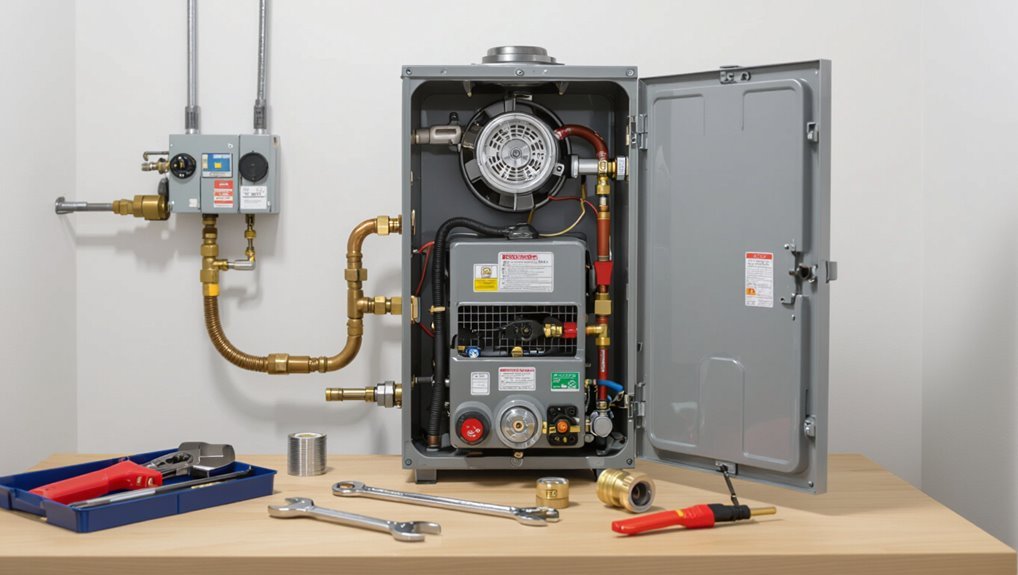
A gas water heater consists of key parts—tank, burner, thermostat, pilot light, dip tube, and anode rod—that work together to heat and deliver water.
Built-in safety devices such as the temperature-and-pressure relief valve, thermocouple, and shutoff valve protect against overheating, overpressure, and gas leaks.
Common failure modes (e.g., sediment buildup, pilot outage, thermostat failure, corroded anode) and their causes should be recognized before attempting repairs.
Main Parts Explained Tank, Burner, Thermostat, Pilot Light, Dip Tube, Anode Rod
Understanding the main components of a gas water heater clarifies how the appliance heats and delivers hot water while maintaining safety.
The tank stores water; the burner heats it; the thermostat regulates temperature; the pilot light ignites the burner.
The dip tube directs cold water to the tank bottom. The anode rod prevents corrosion.
This overview supports how to repair gas water heater effectively.
Safety Mechanisms Temperature & Pressure Relief Valve, Thermocouple, Shutoff Valve
Having outlined the main components that heat and deliver water, attention turns to the safety mechanisms that protect both the appliance and occupants from overpressure, overheating, and gas leaks.
The temperature‑and‑pressure relief valve vents excess heat or pressure. The thermocouple detects pilot flame and shuts gas if extinguished.
A manual shutoff valve allows immediate isolation for maintenance or emergencies, preventing fuel flow.
Common Failure Modes and Their Causes
Several predictable failure modes affect gas water heaters, each traceable to specific components or operating conditions.
Common issues include pilot outages from a failing thermocouple, burner clogging or corrosion causing weak heat, sediment buildup reducing tank efficiency and causing noise, T&P valve leaks from pressure or thermal stress, thermostat failure yielding incorrect temperatures, and gas valve malfunctions leading to unsafe operation or no heating.
Quick Checklist Before You Start Any Repair
Before beginning any repair on a gas water heater, the first step is to confirm personal safety measures and don appropriate protective equipment.
Next, a concise inventory of required tools and materials should be assembled to avoid interruptions.
Finally, clear criteria should be used to decide whether the task is within DIY limits or requires a licensed professional.
Safety Precautions and Personal Protective Equipment
A concise safety checklist reduces the risk of injury and property damage when working on a gas water heater.
Confirm gas supply is shut off and pilot extinguished; ventilate the area.
Wear heat-resistant gloves, safety goggles, and long sleeves to protect from scalds and debris.
Use a respirator if flue gases or dust are present.
Keep a fire extinguisher nearby and test detectors.
Tools and Materials You’ll Need
When preparing to work on a gas water heater, technicians should assemble a compact set of reliable tools and materials to avoid interruptions and reduce risk.
Essential items include hand tools, leak-detection supplies, replacement parts, and safety equipment for confined spaces.
- Adjustable wrench, screwdrivers, pliers, pipe wrench
- Gas leak detector, soapy water, multimeter
- Thermocouple, dip tube, replacement valves
- Gloves, eye protection, heat-resistant tape
When to Call a Professional vs. DIY Boundaries
If the issue involves gas lines, persistent pilot-light failures, unexplained carbon monoxide readings, major leaks, or any repair requiring opening the combustion chamber or altering gas fittings, a licensed professional should be contacted immediately.
Otherwise, only routine tasks such as draining, replacing a sacrificial anode, swapping simple valves, or tightening accessible fittings should be attempted by someone with appropriate tools and basic plumbing experience.
Follow safety checks, confirm permits, and call a pro for uncertainty.
Diagnosing the Problem: Step-by-Step Troubleshooting Flow
The technician follows a systematic troubleshooting flow that begins with basic checks for no-hot-water conditions and simple tests to isolate supply or ignition faults.
Next, thermostat settings, tank capacity, and heating elements are assessed when water temperature is incorrect, while pilot light behavior and burner function are examined if it will not stay lit or ignite.
Finally, unusual noises prompt inspection for sediment, scale, or burner problems, and any leaks are traced by location to determine whether valves, fittings, or the tank itself are at fault.
No Hot Water Initial Checks and Tests
A few basic checks quickly narrow the most common causes of no-hot-water in a gas water heater.
Inspect pilot light, gas supply valve, and thermostat setting. Confirm power to electronic ignition and check for error codes.
Verify cold-water inlet and hot outlet valves are open and that sediment buildup isn’t blocking flow.
Smell for gas and shut off if detected, calling a professional.
Insufficient Hot Water or Water Too Hot Thermostat and Tank Issues
Having ruled out common causes of no hot water, attention turns to situations where water temperature is wrong—either insufficient hot water or water that is too hot.
Check thermostat setting and probe for proper operation; replace faulty thermostats.
Inspect dip tube for stratification and sediment buildup in the tank reducing capacity.
Flush tank to remove sediment, test temperature-pressure relief valve, and verify correct burner and thermostat interaction.
Pilot Light Problems Won’t Stay Lit or Won’t Ignite
Start by observing the pilot assembly and ignition sequence to identify whether the issue is a failure to light or a pilot that lights but then goes out.
Check fuel supply and valve positions, inspect thermocouple or flame sensor for dirt or wear, verify proper air supply and burner ports, test ignition spark or control module, and replace faulty components or clean connections before retesting ignition sequence.
Strange Noises Sediment, Scale, or Burner Issues
When unusual popping, rumbling, or hissing comes from a gas water heater, proceed with a systematic diagnostic flow that distinguishes between sediment/scale buildup in the tank and problems at the burner assembly.
Check age and maintenance history, listen to noise timing, drain and inspect for sediment, flush if needed.
Inspect burner flame shape, color, and soot; clean or replace burner components if combustion anomalies persist.
Leaks Location-Based Diagnosis (valves, fittings, tank)
Diagnose leaks by locating their exact source and tracing wetness to its origin: valves and fittings typically drip at connections or nearby piping. The pressure relief valve discharges intermittently under overpressure, and tank leaks appear as continuous seepage or pooled water beneath the heater.
Inspect union joints, threaded fittings, and inlet/outlet shutoffs; feel for dampness after drying. Small fitting leaks may tighten; tank failures require replacement.
Unusual Odors or Discolored Water Bacterial or Anode Rod Concerns
After checking for visible leaks and pinpointing their sources, attention shifts to water quality issues such as unusual odors or discoloration, which often stem from bacterial growth or a depleted anode rod.
Inspect anode rod condition, test for hydrogen sulfide (rotten-egg smell), flush tank, and sanitize with diluted bleach if bacteria suspected.
Replace a corroded anode and retest water until resolved.
How to Relight a Pilot Light Safely
The section outlines a clear, step-by-step pilot relighting procedure for standing pilot systems, including safety checks and correct knob/igniter actions.
It then covers common ignition faults—such as thermocouple failure and interrupted gas supply—and practical fixes to address them.
Finally, it explains resetting and troubleshooting electronic ignition systems with diagnostic tips to identify control or sensor issues.
Step-by-Step Pilot Relighting Procedure for Standing Pilot Systems
One clear, methodical sequence guides safe relighting of a standing pilot: confirm gas is off and the area is ventilated, locate the pilot assembly and control knob, purge any lingering gas per the manufacturer’s instructions, then follow the specific ignition steps while observing flame size and color.
Depress control to “pilot,” ignite per label, hold timed interval, release and guarantee steady blue flame before setting to “on.”
Common Ignition Problems and Fixes (thermocouple, gas supply)
Having covered the safe sequence to relight a standing pilot, attention now turns to common reasons a pilot will not stay lit and straightforward remedies.
Faulty thermocouples often fail to sense heat; replace if bent, corroded, or loose.
Verify gas supply: check shutoff valve, regulator, and supply line for leaks or blockages.
Clean pilot orifice and guarantee proper flame contact.
Electronic Ignition Systems Reset and Diagnostic Tips
Many electronic ignition water heaters include a reset button and diagnostic LEDs that help identify faults before attempting a relight.
Technicians should consult the unit’s code chart, press reset only after checking gas supply and power, and observe LED patterns for sensor, ignition, or valve failures.
If codes persist, replace failed components or contact a qualified service technician to avoid unsafe attempts.
Fixes for Common Problems: Detailed DIY Steps
The following section outlines concise, step-by-step DIY procedures for the most frequent gas water heater issues.
It covers thermostat adjustment or replacement, burner assembly cleaning or replacement, thermocouple replacement, a full tank flush to remove sediment, and anode rod replacement to prevent corrosion.
Each procedure is presented with required tools, safety checks, and clear sequencing to aid a competent homeowner.
Replacing or Adjusting the Thermostat
Begin by shutting off the gas supply and power to the heater, then confirm the pilot is out and the unit is cool to the touch before attempting any thermostat work.
Remove access panel and insulation.
Test thermostat continuity with a multimeter; replace if faulty.
To adjust, rotate temperature dial in small increments, reassemble, restore power and gas, then verify proper flame and water temperature.
Cleaning or Replacing the Burner Assembly
Access the burner assembly only after shutting off gas and power and confirming the pilot is extinguished and the unit is cool; this guarantees safety before any cleaning or replacement work begins.
Remove access panels, disconnect gas line fittings if required, then inspect for soot, corrosion, or blockages.
Clean with a soft brush and compressed air or replace a damaged burner; reassemble, test for proper ignition and flame.
Replacing the Thermocouple
After reassembling and confirming the burner functions correctly, attention turns to the thermocouple when pilot outages or intermittent gas flow persist.
Shut gas, remove pilot tube connection, detach mounting bracket, and extract the old thermocouple.
Install matching replacement, secure fittings, reconnect pilot and gas valve, then relight per manufacturer instructions.
Verify steady pilot flame and proper gas shutoff response before restoring full operation.
Flushing the Tank to Remove Sediment Full Procedure
Several homeowners should plan to flush a gas water heater annually to remove sediment that reduces efficiency and can shorten tank life.
The procedure: turn off gas and pilot, shut cold-water supply, attach a hose to the drain valve, open a hot tap, open drain valve and flush until clear, close valve, remove hose, refill tank, restore gas and relight pilot per manufacturer instructions.
Replacing the Anode Rod to Prevent Corrosion
Begin by locating the anode rod—usually on the tank’s top or under a removable hex head—and confirm the heater is drained and cold before proceeding.
Use a breaker bar or socket to loosen the rod, remove the corroded rod, inspect for pitting, and install a new compatible anode.
Tighten securely, refill tank, check for leaks, and restore power/gas per safety protocols.
Repairing or Replacing the Temperature & Pressure Relief Valve
Diagnose the temperature and pressure (T&P) relief valve by observing its discharge behavior and checking for leaks, hissing, or mineral buildup that indicate sticking, corrosion, or sealing failure.
Isolate and depressurize the tank, remove the valve with an appropriate wrench, inspect threads and seat, replace with a rated T&P valve if damaged, apply thread sealant, torquing to specification, and test for proper operation.
Fixing Minor Leaks Valve Tightening, Seal Replacement, Patch Options
Addressing minor leaks on a gas water heater typically involves tightening fittings, replacing seals, or applying temporary patches, and should be approached methodically to guarantee a safe, lasting repair.
Isolation of water and gas precedes inspection.
Tighten loose compression nuts, swap deteriorated O‑rings or tank threads with proper seals, and use epoxy or silicone patches for small external leaks; replace components if leakage persists.
Addressing Pilot and Ignition Module Failures
Pilot light and ignition module failures are common and usually traceable to a few specific causes—dirty or bent thermocouples, clogged pilot orifices, weak igniter batteries, faulty thermopiles, or failed control modules—and can often be resolved with systematic, safety-first DIY steps.
Inspect and clean pilot assembly, straighten or replace thermocouple, test thermopile voltage, replace batteries or igniter, and swap control module only after confirming other components.
Parts Replacement Guide and Compatibility
The guide explains how to identify correct replacement parts by matching model numbers and technical specifications to guarantee compatibility.
It outlines a concise, step-by-step procedure for removing and installing common components such as thermostats, thermocouples, and gas valves.
Typical cost ranges and reliable sources for parts are noted to help readers compare prices and purchase the right items.
How to Identify the Correct Replacement Parts (model numbers, specs)
When replacing parts, a technician first confirms the water heater’s exact model number and serial number—usually found on the data plate.
They then cross-reference those identifiers with manufacturer parts lists and service manuals to verify compatible components and specifications.
They note part numbers, dimensions, pressure and temperature ratings, gas type, and electrical requirements.
Then, they obtain OEM or equivalent certified replacements from authorized dealers or verified suppliers.
Step-by-Step Component Replacement Process
After verifying model and part specifications, the technician follows a systematic replacement sequence to guarantee safety and compatibility:
- Shut gas and water, relieve pressure, and disconnect power to isolate the unit.
- Remove access panels, document wiring and tubing orientation, then extract the faulty component.
- Install the OEM-compatible replacement, ensuring seals, fittings, and torque match specs.
- Reassemble, restore services, test for leaks and proper operation.
Cost Estimates and Where to Buy Parts
Budgeting for parts involves weighing component quality, brand compatibility, and local labor rates to produce a realistic repair estimate. Prices vary: thermostats and thermocouples are low-cost; valves and burners cost more. Sourcing options include manufacturer dealers, big-box stores, and reputable online retailers; confirm model numbers and warranties before purchase.
| Part Type | Typical Price Range |
|---|---|
| Thermostat/thermocouple | $10–$40 |
| Valve | $30–$120 |
| Burner assembly | $50–$200 |
| Anode/other fittings | $15–$80 |
Testing After Repair and Preventive Maintenance
After repairs, the technician follows a safe restart procedure and systematically tests the heater for proper ignition, combustion, and secure gas connections.
Performance checks include measuring outlet temperature, system pressure, and observing flame characteristics to confirm efficient operation.
A routine maintenance schedule—covering flushing, anode inspection, vent cleaning, winterizing, and long-term storage precautions—reduces failures and extends service life.
How to Safely Restart and Test the Heater
Several quick checks should be completed before relighting the pilot and powering the gas water heater to guarantee safety and proper operation.
Confirm gas valve is off, connections are tight, and no odor of gas exists.
Restore gas, follow manufacturer pilot lighting steps, observe for steady ignition, and inspect for leaks.
Reinstall access panels and document repairs for future reference.
Performance Checks Temperature, Pressure, Flame Characteristics
Begin performance checks by verifying temperature, pressure, and flame characteristics to confirm the heater operates safely and efficiently after repairs.
Measure outlet temperature against thermostat setpoint, inspect pressure relief valve activation threshold, and confirm stable water pressure.
Observe burner flame color, shape, and steadiness—blue, centered, without yellow tips or soot.
Document readings and address deviations promptly.
Routine Maintenance Schedule and Procedures
Having confirmed temperature, pressure, and flame characteristics, the technician proceeds to a structured routine maintenance schedule that covers testing after repair and preventive tasks.
Regular inspections, functional tests, and component replacements minimize failures and confirm safety. Documentation and customer instruction complete the process.
- Visually inspect and test controls
- Verify pilot and burner operation
- Flush sediment; check anode
- Record results and advise owner
Winterizing and Long-Term Storage Tips
Prepare the water heater for cold storage by draining and isolating it, relieving pressure, and protecting exposed components from freezing to prevent damage and guarantee safe restart.
Store in a dry, ventilated area with gas supply capped and controls off.
Remove or insulate anode and sensors, coat fittings with corrosion inhibitor, and label maintenance status.
Periodically inspect and rehydrate seals before reactivation.
Troubleshooting Scenarios and Quick Solutions
Common trouble signs—intermittent lukewarm output, loud popping or rumbling during heating, and a pilot flame that extinguishes shortly after lighting—warrant targeted checks and quick remedies.
Each scenario points to different causes such as sediment buildup, thermal expansion or combustion issues, and pilot assembly or gas supply faults.
The following discussion outlines concise diagnostic steps and practical fixes for each problem.
Scenario: Heater Delivers Lukewarm Water Only at Certain Times
When a gas water heater supplies warm instead of consistently hot water at specific times, intermittent demand, thermostat settings, or delayed pilot/ignition issues are often responsible.
Identifying whether the problem occurs during peak usage, at particular outlets, or after long idle periods helps narrow the cause.
Check thermostat temperature and dip tube condition, inspect pilot/igniter operation, evaluate recovery capacity versus household demand, and test for cross-connections.
Scenario: Loud Popping or Rumbling When Water is Heated
A loud popping or rumbling noise from a gas water heater typically signals sediment buildup on the tank bottom or scale around the burner, which traps water and causes localized boiling and steam pockets that implode with a popping sound.
Less commonly, loose baffles or an improperly seated combustion chamber can amplify vibration.
Flush the tank, inspect and clean burner and combustion area, tighten or replace loose components, retest.
Scenario: Pilot Keeps Going Out After a Short Time
After addressing noises caused by sediment and loose parts, attention often turns to the pilot light if the heater won’t stay lit.
Check for drafts, clogged pilot orifice, weak thermocouple, or faulty gas valve. Clean the pilot assembly, reposition shielding from drafts, tighten connections, and replace a failing thermocouple.
If problems persist, consult a licensed technician to inspect gas controls and safety components.
Safety, Codes, and Environmental Considerations
Repairing a gas water heater requires adherence to local codes and often permits, so homeowners should verify regulations before starting work.
Proper disposal or recycling of old tanks prevents hazardous waste and may be required by municipal programs.
Attention to carbon monoxide risks—including use of detectors, correct venting, and immediate response to suspected leaks—is essential for safety.
Local Code and Permit Considerations for Gas Appliance Work
When working on gas water heaters, compliance with local building and fuel-gas codes is essential to guarantee safety and legal operation.
Permitting requirements, inspection schedules, and approved materials vary by jurisdiction and can affect both scope and timing of the job.
Homeowners should verify permit necessity, follow licensed contractor rules, schedule required inspections, and document approvals to avoid fines, voided warranties, or unsafe installations.
Proper Disposal and Recycling of Old Water Heaters
Although often overlooked, proper disposal and recycling of an old gas water heater is a critical step that protects occupants, complies with codes, and reduces environmental impact.
Contractors or owners should drain and disconnect appliances, cap gas and water lines, and follow local hazardous-waste rules.
Salvageable metals merit recycling; foam insulation and refrigerants require special handling.
Document disposal per permit and utility requirements.
Carbon Monoxide Risks, Detection, and Mitigation
Recognize that a malfunctioning or improperly vented gas water heater can produce carbon monoxide (CO), a colorless, odorless gas that poses immediate life-threatening risks and chronic health effects at lower concentrations.
Install UL-listed CO detectors near sleeping areas and the water heater, test regularly, guarantee proper venting and combustion air, follow local codes, and call a qualified technician for persistent CO readings or suspected leaks.
Additional Resources and When to Hire a Pro
The article provides printable diagnostic checklists and links to manufacturer manuals and diagrams for reference.
It lists clear signs—such as persistent gas smells, pilot assembly damage, or repeated pressure issues—when DIY should stop and a licensed technician must be called.
Contact information for manufacturer support and online resources is included to assist with parts, specifications, and professional referral.
Diagnostic Checklists to Print or Save
Prepare printable diagnostic checklists that guide step-by-step inspections, safety checks, and common fault identification for a gas water heater.
These concise sheets speed diagnosis, document findings, and note repairs or parts needed.
Keep digital and printed copies near the unit for reference.
- Visual inspection steps
- Pilot/ignition and burner checks
- Leak and pressure tests
- Maintenance and parts log
Signs You Must Stop DIY and Call a Licensed Technician
When should homeowners stop troubleshooting and call a licensed technician?
Persistent gas odors, suspected leaks, pilot assembly or gas valve failures, repeated ignition or combustion problems, visible corrosion or tank bulging, water temperatures fluctuating dangerously, and failed safety devices (TPR valve, gas shutoff) require professional intervention.
If diagnostic steps don’t resolve the issue quickly, stop DIY to prevent injury, fire, or code violations.
Useful Online Manuals, Diagrams, and Manufacturer Support
Owner manuals, schematic diagrams, and manufacturer support pages provide authoritative guidance for diagnosing and repairing gas water heaters, and should be the first reference after basic safety checks.
They clarify parts, error codes, torque specs, and warranty limits; OEM troubleshooting flowcharts reduce guesswork.
When stuck or facing gas connections, contact certified service.
- Model-specific manual
- Parts exploded diagrams
- Error code lookup
- Manufacturer technical support
Conclusion
A concise understanding of gas water heater repair improves safety and saves money. Nearly 60% of household water heater failures are linked to simple issues—sediment buildup, faulty thermostats, or pilot light problems—resolvable with basic tools and proper precautions. Following the troubleshooting flow, safety checklist, and stepwise fixes reduces risks and extends unit life. If complex failures, gas leaks, or code concerns arise, a licensed technician should be called to guarantee compliance and safe operation.