
How to Repair Cast Iron Sewer Pipe: Step-by-Step Fixes, Costs, and When to Call a Pro
If you’re dealing with issues in cast iron sewer pipes, such as slow drains, odors, gurgling sounds, rust stains, or visible leaks, it’s crucial to understand your repair options. Small cracks can often be fixed with epoxy, wraps, or slip couplings, while larger corroded sections might require replacement or trenchless CIPP relining. DIY repairs can cost hundreds of dollars, but full replacements may run into the tens of thousands. Safety, permits, and using a camera for diagnosis are key considerations. It’s best to call a professional if you’re facing significant collapses, extensive root intrusions, multiple failures, or if the problem’s scope is unclear. Continue reading for detailed step-by-step methods, associated costs, and how to verify issues.
What It Means When a Cast Iron Sewer Pipe Needs Repair
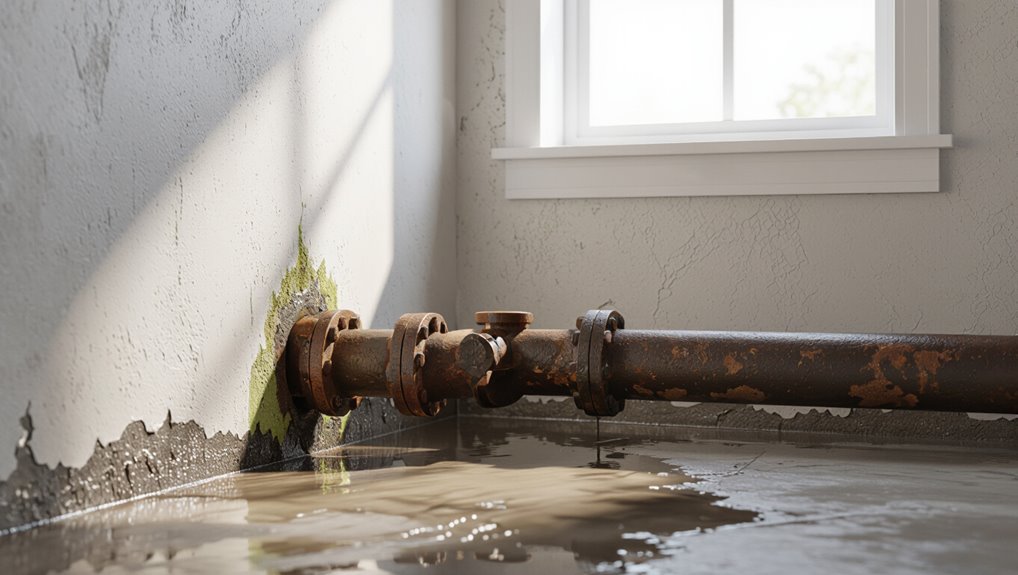
When a cast iron sewer pipe needs repair, visible signs such as slow drains, recurring clogs, sewage odors, wet spots, and rusty water often appear.
These symptoms typically stem from common causes like corrosion, root intrusion, shifting soil, and mechanical damage.
Over time deterioration usually progresses from surface pitting to wall thinning, perforations, and eventual collapse, increasing the urgency for repair or replacement.
Common symptoms and signs to watch for
A slow-draining sink, recurring clogs, and foul sewer odors are common early indicators that a cast iron sewer pipe may need repair.
Visible rust stains, unexplained water damage on floors or ceilings, gurgling toilets, and persistent backups signal deterioration.
Homeowners researching how to repair cast iron sewer pipe should monitor these signs and document occurrences before consulting a plumber for inspection.
Typical causes of cast iron pipe failure
Because cast iron corrodes over time and endures mechanical stress, failures typically stem from a handful of identifiable causes.
Common origins include internal corrosion from acidic waste, external corrosion from soil moisture and stray electrical currents, mechanical damage from shifting soil or roots, freeze-thaw cracking, and joint separation due to ground movement.
Manufacturing defects and overloads accelerate deterioration.
How cast iron deterioration progresses over time
Although initially robust, cast iron sewer pipes undergo a predictable sequence of deterioration that moves from surface pitting to structural compromise.
Microbial corrosion and electrolytic reactions create pits and scale, reducing wall thickness. Cracks and hairline fractures form, expanding under load and freeze cycles.
Joints loosen, leaks develop, and sections may collapse, increasing blockages, sinkage risk, and urgency for repair or replacement.
Quick Assessment Is Repair or Replacement Required?
A quick assessment starts with a few simple home tests—listening for unusual sounds, checking for slow drains or backups, and inspecting accessible joints for corrosion or leaks.
If problems are localized and the metal is largely intact, a short repair such as a patch or section replacement may suffice; widespread rust, multiple leaks, or collapsed sections usually indicate full replacement.
Any signs of sewage odor indoors, significant ground settlement, or raw sewage exposure warrant immediate professional attention.
Simple home tests to evaluate pipe condition
When inspecting cast iron sewer lines, homeowners can perform a handful of straightforward tests to gauge whether localized repair or full replacement is warranted.
Visual checks for surface pitting, flaking and visible leaks; pinch and tap tests to detect thin or hollow sections; slow drainage and recurring clogs indicating internal buildup; and simple camera rental inspections provide decisive evidence to prioritize professional evaluation or temporary fixes.
When a short repair is appropriate vs. full replacement
If visible damage is limited, odor-free, and drains function without persistent backups, a short repair often suffices; widespread corrosion, multiple leaks, significant pipe collapse, or recurring blockages typically indicate replacement is required.
The decision balances extent of deterioration, repair longevity, cost comparison, access difficulty, and future risk.
Short repairs suit isolated cracks or joints; replacement is prudent for systemic failure.
Red flags that require immediate professional attention
Several unmistakable signs demand immediate professional assessment: persistent foul odors emanating from floor drains, continuous slow or backed-up fixtures despite attempted clearings, visible active leaks or pooling near pipe runs, sagging or collapsed sections of cast iron, and heavy rust flakes or perforations exposed during inspection.
Additionally, recurring backups after temporary fixes, multiple joint failures, sewer odor in living spaces, or foundation undermining warrant urgent replacement rather than DIY repair.
Tools, Materials, and Safety Preparations
Before beginning any cast iron sewer pipe repair, the required tools and replacement parts—such as couplings, sleeves, clamps, epoxies, and liners—should be assembled and verified for compatibility.
Appropriate personal protective equipment and clear safety procedures, including shoring for trenches and ventilation for confined spaces, must be in place.
Additionally, obtain necessary permits, check local codes, and arrange utility locates to avoid hidden hazards.
Essential tools for DIY cast iron sewer repair
A concise set of tools, appropriate materials, and strict safety preparations are essential for any DIY cast iron sewer repair; assembling them beforehand streamlines work and reduces risk.
Essential tools include pipe wrench, band saw or reciprocating saw with metal blade, torque wrench, rotary grinder, inspection camera, drain snake, pry bar, and heavy-duty gloves.
Respirator, eye protection, and work lights are mandatory.
Materials and parts: couplings, sleeves, epoxies, clamps, and liners
Durable replacement parts and compatible repair materials determine whether a cast iron sewer fix will hold under long-term stress and corrosion.
Appropriate couplings and stainless-steel clamps provide mechanical joints; split or slip sleeves bridge breaks.
Epoxy compounds repair small holes and seal joints; choose formulations rated for sewage and metal.
Cured-in-place liners offer trenchless rehabilitation for extensive deterioration, extending service life without full replacement.
Personal protective equipment and jobsite safety
Work on couplings, sleeves, epoxies, and liners brings workers into confined, contaminated, and mechanically hazardous environments where proper personal protective equipment and clear jobsite protocols are mandatory.
Workers should wear NIOSH-approved respirators, chemical-resistant gloves, eye protection, hearing protection, and impermeable coveralls.
Ventilation, atmospheric monitoring, lockout/tagout, spill containment, and decontamination stations must be established.
Training and emergency plans are required before work begins.
Permits, local codes, and utility locates
Why consult local authorities before starting repairs?
Contractors and homeowners must verify permit requirements, inspection schedules, and applicable plumbing codes to guarantee legal compliance and safety.
They should order utility locates to mark underground gas, electric, water, and telecom lines.
Failure to follow permits or skip locates risks fines, project delays, liability, and hazardous strikes; documentation preserves compliance records.
Step-by-Step Repairs for Common Cast Iron Sewer Problems
The next section outlines practical, stepwise repairs for the most common cast iron sewer failures, from small leaks to localized replacements.
It summarizes straightforward fixes and when to escalate to relining or section replacement. Clear criteria for choosing epoxy, wraps, couplings, or CIPP are provided to guide the technician.
- Use epoxy or putty for small pinhole leaks and temporary sealing.
- Apply wrap-around repair bands for hairline cracks.
- Replace short damaged runs with slip couplings or repair leaking hub joints with compression couplings.
- Consider cured-in-place pipe (CIPP) relining for larger interior deterioration.
Repairing small pinhole leaks with epoxy or putty
To address small pinhole leaks in cast iron sewer pipe, a quick, targeted repair with epoxy or plumber’s putty can stop leaks without replacing the section; the choice depends on leak size, pipe condition, and whether the pipe is wet or dry.
Clean and dry the area, remove corrosion, apply epoxy putty or a rapid-setting compound, smooth, and allow full cure before testing for leaks.
Fixing hairline cracks with wrap-around repair bands
After stopping small pinhole leaks with epoxy or putty, slightly larger hairline cracks require a more robust, wrap-around repair band that conforms to the pipe and restores pressure resistance.
The band is centered over the crack, tightened per manufacturer torque, and sealed with included gasket or adhesive.
Inspection guarantees full contact and no remaining seepage.
Monitor periodically for corrosion or movement.
Replacing a short damaged section with slip couplings
Begin by isolating a short damaged run and cutting out the compromised section to prepare for a slip-coupling replacement.
Deburr pipe ends, measure accurately, and select stainless steel slip couplings sized for cast iron.
Slide couplings over each end, align pipes, then tighten clamps evenly to compress seals.
Test for leaks under low flow, recheck after 24 hours, and backfill once confirmed.
Repairing a leaking hub joint with compression couplings
Inspect the leaking hub joint to confirm sound mating surfaces and determine whether a compression coupling can seal without extensive excavation.
Clean debris and old sealant, then fit a properly sized rubber sleeve and stainless steel band over the joint.
Tighten per manufacturer torque specs, test for leaks, and monitor.
If corrosion or misalignment prevents a tight seal, plan for section replacement or professional assessment.
Relining an interior section using cured-in-place pipe (CIPP)
Relining an interior section with cured-in-place pipe (CIPP) provides a trenchless method to restore structural integrity and stop leaks without removing existing cast iron.
A resin-saturated liner is inverted or pulled into the host pipe, positioned across the damaged span, then cured thermally or with UV.
The result is a seamless, corrosion-resistant inner wall that seals cracks and holes, extending service life and minimizing disruption.
Installing an interior sleeve for larger localized corrosion
For larger localized corrosion where a full liner or replacement is impractical, installing an interior sleeve offers a durable, targeted repair that restores pipe strength and seals active leaks.
A rigid or folded stainless steel or polymer sleeve is positioned, expanded, and secured across the defect. Installation requires cleaning, precise measurement, and often spot welding or adhesive bonding.
Inspection confirms seal integrity before backfilling.
Detailed Procedure: Replacing a Section of Cast Iron Pipe
The procedure for replacing a section of cast iron sewer pipe begins with preparing the work area and cutting out the damaged segment to sound pipe.
Next, accurate measurements guide selection and fitting of the replacement piece and couplings, with attention to proper alignment and torque for watertight seals.
Finally, the joint is tested, the trench is backfilled carefully, and finished surfaces are restored to original condition.
Preparing the area and cutting out the damaged segment
Begin by isolating the work area and ensuring all water and sewage sources are shut off or diverted; this prevents contamination and limits damage during cutting.
Clear debris and set up containment (plastic sheeting, buckets). Ventilate and wear PPE.
Expose the pipe, mark cut lines beyond corroded sections, and use an appropriate cutting tool (reciprocating saw with carbide blade) to remove the damaged segment cleanly.
Measuring and selecting the correct replacement piece
Once the cut is clean and ends are squared, measure the exact distance between the prepared pipe faces and record both the inside and outside diameters of the existing pipe and hub dimensions.
Select a replacement segment matching material, wall thickness, and nominal pipe size.
Account for insertion depth and coupling allowance, then mark and cut the new piece to the final measured length before dry-fitting to confirm alignment.
Installing couplings and ensuring watertight seals
Fit couplings that match the pipe material and measured dimensions, ensuring gasket orientation and seating are correct before final assembly.
Align replacement and existing pipe ends straight, slide couplings fully over joints, then tighten clamps or bolts incrementally and evenly to specified torque.
Inspect gaskets for uniform compression, test with low-pressure water, and correct any leaks before backfilling or continuing the repair.
Backfilling and restoring finished surfaces
Several clear steps guide backfilling and surface restoration after a cast iron pipe replacement to protect the new joint, maintain grade, and restore the site to its prior condition.
Compact clean filler in 6–8-inch lifts, avoiding sharp rocks.
Reestablish bedding and slope, tamping each layer.
Replace topsoil and sod or hardscape, matching original compaction and alignment.
Inspect final grade and test for settlement.
Comparison of Repair Methods and Lifespan Expectations
The section compares short-term fixes, trenchless relining, and full replacement by summarizing cost ranges, durability, and typical completion times to help choose the right approach. The table below highlights key differences at a glance to frame the following discussion. Readers are encouraged to weigh upfront cost against expected lifespan and disruption when deciding.
| Repair Method | Cost / Lifespan / Time |
|---|---|
| Short-term fixes | Low cost / 1–5 years / hours–days |
| Trenchless relining | Moderate cost / 15–50+ years / 1–3 days |
| Full replacement | High cost / 50+ years / days–weeks |
| Notes | Trade-offs: budget vs. longevity vs. site disruption |
Short-term fixes vs. trenchless relining vs. full replacement
When evaluating options for aging cast iron sewer lines, homeowners typically weigh short-term patching, trenchless relining, and full replacement against cost, disruption, and expected service life.
Short-term patches address localized leaks quickly but offer limited longevity.
Trenchless relining preserves existing alignment, extends service life considerably with less surface disruption.
Full replacement eliminates systemic corrosion risks and provides the longest-term reliability.
Cost ranges, durability, and typical time to complete
Although costs vary with pipe condition, accessibility, and local labor rates, homeowners can expect markedly different budgets, lifespans, and project durations depending on the chosen method:
- short-term patches cost $200–$1,000, last 1–5 years, and take hours;
- trenchless relining runs $2,500–$8,000, lasts 20–50 years, and completes in a day or two;
- full replacement costs $5,000–$25,000+, lasts 50+ years, and takes several days to weeks.
Estimated Costs and Factors That Affect Pricing
Estimated costs vary widely depending on whether a homeowner buys materials for a DIY patch or hires a contractor for labor-intensive repairs.
Key price drivers include site access, soil conditions, pipe depth, and the extent of damage, which together determine whether a job is a minor leak repair, a section replacement, or a full repipe.
Typical contractor estimates combine materials, excavation, permits, and labor, while DIY expenses are limited mainly to parts and tools.
Breakdown of DIY material costs
Materials for repairing cast iron sewer pipe vary widely in price depending on type and quantity: basic items like sandpaper, pipe cleaner, and brush-in epoxy sealant can run $20–$60, while specialty products such as stainless band clamps, rubber repair sleeves, or cast-iron repair compounds typically cost $30–$150 each.
Additionally, replacement pipe sections or couplings can add $50–$200 depending on size and material. Other typical DIY costs include primer, gloves, miscellaneous fittings, and small tools, often totaling $10–$75 extra.
Typical contractor pricing and labor components
After outlining typical DIY material costs, attention shifts to contractor pricing and the labor components that drive professional repair estimates.
Contractors itemize labor hours, crew size, specialized equipment, permit and disposal fees, and overhead. Estimates separate diagnostic, excavation, pipe replacement or lining, and restoration labor.
Hourly rates vary by region and skill level; transparent bids list line-item labor, materials, and contingency allowances.
Cost drivers: access, soil, depth, and extent of damage
Four primary site conditions — access, soil type, burial depth, and the damage’s scope — together dictate a large portion of repair costs because each affects labor time, equipment needs, and risk.
Limited access requires trenches or lifts; unstable or rocky soils increase shoring and excavation difficulty; deeper pipes demand more labor and safety measures; widespread corrosion or multiple breaks raises material and disposal expenses.
Examples of cost scenarios (minor leak, section replace, full repipe)
A range of typical repair scenarios—minor leak patching, single-section replacement, and full repipe—illustrates how scope, access, and pipe condition drive cost differences.
A small above-ground leak fixed with a sleeve or epoxy may cost a few hundred to a couple thousand dollars.
Replacing a short buried section generally runs several thousand due to excavation and jointing.
A complete repipe can escalate into the tens of thousands when trenching, disposal, and restoration are required.
Minor leak: $200–$2,000.
Section replace: $2,000–$8,000.
Full repipe: $8,000–$30,000+.
When to Call a Professional Plumber or Sewer Specialist
When cast iron lines show signs of collapse, extensive root intrusion, or simultaneous failure across multiple drains, a professional plumber or sewer specialist should be contacted.
Homeowners should ask contractors about specific experience with cast iron systems, licensing and insurance, planned repair methods, timeline, and references.
Quotes should be compared for scope, materials, labor, and included warranties, with preference given to clear, itemized bids and written guarantees.
Situations best left to pros (collapses, major root intrusion, multi-line failure)
Although many cast iron sewer issues can be managed with section repairs or root cutting, certain scenarios clearly require a professional’s assessment and equipment.
Collapsed mains, extensive root penetration compromising pipe integrity, and simultaneous failures across multiple lines demand trenching, structural replacement, or coordinated repairs.
Professionals provide CCTV diagnostics, heavy excavation, permits and engineered solutions to guarantee safety, longevity, and code compliance.
Questions to ask potential contractors
How should homeowners vet contractors before committing to major cast iron sewer work?
Ask for license and insurance verification, years of sewer-specific experience, references for similar jobs, inspection and repair methods (trenchless vs. open), estimated timeline, permit handling, contingency plans for surprises, and payment schedule.
Confirm written estimates, clear communication channels, and warranty coverage on labor and materials before hiring.
How to evaluate quotes and warranties
After verifying licenses, insurance, references, and repair approaches, the next step is to scrutinize quotes and warranties to guarantee value and protection.
Compare itemized estimates, timelines, materials, and labor rates.
Confirm whether warranties are manufacturer, contractor, or both; note duration, coverage limits, exclusions, and transferability.
Request written guarantees, dispute resolution terms, and clarity on post-repair inspections and corrective work.
Preventive Maintenance to Prolong Cast Iron Sewer Life
Preventive maintenance can greatly extend the service life of cast iron sewer pipes by catching problems early and reducing corrosive and biological damage. A routine inspection schedule should identify leaks, pitting, joint separation, and signs of root intrusion.
Practical steps include corrosion inhibition, root control, and targeted treatments to slow deterioration.
- Establish quarterly or annual inspections with camera scans and visual checks
- Use corrosion-inhibiting coatings or linings and maintain proper soil drainage
- Employ mechanical or chemical root control and keep vegetation away from lines
- Apply recommended sealants, epoxy liners, or sacrificial anodes where appropriate
Regular inspection schedule and what to look for
A consistent inspection schedule is essential to catch early signs of deterioration in cast iron sewer lines and to extend their service life.
Inspectors should perform visual checks annually, camera inspections every 3–5 years, and after major weather events.
Look for corrosion, pitting, joint separation, slow drainage, foul odors, and sediment buildup.
Document findings, compare over time, and schedule repairs when deterioration progresses.
Best practices to reduce corrosion and root intrusion
Building on routine inspections, proactive measures can substantially slow corrosion and block root intrusion in cast iron sewer lines.
Maintain proper soil grading and drainage to avoid constant moisture contact. Keep vegetation and deep-rooted trees well back from sewer routes.
Guarantee joints remain sealed and address leaks promptly.
Periodic professional camera inspections and targeted root cutting prevent damage before replacement becomes necessary.
Recommended products and treatments to slow deterioration
Several targeted products and treatments can meaningfully slow corrosion and extend the service life of cast iron sewer lines.
Epoxy and polyurethane coatings seal interior surfaces; enzymatic cleaners control corrosive hydrogen sulfide by reducing organic buildup.
Cathodic protection kits mitigate electrochemical attack on buried sections.
Regular application of root inhibitors and protective mortar sleeves at joints reduces mechanical and biological damage, delaying costly replacements.
Troubleshooting Common Post-Repair Issues
After repairs, the inspector checks for continued leaking using dye tests and targeted pressure checks to rule out seals, fittings, or hidden hairline cracks.
Persistent odors, slow drains, or pooling are evaluated for partial blockages, trapped air, or improper pitch resulting from the repair.
If a repaired section fails prematurely, materials, installation technique, and surrounding soil or corrosion conditions are reviewed to determine responsibility and corrective action.
Continued leaking after repair diagnostics and fixes
Occasional or persistent leaks after a cast iron sewer pipe repair indicate that an underlying issue was missed or that a corrective measure failed to fully address the problem.
Technicians should re-inspect joints, couplings, corrosion zones and surrounding soil movement. Confirm proper sealant application, clamp torque, and alignment.
If visible defects recur, perform camera inspection and pressure testing; repeat repairs or replace sections when deterioration or structural failure persists.
Odors, slow drains, and water pooling after work
Persistent leaks can mask or coincide with other symptoms that only become apparent once repairs are completed. Technicians should therefore broaden their inspection to include odors, slow drains, and water pooling as potential indicators of remaining defects.
Investigate trapped sewage smells for venting or trap breaches. Probe slow drains for partial obstructions or misaligned joints, and trace pooling to grade issues, leaks, or inadequate drainage pathways.
When a repaired section fails prematurely
Several repaired cast iron sections can fail prematurely when underlying causes are missed or repair methods are mismatched to the damage. Technicians should therefore treat early failure as a signal to re-evaluate materials, installation quality, and site conditions.
Inspect joints, bedding, and adjacent pipe for corrosion, misalignment, or root intrusion. Verify gasket type, sealing technique, and trench compaction.
Consider camera survey, material upgrade, or full replacement if issues persist.
Typical Mistakes to Avoid During Cast Iron Sewer Repairs
Common mistakes during cast iron sewer repairs often stem from wrong material choices, poor preparation, and neglecting site conditions.
Technicians who select improper couplings, skip thorough surface prep for epoxies or wraps, or ignore surrounding soil and structural factors risk premature failure. Addressing these areas proactively reduces rework and extends repair life.
- Using incorrect coupling types or improper installation
- Failing to prepare and clean surfaces before applying epoxies or wraps
- Overlooking soil movement, bedding, or nearby structural loads
- Relying on temporary fixes instead of evaluating long-term site conditions
Improper coupling selection and installation errors
Selecting the wrong coupling or installing it incorrectly undermines the integrity of a cast iron sewer repair and can lead to leaks, misalignment, and premature failure.
Common errors include mismatched diameters, incompatible materials, uneven gasket seating, and insufficient torque on clamps.
Proper coupling selection, alignment verification, corrosion-resistant components, and adherence to manufacturer torque and installation steps prevent failures and reduce callbacks.
Inadequate surface preparation for epoxies and wraps
Prepare surfaces thoroughly before applying epoxies or wraps; inadequate cleaning, rust removal, or drying prevents proper adhesion and compromises the repair.
Technicians must remove loose scale, grease, and old coatings, then abrade to sound metal and guarantee complete drying.
Failure to follow manufacturer surface-profile and cleanliness specs leads to delamination, accelerated corrosion, and shortened service life, often requiring costly rework.
Ignoring soil and structural considerations
Why would soil conditions and nearby structural loads be treated as afterthoughts when they fundamentally determine repair longevity? Ignoring ground movement, poor compaction, roots, or building loads leads to recurring fractures, joint failure, and misalignment.
Proper assessment, trench support, backfill compaction, and addressing adjacent foundations or paving prevent premature repair failure. Consult geotechnical input for high-risk sites.
Estimated Timeline for Each Repair Type
Estimated timelines vary by repair type and affect planning and disruption.
Quick fixes typically take only a few hours, while section replacements usually require several days for excavation, replacement, and testing.
Trenchless relining can often be completed in a day with minimal disruption, whereas a full repipe may take multiple days to a week and involve significant access and disturbance.
Quick fixes: hours
Quick fixes for cast iron sewer pipes typically take from under an hour to a few hours depending on the method and condition of the pipe.
Common short repairs include patching small holes, applying epoxy putty, clearing minor clogs with a plumber’s auger, and replacing short coupling sections.
Prep and curing times vary; most DIY patches finish within two to four hours.
Section replacement: days
Sectional replacement of cast iron sewer pipe typically spans multiple days due to the need for excavation, removal of the damaged segment, fitment of new pipe or couplings, backfilling, and final inspections.
Contractors coordinate permits, utility checks, and soil stabilization. Actual duration depends on access, pipe depth, extent of corrosion, weather, and unexpected obstructions.
Most straightforward replacements finish in two to three days with proper planning.
Trenchless relining or full repipe: timeline and disruption
Trenchless relining and full repipe each follow distinct timelines and levels of disruption: trenchless relining is typically completed in one to two days with minimal surface disturbance, while a full repipe can take several days to a week depending on access and length of pipe replaced.
Trenchless requires short prep and curing; full repipe involves excavation, restoration, crew coordination and longer downtime for fixtures and landscaping.
Signs Repair Worked How to Verify Success
Verification typically begins with leak testing and a follow-up camera inspection to confirm seals and pipe integrity.
Technicians also advise monitoring flow, odors, and soil moisture around the repair site for several weeks.
Any recurring backups, wet spots, or persistent smells indicate further attention is required.
Leak testing and camera inspection methods
Confirming a successful cast iron sewer repair requires both pressure/leak testing and a camera inspection to catch issues invisible from the surface.
Pressure testing (air or water) verifies seals under load; the camera inspection documents interior condition, joint integrity, and residual corrosion.
Combine results: no pressure loss plus clear camera footage indicates success.
Record findings and compare to pre-repair baselines for verification.
What to monitor in the weeks after repair
After pressure and camera tests show no immediate defects, monitoring should shift to regular observations and simple functional checks over the following weeks to catch problems that only appear under routine use.
Inspect for slow drains, recurring odors, damp spots or staining, and new corrosion near repair joints.
Re-run a short camera pass if concerns arise, and confirm stable water flow and no pressure loss.
Additional Resources and Next Steps
The article suggests documenting all damage and repairs with photos, dates, receipts, and contractor reports to support insurance claims or future resale.
It also recommends scheduling routine camera inspections—typically every 3–5 years or sooner if problems recur—to monitor pipe condition.
Readers are directed to professional inspection services and standard documentation templates for practical follow-up.
How to document damage and repairs for insurance or resale
Documentation is essential when evaluating cast iron sewer pipe issues, as clear records support insurance claims and improve resale transparency.
Photographs, video inspections, dated repair invoices, contractor qualifications, and parts receipts should be organized chronologically.
Include scope-of-work descriptions, before-and-after images, and warranties.
Store digital copies in cloud and physical copies in a file.
Provide summaries for insurers and prospective buyers to expedite verification.
When to schedule routine camera inspections
When should homeowners and property managers schedule routine camera inspections of cast iron sewer lines to balance prevention and cost?
Inspections are recommended every 3–5 years for older systems, sooner (annually or biannually) after recurring backups, heavy tree root activity, or after repairs.
Schedule before major renovations, property transfers, or when buying older homes to identify corrosion, joint failure, or offsets and estimate remaining service life.
Conclusion
Careful craftsmen conclude: corrugated clamor calmed as cast iron’s cracked corridors are cautiously cut, cleaned, clamped, and connected. Steady, sensible steps stave structural strain, shifting sewered sorrow into smooth, safe flow. Modest maintenance, measured materials, and mindful methods minimize messy mayhem; major maladies merit masterful manpower. With vigilant verification—visual, video, and water tests—confidence climbs. Conscientious care converts costly chaos into calm continuity, conserving comfort, curb appeal, and community calm.

