
How to Make a Sprinkler Blowout Adapter: Step-by-Step DIY Guide for Safe Winterization
To create a sprinkler blowout adapter for safely winterizing your irrigation system, you’ll need to connect an air compressor to your system to expel water from pipes and heads before freezing temperatures arrive. This adapter is made using threaded fittings, a brass or nylon connector, a hose connector, PTFE tape, O-rings, and a pressure regulator with a gauge. Proper assembly and compressor sizing (50–80 psi) are crucial to prevent leaks and damage. Follow our step-by-step guide for assembly, purging procedures, and safety checks to ensure effective winterization without overpressurization.
What a Sprinkler Blowout Adapter Is and Why You Need One
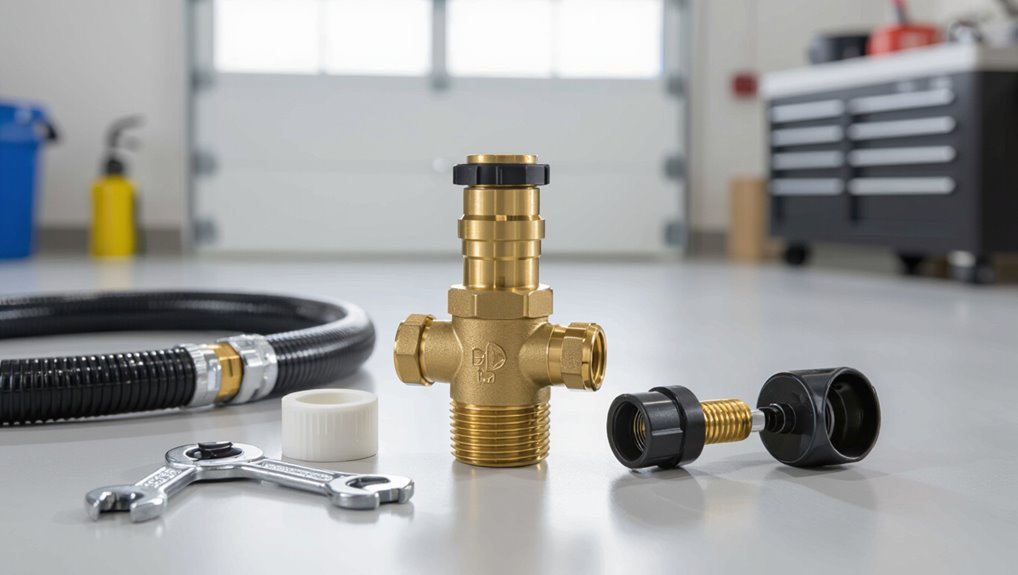
A sprinkler blowout adapter is a simple fitting that connects a compressor to an irrigation system to force-drain water before freezing temperatures arrive.
Building a DIY adapter can reduce winterization costs and give homeowners control over timing and technique compared with hiring a service.
Proper use of the adapter protects pipes, valves, and sprinkler heads from freeze damage and reduces the risk of costly repairs.
Definition and purpose of a blowout adapter
Sprinkler blowout adapters are compact fittings that connect an air compressor to an irrigation system, allowing pressurized air to force water out of pipes and sprinkler heads before winter freezes.
A blowout adapter seals the compressor connection, directs airflow, and prevents system backflow.
Understanding its definition and purpose helps users decide materials and steps when learning how to make a sprinkler blowout adapter.
Benefits of using a DIY adapter vs. professional service
While hiring a professional guarantees expertise and warranty coverage, many homeowners weigh the cost savings and control offered by constructing a DIY blowout adapter against the convenience and reduced risk of a paid service.
DIY benefits include lower expense, immediate availability, and customization to specific systems.
Professionals offer time savings, guaranteed thoroughness, and liability protection; choices depend on skill, budget, and tolerance for responsibility.
Safety and system protection during winterization
Winterizing an irrigation system protects underground pipes, valves, and emitters from freeze damage by removing trapped water and preventing expansion that causes cracks and leaks.
Proper blowout procedures reduce repair costs, avoid contamination, and extend component life. A correctly sized adapter and regulated air pressure guarantee thorough draining without overpressurizing.
Adherence to safety protocols prevents injury and preserves system integrity during cold months.
Types of Sprinkler Systems and Compatibility Considerations
Different sprinkler systems use varied valve layouts and backflow assemblies that affect where a blowout adapter can attach.
The reader should locate the system’s main connection point, note thread types (NPT, BSP, or garden hose), and measure any fittings before proceeding.
A simple compatibility checklist—valve/backflow type, thread size, and available adapter options—streamlines selecting or fabricating a DIY blowout adapter.
Common sprinkler valve and backflow configurations
Identify the valve and backflow arrangement before selecting or fabricating a blowout adapter, since compatibility hinges on system type and fittings.
Common configurations include individual solenoid valves at a manifold, zone valves with a central controller, pressure vacuum breakers, reduced pressure assemblies, and atmospheric vacuum breakers.
Each has distinct inlet/outlet sizes, orientation, and isolation points; adapters must match pressure ratings and connection styles.
Identifying your system’s connection point and thread types
Before choosing or fabricating a blowout adapter, the exact connection point and thread type on the irrigation system must be determined to ascertain a secure, leak-free fit.
Inspect valve outlets, manifold ports, or backflow service ports visually and with calipers. Identify thread standard (NPT, BSP, metric) and size, note male/female orientation, and photograph fittings for reference when sourcing or machining adapters.
Compatibility checklist for DIY blowout adapters
With the connection point and thread type documented, the next step is to confirm that a DIY blowout adapter will physically and functionally match the sprinkler system.
Verify system type (residential, commercial, drip), pressure ratings, valve configurations, pipe material and diameter, backflow device location, and required fittings.
Make sure adapter materials resist winter conditions and match local codes and manufacturer recommendations before use.
Tools and Materials Required
A concise inventory of tools, consumables, and optional accessories establishes what is needed to fabricate and use a blowout adapter.
Recommended air compressor specifications and compatible fittings are listed to guarantee sufficient pressure and safe connections.
A short note on optional items—pressure gauges, quick-connect couplers, and inline filters—highlights components that simplify winterization.
List of required tools and consumables
Several essential tools and consumables are required to assemble a reliable sprinkler blowout adapter. A compact selection guarantees efficient, safe assembly and leak-free operation when winterizing irrigation systems.
Recommended items focus on connectivity, sealing, and basic hand tools for straightforward construction and testing.
- Brass or nylon adapter, threaded fittings, hose connector
- PTFE tape, pipe thread sealant, O-rings
- Adjustable wrench, vice grips, small plumber’s screwdriver
Recommended compressor specifications and fittings
When selecting a compressor for a sprinkler blowout, guarantee it delivers a regulated 50–80 psi output and a minimum of 4–6 CFM at that pressure to clear lateral lines without overstressing fittings or sprinkler components.
Choose oil-free models for low maintenance.
Include a pressure regulator, safety relief valve, quick-connect coupler, and 3/8″ or 1/2″ hose rated for 100+ psi.
Use brass or stainless fittings.
Optional accessories for easier winterization
Although not strictly necessary for a basic blowout, a handful of optional accessories can make winterizing a sprinkler system faster, safer, and less likely to cause component damage.
Useful extras include items that improve control, protect fittings, and simplify draining. Consider these options:
- Pressure regulator and gauge for controlled blowouts
- Foam or rubber fitting protectors to prevent damage
- Quick-connect hose adapters for faster setup
Step-by-Step Guide to Building a Basic Blowout Adapter
Before beginning work, the technician verifies the water supply is shut off and the area is clear of obstacles.
Next, the correct valve or hose bib is located and disconnected to provide access for the adapter.
Finally, the adapter is assembled with the required fittings and thread sealant, torqued to spec, and securely attached to the system following safe procedures.
Preparing the work area and turning off the water
Clear the area around the irrigation control valve and main shutoff, removing hoses, tools, and debris so access is unimpeded.
Verify all zone timers are off and unplug electrical controllers.
Locate the property’s main water supply and confirm shutoff capability.
Slowly close the main supply, then relieve system pressure by opening a convenient drain or manual bleeder.
Wear gloves and eye protection while performing these steps.
Identifying and disconnecting the appropriate valve or hose bib
With the main supply closed and system pressure relieved, attention shifts to locating the valve or hose bib that will serve as the connection point for the blowout adapter.
The person inspects the irrigation layout, identifies an accessible drain or hose connection upstream of zone valves, confirms it’s isolated from mains, then removes any cap or hose, cleans threads, and checks for leaks or damage before proceeding.
Assembling the adapter: parts, thread sealant, torque
Gather the components—a pressure-rated hose connector or quick-connect fitting, an inline check valve if desired, compatible adapters for the system threads, and a pneumatic plug or NPT cap—lay them out to confirm size and material compatibility.
Apply PTFE tape or pipe dope to male threads, assemble sequentially, hand-start all fittings, then tighten to recommended torque with a wrench, avoiding overtightening.
Attaching the adapter to the system safely
Begin by depressurizing and isolating the irrigation main: close the supply valve, operate a downstream manual valve or bleed the zone to relieve residual pressure, and verify zero pressure at the attachment point with a gauge.
Align adapter threads, apply controlled torque, and hand-start fittings to avoid cross-threading. Securely tighten with a wrench, inspect for leaks, and confirm firm, leak-free connection before pressurizing.
Step-by-Step Procedure for Performing the Blowout
The procedure begins with setting the compressor to the recommended pressure and performing all safety checks before connecting the adapter.
Zones are then purged one at a time in a prescribed sequence with controlled timing, observing for clear airflow and the absence of moisture as indicators of a successful blowout for each zone.
Finally, the compressor is shut down, the adapter removed, and fittings inspected for damage or leaks.
Setting compressor pressure and safety checks
Before powering the compressor, the operator verifies the required pressure for the specific irrigation system and conducts a brief safety checklist: confirm compressor oil and fuel levels, inspect hoses and fittings for damage, assure all zone valves are closed except the one being tested, and place a pressure regulator and gauge between the compressor and adapter to limit input pressure to the system’s safe maximum.
The operator then sets pressure below pipe and component ratings, secures PPE, verifies clear area, and makes certain emergency shutoff is accessible before initiating air.
Purging zones one at a time: sequence and timing
Start each zone purge by confirming the compressor pressure is set to the predetermined safe limit and the regulator and gauge are functioning.
Then open the selected zone valve and slowly introduce air into the line until water visibly exits the highest sprinkler heads or until the pressure gauge stabilizes at the target blowout pressure.
Proceed sequentially, purging adjacent zones one at a time, allowing each to run long enough to clear remaining water before closing the valve.
Signs of successful blowout for each zone
Observe clear, consistent indicators to confirm each zone has been successfully purged: compressed air should expel a steady stream of mist or droplets from the highest heads.
Pressure on the gauge should hold at the preset blowout level without sudden spikes or drops.
Sprinkler risers and lateral lines should emit only air after a continuous run of several seconds.
Absence of water at heads and audible airflow confirm completion.
Shutting down and removing the adapter after completion
Shutting down and removing the adapter requires a controlled, stepwise sequence to depressurize the system, prevent water backflow, and protect fittings and the compressor.
After closing the main valve, bleed remaining air slowly at the adapter port until steady air flows.
Shut off the compressor, disconnect hoses, cap the service port, inspect fittings for moisture or damage, and store the adapter clean and dry.
Two Alternative DIY Adapter Designs and When to Use Them
Two practical DIY options are the quick-connect hose-based adapter, assembled from a garden hose fitting, quick-connect coupler, and suitable sealant, and a threaded valve-spud adapter, built from a threaded spud and fittings for systems that require higher-pressure handling.
Each design includes straightforward steps for cutting, threading or sealing, and testing before use.
A concise comparison of pros and cons—ease and speed versus pressure tolerance and durability—helps determine the appropriate choice for a given system.
Quick-connect hose-based adapter (materials and steps)
A simple quick-connect hose-based adapter lets a homeowner convert an ordinary garden hose into a reliable sprinkler blowout fitting using common parts and minimal tools.
Required materials: quick-connect male and female fittings, 3/4″ garden hose adapter, hose clamp, Teflon tape.
Steps: attach male to compressor hose, secure female to garden hose, tape threads, clamp for leak prevention, test at low pressure before full use.
Threaded valve-spud adapter for high-pressure systems
For higher-pressure systems where quick-connect hose fittings may not provide a sufficiently secure seal, a threaded valve-spud adapter offers greater strength and leak resistance.
It uses a metal spud threaded into the irrigation valve outlet, sealed with PTFE tape and a crush washer, then connected to a high-pressure hose or compressor fitting.
Suitable for municipal pressure and commercial zones.
Pros and cons comparison
When comparing the quick-connect hose adapter and the threaded valve-spud adapter, each design presents distinct trade-offs in strength, ease of use, and suitability for different pressure conditions. The quick-connect suits low-to-moderate pressure, fast hookups, but can slip under high PSI. The threaded spud offers stronger seals for high-pressure systems yet requires tools and time to install.
| Quick-connect | Threaded spud |
|---|---|
| Fast, user-friendly | Secure, high-pressure capable |
| Prone to slip at high PSI | Requires tools/time |
Troubleshooting Common Problems
Common issues with a homemade blowout adapter include leaking connections or poor seals, which are often corrected with better fittings, thread tape, or replacement O-rings.
Low airflow or weak purges can stem from undersized fittings, clogged lines, or insufficient compressor pressure and are resolved by checking component sizes, clearing obstructions, and verifying compressor output.
Stuck valves, frozen pipes, or debris require careful thawing, manual valve actuation, and line flushing before attempting another purge.
Adapter leaks or poor seal solutions
Inspect the connection if the adapter leaks or the seal feels weak, since most failures stem from worn threads, damaged O-rings, or mismatched fittings.
Tighten fittings evenly, replace degraded O-rings, apply appropriate thread tape or sealant, and swap adapters for correct size/type.
Reinspect after pressure testing. If leaks persist, replace the defective component rather than over-tightening, which can cause further damage.
Low airflow or weak purge’ diagnosis and fixes
Check airflow and pressure readings first to pinpoint whether low airflow or a weak purge stems from supply-side restrictions, valve seating issues, or losses at connections.
Inspect hose diameter, fittings, and inline filters for clogs or kinks.
Verify compressor or blower output matches required PSI and CFM.
Tighten or replace leaking connectors, clean screens, and retest; consider larger hose or higher-capacity source if still inadequate.
Dealing with stuck valves, frozen pipes, or debris
After confirming supply-side performance and eliminating restrictions, attention shifts to blockages and mechanical failures that can stop a blowout.
The technician inspects valves for seizure, applies penetrating lubricant, and carefully operates actuator stems.
Frozen pipes require gradual thawing with warm water or heat tape; never force fittings.
Flush lines to remove debris, replace damaged valve seals, and retest pressure before proceeding.
Safety Precautions and Best Practices
The section outlines compressor and pressure safety guidelines to prevent overpressurization and equipment failure.
It also covers required personal protective equipment and site safety measures to reduce injury risk.
Finally, it defines clear signs and situations when work should stop and a professional should be contacted.
Compressor and pressure safety guidelines
Prioritize pressure limits and compressor condition before connecting any blowout adapter: verify the compressor’s maximum output, confirm the system’s rated pressure, and guarantee all relief valves and gauges are functional and calibrated.
Use regulated pressure not exceeding the lowest-rated component, employ a pressure reducer and inline gauge, purge air lines slowly to prevent water hammer, and inspect hoses and fittings for wear or leaks before operation.
Personal protective equipment and site safety
Wear appropriate personal protective equipment and establish a clear safety perimeter before any blowout work begins.
The operator should use eye and hearing protection, gloves, and sturdy footwear. Guarantee bystanders and pets remain outside the cordoned area.
Keep tools organized, mark exposed valves and risers, and verify stable footing.
Inspect hoses and fittings for damage before pressurization to prevent unexpected failures.
When to stop and call a professional
When should work stop and a professional be called? If leaks, ruptured pipes, inaccessible main valves, odd sounds, or persistent pressure loss occur, cease work.
If compressed-air equipment malfunctions, fittings won’t seal, or lines are frozen or buried unpredictably, contact a licensed irrigation or plumbing professional.
For uncertainty about codes, backflow devices, or liability, defer to certified technicians to prevent damage and injury.
Maintenance, Storage, and Reuse of Your Adapter
After each use, the adapter should be wiped clean and its threads, fittings, and seals inspected for wear or debris.
Components must be stored dry and protected from sunlight and freezing to prevent corrosion and deformation.
Any cracked, hardened, or leaking fittings and seals should be replaced before reuse.
Cleaning and inspecting components after use
Begin by rinsing all adapter parts with clean water to remove debris and residual antifreeze, then allow them to drain.
Visually inspect fittings, O-rings, and threads for cracks, wear, or corrosion.
Replace damaged seals and lubricate moving components with manufacturer‑approved grease.
Run a pressure check before reuse and document condition and any repairs to track lifecycle and reliability.
Proper storage to prevent damage and corrosion
Once cleaned, inspected, and pressure-tested, the adapter should be stored to minimize exposure to moisture, temperature swings, and corrosive agents.
Components are dried, wrapped in anti-corrosion paper or sealed plastic, and placed in a padded, labeled container off the floor.
Valves and threads face upward; desiccant packs and silica gel maintain dryness.
Store in a cool, stable indoor location away from chemicals.
When to replace fittings and seals
How often fittings and seals should be replaced depends on usage intensity, environmental exposure, and visible wear. Routine inspection schedules help determine exact timing.
Inspect before storage and after heavy use. Replace if cracks, deformation, hardening, leaks, or thread damage appear. Use compatible replacements and lubricants.
Keep spares with the adapter. Document replacement dates to track longevity and predict future needs.
Cost Breakdown and Time Estimates
Typical material costs and any tool investment are summarized to help readers budget for the project.
Estimated build time for the adapter and expected duration for a full-system blowout are given for novice, intermediate, and experienced users.
This section helps compare one-time purchases against recurring seasonal-time savings.
Typical material costs and tool investment
A clear budget outline helps hobbyists and DIYers gauge the outlay required for fabricating a sprinkler blowout adapter. Typical costs: fittings and sealant $10–30, pressure-rated hose $20–60, adapters $5–25. Basic tools (wrenches, tape) often owned; specialty pneumatic fittings or gauges add $20–80.
| Item | Typical Cost | Notes |
|---|---|---|
| Fittings & sealant | $10–30 | PVC/metal options |
| Hose | $20–60 | Pressure-rated |
| Tools/gauges | $20–80 | One-time investment |
Estimated time for build and full system blowout by experience level
Why does experience level matter when estimating time for building a blowout adapter and completing a full system blowout?
Novices may take 60–90 minutes to assemble a simple adapter and 1.5–3 hours for a full system, allowing extra troubleshooting.
Intermediate users typically need 30–45 minutes to build and 1–2 hours to blow out.
Experts often finish both tasks under an hour.
Examples and Real-World Scenarios
The article presents concise examples to illustrate how a homemade blowout adapter is applied in different settings.
A small residential lawn walkthrough shows step-by-step connections and typical time needed, while a multi-zone irrigation example highlights sequencing and pressure considerations for larger properties.
Separate notes address special cases such as systems with backflow preventers or drip irrigation to clarify necessary modifications and precautions.
Small residential lawn walkthrough
Several common layouts illustrate how a homeowner can plan and execute a sprinkler blowout on a small residential lawn: a simple rectangular yard with four to six zones, a front-and-back split property with separate controllers, and a compact corner lot with basic drip and sprinkler hybrids.
The walkthrough outlines shutoff, zone-by-zone compressor hookup, pressure checks, and final valve isolation for winter safety.
Multi-zone irrigation for larger properties
Moving from small residential blowouts to larger properties introduces scale-related challenges: multiple controllers, longer lateral runs, higher zone counts, and diverse irrigation types (rotors, sprays, drip).
Technicians plan phased blowouts, label zones, and use higher-capacity compressors with regulated manifolds.
Real-world examples include estates split by controllers, golf-course fairway strings requiring sequential flushing, and equestrian facilities with extended mainlines needing staged pressure management.
Notes for systems with backflow preventers or drip irrigation
Address systems with backflow preventers and drip lines by first identifying components that change standard blowout procedures: backflow assemblies require isolation and sometimes depressurization without compromising municipal connections, while drip networks use low-flow emitters and inline filters that are vulnerable to high-pressure compressor pulses.
Use manual shutoffs, pressure regulators or relief valves, and gradual ramp-up compressed air to protect backflow devices and delicate drip components.
Quick Reference Checklist for a Successful DIY Blowout
A single, well-ordered checklist assures nothing critical is missed during a DIY sprinkler blowout:
A concise checklist orients the operator, assures safety, protects equipment, and confirms system readiness before winter.
- Close main water and bleed residual pressure
- Connect blowout adapter and set compressor pressure per system specs
- Purge zones sequentially until clear, then shut down and winterize exposed components
Conclusion
As winter’s breath tightens its grip, the DIY blowout adapter becomes a silent lighthouse for a sprinkler system—simple, steadfast, lifesaving. By matching system types, gathering modest tools, and following measured steps, homeowners stave off frost’s slow sabotage. The adapter and careful blowout transform fragile pipes into winter-ready armor, saving money and heartache. With basic upkeep and sensible storage, this small contrivance returns each spring, proof that foresight outwits freeze.

