How to Replace a Bathtub Liner: Step-by-Step Guide to Remove, Repair, and Install a New Liner
To replace a bathtub liner, you’ll need to evaluate the damage, remove the old liner, repair the underlying surface, and install a new acrylic or PVC liner. This process involves specific steps such as scoring caulk, heating and peeling off the old liner, cleaning any adhesive residue, and addressing rust or gouges. During installation, ensure you dry-fit the new liner, apply full-coverage adhesive, trim as necessary, reinstall the drain hardware, and caulk edges. Following the recommended cure times and maintenance tips will help ensure the longevity of your new liner. For detailed guidance on each step, refer to the full guide.
Overview of Replacing a Bathtub Liner: What Homeowners Should Know
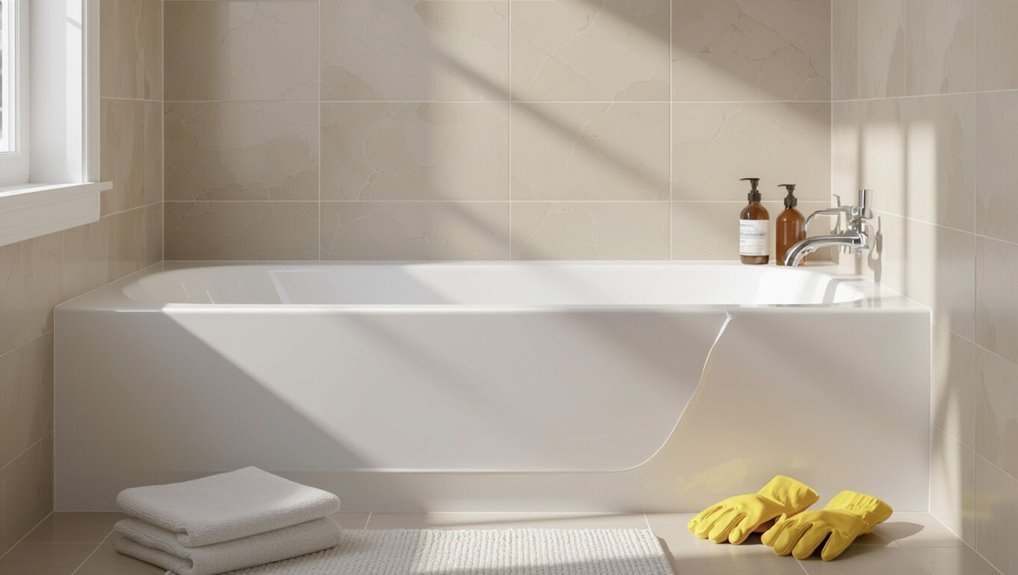
Replacing a bathtub liner typically involves removing the old liner or fitting a new custom acrylic shell, with the expected outcome of a refreshed, watertight surface.
Homeowners should consider replacement when damage is extensive, repairs or reglazing are temporary, or when underlying plumbing or mold issues are present.
The project usually takes a few hours to a couple of days, costs vary widely by materials and labor, and ranges from DIY-friendly to requiring a skilled installer.
Quick summary of the process and expected outcomes
Begin by evaluating the existing tub and surrounding conditions to determine whether a liner is appropriate; then assess measurements, remove fixtures, and prep surfaces.
The process covers fitting, adhesive application, trimming, and sealing, plus reconnecting hardware.
Homeowners can expect improved appearance, leak prevention, and shorter downtime versus full replacement when following clear instructions on how to replace bathtub liner and hire professionals if needed.
When to replace a bathtub liner versus repair or reglaze
When is a replacement liner the better choice versus repair or reglazing?
A replacement is recommended when the original tub has extensive cracking, delamination, persistent leaks, severe staining, or structural deterioration that repairs or reglazing cannot reliably address.
Liners also suit homeowners seeking significant appearance changes or improved durability.
Minor chips, surface scratches, and single small cracks usually favor repair or reglazing.
Typical time, cost range, and skill level required
Although exact figures vary by material and region, homeowners can expect a bathtub liner project to take a contractor roughly one to three days and to cost anywhere from about $800 to $3,500.
Higher-end custom fits or complicated drain and surround work drive the upper range.
Typical DIY attempts take longer and can risk leaks; professional installers guarantee fit, warranty, and proper plumbing expertise.
Tools, Materials, and Safety Supplies Needed
A concise checklist of essential tools—utility knife, pry bar, caulk gun, drill, and measuring tools—sets the stage for the replacement.
Material options such as off-the-shelf acrylic, PVC sheets, or custom-fit liners will be compared for durability, cost, and fit.
Recommended safety gear and ventilation practices, including gloves, eye protection, and adequate airflow during adhesive application, are noted before procedures begin.
Tools checklist
Preparation hinges on assembling the right tools, materials, and safety supplies before beginning a bathtub liner replacement. A concise checklist reduces surprises and keeps work efficient.
Essential items include cutting, fastening, sealing, and protection tools as well as personal protective equipment. Gather them and verify functionality before starting.
- Utility knife — steady, confident cuts
- Drill and bits — decisive power
- Caulk gun — clean, reassuring seals
- Respirator and gloves — calm, sure protection
Materials and replacement liner options (acrylic, PVC, custom-fit)
With tools verified, attention turns to the materials that determine fit, durability, and finish for a replacement liner. Choices include acrylic (rigid, glossy), PVC (flexible, affordable), and custom-fit molded shells.
Selection depends on tub shape, budget, and desired lifespan. Installers weigh trade-offs between appearance and repairability.
- Relief at a seamless look
- Confidence in lasting strength
- Calm from easy maintenance
- Pride in a perfect fit
Safety gear and ventilation recommendations
Several essential items protect installers and occupants during liner replacement: chemical-resistant gloves, eye protection, a respirator rated for organic vapors, and disposable coveralls to prevent skin contact with adhesives and solvents.
Guarantee continuous fresh-air flow: open windows, use exhaust fans, and position a portable ventilator.
Monitor air quality and take breaks to avoid fatigue.
- Fear eased by proper gear
- Confidence in clean air
- Relief from chemical exposure
- Peace of mind for occupants
Assessing Your Current Tub and Liner Condition
The installer begins by inspecting the liner and tub for visible damage such as cracks, mold growth, and areas where the liner has pulled away from the substrate.
If the underlying tub shows structural problems or extensive corrosion, it must be repaired or replaced before a new liner is fitted.
Accurate measurements of the tub’s length, width, depth, and drain location are taken to guarantee the replacement liner will fit correctly.
How to inspect for damage: cracks, mold, adhesion failures
Careful inspection reveals the true condition of both tub and liner before any removal or repair work begins.
Visually scan for hairline and structural cracks, soft spots, warped edges, and surface blistering.
Probe adhesive bonds at seams and around fixtures for separation.
Check for mold and mildew in seams, drain surrounds, and under lifted sections.
Document findings and photograph areas for reference.
When the underlying tub needs repair or replacement first
Assess whether the existing tub structure must be repaired or replaced before proceeding with a liner by evaluating its material condition, mounting integrity, and compatibility with a new liner.
Look for structural cracks, corrosion, sagging, loose anchors, water damage behind apron or surround, and warped rims.
If structural issues compromise liner adhesion or safety, prioritize repair or full replacement before ordering or installing a new liner.
Measuring the tub for a correct liner fit
Before ordering a liner, measure the tub precisely to confirm a snug, safe fit that will adhere properly and function long-term.
Record interior length, width at rim and floor, depth, drain and overflow locations, and lip thickness.
Verify straightness and any tapering.
Note damage, warping, or nonstandard shapes.
Provide measurements and photos to the supplier to guarantee a custom or correct-fit liner.
Preparing the Bathroom and Work Area
Before any removal begins, the area should be cleared and all nearby surfaces and fixtures covered with drop cloths or protective film to prevent damage.
The water supply must be shut off and visible hardware disconnected or labeled for reinstallation.
Shower doors, caulk, and accessories should be removed carefully with appropriate tools to avoid chipping tile or harming plumbing connections.
How to protect surrounding surfaces and fixtures
Several key surfaces and fixtures must be shielded to prevent damage from dust, tools, solvents, and falling debris during a bathtub liner replacement.
Cover countertops, floors, toilet, and vanity with drop cloths or rosin paper.
Protect faucets, showerheads, and electrical outlets with plastic and tape.
Seal nearby cabinets and mirrors, and ventilate to control dust and fumes while preserving finishes and hardware.
Turning off water supply and disconnecting hardware
Shut off the room’s water supply at the individual shutoff valves or, if valves are absent or leaky, at the home’s main water valve to prevent accidental flow during liner removal.
Drain remaining water from faucets and the tub, then disconnect supply lines, shower heads, and handheld hoses.
Label and store small parts, cap open lines to avoid contamination, and keep tools organized for reassembly.
Removing shower doors, caulk, and accessories safely
With water off and fixtures detached, attention shifts to the tub surround: remove shower doors, trim, caulk, and any mounted accessories to create a clear, safe workspace.
Use proper tools—screwdriver, utility knife, pry bar—and wear gloves and eye protection.
Score old caulk, cut seals, unbolt tracks, and label hardware.
Store parts and fasteners in a sealed container for reinstallation.
Step-by-Step Removal of the Old Bathtub Liner
The procedure begins with softening the old adhesive and carefully scoring through the liner to create manageable sections.
Technicians then lift and peel each section using controlled, low-angle motions and appropriate tools to protect the tub and surrounding walls.
Once removed, remaining adhesive is scraped and dissolved, and the surface is cleaned and inspected to guarantee proper adhesion for the new liner.
Softening adhesive and cutting through the liner
Begin by heating the liner and its adhesive to weaken the bond before cutting.
Using a heat gun on low to medium, warm sections evenly until adhesive softens.
Score the liner with a utility knife, then extend cuts with a reciprocating saw or heavy-duty shears as needed.
Work in manageable panels, reheating if resistance returns, and keep blades sharp for clean, controlled cuts.
Safe removal techniques to avoid tub or wall damage
Carefully peel back a warmed section of liner, working from one corner toward the drain to control tension and reveal the original tub surface gradually.
Proceed slowly, supporting the exposed liner to prevent snapping.
Use a wide putty knife between liner and tub to separate adhesive gently, keeping blade flat to protect porcelain or acrylic.
Avoid prying against walls or seams to prevent damage.
Cleaning residual adhesive and surface prep for new liner
With the liner removed and the original surface exposed, attention shifts to removing residual adhesive and preparing the tub for a new liner.
Remaining glue is softened with a solvent recommended for the adhesive type, then scraped with plastic or non-marring tools.
Surfaces are degreased, rinsed, and dried.
Any chips or gouges are filled and sanded smooth to guarantee proper liner adhesion.
Repairing Underlying Tub and Surrounding Surfaces
Before installing the new liner, the condition of the original tub and surrounding walls must be evaluated for chips, rust, or holes and repaired accordingly.
Any mold, water damage, or compromised subwall should be removed and rebuilt to guarantee a sound substrate.
Finally, the entire area must be primed and leveled so the liner will adhere properly and sit evenly.
Repairing chips, rust, or holes in the original tub
Addressing chips, rust, and holes in the original tub is essential to ascertain the liner adheres properly and to prevent future deterioration.
Inspect surfaces, remove loose paint and corrosion, then sand to bright metal.
Apply rust converter where needed, fill holes with appropriate epoxy or metal-repair compound, sand smooth, and prime with a bonding primer.
Confirm clean, dry surface before liner installation.
Addressing mold, water damage, and subwall repairs
Inspect the area thoroughly for mold, rot, and water damage, noting soft subwall sections, discolored drywall, musty odors, and any structural compromises that could undermine a new liner.
Remove damaged drywall and backer board to sound framing, cut away wet insulation, treat mold with appropriate biocide, dry completely, replace compromised studs or sheathing, and install moisture-resistant backing to restore a stable substrate.
Priming and leveling the surface before liner installation
With the substrate repaired and mold or rot remediated, attention shifts to preparing the tub and surrounding surfaces so a liner will bond and sit true.
Surfaces are cleaned, sanded, and degreased. High spots are faired, low areas filled with approved leveling compound, and seams feathered.
A compatible primer is applied per manufacturer instructions, ensuring full cure before liner placement for reliable adhesion and even fit.
Choosing and Preparing the New Liner
The homeowner must decide between off-the-shelf liners, which are cheaper and faster to obtain, and custom-fabricated liners that offer a precise fit for irregular tubs.
They should choose a finish, color, and material thickness that balance appearance, durability, and maintenance needs.
Before installation, the liner must be acclimated to room temperature and inspected closely for warping, blemishes, or manufacturing defects.
Differences between off-the-shelf vs. custom liners
Choosing between an off-the-shelf and a custom bathtub liner hinges on fit, finish, and budget: prefab liners offer lower cost and faster availability but require a near-standard tub shape, while custom liners are molded to exact dimensions for a seamless look and longer lifespan at higher expense.
Off-the-shelf suits simple, budget projects; custom fits irregular tubs, minimizes trimming, and reduces installation adjustments.
Selecting finish, color, and thickness
When selecting a bathtub liner, homeowners should prioritize finish, color, and thickness according to usage patterns and existing bathroom style: a gloss finish hides more stains and is easier to clean, matte reduces glare and shows fewer water spots, standard white remains the most versatile, while subtle neutrals or pastels can refresh a dated palette.
Thicker liners offer durability and better sound insulation; thinner options are more affordable.
Acclimating and inspecting the liner before installation
Allow the liner to acclimate in the installation room for at least 48 hours, laying it flat and away from direct heat or sunlight so temperature and humidity equalize with the bathroom environment.
Then inspect for warps, cracks, blemishes, or factory defects.
Measure dimensions against the tub, confirm drain and overflow cutouts align, and document any issues for replacement or repair before installation begins.
Installing the New Bathtub Liner: Step-by-Step
The installer begins by dry-fitting the liner to confirm alignment and access to drain and fixture locations.
After selecting a compatible adhesive (typically solvent-based or urethane adhesives recommended by the liner manufacturer), they apply adhesive evenly, set the liner while smoothing out air pockets, and trim edges to fit.
Finally, the installer secures and finishes cutouts, then reinstalls the drain, overflow, and any hardware to complete the job.
Dry-fit and alignment checks
Start by placing the liner into the tub opening to verify orientation and fit without adhesive or fasteners.
Inspect gaps around edges, lip seating, and drain alignment. Confirm clearance for faucets and overflow.
Make minor adjustments by shifting or trimming perimeter material as needed.
Use a level to guarantee even placement and note reference marks on the surround for final installation.
Applying adhesive and recommended adhesives/types
Apply adhesive with care and precision to secure the liner evenly to the tub shell.
Use marine-grade or polyurethane adhesives formulated for acrylic-to-porcelain bonding; solvent-based contact adhesives also work if compatible with both surfaces.
Follow manufacturer cure times and temperature guidelines.
Apply in beads or ribbons per instructions, keeping adhesive off visible edges.
Wear gloves and guarantee proper ventilation during application.
Positioning the liner and eliminating air pockets
Place the liner carefully into the tub shell, aligning drain and overflow openings before lowering it fully. Once seated, press from the center outward with a roller or firm hand to bond the adhesive and push trapped air toward the edges.
Work systematically, overlapping passes to guarantee full contact. Probe gently for bubbles; puncture and smooth any persistent pockets, then re-roll to consolidate adhesion.
Trimming, securing edges, and finishing cutouts for fixtures
With the liner seated and bonded, trim the excess material flush with the tub flange and around the drain and overflow using a sharp utility knife and straightedge; cut slowly in several light passes to prevent jagged edges or accidental gouges into the shell.
Then press and secure edges with adhesive or trim clips, rout smooth cutouts, deburr plastic, and wipe surfaces clean for a neat, watertight finish.
Reinstalling drain, overflow, and hardware
Begin reattaching the drain, overflow, and hardware only after the liner is fully trimmed, bonded, and cleaned, ensuring all mating surfaces are dry and free of debris.
Apply plumber’s putty or silicone gasket as specified, align parts to cutouts, and tighten evenly to avoid distortion.
Test seals with a small water fill, inspect for leaks, and adjust fasteners or seals as necessary before final cleanup.
Sealing, Caulking, and Finishing Touches
Properly sealing the liner with the correct caulk and technique guarantees a watertight bond and long-lasting finish.
Once sealants cure, shower doors and accessories are reinstalled and adjusted for proper fit.
A final cleaning and inspection checklist verifies seal integrity, hardware alignment, and surface condition before regular use.
Proper caulking techniques and sealant selection
Select a high-quality, mildew-resistant silicone or polyurethane sealant designed for tubs and showers.
Apply smooth, continuous beads where liner meets wall and flange, keeping joints minimal.
Tool joints with a rounded finger or caulk tool within the manufacturer’s open time. Wipe excess promptly.
Allow full cure per instructions before water exposure.
Match color and flexibility to accommodate slight movement without gaps.
Reinstalling shower doors and accessories
Reinstalling shower doors and accessories requires careful alignment and watertight sealing to protect the new liner and confirm smooth operation. Each track, hinge, and handle should be mounted per the manufacturer’s specifications, with sealant applied only where needed to prevent leaks without restricting movement.
Fasteners must be corrosion-resistant, seals compressed uniformly, and excess caulk smoothed and removed promptly to guarantee clean joints and reliable performance.
Final cleaning and inspection checklist
Inspect the entire bath area methodically to guarantee seals, caulk lines, and finishing details are complete and watertight.
Check joints for gaps, smooth bead consistency, and adhesion. Remove excess caulk and cure per manufacturer directions.
Verify drain and overflow fittings are secure and leak-free.
Clean surfaces, polish the liner, and document any touch-ups or warranty notes before final use.
Post-Installation Care and Maintenance
After installation, the liner requires a specified curing period and limited use—follow manufacturer guidelines on when it is safe to run water and apply weight.
Routine cleaning with nonabrasive cleaners and soft cloths will extend the liner’s life and preserve seals. The homeowner should watch for early signs of lifting, discoloration, or leaks and contact a professional if adhesive failure or persistent gaps appear.
Curing time, usage restrictions, and when to wait before use
How long should the new liner set before regular use? The installer should follow manufacturer cure times—commonly 24–72 hours for adhesives and sealants, longer for low temperatures.
Avoid standing water, heavy loads, or grout/caulk trimming until fully cured. Light ventilation helps.
If unsure, wait an extra 24 hours; premature use risks bond failure, staining, or seal compromise.
Cleaning recommendations to extend liner life
Regular cleaning and gentle maintenance will greatly extend the life of a new bathtub liner by preventing buildup, stains, and surface damage.
Use mild, nonabrasive cleaners and a soft cloth or sponge; avoid bleach, powdered scrubs, and abrasive pads.
Rinse thoroughly after each use, dry with a soft towel to prevent water spots, and perform monthly deep cleans following manufacturer guidelines.
How to spot early problems and when to call a pro
A few visible signs can indicate that a bathtub liner requires attention before problems worsen: hairline cracks, persistent discoloration, pooling water at seams, lifting or gaps around the flange, and persistent odors despite cleaning.
Inspect regularly for spreading damage, soft spots underfoot, or mold behind edges.
Attempt minor caulking or patch kits; contact a licensed installer when damage reaches the subframe, leaks persist, or repairs recur.
Common Problems and How to Fix Them
Common liner issues include bubbles, wrinkles, and areas of poor adhesion that compromise appearance and function.
Small cracks or chips can often be addressed with compatible repair kits, while persistent mold or lingering odors require thorough cleaning and sometimes resealing of seams.
The following section outlines practical fixes and preventive steps for each problem.
Dealing with bubbles, wrinkles, or poor adhesion
Inspect the liner closely for bubbles, wrinkles, or areas that failed to adhere—these flaws not only look unsightly but can trap water and accelerate wear.
Small air pockets can be smoothed toward the edge with a roller; stalled adhesion requires lifting, cleaning the substrate, applying recommended adhesive, and re-smoothing.
Large wrinkles or persistent delamination necessitate replacing the liner to guarantee a watertight finish.
Repairing small cracks or chips in the liner
Repair minor cracks and chips promptly to prevent water intrusion and further deterioration of the liner.
Clean and dry the damaged area, sand lightly, and apply a compatible vinyl or acrylic repair kit following manufacturer instructions.
Smooth and feather edges, allow proper curing time, then test for leaks.
Replace the liner if damage is extensive or repairs fail to restore integrity.
Handling persistent mold or odor issues
Address persistent mold or lingering odors promptly to prevent health risks and further damage to the bathtub liner and surrounding substrates.
Inspect seams, caulk lines, and drain areas for concealed mold. Clean with mildew-specific cleaners or dilute bleach, rinse thoroughly, and dry.
Replace compromised caulk or liner sections. Improve ventilation and use dehumidifiers.
If odor or mold persists, consult a professional for substrate remediation.
Cost Comparison and When to Hire a Professional
A concise cost comparison helps readers weigh a DIY bathtub liner against professional installation. The table below outlines typical DIY expenses versus contractor estimates and highlights scenarios that justify hiring a pro. Professional help is recommended for extensive damage, complex plumbing, or when warranty-backed work is desired.
| DIY Costs | Pro Estimates |
|---|---|
| Materials: $200–$800 | Installation: $1,000–$3,500 |
| Tools: $50–$300 | Labor: $500–$1,500 |
| Time: 1–3 days | Warranty: Often included |
| Risk: Higher for mistakes | Risk: Lower with licensure |
| Best for: Minor resurfacing | Best for: Structural/plumbing issues |
DIY cost breakdown vs. professional installation estimates
Whether undertaken as a weekend project or contracted out, replacing a bathtub liner involves distinct cost profiles that influence the decision to DIY or hire a professional.
DIY expenses typically include liner kit, adhesives, tools, sealants and disposal — often $200–$700.
Professional estimates add labor, removal, warranty and permit costs, commonly totaling $800–$2,500.
Compare time, skill level and risk when deciding.
Situations that warrant professional help
After comparing DIY and professional cost profiles, certain situations clearly favor hiring a pro: extensive underlying damage (rot, mold, or compromised framing), complex plumbing or drain relocation, nonstandard tub shapes that require custom liners, failure of previous liner installations, and when local codes or permit requirements mandate licensed work.
Additionally, homeowners should hire professionals for warranty-backed installations, tight timelines, or when safety and structural assessments exceed DIY expertise.
Tips to Ensure a Durable, Long-Lasting Liner
Practical tips focus on meticulous surface preparation, correct adhesive selection, and precise trimming to prevent gaps and stress points that cause future failures.
Choosing durable materials—such as high-quality acrylic or reinforced composites—and applying proven installation techniques extends service life.
Attention to manufacturer guidelines and proper curing guarantees a reliable, long-lasting liner.
Best practices during installation to avoid future failures
Because proper preparation and attention to detail at each step determine a liner’s longevity, installers should follow a strict sequence of best practices—surface inspection and repair, precise measurements, adhesive selection per manufacturer specs, controlled curing conditions, and careful edge sealing—to minimize leaks, warping, and bond failures.
Solid execution reduces callbacks and disappointment.
- Pride in craftsmanship
- Confidence in performance
- Relief from future leaks
- Satisfaction with durability
Materials and techniques that improve longevity
With a solid installation process established, attention turns to the materials and techniques that extend a liner’s service life.
Use high-density acrylic or ABS with UV and chemical-resistant coatings. Guarantee full-coverage adhesive bonding, proper substrate preparation, and sealed seams with marine-grade silicone.
Incorporate reinforced flange supports, gentle drainage slopes, and routine maintenance—cleaning with pH-neutral products and prompt grout or seal repairs—to prevent water intrusion.
Alternative Options to Replacing the Liner
The article next examines alternatives to installing a new liner, including reglazing, specialty painting, and full tub replacement.
Each option carries distinct trade-offs in cost, durability, and appearance that influence suitability for different damage levels.
Guidance is provided on when a less invasive fix is more cost‑effective versus when a complete replacement is warranted.
Reglazing, painting, or full tub replacement pros and cons
Homeowners weighing options beyond installing a new liner can consider reglazing, painting, or a complete tub replacement, each offering distinct trade-offs in cost, durability, and appearance.
Reglazing is affordable and quick but less durable; painting is cheapest and cosmetic, requiring frequent touch-ups.
Full replacement provides longevity, customization, and fixes structural issues but involves highest cost, demo, and longer downtime.
When alternatives are more cost-effective or appropriate
Consider alternatives when cost, time, or the tub’s condition make a full liner replacement unnecessary: small cosmetic issues, minor surface wear, or budget constraints often favor reglazing or repainting, while structural damage, persistent leaks, or mold call for full replacement. Alternatives should be chosen based on inspection, longevity needs, and resale value.
| Option | Best for |
|---|---|
| Reglazing | Cosmetic wear |
| Repainting | Short-term fixes |
| Patch repair | Local chips |
| Full replacement | Structural failure |
Conclusion
Replacing a bathtub liner can be approached with careful planning and patience. Like a skilled tailor refitting a favorite coat, the installer must measure precisely, address underlying damage, and follow proper adhesion and sealing steps to guarantee a snug, lasting fit. When done correctly, the result restores appearance and function, but persistent damage or complex plumbing may warrant professional help to avoid costly mistakes and maintain safety.