How to Measure a Faucet Cartridge: Step-by-Step Guide for Accurate Replacement
To accurately measure a faucet cartridge for replacement, start by shutting off the water supply. Next, remove the handle and trim, then carefully extract the cartridge. Use calipers or a ruler to measure the overall and exposed lengths, body and stem diameters, port sizes, spacing, and stem type (such as splined, D-shaped, or threaded). Take photographs of the components, noting any retaining clips and O-rings, and record your measurements in both millimeters and inches. Finally, compare these specifications with manufacturer diagrams or replacement listings to ensure a proper match. Following this guide will help you find the correct replacement cartridge.
What a Faucet Cartridge Is and Why Accurate Measurement Matters
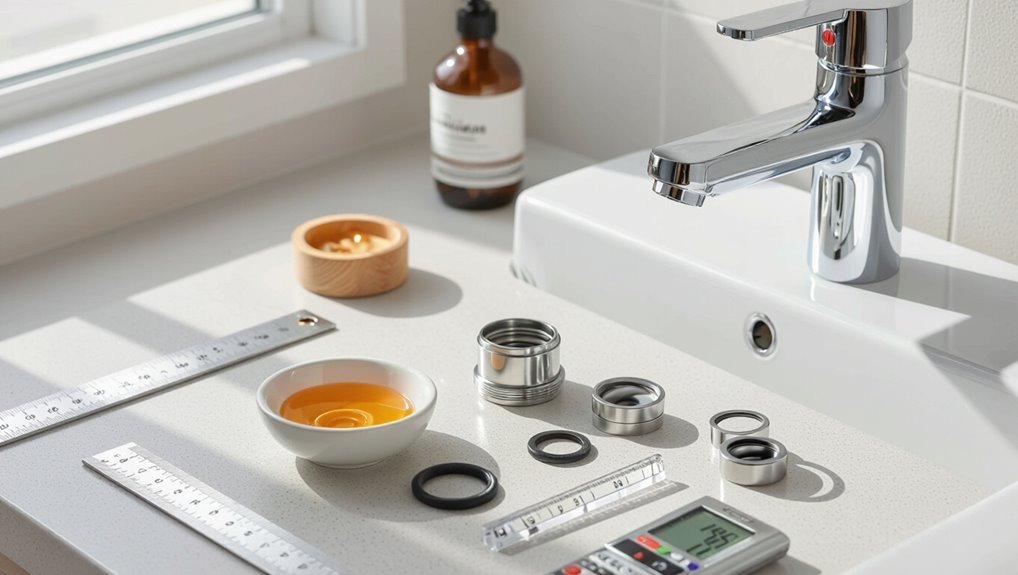
A faucet cartridge is the internal component that controls water flow and temperature by directing valves and seals within the faucet body.
Using the wrong cartridge size can cause leaks, poor handle operation, or complete failure to shut off water.
Exact measurements are essential because many brands and models use similar-looking cartridges that are nonetheless incompatible.
Definition and role of a cartridge in faucet operation
Central to faucet function, the cartridge is the internal valve assembly that regulates water flow and temperature by aligning internal ports and seals when the handle is moved.
It converts handle motion into precise mixing and shutoff actions. Understanding this component is essential when learning how to measure a faucet cartridge for correct fit, compatibility, and reliable replacement.
Common problems caused by incorrect cartridge size
Several issues arise when a faucet cartridge is the wrong size, directly impacting function and longevity.
Misalignment can cause leaks, drips, and poor seal integrity.
Excessive play or tightness leads to difficulty operating the handle, accelerated wear, or internal damage.
Water pressure and temperature control may become inconsistent, shortening component life and prompting premature replacement or costly repairs.
Overview of compatibility issues with brands and models
When replacing a faucet cartridge, compatibility across brands and models depends on precise dimensions, mounting types, and valve mechanisms.
Even minor variations in stem shape, housing diameter, or port alignment can prevent proper fit and function. Manufacturers use proprietary designs, differing retention clips, and varied sealing methods.
Cross-referencing model numbers and measuring key dimensions prevents mismatches, leaks, and operational failures.
Quick identification: Determine if your faucet uses a cartridge
Visual cues such as a single central handle, a visible escutcheon plate, or a cylindrical stem often indicate a cartridge-style faucet.
Single-handle cartridges typically control both hot and cold with one unit, while double-handle setups may hide separate cartridges beneath each handle.
When appearance is unclear, consulting the manufacturer documentation or checking the model number provides definitive identification.
Visual cues for cartridge-style faucets
Because cartridge faucets share distinctive features, a quick visual inspection often reveals whether a cartridge is present.
Look for a single lever or compact body with a removable handle; absence of exposed springs or separate valve assemblies suggests a cartridge.
Smooth, cylindrical spout bases, uniform escutcheons, and minimal visible fasteners further indicate cartridge-style internals, simplifying measurement and replacement preparations.
Single-handle vs. double-handle cartridge differences
Identifying whether a faucet uses a single-handle or double-handle cartridge hinges on the number of control levers and how they connect to the valve assembly.
Single-handle cartridges consolidate temperature and flow control into one central unit, often with a single stem.
Double-handle setups use separate cartridges or valves for hot and cold, each with its own stem and distinct control lever, requiring individual measurement.
When to consult manufacturer documentation or model number
After checking whether a faucet has a single or double handle, the next step is to verify the exact cartridge type using manufacturer documentation or the model number.
Consult manuals, online parts diagrams, or the maker’s website when handles, trim, or visible cartridge features are ambiguous.
Model numbers guarantee correct dimensions, seal types, and compatible replacements, preventing mismatches and leaks.
Tools and materials needed to measure a faucet cartridge
A concise set of tools and materials makes accurate cartridge measurement straightforward. Essential measuring tools include a caliper, tape measure, and ruler, while supplementary items such as a notepad, camera, wrench, and any replacement cartridge packaging aid documentation and fit checks.
A brief safety and preparation checklist—shutting off water, protecting surfaces, and wearing gloves—should precede any measurement.
Essential measuring tools (caliper, tape, ruler)
Several basic tools make accurate cartridge measurement possible: a caliper for precise internal and external dimensions, a tape measure for longer reach and overall faucet length, and a rigid ruler for quick, straight-line checks.
A digital or vernier caliper yields millimeter accuracy for bore and shaft diameters. The tape measures overall assembly span. The ruler verifies visible flat surfaces and depth markings.
Additional items (notepad, camera, wrench, replacement cartridge packaging)
Having established the measurement tools, attention turns to supplementary items that streamline the process and document findings.
A notepad captures measurements and part numbers; a camera records orientation and visible markings for later reference.
A wrench assists controlled disassembly without damaging fittings.
Keeping original replacement cartridge packaging helps verify model compatibility and stores small components, preventing loss and easing reassembly.
Safety and preparation checklist
Before beginning measurements, guarantee all necessary tools and safety items are assembled and the work area is prepared: shut off water supply, clear and dry the sink area, and gather a flashlight, calipers or ruler, adjustable wrench, needle-nose pliers, towels, gloves, notepad, and camera.
Verify lighting, wear gloves and eye protection, protect surfaces with towels, keep parts organized, and document measurements and photos for accurate replacement.
Step-by-step measurement process for cartridge replacement
First, the technician shuts off the water supply and clears the workspace before beginning.
Next, the handle and trim are removed carefully to avoid damage, followed by safe extraction of the cartridge from the faucet body.
Finally, the technician measures overall and exposed cartridge lengths, then records the cartridge body and stem diameters.
Step 1 Turn off water supply and prepare the workspace
Shut off the water supply at the shutoff valves or main line and open the faucet to relieve residual pressure; this prevents spills and makes the cartridge accessible.
Clear the area, gather tools (screwdrivers, pliers, rags, container for parts), place a towel to protect finishes, and guarantee good lighting.
Verify valve closure by confirming no water flows when the faucet is briefly operated.
Step 2 Remove handle and trim pieces without damage
Remove the handle and trim carefully to expose the cartridge while protecting finishes and keeping parts organized.
Using appropriate tools, loosen set screws or fasteners, lift handles straight off, and remove escutcheons and decorative caps.
Place screws, washers, and small parts in labeled containers.
Avoid prying against finished surfaces; use protective cloth.
Photograph assembly positions for accurate reassembly later.
Step 3 Extract the cartridge safely from the faucet body
With the trim pieces set aside, the technician should access the cartridge bore and prepare to extract the cartridge while protecting the faucet finish and surrounding fixtures.
They disconnect supply lines if needed, remove retaining clip or nut, and use pliers or a cartridge puller straight-on to avoid twisting.
Extracted parts are inspected for damage and placed on a towel for measurement and replacement.
Step 4 Measure overall cartridge length and exposed length
Measure the cartridge carefully to confirm a correct replacement; accurate dimensions prevent leaks and fit issues.
Record the overall length from base to tip using a caliper or ruler.
Then measure the exposed length — the portion protruding above the valve housing.
Note measurements in millimeters and inches, and document orientation (which end is up) to guarantee precise matching when ordering a replacement.
Step 5 Measure cartridge body diameter and stem diameter
After noting overall and exposed lengths, attention turns to the cartridge diameters, since correct diameters guarantee a proper seal and fit within the valve body.
Using calipers, measure the widest body section across flats or circumference. Record stem diameter separately at the base and tip.
Note whether measurements are metric or imperial and round to the nearest 0.1 mm or 1/64 inch.
Step 6 Identify and measure number, position, and type of ports/holes
Ports and holes determine how water flows through the cartridge, so identifying their number, position, and type is essential before ordering a replacement.
Inspect the cartridge face and sides, count inlet and outlet ports, note their arrangement (inline, triangular, offset), and measure diameters and center-to-center distances with calipers.
Record any keyed shapes or sealing recesses to guarantee compatibility with the new part.
Step 7 Measure stem type and dimensions (splines, flat, threaded)
With the ports and holes cataloged, attention shifts to the cartridge stem, where handle fit and control mechanics are determined.
Inspect stem type—splined, D-shaped (flat), or threaded—then measure overall length, exposed spline count and pitch, flat width, and thread diameter/length with calipers.
Record orientation and any keyways precisely to guarantee compatible replacement and proper handle alignment.
Step 8 Note retaining clips, O-rings, and seat features
Examine the cartridge’s retaining clips, O-rings, and valve seats closely, since these small components determine seal integrity and securement method.
Document clip type and orientation, O-ring count, cross-sectional size and material, and whether seats are integrated, replaceable, or need cleaning/reconditioning.
Record dimensions and positions of clips, note O-ring hardness/color and any wear, and inspect seat surfaces for grooves, mineral build-up, or deformation.
Step 9 Photograph and label measurements for reference
Begin by positioning the cartridge and its detached components on a clean, well-lit surface.
Take clear, close-up photographs from multiple angles to capture overall shape, alignment marks, and the locations of retaining clips, O-rings, and valve seats.
Label each photo with measured dimensions, part orientation, and any wear notes.
Store images with filenames referencing faucet model and date for accurate future reference.
How to interpret measurements and match to replacement cartridges
Measurements should be converted between metric and imperial to guarantee exact fits, especially when small differences affect sealing or spline engagement.
Matching stem types and spline counts against common brand profiles and cross-referencing those dimensions with manufacturer part numbers helps identify exact OEM options.
If no direct match exists, the installer must weigh choosing a universal cartridge that fits the measured geometry versus sourcing an OEM replacement for assured compatibility.
Understanding metric vs. imperial measurements
When identifying a replacement cartridge, the difference between metric and imperial measurements determines whether dimensions are read in millimeters or inches and how they convert; accurate interpretation prevents ordering incompatible parts.
Technicians confirm unit type on parts or documentation, use calipers set to mm or inches, convert where needed (25.4 mm = 1 in), and compare tolerances to manufacturer specifications before purchase.
Matching stem types and spline counts to common brands
Matching a faucet cartridge requires identifying the stem type and spline count, since those features determine compatibility with specific manufacturers and handle interfaces.
Measure stem style (flat, D-shaft, round) and count splines on the end.
Compare these attributes to common brand profiles—Moen, Delta, Kohler, Grohe—whose cartridges share characteristic stem shapes and spline counts to narrow replacement options efficiently.
Cross-referencing measurements with manufacturer part numbers
How can a few precise dimensions and a spline count be translated into a confident replacement choice? The technician records overall length, stem diameter, spline count, and seal type.
Then, they consult manufacturer catalogs, online parts diagrams, and OEM cross-reference charts. Exact matches or listed equivalents yield part numbers.
Confirm thread pitch and orientation before ordering to avoid mismatches and returns.
When to choose universal cartridges vs. OEM replacements
Decide between universal and OEM cartridges by weighing fit, function, and risk: universal cartridges suit common single- and two-handle faucets where spline counts, stem diameters, and seal types align, offering quick, cost-effective fixes;
OEM replacements are preferred when exact dimensions, proprietary seals, or manufacturer-specific features (pressure balancing, ceramic disk tolerances) are required to preserve performance and warranty.
Match measured dimensions to specs; verify mounting and flow characteristics.
Common variations and special cases
Different faucet types require different measurement approaches and attention to unique features.
Ceramic disc and washer-style cartridges measure and function differently, while integrated valve assemblies or non-removable cartridges may require measuring the entire unit or consulting manufacturer specs.
Tub/shower valves and antique or discontinued faucets often need model-specific dimensions or adapter solutions to find a compatible replacement.
Ceramic disc cartridges vs. washer-style cartridges
Often overlooked, the choice between ceramic disc and washer-style cartridges hinges on construction and operation: ceramic discs use two precision-matched rotating plates to control flow and temperature, while washer-style cartridges rely on a rubber or neoprene washer that seals against a valve seat.
Ceramic discs offer greater longevity and smoother operation; washers are simpler and cheaper but wear faster and require more frequent replacement.
Integrated valve assemblies and non-removable cartridges
When faucets incorporate integrated valve assemblies or non-removable cartridges, the entire mixing mechanism is housed as a single unit that cannot be easily disassembled for measurement or part replacement.
In such cases, identification relies on model numbers, manufacturer documentation, or full-unit replacement. Measuring external connections, inlet spacing, and trim dimensions helps confirm compatibility, but often the solution is ordering the OEM assembly or replacing the faucet.
Tub/shower valve cartridge differences
Because tub/shower valves must control higher flow, withstand divergent trim styles, and often integrate diverters, their cartridges vary more in size, port configuration, and sealing methods than standard sink cartridges.
Variations include multiport diverter cartridges, pressure-balancing versus thermostatic designs, and larger O-rings or bonnets for leak resistance.
Measurements must note port spacing, stem type, and overall length for proper replacement.
Antique or discontinued faucet considerations
Although antique and discontinued faucet cartridges may appear interchangeable with modern parts, they frequently feature nonstandard dimensions, unique fasteners, or proprietary stem profiles that complicate replacement.
Measure overall length, stem diameter, and port spacing; photograph identifying marks.
Seek manufacturer diagrams, specialty suppliers, or salvage parts.
Consider adapting with custom sleeves, O-rings, or a professional machinist when exact replacements are unavailable.
Troubleshooting measurement problems
When measurements are hindered by corrosion or a stuck cartridge, the technician should describe removal techniques and safety precautions.
If measurements are ambiguous or inconsistent, repeating measurements with different tools and noting variances helps identify the correct dimensions.
When recorded sizes do not match available parts, comparing profile photos and consulting manufacturer diagrams can reveal compatible alternatives or necessary adapter options.
Dealing with corroded or stuck cartridges
Handle corroded or seized cartridges with steady, deliberate techniques to avoid damage to surrounding components.
Apply penetrating oil, allow dwell time, then attempt gentle rotation with appropriate pliers and protective cloth. If movement occurs, work incrementally, reapplying lubricant.
For immovable cartridges, heat application (controlled) or professional-grade extractors may be used.
Replace damaged seals and clean mating surfaces before measurement.
Handling ambiguous or inconsistent measurements
After freeing a seized cartridge and cleaning mating surfaces, measurement discrepancies can still arise from worn parts, tool errors, or residual corrosion.
Re-measure critical dimensions with calibrated tools, record multiple readings, and average consistent values.
Inspect for eccentric wear, broken tabs, or build-up altering profiles.
Photograph parts, note tolerances, and consult manufacturer diagrams before selecting candidate replacements or seeking expert verification.
When measurements don’t match available parts
What if measured dimensions refuse to match any cataloged cartridge? The technician should verify measurement method, re-measure critical points, and inspect for wear, broken features, or aftermarket modifications.
Photograph the cartridge, note markings, and compare with OEM diagrams. When uncertainty remains, consult manufacturer support, bring the part to a plumbing supplier, or consider universal cartridges and professional replacement to guarantee fit and function.
Buying and testing the replacement cartridge
For a replacement cartridge, shoppers can compare options from online retailers, local plumbing stores, or the faucet manufacturer to guarantee availability and warranty coverage.
Packaging and product listings should be checked for model number, dimensions, materials, and included seals or O-rings.
After installing the new cartridge, the fit should be verified and the faucet tested for smooth operation and any leaks at normal water pressure.
Where to buy: online, local plumbing stores, manufacturer
Where is the best place to purchase a replacement cartridge depends on priorities such as speed, price, and certainty of compatibility.
Online retailers offer a wide selection and reviews; local plumbing stores provide immediate pickup and expert advice; buying directly from the manufacturer guarantees exact fit and warranty coverage.
Compare return policies, shipping times, and available part numbers before committing to a source.
What to check on packaging and product listings
Many buyers should inspect labels and listings closely to confirm compatibility and quality before purchasing a replacement cartridge.
Check model and part numbers against measurements, finish, and mounting type.
Verify material (ceramic, plastic), OEM versus aftermarket status, warranty, and return policy.
Look for clear photos, dimensional diagrams, and seller reviews indicating authentic fit and reliable performance.
Installing the new cartridge and verifying fit
Begin by turning off the water supply and removing any handles or trim to expose the valve body; this guarantees a clean, safe workspace for installing the replacement cartridge.
Align the new cartridge with orientation marks, seat it fully, and secure retaining clips or nuts to manufacturer torque.
Reassemble trim and handles, confirming smooth movement and correct alignment before proceeding to operational testing.
Testing for leaks and proper operation after installation
Open the water supply slowly and observe the cartridge area, connections, and visible seals for any signs of dripping or seepage.
Operate the faucet through full range—hot, cold, and mixed—to confirm smooth motion and correct flow.
Check for pressure stability, unusual noises, or sputtering.
Tighten fittings if needed, recheck for leaks, and document performance for warranty or return decisions.
Tips to avoid mistakes and extend faucet life
Accurate measurement and clear documentation of cartridge dimensions and model numbers prevent ordering errors and streamline future repairs.
Regular preventive maintenance—such as cleaning aerators, checking seals, and monitoring water pressure—reduces wear and the frequency of replacements.
A professional plumber should be contacted for persistent leaks, complex cartridge types, or when supply lines and valves require replacement.
Best practices for measuring and recording details
Measure carefully and record every relevant dimension and marking to prevent mismatches and repeat trips to the hardware store.
Use a caliper or ruler, note cartridge length, diameter, splines, O-ring positions, and model numbers. Photograph angles and label parts removed.
Log measurements in a notebook or phone note with date and faucet brand. Double-check entries before purchasing replacements.
Preventive maintenance to reduce future replacements
Perform routine maintenance on the faucet to prevent wear that leads to cartridge failure: flush lines periodically, replace worn O-rings and seals at the first sign of leakage, clean mineral buildup with appropriate cleaners, and lubricate moving parts with plumber-approved grease.
Inspect mounting hardware and handle operation quarterly, tighten loose fittings, monitor water quality, and store replacement parts.
Prompt minor repairs extend cartridge life and reduce replacement frequency.
When to call a professional plumber
When should a homeowner call a professional plumber? A professional is advised for persistent leaks, unclear cartridge sizing, corroded components, damaged valve seats, or when water supply shutoff fails.
Complex multi-handle systems, hidden access, or repeated DIY failures also warrant expert help.
Timely professional intervention prevents further damage, guarantees correct parts and installation, and extends faucet lifespan.
Quick reference measurement checklist
A concise checklist helps guarantee the correct cartridge is ordered the first time.
The most important measurements and details should be recorded clearly and kept with the faucet photo. Below is a simple reference to capture the essentials before purchase.
- Cartridge height and stem length
- Overall cartridge diameter and base shape
- Number and spacing of ports or clips
- Model number or manufacturer marking (if visible)
Essential measurements to record before ordering
Before ordering a replacement cartridge, gather a concise set of measurements that confirm compatibility:
Record exact dimensions and details to guarantee a correct fit and function.
- Cartridge length and overall diameter
- Mounting flange type and distance between screw holes
- Stem type, spline count, and height above body
- Valve seat diameter and inlet/outlet spacing
Comparison chart of common cartridge types and identifying features
Recognizing common faucet cartridge types is essential for accurate replacement and repair; the following comparison highlights key identifying features—shape, stem type, mounting tabs, and material—that distinguish ceramic disc, ball, cartridge (single-handle cylindrical), and compression-style units. A concise chart follows to enable quick identification and selection.
| Type | Shape | Key Feature |
|---|---|---|
| Ceramic disc | Flat, round | Dual ceramic plates, short stem |
| Ball | Spherical | Single hollow ball, adjustable cams |
| Cartridge | Cylindrical | Straight stem, O-rings |
Conclusion
A homeowner, toolbox open, holds the final measurement as if it were a secret key. The careful tally of cartridge length, diameter, and spline count promises either a seamless fit or the quiet return of a drip. After matching specs and installing the new part, a cautious turn of the handle decides the outcome. Silence follows — or a single, persistent drip — revealing whether precision prevailed or another search must begin.