
How to Remove Rusted Cast Iron Pipe Fittings: Step-by-Step Fixes and Preventive Tips
To effectively remove rusted cast iron pipe fittings, first shut off the water supply and wear appropriate personal protective equipment (PPE). Apply penetrating oil to the threads to help loosen the rust. For light rust, a wire brush can be used, followed by a rust inhibitor treatment. If corrosion is severe, you may need to cut out and replace the fittings. Always use the correct wrenches, apply heat cautiously to avoid damaging threads, and reseal with the appropriate compound, then pressure-test the joints. For buried lines, consider implementing cathodic protection and conducting routine inspections to prevent future rust issues. Follow the detailed step-by-step methods and tools outlined for a successful repair.
Overview of Removing Rusted Cast Iron Pipe Fittings
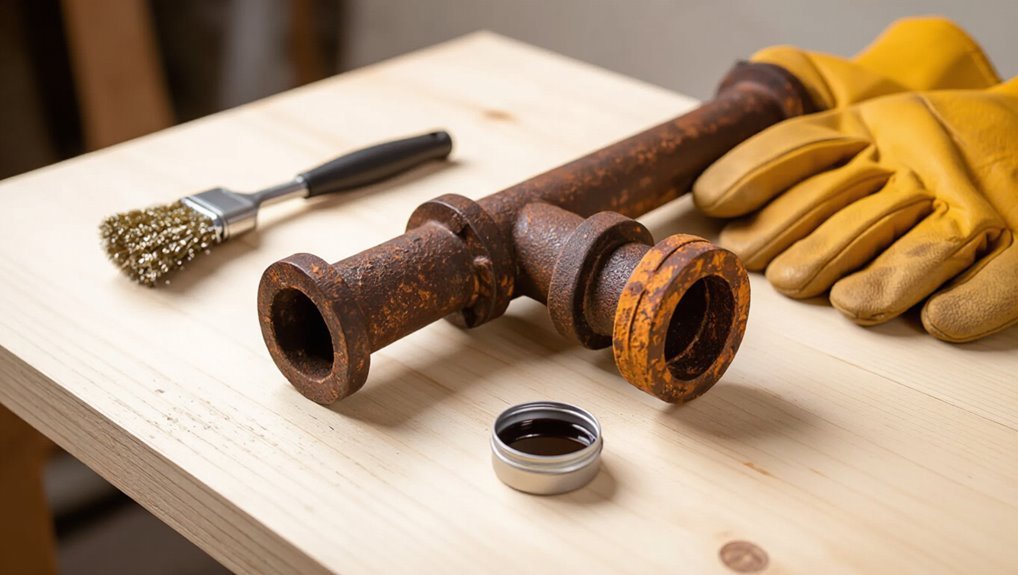
Rust forms on cast iron pipe fittings when moisture, oxygen, and stray electrical currents promote oxidation and corrosion.
Assessment of leakage, structural integrity, and service history determines whether fittings can be repaired with cleaning and sealing or must be replaced.
Common tools and materials for either approach include penetrating lubricant, pipe wrenches, wire brushes, replacement gaskets or couplings, and safety equipment.
What causes rust and corrosion in cast iron pipe fittings
Exposure to oxygen and moisture initiates an electrochemical reaction that converts iron in cast iron fittings into iron oxide, commonly called rust.
Corrosion accelerates with salt, acids, galvanic contact with dissimilar metals, and prolonged wetting.
Poor drainage, soil chemistry, and mechanical damage remove protective coatings.
Understanding these causes helps inform how to remove rusted cast iron pipe fittings and prevent recurrence.
When to repair vs. when to replace fittings
Determine whether a fitting can be repaired or must be replaced by evaluating the extent of corrosion, structural integrity, and the piping system’s service demands.
Repair is viable for surface rust, minor pitting, or when seals and threads remain sound.
Replace when walls are thin, cracks or deep corrosion compromise strength, leaks recur, or when code, longevity, or critical service require a new, reliable fitting.
Tools and materials you’ll need
A compact, well-chosen set of tools and materials makes removing rusted cast iron fittings faster and safer; essential items include hand wrenches (pipe wrenches and adjustable wrenches), penetrating lubricant, wire brushes, carbide or brass chisels, replacement seals or gaskets, and appropriate personal protective equipment such as gloves and eye protection.
- Penetrating oil, rust remover, rags
- Brushes, chisels, sealant and replacement parts
- Wrenches, torque control, safety goggles and gloves
Safety Precautions Before Starting
Before beginning work, the author recommends donning appropriate personal protective equipment and ensuring adequate ventilation to limit exposure to rust particles and fumes.
The procedure should only start after shutting off the water supply and relieving system pressure to prevent leaks or injury.
Prior to disturbance of coatings, the material must be inspected for lead paint, asbestos, or other hazardous finishes and handled according to regulations.
Personal protective equipment and ventilation
Wear proper personal protective equipment and secure adequate ventilation when working on rusted cast iron fittings to minimize exposure to dust, chemical cleaners, and metal particles.
Use NIOSH-approved respirators for fine particulates and fumes, safety goggles, chemical-resistant gloves, and long sleeves.
Guarantee cross-ventilation or mechanical exhaust in confined spaces.
Dispose of contaminated PPE and launder clothing separately after work.
Shutting off water and relieving pressure
Shut off the main water supply to the affected line and confirm zero pressure by opening nearby faucets and any downstream fixtures; this prevents sudden bursts when loosening or removing rusted cast iron fittings.
Then drain remaining fluid from the segment, using bucketed drains or a wet vacuum.
Close isolation valves, tag them, and verify with a pressure gauge or visual check before starting disassembly.
Identifying lead paint, asbestos, or hazardous coatings
How can one determine whether old pipe coatings contain lead, asbestos, or other hazardous materials?
Visual clues, age, and texture offer initial hints—chalky paint may indicate lead, friable insulation may suggest asbestos.
Use EPA/OSHA guidance: test samples with certified labs or DIY lead test kits for paint.
If hazardous materials are suspected, stop work and hire licensed abatement professionals before proceeding.
Step-by-Step: Preparing the Work Area
Before removing rusted cast iron fittings, the work area should be prepared to provide safe access and secure support for the pipe.
Surrounding surfaces and nearby components must be cleaned and protected to prevent damage and contamination.
Each fitting should be clearly marked and the assembly documented to guarantee correct reassembly.
Accessing and supporting the pipe
Clear the surrounding area and turn off water and power sources to the section of pipe to be worked on. Then isolate the segment by closing nearby valves or cutting supply lines as required.
Expose the fitting by removing insulation or drywall as needed. Secure the pipe with adjustable supports or pipe stands to prevent movement.
Verify adequate access for tools and a stable, level support before beginning removal.
Cleaning surrounding surfaces and protecting nearby components
With the pipe secured and access confirmed, attention shifts to cleaning the surrounding surfaces and shielding nearby components to prevent damage or contamination.
Remove loose debris, oil, and rust flakes with a stiff brush and vacuum.
Wipe adjacent surfaces with a damp rag and mild detergent.
Cover valves, electrical connections, and finishes with plastic sheeting and tape to keep them clean and dry.
Marking fittings and documenting assembly for reassembly
Several fittings and joints should be clearly marked and photographed so each piece can be returned to its original position during reassembly.
Use numbered tags, paint pens, or masking tape with labels and take multiple photos from different angles.
Record thread directions and orientation in a notebook or on the photos.
Store fasteners in labeled containers to prevent mix-ups and speed accurate reassembly.
Step-by-Step: Removing Surface Rust from Threaded Fittings
The following section outlines practical methods for removing surface rust from threaded cast iron fittings, covering mechanical options like wire brushes, sandpaper, and rotary tools.
It also summarizes chemical approaches such as rust converters and penetrating lubricants, plus when controlled heat can help loosen seized threads.
Finally, it presents best practices for protecting threads during and after cleaning to preserve fit and function.
Mechanical methods: wire brush, sandpaper, and rotary tools
Begin by examining the threaded fitting to determine rust severity and whether threads are deformed; this assessment guides the choice among a stiff wire brush, medium-grit sandpaper, or a powered rotary brush or flap wheel.
Use steady pressure, follow thread profile, and remove loose scale.
For tight crevices, employ a small brass brush or needle files.
Clean debris and inspect threads for fit before reassembly.
Chemical methods: rust converters and penetrants
After mechanical loosening and an inspection confirms threads are intact, chemical options can be applied to treat remaining surface rust and free seized parts.
Apply a penetrating oil to seep into crevices, wait per product instructions, then attempt gentle rotation.
For heavily oxidized areas, use a rust converter to stabilize iron and prevent flaking before repainting or reassembling.
Follow safety and disposal guidelines.
Using heat to loosen rusted threads
Apply controlled heat to expand metal and break rust bonds when penetrating oils and converters fail to free seized threads.
Heat applied with a propane torch targeted to the joint softens corrosion, enabling mechanical breakup with wrenches or taps.
Heat should be incremental, monitored to avoid damage to surrounding materials.
After loosening, allow cooling before disassembly and clean residues promptly to prevent reoxidation.
Best practices for protecting threads during cleaning
Protect threads with simple, deliberate measures before cleaning to prevent damage and preserve fitment integrity: apply penetrating oil, wrap delicate threads with a thin cloth or plumber’s tape, and mask adjacent surfaces with painter’s tape.
Use nylon brushes and nonmetallic picks for rust removal. Avoid aggressive wire wheels on the threaded portion.
Inspect and re-tape or apply anti-seize before reassembly to guarantee proper sealing.
Step-by-Step: Loosening and Removing Severely Rusted or Stripped Fittings
For severely rusted or stripped fittings, start by applying penetrating oil and allowing adequate dwell time to penetrate threads.
Use correct wrenching techniques—proper size, steady force, and heat when appropriate—to minimize pipe damage, and consider impact tools or bolt extractors with safety precautions if fittings resist.
When mechanical methods fail, cut out and replace the affected section to restore integrity.
Applying penetrating oil and dwell time
Spray a liberal coat of penetrating oil onto the joint and surrounding threads, ensuring the lubricant reaches visible crevices and rust pockets.
Allow extended dwell time—at least 15–30 minutes for light corrosion, several hours or overnight for severe seizing.
Reapply if runoff is evident. Gentle tapping can help oil penetrate.
Wipe excess before attempting loosening to prevent slippage and contamination.
Correct wrenching techniques to avoid pipe damage
Begin with a firm plan: assess the fitting, select the correct wrench size and type, and visualize each turn to minimize force and prevent rounding or cracking.
Use a wrench that seats fully on flats, apply steady, controlled pressure, and pull rather than jerk.
Support adjacent piping to avoid stress, back off slowly if resistance increases, and reapply penetrating oil as needed before continuing.
Using impact tools and bolt extractors safely
When fittings resist conventional wrenches, proceed with impact tools and bolt extractors while prioritizing control and safety: inspect the fitting and surrounding piping, choose the correct extractor size and an impact wrench with adjustable torque, don personal protective equipment, and clear the work area of bystanders before applying any percussive force.
Use short bursts, steady alignment, and progressively higher torque; stop if cracking or undue movement appears.
Cutting and replacing sections when fittings won’t budge
Cut away seized fittings and damaged pipe sections using controlled cutting methods so the remaining system can be reassembled with new, compatible components.
Use reciprocating saws with metal blades or an angle grinder, protect adjacent pipes and surroundings, and cut squarely for clean joints.
Remove burrs, deburr ends, measure and fit replacement pieces, and install appropriate couplings or connector fittings following sealant and torque specifications.
Replacing Cast Iron Fittings and Making Secure Connections
Selection of replacement fittings and compatible materials should prioritize matching pipe type, size, and pressure ratings to guarantee a durable joint.
Before assembly, pipe ends and threads must be cleaned, cut square, and inspected; appropriate thread sealant, tape, or joint compound applied according to manufacturer instructions.
Connections should be tightened to recommended torque values and pressure-tested for leaks before returning the system to service.
Choosing replacement fittings and compatible materials
Choose replacement fittings that match the original pipe system’s material, size, and joining method to secure a reliable connection and long-term performance.
Select corrosion-resistant options—stainless steel, brass, or properly rated PVC/CPVC—when compatibility allows.
Verify pressure and temperature ratings, thread type (NPT, BSP) or hub dimensions, and use approved connector adapters for mixed-material joints to prevent galvanic corrosion and guarantee code compliance.
Preparing pipe ends and threads for new fittings
After confirming compatible replacement fittings and adapters, attention turns to preparing the pipe ends and threads to guarantee a secure, leak-free connection.
Cut pipe squarely, deburr inside and outside, and remove corrosion, old compound, and scale with a wire brush or file.
Clean threads with a thread chaser or die, verify alignment and fit, and inspect surfaces for damage before assembly.
Proper application of thread sealant, tape, and joint compounds
Apply thread sealant, tape, or joint compound evenly and sparingly to clean, dry male threads, taking care not to contaminate the pipe bore.
Use PTFE tape wrapped clockwise three to five times or a compatible pipe dope applied in a thin layer.
Avoid lubricants or excessive material.
Verify seals match pipe material and service conditions; allow cure time per manufacturer before handling.
Torque guidance and leak testing procedures
Several key torque values and methodical leak-testing steps guarantee safe, durable connections when replacing rusted cast iron fittings.
Torque ranges depend on size and material—typically 20–40 ft·lb for small nipples, 50–80 ft·lb for larger joints—applied incrementally.
Pressurize system, inspect joints for drips, use soap solution for gas lines, monitor for 15–30 minutes, and retorque if necessary.
Restoring and Protecting Existing Cast Iron Fittings
After removal of rust and proper cleaning, treated fittings can be primed with rust inhibitors and sealed with appropriate paints or protective coatings to extend service life.
Choices range from oil-based primers and enamel paints to epoxy or polyurethane coatings for harsher environments.
For installations in corrosive settings or buried lines, consideration should be given to sacrificial anodes or cathodic protection to prevent future deterioration.
Applying rust inhibitors and primers to cleaned fittings
With fittings stripped of loose rust and contaminants, the next step is to stabilize bare iron surfaces with a rust inhibitor and then prime them to create a durable paint bond; this prevents flash rusting and provides corrosion resistance before finishing coats are applied.
Apply a compatible phosphoric or tannic acid-based inhibitor, allow recommended dwell time, then use a metal primer specified for ferrous substrates, following drying and recoat intervals.
Painting and coating options for long-term protection
Once protected with a rust inhibitor and primer, cast iron fittings can be finished with paint or specialized coatings chosen for durability, environmental conditions, and service requirements.
Epoxy and polyurethane topcoats resist chemicals and abrasion; zinc-rich primers offer added corrosion resistance.
For buried or submerged fittings, use certified marine or pipeline coatings.
Guarantee proper curing, thickness, and periodic inspection to maintain long-term protection.
When to use sacrificial anodes or cathodic protection
When is electrochemical protection warranted for restored cast iron fittings?
It is recommended when fittings face persistent galvanic corrosion, buried or submerged conditions, or critical systems where failure risk is unacceptable.
Sacrificial anodes suit localized, cost-sensitive jobs; impressed-current systems fit extensive networks needing controllable protection.
Evaluate soil/electrolyte conductivity, accessibility, and maintenance capacity before selecting a method.
Troubleshooting Common Problems
When problems arise after removing rusted cast iron fittings, common failures include stripped threads, cracked or warped pieces, and persistent leaks after reassembly.
Stripped threads can be repaired with thread inserts or by re-tapping, while cracked or warped fittings require assessment to determine whether welding, patching, or full replacement is safest.
Persistent leaks demand systematic diagnostics—inspect seals and mating surfaces, confirm proper torque and alignment, and pressure-test to isolate the source.
Stripped threads and how to repair them
Inspect the threads carefully to determine the extent of damage: minor galling or burrs can often be cleaned up, while severely stripped or worn threads may require repair or replacement.
Use a thread file or die to reshape damaged threads, cleaning with solvent and a wire brush.
For badly damaged sections, install a compatible insert or replace the fitting to restore a reliable seal.
Cracked or warped fittings: repair options vs replacement
After addressing thread damage, attention turns to cracks and warping in cast iron fittings, which pose a greater risk of leaks or failure.
Small hairline cracks can be stabilized with epoxy or metal-filled compound as a temporary measure.
Significant cracks, distortion, or compromised threads require full replacement. Replacement guarantees long-term integrity; weigh cost, access difficulty, and safety before choosing repair.
Persistent leaks after reassembly and diagnostic steps
Reassemble the joint carefully, then observe for persistent leaks and methodically isolate their cause.
Inspect seals, threads, and mating faces for gaps or damaged material.
Pressure-test in stages to localize seepage.
Swap suspect gaskets or fittings and retest.
Check alignment, torque, and support to prevent stress.
If leaks persist, consider cutting out the section for replacement or consulting a professional plumber.
Preventive Maintenance to Avoid Future Rust
A concise preventive maintenance program begins with a routine inspection checklist that identifies early corrosion, loose joints, and protective coating failures.
Controlling the environment—managing humidity, ensuring proper drainage, and applying insulation where needed—reduces conditions that promote rust.
Recommended maintenance schedules should be tailored to system type and exposure, with higher-risk installations inspected and serviced more frequently.
Routine inspection checklist
Monthly inspections provide the most reliable balance between early detection and practical workload for preventing rust on cast iron pipe fittings. They should include a systematic visual scan for surface corrosion, tactile checks for loose or flaking material, verification of protective coatings or paints, inspection of nearby moisture sources (leaks, condensation, or drainage issues), and confirmation that ventilation and insulation remain intact.
- Record locations and severity
- Note required minor repairs
- Schedule follow-up inspections
Environmental controls: humidity, drainage, and insulation
Effective environmental controls focus on limiting moisture exposure through controlled humidity, proper drainage, and adequate insulation to prevent rust on cast iron fittings.
Maintain indoor relative humidity below 60%, install and slope drainage to divert water away from piping, and insulate cold surfaces to prevent condensation.
Ventilation and vapor barriers reduce prolonged dampness.
Regularly verify seals and repair leaks promptly to minimize corrosion risk.
Recommended maintenance schedule for different systems
Several systems benefit from a tailored preventive-maintenance cadence to minimize rust on cast iron fittings.
Residential plumbing: inspect annually, clean and touch up coatings every 2–3 years.
Commercial systems: quarterly inspections, annual cleaning, recoat as needed.
Outdoor or coastal installations: biannual inspections, annual corrosion treatments.
Industrial/high-moisture: monthly checks, corrosion inhibitors deployed, immediate repairs when any degradation appears.
Cost, Time, and When to Hire a Professional
Typical DIY removal of rusted cast iron fittings often takes a few hours to a day and involves modest costs for tools and replacement parts.
If leaks persist, fittings are seized or the work affects structural or sewer lines, a licensed plumber should be called.
Before hiring, confirm the contractor’s license, insurance, estimated timeline and total price, and ask for references or a written warranty.
Estimated DIY time and typical costs
A modest rusted cast iron pipe fitting removal and replacement project usually takes an experienced DIYer two to four hours for a single joint, while novice homeowners should plan on a half- to full-day to allow for learning, preparation, and unexpected complications. Typical costs: tools $30–100, fittings $10–40, sealant $5–15; total DIY $45–155.
| Item | Low | High |
|---|---|---|
| Tools | $30 | $100 |
| Fitting | $10 | $40 |
| Sealant | $5 | $15 |
| Total | $45 | $155 |
Signs you should call a licensed plumber
When rusted cast iron fittings show persistent leaks, significant corrosion that compromises pipe integrity, or problems that extend beyond a single joint—such as recurring backups, foul odors, or multiple failing connections—it’s time to call a licensed plumber.
Professionals provide accurate diagnosis, safer removal of corroded sections, and guaranteed replacements that can prevent costly secondary damage.
Hire a pro when repairs exceed DIY skills, require permits, or risk structural harm.
Questions to ask a contractor before hiring
How much will the work actually cost, and how long will it take to complete?
The homeowner should request written estimates, timelines, and scope details.
Ask about licensing, insurance, references, and warranties.
Clarify emergency availability, cleanup, and permit responsibilities.
Determine when a professional is necessary versus DIY, and confirm payment terms and dispute resolution before signing any contract.
Quick Reference: Tools, Products, and Materials Checklist
Several essential tools, products, and materials are required to remove rusted cast iron pipe fittings safely and effectively.
The checklist lists protective gear, cutting and wrenching tools, rust removal products, replacement fittings, sealants, and cleanup supplies. Quick access to these items minimizes downtime and improves safety.
- Safety: gloves, goggles, respirator
- Tools: pipe wrench, reciprocating saw, chisels
- Products: penetrating oil, rust remover, pipe sealant
Conclusion
With careful technique and the right tools, removing rusted cast iron pipe fittings becomes as manageable as peeling paint from an old fence. Following safety precautions, preparing the area, and choosing appropriate rust removers and penetrating oils reduces damage and effort. For seized or stripped fittings, controlled heat, mechanical leverage, or cutting may be necessary. Regular preventive maintenance minimizes recurrence; however, complex replacements or structural concerns warrant hiring a professional to guarantee safe, lasting repairs.
