How to Keep a Toilet From Sweating: Simple Fixes to Stop Condensation Now
To stop your toilet from sweating, reduce bathroom humidity by using an exhaust fan, opening a window, or installing a dehumidifier. Dry any condensation on surfaces, limit long hot showers, and consider adding a tank insulation liner or foam wrap. If sweating persists, check for leaks and assess your ventilation and piping for longer-term solutions.
Why Your Toilet Tank or Bowl Sweats
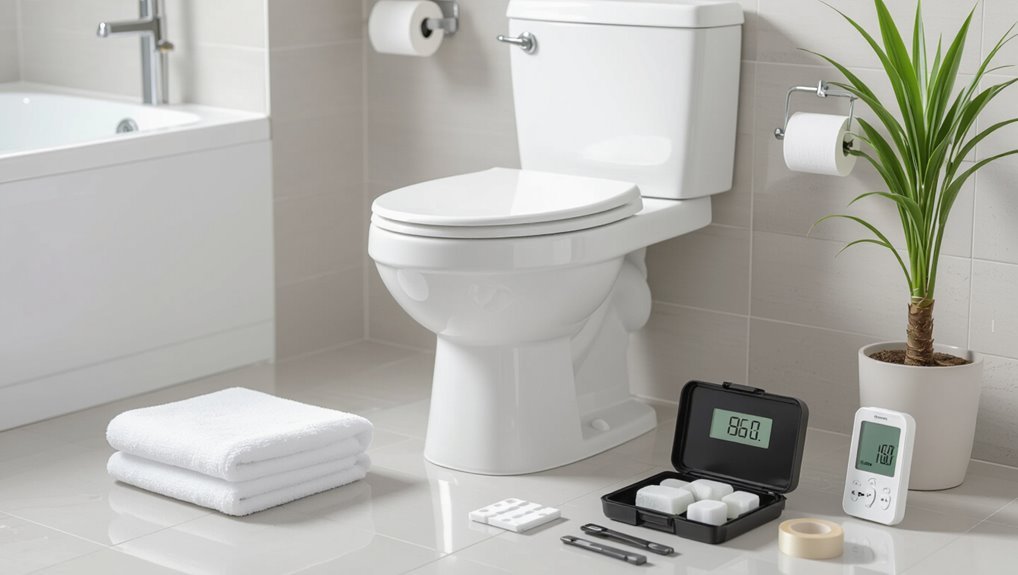
Condensation forms on toilet tanks and bowls when warm, humid room air meets the cold surface of water-filled porcelain, causing moisture to collect.
Common contributors include high indoor humidity, cold supply water, and inadequate ventilation.
Distinguishing sweating from a leak involves noting temporary surface moisture that appears with humidity changes rather than continuous dripping or pooled water.
How condensation forms on toilet surfaces
Moisture appears on toilet tanks and bowls when warm, humid room air contacts cooler porcelain or plastic surfaces, causing water vapor to change into liquid.
Condensation forms as temperature difference lowers air’s capacity to hold moisture, producing droplets that collect and run.
Understanding this physical process helps readers consider practical steps and informs strategies about how to keep toilet from sweating without guesswork.
Common causes: humidity, cold water temperature, poor ventilation
Several factors commonly explain why a toilet tank or bowl sweats: high indoor humidity, unusually cold supply water, and inadequate ventilation.
Warm, moist air meeting cool surfaces causes condensation. Excess humidity from showers or dryers raises ambient dew point.
Cold municipal or well water lowers fixture temperature. Poor ventilation prevents moisture removal, prolonging damp conditions that promote persistent sweating on tank and bowl exterior.
Signs that sweating is due to condensation and not a leak
Look for patterns that distinguish surface sweating from a plumbing leak: condensation forms uniform beads on cold tank or bowl surfaces, appears during high humidity or after heavy use, and dries without pooling or water trails.
Leaks typically produce steady drips, localized wet spots, mineral stains, or puddles on the floor.
Inspect timing, location, and residue to confirm condensation.
Quick Fixes You Can Do Now to Stop Toilet Sweating
Immediate steps can curb toilet sweating by reducing bathroom humidity with a dehumidifier, open window, or running fan on a timer.
Simple fixes like adding foam insulation to the tank and exposed pipes or applying an anti-sweat coating or sealant also prevent condensation.
These measures can be implemented quickly and afford noticeable results.
Reduce bathroom humidity immediately
Open windows, run fans, and stop long hot showers to quickly lower moisture that encourages toilet sweating.
Wipe visible condensation from porcelain and nearby surfaces with a dry cloth.
Place moisture-absorbing packets or a small desiccant container discreetly near the toilet.
Avoid drying wet towels or clothing in the bathroom.
These immediate steps cut ambient humidity and reduce condensation until longer-term ventilation improvements are made.
Improve ventilation: fans, windows, and timers
When poor airflow allows humid air to linger, installing or optimizing ventilation cuts the moisture that causes toilet sweating.
Recommend running an exhaust fan during and after showers, guarantee window vents or operable windows provide cross‑ventilation, and add a timer or humidity sensor to keep airflow long enough to drop humidity below condensation point.
Maintain fan cleanliness and correct ducting for best results.
Simple insulation patches for the tank and pipes
If improved ventilation does not fully stop condensation, applying simple insulation directly to the tank and exposed pipes offers a fast, inexpensive next step.
Foam pipe sleeves, adhesive-backed foam tape, or a fitted tank cover reduce surface temperature and block moisture. Cut to size, secure with waterproof tape or clips, and guarantee access to fittings.
Inspect periodically for dampness or mold and replace as needed.
Apply anti-sweat coatings or sealants
Apply a thin anti-sweat coating or sealant directly to the toilet tank and nearby cold-water pipes to reduce surface condensation quickly and affordably.
These products form a waterproof barrier that lowers thermal transfer and resists moisture buildup.
Choose a product rated for plumbing and follow manufacturer instructions: clean surfaces, apply evenly, and allow proper cure time.
Reapply as directed for sustained protection.
Step-by-Step: Insulating a Toilet Tank
The section lists the tools and materials needed, explains how to drain and clean the tank, and outlines options for installing foam insulation or a tank liner.
It then covers reassembly steps and simple tests to confirm the insulation is stopping condensation.
Clear, sequential instructions make the task approachable for a homeowner with basic tools.
Tools and materials you’ll need
A small set of basic tools and materials will be needed to insulate a toilet tank effectively: a foam tank liner kit or rigid foam board, a utility knife, adhesive or waterproof tape, a measuring tape, and gloves.
Additional supplies guarantee a good fit and secure installation.
- Foam tank liner or rigid foam panel
- Waterproof adhesive or tape
- Measuring tape and marker
- Utility knife and gloves
Preparing the tank: draining and cleaning
Begin by shutting off the toilet’s water supply and flushing to empty the tank.
Then sponge out any remaining water so the interior is dry.
Remove the tank lid and inspect for mineral buildup, mold, or debris.
Use a mild cleaner and a nonabrasive brush to scrub surfaces, rinse thoroughly, and dry completely with a lint-free cloth before proceeding to insulation.
Installing foam insulation or tank liners
Once the tank is dry and clean, proceed to fit foam insulation or a dedicated tank liner to reduce condensation and improve temperature stability.
Choosing between pre-cut foam panels and molded liners depends on tank shape and user preference. Measure interior dimensions, trim material for a snug fit, and secure with adhesive or clips per manufacturer instructions.
Guarantee no interference with flushing mechanisms before finishing.
Reassembling and testing for effectiveness
With the foam or liner fitted and trimmed to clear moving parts, reassembly can proceed.
Replace the tank lid carefully, reconnect any removed supply lines, and reopen the shutoff valve.
Flush twice to confirm normal fill and float operation.
Check for leaks at fittings and guarantee the liner stays in place.
Monitor over 24–48 hours for reduced condensation and proper function.
Long-Term Solutions to Prevent Condensation
Long-term prevention of toilet condensation focuses on durable upgrades and better humidity management.
Options include installing an insulated tank cover or wrap, switching to a dual-flush or tankless system, and replacing the cold-water supply or adjusting the fill valve to reduce temperature differences.
Improving whole-bathroom ventilation and dehumidification completes a thorough approach.
Installing a toilet tank cover or insulating wrap
Consider installing a fitted tank cover or an insulating foam wrap to reduce condensation on cold toilet tanks. These covers create a thermal barrier, slowing heat transfer and preventing moisture buildup.
Choose mildew-resistant, washable materials sized to fit snugly without obstructing lids or hardware. Proper installation and occasional cleaning maintain effectiveness, offering a low-cost, noninvasive long-term solution for persistent sweating issues.
Upgrading to a dual-flush or tankless system
Upgrade bathroom plumbing to a dual-flush or tankless toilet to address condensation at its source by reducing the amount of cold water stored in, or eliminating the need for, a chilled tank.
Dual-flush models cut tank volume and frequency of cold fills; tankless units deliver hot or temperate water on demand.
Both options reduce surface temperature differential, lowering condensation risk and offering long-term efficiency benefits.
Replacing cold-water supply or adjusting fill valve settings
After switching to a dual‑flush or tankless system, attention can turn to the supply side: reducing the temperature differential by replacing excessively cold inlet piping or fine‑tuning the fill valve.
Replacing metal supply lines with insulated or PEX piping raises incoming water temperature. Alternatively, adjust the fill valve to slightly reduce tank chill without compromising flush performance.
Test and monitor for leaks and proper refill.
Improving whole-bathroom humidity control
Many bathrooms benefit from addressing ambient moisture rather than treating condensation as a toilet-only issue.
Improve ventilation with a properly sized exhaust fan vented outside, run it during and after showers, and consider a timer.
Add a dehumidifier for persistently damp spaces, increase insulation on cold surfaces, and promote air circulation with door gaps or a small fan to maintain lower relative humidity.
Comparing Popular Anti-Sweat Options
A concise comparison helps homeowners choose between foam insulation, tank liners, and anti-sweat paint based on cost, durability, ease of installation, and effectiveness. The table below sketches typical trade-offs to frame the discussion. Subsequent sections examine each option against these criteria.
| Option | Typical Cost | Typical Durability |
|---|---|---|
| Foam insulation | Low–Moderate | Moderate |
| Tank liner | Moderate | High |
| Anti-sweat paint | Low | Low–Moderate |
Foam insulation vs. tank liners vs. anti-sweat paint
Several common methods address toilet tank sweating: foam insulation, tank liners, and anti-sweat paint, each offering different costs, installation complexity, and effectiveness.
Foam insulation fills gaps to reduce condensation.
Tank liners create a moisture barrier inside the tank.
Anti-sweat paint adds a thin insulating coat externally.
Choice depends on compatibility with tank design, maintenance preferences, and desired permanence without detailing costs or durability here.
Cost, durability, ease of installation, and effectiveness
When weighing foam insulation, tank liners, and anti-sweat paint, cost, durability, installation difficulty, and real-world effectiveness determine which solution fits a bathroom’s needs.
Foam is inexpensive, simple to fit, but less durable. Tank liners cost more, last longer, and require moderate effort.
Anti-sweat paint is cheapest, easy to apply, yet variable in results. Choice depends on budget, skill, and humidity level.
When to Call a Professional
If persistent condensation, leaking, unusual noises, or mold appear despite DIY efforts, a professional may be needed.
A plumber can address leaking seals, faulty valves, or replacement of tank components, while an HVAC technician can correct room humidity issues or ventilation problems; typical service calls range from about $75–$150 plus parts, with repairs often running $150–$600 depending on complexity.
Homeowners should call a pro when the problem affects structural materials, poses a health risk, or exceeds basic repair skills.
Signs you need a plumber or HVAC technician
How can a homeowner tell when a sweating toilet requires professional help rather than a DIY fix?
Persistent condensation despite insulation or ventilation upgrades, recurring water pooling or damage to flooring, signs of mold, unusual tank noises, or suspected leaks indicate professional assessment.
Complex HVAC humidity issues, hidden plumbing faults, or repeated problems after attempts at repair warrant contacting a licensed plumber or HVAC technician promptly.
Typical services professionals provide and estimated costs
A licensed plumber or HVAC technician will diagnose the cause of toilet sweating and then perform targeted services such as replacing or upgrading tank insulation (factory or aftermarket kits), installing anti-sweat valves or mixing valves, and repairing or replacing faulty fill/float mechanisms.
They may also locate and fix leaks and evaluate whole‑house humidity solutions like exhaust fans or dehumidifiers.
Typical costs range:
- tank insulation $20–70
- valve work $100–300
- repairs $75–250
- humidity solutions $200–1,200.
Preventive Habits to Keep a Bathroom Dry
Routine care and timely seasonal checks help prevent excess moisture before it becomes a problem.
Attention to ventilation, humidity control, and drying practices reduces condensation risk.
Choosing moisture-resistant fixtures and materials further minimizes sweating and simplifies upkeep.
Daily and seasonal maintenance checklist
Because moisture problems evolve with daily use and seasonal shifts, a concise maintenance checklist helps prevent toilet sweating before it starts.
Regular quick checks, timely repairs, and seasonal adjustments keep surfaces dry and systems efficient.
- Inspect tank and seals weekly for leaks or corrosion.
- Wipe surfaces daily to remove condensation.
- Flush and test valves monthly.
- Adjust insulation or covers before humid seasons.
Best practices for ventilation and moisture management
When humidity rises or showers run long, proper ventilation and targeted moisture-control habits prevent condensation before it forms.
Exhaust fans should run during and 10–20 minutes after bathing; windows opened when possible.
Wring towels outside, use squeegees on wet walls, and avoid drying clothes indoors.
Monitor humidity with a hygrometer and set fans or dehumidifiers to maintain 50% RH or lower.
Materials and fixtures that resist condensation
Selecting materials and fixtures that resist condensation reduces the need for corrective measures by minimizing surfaces where moisture can collect.
Porcelain, matte finishes, and textured tiles lower surface cooling and visible droplets. Insulated toilet tanks, wrapped pipes, and anti-sweat coatings prevent cold spots.
Choosing moisture-resistant paint, vapor-retardant drywall, and sealed grout completes a durable, low-condensation bathroom system.
Troubleshooting Common Problems After DIY Fixes
If sweating continues after insulation, the cause should be reevaluated and measurements of tank and room humidity checked.
New leaks or unusual odors following modifications warrant immediate inspection of seals, supply lines, and venting to rule out installation errors.
Recommended repairs may require adaptation for different toilet models, so model-specific parts and clearances should be confirmed before further work.
Persistent sweating despite insulation
Occasionally homeowners find that a toilet continues to sweat even after adding insulation, signaling that the underlying causes were not fully addressed; common culprits include incomplete coverage, inadequate seal around the tank, persistent high humidity, or a malfunctioning fill valve that keeps the tank colder than ambient air.
Inspect insulation continuity, replace worn gaskets, test and adjust the fill valve, and control room humidity with ventilation or a dehumidifier.
New leaks or odors after modifications
Encountering new leaks or unpleasant odors after modifying a toilet often indicates a faulty seal, loose connection, or disturbed venting rather than an inherent failure of the fixture.
Inspect the wax ring, supply line, tank-to-bowl bolts and gasket, and any added insulation for gaps or compression.
Re-tighten fittings, replace compromised seals, and test for odor travel; consult a plumber if smells persist.
Adjusting fixes for different toilet models
Different toilet models—tank-and-bowl (two-piece), one-piece, wall-hung, and pressure-assist—require distinct adjustment approaches after DIY repairs because of varying internal mechanisms, mounting configurations, and access points.
Two-piece tanks need seal and bolt rechecks; one-piece units demand careful gap sealing. Wall-hung systems require concealed-frame inspection; pressure-assist toilets call for checking pressure vessel fittings.
Follow model-specific manuals and test thoroughly.
Quick Product and Material Recommendations
The section offers concise product and material suggestions to address toilet sweating and related humidity issues.
It highlights effective insulation options, ventilation choices, and adhesives suitable for moist conditions. Practical choices are listed to help readers select what fits their bathroom setup.
- Tank insulation kits and foam liners for cold-water tanks
- Compact bathroom dehumidifiers and low-noise exhaust fans
- Waterproof adhesives and silicone sealants rated for high humidity
- Moisture-resistant tape and foam weatherstripping for quick fixes
Recommended insulation kits and tank liners
Several compact insulation kits and replacement tank liners are widely available to prevent toilet sweating, differing mainly by material, fit, and installation method.
Recommended options include foam tank liners, polyethylene jackets, and closed-cell foam adhesive kits. Choose a model sized for common two-piece tanks, with cut-to-fit features and corrosion-resistant fasteners.
Prioritize easy installation, washable materials, and positive customer reviews for durability.
Best dehumidifiers and exhaust fans for bathrooms
Beyond insulating the tank, controlling ambient humidity is the most effective way to stop toilet sweating. Targeted dehumidifiers and properly rated exhaust fans remove moisture before it condenses on cold surfaces.
Recommend compact electric dehumidifiers (10–20 pint capacity) for small bathrooms, Energy Star exhaust fans rated ≥50 CFM with low sone levels, and humidity-sensing or timer controls to maintain 50% RH or lower.
Useful adhesives and sealants for humid environments
For humid bathrooms and other moisture-prone areas, select adhesives and sealants formulated to resist water, mold, and prolonged dampness; silicone and polyurethane sealants, marine-grade adhesives, and solvent-free polyurethane construction adhesives are reliable choices.
Choose mildew-resistant caulk for joints, butyl tape for watertight seals, and epoxy for bonding metal or ceramics.
Confirm surfaces are clean and dry per manufacturer directions for lasting performance.
Conclusion
After all that effort to tame a sweating toilet, the solution turns out to be predictably modest: insulation, ventilation, or a slightly less dramatic bathroom microclimate. Ironically, a porcelain throne’s biggest crime was basic thermodynamics, not poor manners. With a towel, foam, or a fan, condensation retreats and dignity is restored. The homeowner can now enjoy a dry bathroom and the quiet satisfaction that science beat embarrassment—until next summer’s humidity returns.