How to Remove Water Stains in Bathtub Fast: 7 Proven Methods That Work
If you’re looking to remove water stains from your bathtub quickly, there are several effective methods you can try. The best options include soaking with white vinegar, applying a baking soda paste, using lemon with salt, scrubbing with a melamine sponge, utilizing pumice on porcelain, or employing a commercial descaler. For organic discoloration, diluted bleach can also be effective. Remember to test any method first, wear gloves, and ensure good ventilation. Always rinse and dry the area thoroughly afterward to prevent streaking. Keep reading for step-by-step instructions, safety tips, and advice on long-term stain prevention.
Fast Overview: Best Ways to Remove Water Stains from a Bathtub
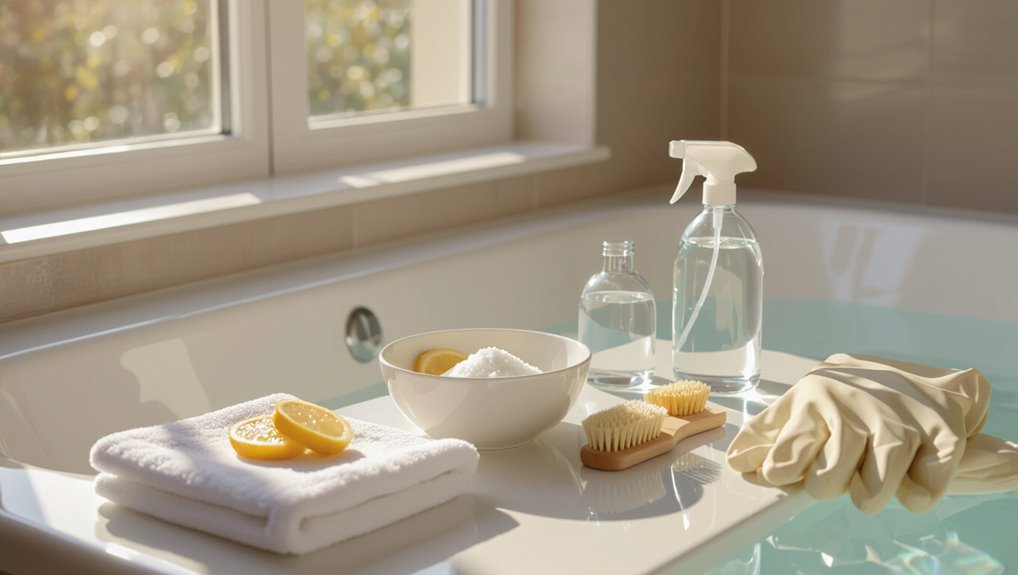
A concise summary lists the most effective stain-removal methods—acidic cleaners, abrasive pads, baking soda paste, and commercial limescale removers—so readers can pick a starting approach quickly.
Guidance contrasts simple DIY fixes for light or recent stains with professional services for deep-set mineral deposits or damaged surfaces.
The overview helps determine when a homeowner can safely attempt cleaning and when to call a specialist.
Quick answer most effective methods at a glance
Several straightforward methods remove bathtub water stains quickly:
- white vinegar or citric acid for mineral buildup,
- baking soda paste for gentle abrasion,
- commercial descalers for stubborn scale,
- and diluted bleach for organic discoloration (only on appropriate surfaces).
For readers seeking how to remove water stains in bathtub, choose method by stain type and surface compatibility; rinse thoroughly and test in an inconspicuous area first.
When to choose DIY vs professional cleaning
After skimming quick DIY fixes like vinegar, baking soda, and commercial descalers, readers should weigh when a homeowner can handle the job and when to call a pro.
DIY suits light mineral buildup, good ventilation, and basic tools.
Hire professionals for deep etching, persistent stains, fragile surfaces, mold, or when warranty, safety, or time constraints demand expertise and specialized equipment.
Why Bathtub Water Stains Form and Where They Appear
Water stains form when minerals, soap residues, and hard water react with surfaces to leave deposits and films.
Different tub materials—porcelain, enamel, acrylic, fiberglass, and natural stone—show and hold these deposits in distinct ways, affecting how stains look and how they should be cleaned.
Color, texture, and location (rim, grout lines, drain area) help identify whether a mark is mineral build-up, soap scum, or a deeper surface issue.
Chemistry of water stains: mineral deposits, soap scum, and hard water
Although bathtub stains often look similar, they arise from distinct chemical processes.
Mineral deposits form when calcium and magnesium precipitate from hard water, leaving white or crusty scale.
Soap scum results from fatty acids reacting with those minerals to create insoluble films.
Iron and manganese produce rust-colored stains.
Acidic or alkaline cleaners dissolve different residues, so identification guides effective removal.
Common bathtub materials and how stains differ (porcelain, enamel, acrylic, fiberglass, stone)
Because different bathtub surfaces interact with minerals, soaps, and cleaners in distinct ways, stain appearance and removal methods vary by material.
Porcelain and enamel resist light staining but foul without abrasive care.
Acrylic and fiberglass scratch and hold soap film, requiring gentle cleaners.
Natural stone absorbs minerals and may etch, needing pH-neutral treatment.
Correct material-specific approaches prevent damage and improve results.
Identifying stain types by color, texture, and location
Stains in a bathtub reveal their origins through color, texture, and placement: rusty brown streaks usually indicate iron deposits from hard water or corroding pipes; chalky white residue signals mineral scale like calcium or magnesium; dark green or black spots point to mold or mildew where moisture lingers; and oily, rainbow-hued films come from soaps, lotions, or body oils.
Edges, drain areas, and beneath faucets help confirm sources.
Safety and Preparation Before Cleaning
Before cleaning, the person should prepare by wearing appropriate protective gear and ensuring adequate ventilation to avoid inhaling fumes.
They should assemble a concise checklist of tools and supplies—gloves, nonabrasive pads, suitable cleaners, and a bucket—so the task proceeds efficiently.
Finally, a small, inconspicuous spot should be tested with the chosen cleaner to confirm compatibility and prevent surface damage.
Protective gear and ventilation
Put on appropriate protective gear and secure adequate ventilation before handling cleaning agents.
Wear chemical-resistant gloves and eye protection; consider a mask for strong fumes. Open windows and run an exhaust fan to disperse vapors.
Avoid confined spaces and never mix cleaners.
Ascertain bystanders, especially children and pets, are kept away until surfaces are rinsed and the area is fully aired out.
Tools and supplies checklist
When preparing to remove water stains from a bathtub, assemble a concise set of tools and supplies to guarantee the job proceeds safely and efficiently:
- Gloves, goggles, and a mask for protection.
- Mild cleaner, descaler, or baking soda and vinegar.
- Soft scrub brush, microfiber cloths, and nonabrasive pads.
- Spray bottle, bucket, and old towels for rinsing and drying.
Surface testing: how to spot-test cleaners safely
With the supplies gathered, a small spot-test should be performed to confirm any cleaner is safe for the bathtub surface.
Apply a dime-sized amount in an inconspicuous area, wait the manufacturer’s recommended dwell time, then rinse and inspect for discoloration, etching, or dulling.
If no damage appears, proceed; if adverse effects occur, choose a milder product or consult manufacturer guidance.
7 Proven Methods to Remove Water Stains Quickly
The article next outlines seven practical methods for removing bathtub water stains, each suited to different stain types and severity.
Remedies range from a vinegar-and-baking-soda paste for light mineral buildup to a vinegar soak for widespread limescale, lemon and salt for mild organic marks, and commercial limescale removers when stronger action is warranted.
It also covers nonchemical options like melamine sponges for surface scuffs and when to choose each approach safely.
Method 1 Vinegar and baking soda paste (best for light mineral deposits)
Mixing white vinegar and baking soda creates a gentle, effervescent paste that lifts light mineral deposits from bathtub surfaces without harsh chemicals.
Apply paste to stains, let sit 10–15 minutes, then scrub with a nonabrasive sponge or soft brush. Rinse thoroughly and dry to prevent re‑mineralization.
Repeat for stubborn spots. Safe for porcelain and acrylic when used gently.
Method 2 White vinegar soak and spray (fast for widespread limescale)
Soak affected areas in undiluted white vinegar to dissolve widespread limescale quickly; after 15–30 minutes spray remaining spots with vinegar from a bottle and allow another 5–10 minutes before scrubbing.
Rinse thoroughly, then inspect for persistent scale. For stubborn deposits repeat soak or use a nonabrasive scrub pad.
Dry the surface to prevent immediate recurrence and improve results.
Method 3 Lemon juice and salt (natural option for mild stains)
Combine fresh lemon juice with coarse salt to create a mild, natural abrasive that lifts light water stains without harsh chemicals.
Apply paste to stained areas, let sit 5–10 minutes, then scrub gently with a soft cloth or nylon brush. Rinse thoroughly and dry.
Repeat for persistent marks. Safe for many surfaces, but test an inconspicuous spot first to avoid discoloration.
Method 4 Commercial limescale removers (when to use them safely)
When mineral deposits resist home remedies, a commercial limescale remover can be the most effective option for quickly dissolving stubborn water stains.
Choose a product labeled for tubs and the specific surface (porcelain, acrylic, ceramic).
Follow manufacturer instructions, use gloves and ventilation, test a hidden area, limit contact time to avoid etching, and rinse thoroughly to remove residue and protect finishes.
Method 5 Magic eraser or melamine sponge (for surface marks)
Scrub gently with a Magic Eraser or melamine sponge to lift surface water stains without chemicals.
The sponge works by mild abrasion; dampen it and test an inconspicuous area first to avoid dulling finishes.
Use light, even strokes; replace the sponge when worn.
Rinse thoroughly and dry the tub surface to prevent immediate re-marking and assess if additional treatment is needed.
Method 6 Hydrogen peroxide and baking soda (for stubborn, discolored stains)
If a Magic Eraser only lifts surface marks and discoloration persists, a paste of hydrogen peroxide and baking soda can be used to treat more stubborn, oxidized water stains.
Mix into a thick paste, apply to stains, let sit 15–30 minutes, then scrub gently with a nonabrasive pad.
Rinse thoroughly and repeat if needed; test in an inconspicuous spot first.
Method 7 Pumice stone technique for porcelain/enamel (careful abrasive option)
Reach for a wet pumice stone only on porcelain or enamel tubs, as its gentle abrasive action can remove mineral buildup and rust without harsh chemicals.
Work small areas with light pressure, keeping both stone and surface wet to prevent scratching. Rinse frequently to inspect progress.
Stop if glaze dulls or scratching appears; polish with a soft cloth and mild cleaner afterward.
Tools and time estimates for each method
Gathering the right tools and setting realistic time estimates helps users choose the fastest, safest approach for their specific bathtub surface and stain severity. A concise list pairs each method with required tools and expected duration: pumice (stone, water) — 10–30 minutes; vinegar/baking soda — 15–45 minutes; commercial cleaner — 10–20 minutes; scrubbing pad/mild abrasive — 10–25 minutes.
| Method | Time |
|---|---|
| Pumice | 10–30 min |
| Vinegar/baking soda | 15–45 min |
| Commercial cleaner | 10–20 min |
| Scrubbing pad | 10–25 min |
Step-by-Step Cleaning Procedures
The article presents clear step-by-step procedures for tackling bathtub water stains, beginning with a vinegar and baking soda paste application and a vinegar soak secured with plastic wrap.
It also outlines safe use of commercial limescale removers, including necessary precautions and contact times.
Finally, it explains proper rinsing, buffing, and drying techniques to achieve a streak-free finish.
Step-by-step: Vinegar and baking soda paste application
Mixing a paste of white vinegar and baking soda creates a mildly abrasive, acidic cleaner that lifts mineral deposits without harsh chemicals.
Apply a thin layer to stained areas, let sit 10–15 minutes, then scrub gently with a non-scratch sponge or soft brush.
Rinse thoroughly with warm water and dry with a microfiber cloth.
Repeat for stubborn spots until stains fade.
Step-by-step: Vinegar soak with plastic wrap method
After trying a paste for surface spots, one effective next step is a vinegar soak sealed with plastic wrap to tackle deeper mineral rings.
Pour white vinegar over stained areas, saturating rings. Cover with plastic wrap, pressing edges to seal and prevent evaporation.
Let sit 30–60 minutes. Remove wrap, scrub gently with a nonabrasive pad, rinse thoroughly, and dry to inspect results.
Step-by-step: Using commercial limescale remover safely
Begin by selecting a commercial limescale remover formulated for the bathtub’s surface—read the label to confirm compatibility with acrylic, porcelain, enamel, or fiberglass.
Then gather protective gear like gloves, goggles, and adequate ventilation before proceeding.
Apply product sparingly to affected areas, follow manufacturer contact-time instructions, agitate gently with a nonabrasive pad, monitor for surface reaction, and neutralize or remove residue per label directions to guarantee safety.
How to rinse, buff, and dry for a streak-free finish
Rinse the treated area thoroughly with warm water to remove all cleaning residue, then inspect for remaining deposits; verify water runs clear before proceeding to buffing.
Using a microfiber cloth or soft buffer, work in circular motions to lift residual marks without scratching.
Rinse again, then dry immediately with a clean, absorbent towel.
Finish by polishing with a dry microfiber for a streak-free shine.
Method Selection Guide: Which Method to Use Based on Situation
The guide explains how to choose a cleaning approach based on bathtub material, noting that porcelain, acrylic, and enamel respond differently to cleaners and abrasives.
It advises selecting methods according to stain severity and age, from mild cleaners for recent marks to stronger treatments for stubborn, aged deposits.
It also outlines when combining mechanical scrubbing with chemical cleaners yields the best results.
Match method to bathtub material
Match the cleaning method to the bathtub’s material and finish to avoid damage and get the best stain removal results. The owner selects mild, non-abrasive cleaners for acrylic and fiberglass, stronger descalers for porcelain and enamel, and gentle, pH-neutral products for cultured stone. Test inconspicuous areas first.
| Material | Recommended cleaner |
|---|---|
| Acrylic/Fiberglass | Mild detergent |
| Porcelain/Enamel | Descaler/enamel-safe paste |
Choosing by stain severity and age
Having chosen a cleaner appropriate for the tub material, select the technique based on how old and stubborn the water stains are.
Light, recent spots respond to gentle wipes or diluted vinegar.
Moderate stains require baking soda paste or a nonabrasive scrubbing pad.
Heavy, aged mineral buildup may need stronger descalers or repeated applications with soft abrasion, allowing dwell time for efficacy.
When to combine methods for best results
Combine methods when a single approach fails to remove deposits completely or risks damaging the tub surface if used repeatedly.
The person evaluating stains should match cleaners and tools to material and severity: mild abrasives plus acidic soak for mineral rings, enzymatic or oxygen bleach for organic residue, and gentle scraping followed by neutralizing rinse for stubborn buildup.
Test small areas first.
Common Mistakes That Damage Bathtubs
Common errors can worsen stains or permanently damage tub surfaces if left unchecked.
Examples include abrasive scrubbing on delicate finishes, mixing incompatible chemicals like bleach and ammonia, and overusing acidic cleaners on natural stone or grout.
Understanding these pitfalls helps guide safer, more effective stain removal.
Abrasive scrubbing on delicate surfaces
Scrubbing vigorously with abrasive pads or powders can quickly dull or scratch delicate bathtub finishes, turning a glossy surface into a worn, porous one that traps grime and water stains.
Professionals caution against steel wool, heavy scouring powders, and hard-bristled brushes on enamel, acrylic, or fiberglass.
Instead, use nonabrasive cleaners, soft cloths or sponges, and gentle, repeated applications to preserve finish integrity.
Mixing incompatible chemicals (bleach + ammonia)
Many homeowners underestimate the danger of mixing household cleaners, but combining bleach with ammonia produces toxic chloramine and hydrazine gases that can cause coughing, chest pain, and severe respiratory distress.
Practitioners should never mix products; instead, use single-purpose cleaners per label instructions, ventilate areas, and wear protection.
Residual chemical damage can discolor or etch tub finishes, requiring professional repair or refinishing.
Overusing acidic cleaners on stone or grout
Overusing acidic cleaners on natural stone or grout can quickly erode surfaces and strip protective sealants, leaving tiles dull, pitted, or more porous.
Repeated acidic exposure weakens grout bonds and accelerates staining, increasing repair needs.
Recommend testing pH-safe products, using mild cleaners or stone-specific formulas, rinsing thoroughly, and resealing grout periodically to protect integrity and appearance without harsh chemical damage.
Preventing Future Water Stains
Preventing future water stains begins with a simple daily wipe and a weekly cleaning routine to remove mineral buildup before it hardens.
For longer-term protection, installing a water softener and applying appropriate sealants can greatly reduce staining.
Consistent drying and improved ventilation complete the approach by limiting moisture that encourages deposits.
Quick daily and weekly maintenance routine
A brief daily and weekly routine keeps bathtub surfaces free of water spots and mineral buildup before they harden.
A quick squeegee or microfiber wipe after each use prevents droplets from drying. Weekly cleaning removes light residue and maintains shine.
- Rinse tub after use.
- Squeegee or wipe dry.
- Weekly gentle cleaner and scrub.
- Dry fixtures and drain area.
Long-term solutions: water softeners and sealants
After establishing a simple daily and weekly routine, homeowners can address the root causes of recurring water stains with longer-term measures.
Installing a water softener reduces mineral buildup by removing calcium and magnesium, extending fixture life.
Applying quality sealants to grout, tile, and porcelain creates a protective barrier against mineral deposits and soap scum, lowering maintenance frequency and preserving finishes.
Best practices for drying and ventilation
Several simple habits greatly reduce the chance of water stains by limiting lingering moisture: promoting airflow, removing pooled water, and drying surfaces promptly.
After baths, open windows or run an exhaust fan for 15–30 minutes. Squeegee walls and tub, wipe fixtures with a microfiber cloth, and leave cabinet doors ajar.
Maintain low humidity with a dehumidifier where needed to prevent mineral buildup.
When to Call a Professional
Persistent discoloration, deep pitting, or surface damage that resists household treatments are signs that a tub may need professional restoration.
A professional can assess whether cleaning, reglazing, or full refinishing is appropriate and will explain the expected process and timeline.
Homeowners should weigh quoted costs against remaining tub lifespan and appearance goals to decide if refinishing is worth the investment.
Signs that stains require professional restoration
When is a stain more than a DIY problem?
Persistent discoloration after multiple cleaning attempts, deep etching or pitting of the surface, widespread staining across finishes, mold or mineral deposits embedded in porous material, and staining that returns quickly indicate professional restoration is needed.
Structural damage, compromised coatings, or uncertainty about safe treatments also justify calling a specialist.
What to expect from professional cleaning or refinishing
Expect a professional cleaning or refinishing visit to begin with a detailed inspection and assessment of the bathtub’s material, damage extent, and underlying causes of staining.
Technicians then recommend targeted methods—deep cleaning, stain removal, minor repair, or full resurfacing—and explain the procedure timeline, required curing, ventilation needs, warranty coverage, and post-service care instructions to preserve results and prevent recurrence.
Cost considerations and whether refinishing is worth it
Although upfront costs vary widely by tub material, damage extent, and local labor rates, homeowners should weigh the price of professional refinishing against alternatives like replacement or repeated DIY cleaning.
Cost factors include surface prep, repairs, coatings, and warranty. Refinishing is cost-effective when stains, chips, or worn glaze are localized; replacement suits structural damage or severe deterioration.
Compare quotes and expected lifespan before deciding.
Troubleshooting: Stubborn or Recurring Stain Scenarios
When stains resist routine cleaning, the article distinguishes rust from mineral deposits by color and reaction to cleaners. It then recommends targeted treatments.
It also addresses concentrated buildup around fixtures and grout lines that often require narrow tools or stronger cleaners.
Finally, guidance is provided for etched or permanently damaged surfaces where repair or refinishing may be necessary.
Rust stains vs mineral deposits: identification and fixes
Many bathtub stains that look similar are actually caused by different sources—chiefly rust from iron and reddish-brown hardware, or mineral deposits from hard water—and identifying which is present determines the effective treatment.
Rust appears orange to brown and flakes, treated with oxalic acid or commercial rust removers.
Mineral deposits are white or chalky; dissolve with vinegar, citric acid, or descalers, then rinse thoroughly.
Stains around fixtures and grout lines
Inspecting the narrow spaces where fixtures meet tile and along grout lines reveals a different set of challenges: these stains often result from trapped moisture, soap scum buildup, mold or mildew growth, and mineral-laden water that concentrates at seams.
They tend to reappear if underlying causes are not addressed. Targeted cleaning with a brush and diluted bleach or vinegar, grout sealer application, and improving ventilation reduce recurrence.
Repairing etched or permanently damaged surfaces
Addressing etched or permanently damaged bathtub surfaces requires shifting from cleaning to repair or surface restoration, since abrasive stains that have chemically etched or physically worn the finish cannot be removed by scrubbing alone.
Assess damage, then choose refinishing, reglazing, or professional resurfacing. Small pits may be filled; severe wear often needs sanding and a new coating.
Follow manufacturer guidance and safety precautions.
Quick Reference: Fast Methods and Estimated Timelines
A quick-reference guide lists several fast methods for removing common bathtub water stains, each paired with an estimated completion time so users can choose by urgency and available effort.
- Vinegar soak — 15–30 minutes.
- Baking soda paste scrubbing — 10–20 minutes.
- Commercial limescale remover — 5–15 minutes.
- Magic eraser/light abrasive — 5–10 minutes.
Each entry notes typical effectiveness and surface compatibility.
Conclusion
Cleaners conclude: consistent care curbs calcified crud, coaxing clean clarity. Swift solutions — scrub, soak, steam, or specialty sprays — swiftly strip stubborn spots, saving soap-scattered surfaces. Safety steps sanitize setup; simple supplies streamline success. Preventive practices preserve pristine porcelain, protecting pipes and polish. When persistent precipitation persistently plagues progress, professional pros provide precise, proven procedures. Ultimately, steady scrutiny and smart strategies secure sparkling surfaces, simplifying subsequent stain struggles and sustaining sanitary serenity.