How to Remove a Faucet Handle From a Sink: Step-By-Step Repair Guide
To remove a faucet handle from a sink, start by identifying the handle type and shutting off the water supply. Next, take off any decorative caps and loosen the set screws using the appropriate Allen key or screwdriver. Then, lift the handle straight off the valve stem. If the handle is stuck or corroded, apply penetrating oil, gently work it free, or use a puller while protecting the finish. Finally, inspect the O-rings and cartridges for wear. For detailed steps and troubleshooting tips, continue reading.
How to Remove a Faucet Handle from a Sink: Quick Overview
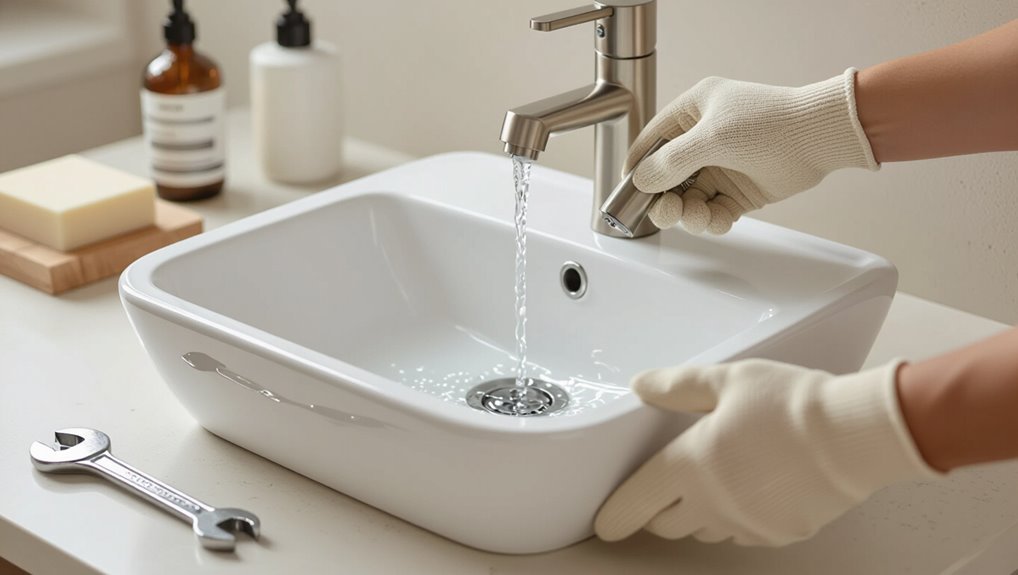
A technician or homeowner may need to remove a faucet handle for repairs, replacement, or to clear mineral buildup.
Required tools typically include a screwdriver, Allen wrench, adjustable wrench, and possibly penetrating oil or a handle puller.
The job usually takes 10–30 minutes and is rated as easy to moderate depending on corrosion and access.
When and why you need to remove a faucet handle
Remove a faucet handle when it interferes with function or access—common triggers include leaks, mineral buildup, worn cartridges, or the need to replace handles for cosmetic updates.
A homeowner may remove a handle to troubleshoot dripping, restore full movement, access internal parts, or upgrade appearance.
Clear reasons streamline deciding how to remove faucet handle from sink and whether to repair, replace, or call a professional.
Tools and materials required
Several basic tools and a few common materials are typically needed to remove a faucet handle safely and efficiently.
A concise kit prevents damage and speeds work. Essential items include hand tools, protective materials, and optional lubricants or cleaners.
- Adjustable wrench, screwdrivers (flat and Phillips), Allen keys
- Rag, plumber’s tape, basin cloth
- Penetrating oil, mild cleaner
Estimated time and difficulty level
Estimate about 15–45 minutes for most single-handle faucets and 30–60 minutes for older or multi-handle setups.
Difficulty ranges from easy to moderate depending on corrosion, tight fasteners, and access beneath the sink.
A novice can usually complete straightforward jobs with basic tools; persistent rust, damaged parts, or confined spaces may require advanced skills or professional help.
Plan accordingly.
Identify Your Faucet Type Before You Begin
Before attempting removal, the writer notes the importance of recognizing common handle styles—single-handle, double-handle, lever, cross, and knob—since each may hide fasteners differently.
They advise checking for concealed screws beneath decorative caps or set screws at the base or back of the handle.
Finally, the writer recommends identifying the valve type (cartridge, ball, ceramic disc, or compression) to anticipate the stem and internal parts that will be exposed.
Common faucet handle types (single-handle, double-handle, lever, cross, knob)
Identifying the faucet handle type is the essential first step, since single-handle, double-handle, lever, cross, and knob designs each hide different fasteners and removal methods.
Single handles often pivot from a cartridge; double handles pair separate hot/cold valves. Levers, crosses, and knobs vary in retention style and tooling required.
- Note symmetry and rotation.
- Check handle profile.
- Match tool access.
How to spot concealed screws, set screws, and decorative caps
With the handle type established, attention turns to where fasteners hide: screws, set screws, and decorative caps commonly conceal the connection points.
Inspect the handle base, underside, and rear for tiny hex or slotted heads. Pry off plastic or metal caps with a flat tool.
Look along lever seams and behind escutcheons for set screws; magnetic pick or flashlight speeds discovery.
Identifying cartridge, ball, ceramic disc, and compression valve stems
Determine the valve stem type to match removal steps and replacement parts.
Cartridge stems are plastic or brass blocks under single handles; ball faucets use a rounded metal ball with ports and springs; ceramic disc valves have flat, round ceramic plates in a wide housing; compression stems are threaded with rubber seats and require turning.
Visual inspection and handle removal reveal the type for correct parts.
Prepare the Work Area Safely
Before beginning, the water supply should be shut off and both the faucet and downstream flow verified closed.
The sink and surrounding surfaces are then protected with towels and basin plugs to catch tools and prevent scratches.
Finally, the immediate area is cleared and necessary tools are organized within easy reach.
Turn off water supply and verify
Shut off the water supply at the nearest valve to the faucet—typically under the sink—and close both the hot and cold lines to prevent flow.
Open the faucet to relieve residual pressure and verify no water runs.
Inspect supply valves for leaks and confirm isolation by feeling for stopped flow.
If valves fail, shut off the main water feed before proceeding.
Protect sink and surrounding surfaces (towels, basin plugs)
While water and tools are still nearby, protect the sink and surrounding surfaces by laying down absorbent towels and fitting a basin plug to catch small parts and prevent debris from falling into the drain.
Place towels around the faucet base and on countertops to absorb spills and shield finishes.
Use a magnetic tray or small container on the towels to hold screws and clips securely.
Clear the area and organize tools
A clear, unobstructed workspace speeds the job and reduces accidents: remove unrelated items from the countertop, push chairs and rugs out of the way, and secure good lighting and ventilation.
Lay out required tools—screwdrivers, Allen keys, basin wrench, pliers, cloths, container for small parts—within easy reach.
Keep parts labeled and separate, make certain a dry floor, and close nearby drawers to prevent trips.
Step-by-Step Removal for Single-Handle Faucets
The technician begins by removing any decorative caps to expose the set screw and then locates all securing fasteners.
Next, the set screw is loosened and removed using the appropriate tool so the handle can be gently lifted off the valve stem without bending or scraping.
Finally, internal parts are inspected and photographed or noted to guarantee correct reassembly.
Remove decorative caps and locate set screws
Begin by inspecting the handle for small decorative caps that conceal the set screw; these caps are usually plastic or metal and sit on the top, front, or base of the handle.
Gently pry caps with a flat tool or fingernail, taking care not to scratch finishes.
Once removed, identify the type and position of the set screw for the correct removal tool.
Loosen and extract set screws safely
Loosen the set screw using the correct-sized Allen wrench or screwdriver, turning counterclockwise with steady pressure until it feels free; if resistance persists, apply penetrating oil, wait a few minutes, then try again.
Hold the handle steady to prevent twisting. Back the screw out fully, then extract it with pliers if necessary.
Inspect threads and clean debris before proceeding.
Remove handle from the valve stem without damage
Gently wiggle the handle while pulling it straight away from the valve stem to disengage its internal splines or splines and cam without bending or snapping any parts.
Support the base to prevent torque on the cartridge. If resistance persists, apply a few drops of penetrating oil, wait, then try again.
Use a plastic puller or padded vise grips to avoid marring finishes.
Inspect and document internal parts for reassembly
Inspect the exposed valve area and lay out removed components in order on a clean, well-lit surface to guarantee accurate reassembly. Photograph each part, note orientation and sequence, and label small pieces. Check for wear, mineral deposits, or broken seals. Store fasteners together and record measurements for replacements.
| Part | Condition | Orientation |
|---|---|---|
| Cartridge | Clean/worn | Facing up |
| Washer | Intact/damaged | Flat side down |
| Screw | Corroded/okay | Threaded end down |
Step-by-Step Removal for Double-Handle and Knob Faucets
The procedure for double-handle and knob faucets treats each hot and cold handle separately, starting with identifying and removing the index caps and set screws.
If handles are tight or corroded, applying penetrating oil and gentle heat or using a handle puller can free them without damage.
After handles are removed, escutcheon plates and trim are lifted or unscrewed to expose the valve stems for further repair or replacement.
Removing hot and cold handles individually
When removing hot and cold handles one at a time, start by shutting off the water supply and relieving pressure at the faucet to prevent leaks while working.
Remove decorative caps, loosen set screws or retaining nuts, and lift the handle straight off the stem.
Inspect the cartridge or valve stem, note orientation, and cover exposed parts.
Repeat identical steps for the other handle.
Dealing with tight or corroded handles
Apply penetrating lubricant to stuck handles and allow it to soak several minutes before attempting removal.
Use a thin nozzle to reach the base, then work the handle gently back and forth with pliers wrapped in cloth to prevent damage.
If corrosion persists, apply heat briefly with a hair dryer, reapply lubricant, and try an impact-style screwdriver or puller designed for faucet handles.
Removing escutcheon plates and trim
After freeing a stubborn handle with lubricant and careful back-and-forth motion, attention shifts to the escutcheon plate and decorative trim that conceal mounting hardware.
For double-handle faucets, remove retaining screws beneath or behind the plate, lift the escutcheon, then loosen mounting nuts.
For knob faucets, pry trim gently with a plastic tool, expose and remove fasteners, and lift off the decorative cover to access supply connections.
Handling Stuck, Corroded, or Stripped Handles
When a faucet handle is stuck, corroded, or stripped, the first course is to apply a penetrating oil and allow gentle soaking to break up rust without forcing the part.
If soaking alone fails, a dedicated handle puller or carefully selected alternative tools can provide controlled leverage to remove the handle.
Throughout the process, care must be taken to protect porcelain, chrome, and plated finishes with cloths, padding, and non-marring contacts to avoid cosmetic damage.
Apply penetrating oil and safe soaking techniques
Loosen seized or corroded faucet handles by using a penetrating oil and patient soaking to break down rust and mineral deposits.
Protect surrounding finishes with tape and rags, apply oil at joints and screw heads, let dwell per product instructions, then gently work the handle back and forth.
Repeat applications as needed and flush residue with water before proceeding to disassembly.
Using a handle puller and alternative tools
Use a handle puller or improvised extraction tools to apply even, controlled force to stuck, corroded, or stripped faucet handles without damaging the valve stem or surrounding finish. Position jaws, tighten evenly, and tap lightly if needed. If handles are rounded, use heat, rubber grips, or custom clamps.
| Tension | Relief | Repair |
|---|---|---|
| Frustration | Satisfaction | Accomplishment |
How to avoid damaging porcelain, chrome, or plated finishes
After employing a handle puller or improvised extraction tools, attention shifts to protecting delicate finishes while freeing stubborn handles.
Wrap cloth or painter’s tape around chrome, porcelain, or plated surfaces before applying tools. Use nylon or brass tools rather than steel; apply penetrating oil sparingly and let it sit.
Work slowly, tapping gently; inspect and rewrap as needed to prevent scratches or chips.
Accessing and Removing Hidden or Undermount Handles
The section explains how to reach screws concealed beneath spouts or escutcheons and how to remove those hidden fasteners.
It distinguishes procedures for wall-mounted versus deck-mounted faucets and notes differences in access and tool requirements.
Special attention is given to integrated sink-faucet combos, which may require panel removal or manufacturer-specific steps.
Removing handles with screw access under the spout or escutcheon
Begin by locating the hidden fastener beneath the spout or escutcheon, since many undermount or concealed-handle faucets secure the handle from below rather than with a visible top screw.
Use a flashlight and mirror if needed. Unscrew with an appropriately sized hex or Phillips driver, supporting the handle to prevent rotation.
Lift the handle straight up; stubborn units may need penetrating lubricant and gentle prying.
Working on wall-mounted and deck-mounted faucets
Many of the same techniques used to find and release hidden fasteners under a spout apply when approaching wall-mounted and deck-mounted faucets, but different mounting configurations and access points change how the handle is reached and removed. Technicians inspect access panels, escutcheons, or under-deck cavities, use long tools or right-angle drivers, and support fixtures before loosening fasteners.
| Type | Access point | Tool |
|---|---|---|
| Wall-mounted | Behind wall plate | Flex driver |
| Deck-mounted | Under sink deck | Long extension |
| Undermount | Panel cutout | Right-angle bit |
| Concealed | Escutcheon gap | Pick set |
| Mounted | Hidden clip | Snap pliers |
Special considerations for integrated sink-faucet combos
Integrated sink-faucet combos often conceal fasteners beneath molded decks or inside the sink rim, so technicians must plan for limited access and unconventional tool angles.
Inspect from underside and inside cabinet for retaining clips, set screws, or snap-fit tabs. Use flexible extension bits, mirror, and LED inspection tools.
Protect finishes with tape, document component orientation, and label hoses before disassembly to guarantee correct reassembly.
Inspecting and Replacing Internal Components
Once the handle is removed, the internal components should be examined for wear, including cartridges, O-rings, and seats.
Parts that show cracking, scoring, or persistent leaks usually require replacement, while lightly corroded pieces can sometimes be cleaned and reused.
For exact matches, removing suspect parts and bringing them to a hardware store guarantees correct replacements.
How to identify worn cartridges, O-rings, and seats
Begin by shutting off the water supply and removing the handle to expose the valve assembly; this creates a clear workspace for inspection.
Examine the cartridge for cracks, mineral buildup, or warping. Check O-rings for flattening, brittleness, or tears.
Inspect seats and springs for grooves, corrosion, or pits. Note leaks, stiffness, or irregular flow as indicators of component failure needing attention.
When to replace vs. clean parts
After inspecting the cartridge, O-rings, seats, and springs for damage and deposits, the next step is to decide whether components require cleaning or full replacement.
Minor mineral buildup and intact rubber can be cleaned and lubricated; cracked, flattened, corroded, or pitted parts should be replaced.
Prioritize seal integrity and smooth operation; replacement prevents recurrent leaks and guarantees reliable faucet function.
Taking parts to a hardware store for exact replacements
Bring the removed parts and any damaged samples to a well-stocked hardware or plumbing supply store to guarantee exact matches.
The technician compares cartridges, O-rings, seats, and screws to original pieces, confirming dimensions and materials.
Purchase identical replacements or compatible OEM parts, noting model numbers.
Keep receipts and test fit before leaving.
Store staff can advise on tools and torque specifications.
Cleaning, Lubricating, and Preparing for Reassembly
After inspection, attention turns to removing corrosion and mineral buildup from exposed parts using appropriate cleaners and brushes.
Moving parts and threads receive a light coating of plumber’s grease or anti-seize to guarantee smooth operation and prevent future seizure.
Worn set screws and damaged trim pieces are replaced before reassembly to restore fit and function.
Cleaning corrosion and mineral buildup
Scrape away loose mineral deposits and flaky corrosion with a plastic putty knife or stiff brush to expose the underlying metal and cartridge surfaces.
Apply a mild vinegar solution or commercial descaler sparingly, let sit briefly, then scrub with a nonabrasive pad.
Rinse thoroughly, dry completely, and inspect seals and passages for remaining buildup or damage before proceeding to lubrication and reassembly steps.
Applying plumber’s grease and anti-seize where appropriate
Apply plumber’s grease sparingly to moving seals, O-rings, and spindle surfaces to guarantee smooth operation and prevent premature wear, while reserving anti-seize compound for threaded metal-to-metal connections to reduce galling and ease future disassembly.
Use lubricants compatible with faucet materials, apply thin even coatings, avoid contaminating water pathways, and wipe excess before reassembly to maintain function and cleanliness.
Replacing worn set screws and trim pieces
Inspecting and removing worn set screws and trim pieces prepares the faucet for reliable reassembly and prevents leaks or loose fittings.
Corroded screws and cracked escutcheons should be replaced with matching stainless or brass fasteners and OEM trim.
Clean mating surfaces, apply thread lubricant or anti-seize sparingly, then hand-tighten and torque to manufacturer specs.
Test operation and adjust alignment before finalizing assembly.
Reassembling the Faucet Handle Correctly
The handle is realigned and carefully reseated onto the valve stem, ensuring any indexing marks match.
Set screws are torqued to the manufacturer’s specification to secure the handle without stripping or binding.
After reassembly, the faucet is tested for smooth operation and checked for leaks at the stem and connections.
Aligning handles and re-seating onto valve stems
Carefully align each handle so its splines or flats match the valve stem profile before lowering it onto the stem, ensuring the handle sits flush and spins freely without binding.
Verify orientation marks or indexing tabs align for correct hot/cold placement.
Press the handle down evenly, confirming no wobble and that the cartridge operates smoothly through its full range.
Proceed to secure fasteners per manufacturer guidance.
Torquing set screws to the right tension
After the handle is seated and aligned on the valve stem, attention turns to torquing the set screw to secure it without deforming the handle or stripping the threads.
Using the correct screwdriver or hex key, apply steady, moderate torque until snug.
Avoid overtightening; feel for resistance change. If specified, use a torque driver set to manufacturer recommendation.
Recheck alignment before finishing.
Testing for leaks and proper operation after reassembly
Turn on the water supply and cycle the handle through its full range to verify smooth movement, correct alignment, and absence of leaks.
Observe beneath the sink and around the valve for any drips.
Check both hot and cold flow, ensuring temperature control and shutoff function.
Tighten fittings if needed, recheck seals, and confirm normal operation before finishing.
Troubleshooting Common Problems After Reinstallation
After reassembly, the guide addresses corrective steps for handles that remain stiff or have become loose.
It then points to common sources of persistent leaks and where to inspect next.
Finally, it outlines diagnostics for no water flow, including checks of supply valves and aerators.
Handle still stiff or loose corrective steps
If the replaced faucet handle feels unusually stiff or, conversely, loose, a few targeted checks usually resolve the issue quickly. Inspect cartridge alignment, retighten mounting nut to spec, lubricate O-rings with silicone grease, and confirm handle seating. If play or binding persists, recheck shims and fasteners.
| Check | Action |
|---|---|
| Alignment | Realign cartridge |
| Nut | Torque to spec |
| O-rings | Lubricate |
| Fasteners | Tighten/reposition |
Persistent leaks where to check next
When stiffness, looseness, or play have been ruled out, attention shifts to locating persistent leaks that may not be obvious at first glance.
Inspect cartridge seals, O-rings, and inlet hoses for hairline damage or improper seating.
Check the spout base, escutcheon, and supply connections for dampness.
Tighten fittings, replace worn seals, and test under full pressure to confirm the source has been resolved.
No water flow after reassembly diagnosing supply issues
Begin by confirming basic supply access before assuming internal faucet faults.
Check shutoff valves under the sink are fully open and visible supply lines are connected and undamaged.
Inspect aerator and cartridge for debris or installation errors.
Test both hot and cold independently.
If no flow persists, verify house water main pressure and consider isolating the faucet to determine whether line blockage or valve failure requires replacement.
Cost, When to Call a Professional, and Warranty Considerations
Typical DIY replacement parts cost a few dollars to under $50, while professional service fees commonly range from $75 to several hundred depending on complexity.
If leaks persist, water damage appears, or multiple components fail, professional plumbing is recommended to prevent further issues.
Before purchasing parts or hiring help, the manufacturer’s warranty and availability of OEM replacements should be checked to avoid voiding coverage and to guarantee proper fit.
Typical costs for DIY parts vs. professional service
Most homeowners will pay only a few dollars to $50 for common replacement parts like O-rings, valve cartridges, or handle screws.
Hiring a plumber typically costs $75–$250 for a simple handle repair and can exceed $400 if a valve or fixture replacement is needed.
DIY saves labor but requires tools and skill; professional service adds diagnostics, guarantees, and often warranty-safe repairs.
Signs it’s time to call a plumber
After comparing DIY part costs and professional rates, homeowners should also recognize the situations where calling a plumber is more cost-effective and safer.
Call a professional for persistent leaks, stripped or corroded fasteners, unexpected water damage, complex valve or cartridge replacement, or lack of proper tools.
Consider labor warranties and liability for additional damage when weighing DIY versus professional service.
Checking manufacturer warranties and replacement parts
When evaluating a faucet repair, homeowners should review the manufacturer’s warranty and parts availability to understand out-of-pocket costs and limits on DIY work. Check warranty duration, covered components, and transferability. Verify OEM part numbers and local availability; compare costs to professional service. If repair risks voiding warranty or involves complex valve replacement, contact a certified technician.
| Item | Action |
|---|---|
| Warranty | Read terms |
| Parts | Confirm OEM availability |
| Cost vs Pro | Compare estimates |
Preventive Care to Avoid Future Handle Removal
A simple preventive care routine can minimize the need for future handle removal by addressing wear and buildup before it becomes a problem.
Recommended actions include a periodic maintenance schedule, use of mild descalers and silicone-based lubricants to reduce mineral deposits, and following manufacturer-safe cleaning products.
Clear tips—such as avoiding abrasive pads, not overtightening screws, and documenting part sizes—help prevent common repair mistakes.
Routine maintenance schedule
Regular inspections every three to six months help identify wear, mineral buildup, and loose components before they require handle removal.
Technicians or homeowners should follow a brief checklist to clean, tighten, and test operation, documenting findings and actions to detect trends and schedule repairs before failures occur.
- Clean and inspect seals and fasteners.
- Tighten loose fittings and test movement.
- Record condition and next inspection date.
Best products to reduce mineral buildup
Although mineral deposits form gradually, choosing the right cleaning agents and water-softening solutions can markedly reduce buildup and extend faucet life. Recommended products include vinegar-based cleaners, mild descalers, and cartridge-safe softener systems. Regular application prevents stiff handles and corrosion.
| Product Type | Example | Frequency |
|---|---|---|
| Vinegar cleaner | White vinegar | Weekly |
| Descaler | CLR | Monthly |
| Water softener | Ion exchange unit | As needed |
Tips for avoiding common mistakes during future repairs
Preventive measures cut down on future faucet-handle repairs and save time and money; simple habits—using appropriate cleaners, avoiding overtightening, and keeping moving parts lubricated—prevent common failures before they start.
Proper inspection, gentle operation, and documentation reduce repeat work.
- Inspect seals and fasteners quarterly.
- Use manufacturer-recommended lubricants.
- Record maintenance dates and actions.
Conclusion
After following straightforward steps to remove a faucet handle, the reader is left with the satisfying irony that a task described as “simple” often reveals hidden screws, stubborn corrosion, and a tiny part that vanishes into the void. Having learned which tools, seals, and gentle curses are required, one emerges convinced that plumbing is either quietly noble or deliberately mischievous—depending on whether the next reassembly goes smoothly or demands a call to the pros.