How to Safely Connect AC Condensate Drain to a Sink: Step-by-Step Guide
To safely connect an AC condensate drain to a sink, follow these essential steps: First, check local plumbing codes, power down the AC unit, and clean the condensate drain and pan. Next, use appropriately sized PVC or vinyl tubing to connect to an approved air gap or indirect sink adapter positioned above the trap. Secure all connections with fittings and sealant, then test for proper flow and leaks. To prevent clogs, perform regular maintenance and use algaecide tablets. The following guide elaborates on the necessary tools, procedures, and alternatives.
Overview of Connecting an AC Condensate Drain to a Sink
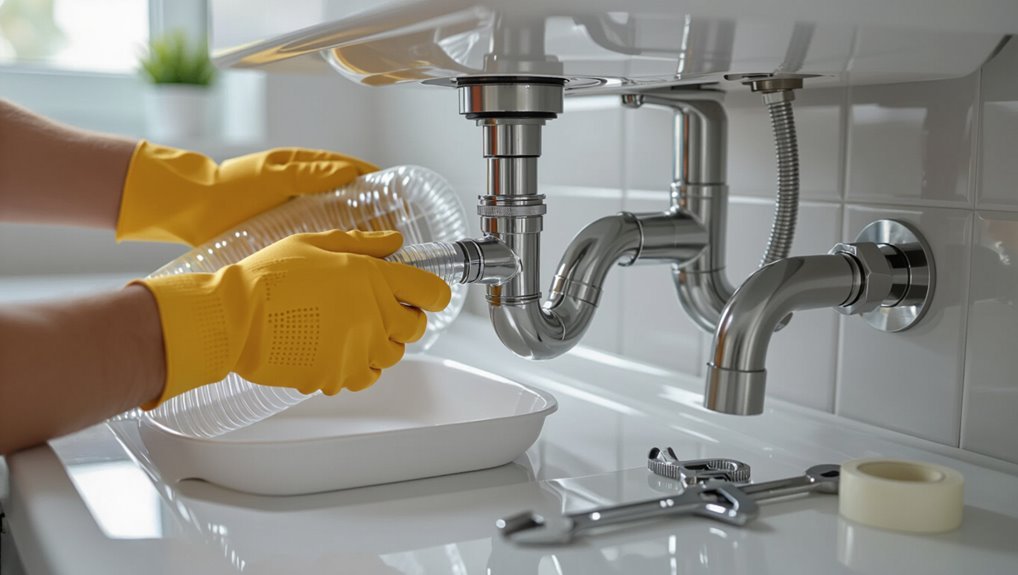
Homeowners route AC condensate to a sink primarily when a nearby drain is convenient or when building plumbing lacks a dedicated condensate outlet.
Before proceeding, local plumbing codes, trap and venting requirements, and sink drain capacity should be verified to confirm compliance and prevent backups or contamination.
Safety considerations include preventing cross-connections to potable water, securing a proper trap and air gap, and guaranteeing the condensate line is accessible for maintenance.
When and why homeowners route condensate to a sink
Because many air-conditioning systems produce more condensate than a nearby floor drain can handle, routing the condensate line to a sink becomes a practical solution.
Homeowners choose this when proximity, gravity flow, or absence of exterior drains make it simplest. It prevents basement moisture, simplifies maintenance, and offers visible drainage.
Guides on how to connect ac drain to sink focus on accessibility and minimizing leaks.
Code, safety, and plumbing considerations to check first
Before connecting an AC condensate drain to a sink, verify local plumbing and building codes, assess trap and vent requirements, and confirm that the sink’s drain and vent configuration can accept the additional flow without causing siphoning or backflow.
Inspect for required air gaps, backflow prevention, and accessible cleanouts.
Evaluate condensate volume, pipe sizing, corrosion risk, and electrical safety near water to guarantee compliance and safe operation.
Quick answer and safety summary
A basic connection typically involves routing the condensate line to the sink trap, securing fittings, and testing for leaks, resulting in a dry drain pan and reliable discharge.
Permits are rarely required for minor condensate routing, but local codes or multi-unit buildings may demand notification or inspection.
A licensed plumber or HVAC technician should be called for complex runs, nonstandard materials, roof or wall penetrations, or any signs of mold, leaks, or code conflict.
Short step-by-step result you can expect
Expect a simple, safe result: condensate from the AC drains into the sink trap through a secure, vented connection that prevents backflow and sewer gas entry.
The installer routes tubing, secures a trap adapter above the P-trap, adds a vent or air gap, tests slope and flow, clamps fittings, and checks for leaks.
The system stays dry, odor-free, and properly drained.
Required permits and when to call a professional
When are permits needed and when should a professional be called?
Local codes may require permits for plumbing alterations, reroof penetrations, or modifications to HVAC systems. If work affects drainage, sewer connections, or building envelope, obtain permits.
Call a licensed plumber or HVAC technician for complex routing, code compliance, inadequate slope, persistent backups, leaks, or when electrical/roof work is involved to guarantee safety and warranty.
Tools, materials, and safety gear needed
A concise inventory of required items follows, listing hand tools and specialty equipment for the condensate connection.
Essential parts and materials—pipe, fittings, trap, sealant and mounting hardware—are enumerated alongside recommended replacements.
Personal protective equipment and basic precautions for working near electrical components and wastewater are noted.
Tools list
Necessary tools, materials, and safety gear are listed below to confirm the condensate drain is connected correctly and safely.
The list focuses on essential hand tools, measuring devices, fastening and sealing implements, and personal protection. Items are chosen to minimize leaks, verify proper fit, and protect the installer during work.
- Adjustable wrench
- Tubing cutter
- Drill with bits
- Silicone sealant and tape
- Safety gloves and goggles
Parts and materials list
With the tools and safety gear established, attention shifts to the specific parts and consumables required to route an AC condensate drain into a sink.
Essential components and materials guarantee a secure, leak-free connection and proper slope for drainage.
- PVC or vinyl drain tubing (proper diameter)
- Hose adapter or barbed fitting
- PVC cement or hose clamps
- Sink trap adapter
- Teflon tape and replacement gaskets
Personal protective equipment and precautions
Safety glasses and nitrile gloves should be worn throughout the condensate drain connection process to protect against chemical splashes, sharp edges, and biological contaminants that can accumulate in HVAC lines.
Additional precautions include proper ventilation, lockout of power, and careful waste handling.
- Respirator (if mold or strong odors)
- Long sleeves and sturdy footwear
- Foldable drain snake
- Disposable towels
- First-aid kit
Preparatory checks before starting
Before any work begins, the technician inspects the condensate line and drain pan for rust, clogs, or leaks and measures the vertical and horizontal distances between the AC unit and the sink to guarantee proper slope and reach.
They check the sink’s trap configuration and any overflow paths to confirm compatibility with a condensate connection.
Finally, they verify local plumbing and building code restrictions to determine required fittings, air gaps, or permit needs.
Inspecting the AC condensate line and drain pan condition
Begin by visually examining the condensate drain line and drain pan for rust, cracks, standing water, obstructions, and signs of biological growth; these conditions indicate leaks, blockages, or imminent failure that must be addressed before connecting the line to a sink.
Note corrosion, soft spots, and loose fittings. Verify drain slope visually, check trap integrity, and document required repairs or replacements before proceeding.
Measuring heights and distances from AC unit to sink
A clear set of measurements is essential to guarantee the condensate drain can run from the air handler to the sink without backflow, sagging, or code violations.
Measure vertical drop from condensate outlet to sink inlet, total horizontal distance along proposed routing, clearance for traps and supports, and elevation changes for accessibility.
Record pipe lengths, fitting locations, and required slope (typically 1/8–1/4 in/ft).
Verifying sink trap configuration and overflow paths
With measurements in hand, attention shifts to the sink’s trap and overflow arrangements to guarantee the condensate will flow correctly and legally into the plumbing.
The technician inspects trap type, height, and orientation, verifies trap weir and venting, and locates overflow outlets.
Any incompatible trap arm length, backflow risk, or blocked overflow is noted for correction before connecting the condensate line.
Confirming local plumbing and building code restrictions
Before any physical connection is attempted, the technician confirms applicable local plumbing and building code requirements to guarantee the condensate line installation complies with legal and safety standards.
They check regulations regarding discharge points, backflow prevention, trap requirements, fixture unit limits, and permitted materials.
Permit and inspection obligations are verified.
Any prohibitions on tying into sanitary lines or exterior drains are noted and respected before work proceeds.
Step-by-step installation process
The installation proceeds in a clear sequence beginning with powering down the AC and preparing the workspace.
Next, drain and clean the condensate line and pan.
Then the installer selects an appropriate sink connection point and fits an air gap or other approved indirect connection.
Finally, the condensate tubing is attached to the unit outlet and secured with proper fittings.
Step 1 Turn off power to the AC unit and prepare workspace
Shut off power to the air conditioning unit at the breaker panel and confirm the system is de-energized by testing the thermostat and using a non-contact voltage tester at the unit; this prevents accidental startup and electrical hazards during work.
Clear the surrounding area, lay down drop cloths, gather insulated tools, safety glasses, gloves, and a flashlight, and guarantee stable access to the unit and sink.
Step 2 Drain and clean the condensate line and pan
Begin by locating and accessing the condensate pan and drain line beneath the evaporator coil to remove standing water and debris.
Empty the pan using a wet vac or bucket, then inspect the drain for clogs.
Flush the line with distilled vinegar or mild bleach solution, followed by water.
Scrape or replace damaged drain components and guarantee proper slope toward the outlet before proceeding.
Step 3 Choose the connection point on the sink drain or tailpiece
One clear decision remains: pick a secure, code-compliant spot on the sink drain or tailpiece where the condensate line can attach without obstructing flow or creating leaks.
Inspect the tailpiece for an existing 3/8–1/2″ branch, knockout, or tee.
Choose a location above the trap arm, accessible for inspection, and free of strain.
Mark position for drilling or tapping.
Step 4 Install an air gap or approved indirect connection
Install an approved air gap or indirect fitting at the marked location to prevent backflow into the condensate line.
Position the device above the sink tailpiece or in a visible, code-compliant spot.
Secure mounting with supplied hardware, confirm vertical clearance for overflow, and seal penetrations.
Verify gap dimensions meet local plumbing codes and that the fitting remains accessible for inspection and maintenance.
Step 5 Attach tubing to condensate outlet and secure fittings
With the air gap or indirect fitting secured and inspected, attention turns to connecting the condensate tubing to the unit outlet and the newly mounted fitting.
Cut tubing to length, deburr ends, and slide on hose clamps.
Push tubing fully onto the outlet and fitting, position clamps over connection points, then tighten snugly.
Inspect for alignment and leaks before proceeding.
Step 6 Route tubing to sink, secure supports, maintain slope
Begin by laying out the condensate tubing along the planned path to the sink, ensuring the route avoids heat sources, sharp edges, and moving parts.
Maintain a continuous downward slope (about 1/8–1/4 inch per foot). Fasten tubing with plastic clamps or straps every 12–18 inches, add long gentle bends rather than sharp kinks, and leave access loops for future inspection or condensate pump placement.
Step 7 Connect to sink drain using a trap adapter or saddle
After routing and securing the condensate tubing with the proper slope, the next step is to join it to the sink drain using either a trap adapter or a saddle.
Select the method compatible with the drain pipe material. Cut and deburr the drain stub or clamp location, attach the adapter or saddle per manufacturer instructions, tighten seals, and secure the condensate line with a hose clamp to prevent disconnection.
Step 8 Test for leaks, proper flow, and backflow prevention
Inspect the completed connection by running the air handler and observing the condensate line and sink junction for leaks, proper drainage, and any signs of backflow.
Verify steady, unobstructed flow; watch for slow drainage or sputtering that indicates blockage or improper slope.
Check all fittings for moisture, tighten or reseat as needed, and confirm the trap prevents sewer gas while allowing uninterrupted condensate discharge.
Step 9 Final sealing, insulation, and tidying of installation
Seal all joints and insulate exposed condensate lines to prevent leaks, thermal loss, and condensation on surrounding surfaces.
Apply silicone or appropriate sealant to threaded and slip connections, secure insulation with tape or zip ties, and wrap fittings.
Trim excess tubing, fasten lines neatly to structure, and clear debris.
Confirm trap access remains, label the drain, and document the work for maintenance records.
Required backflow and sanitary protections
The section addresses required backflow and sanitary protections for condensate drains, starting with the purpose and common types of air gaps used to prevent sewage or sink water from entering AC systems.
It compares installing check valves with the alternative of keeping an indirect drain and notes when each method is appropriate.
It also summarizes typical code-mandated safeguards such as minimum air-gap dimensions, trap requirements, and approved materials.
Purpose and types of air gaps for condensate drains
Because condensate lines can create a direct path between HVAC systems and household plumbing, an air gap is used to prevent sewage or contaminated water from siphoning back into the condensate drain.
Air gaps provide physical separation; common types include vertical open gaps at a drain stub, funnel or trap primer arrangements, and manufactured condensate air-gap fittings.
Codes often mandate minimum distances and accessible placement.
Installing check valves vs. maintaining an indirect drain
When comparing check valves to indirect drains for HVAC condensate, focus centers on preventing backflow and maintaining sanitary separation between the condensate system and household plumbing.
Check valves offer mechanical backflow prevention while indirect drains rely on an air gap to eliminate any physical connection.
Check valves can fail and need maintenance; indirect drains require proper trap and vent configuration to avoid siphoning and odors.
Common code-mandated safeguards
Municipal and plumbing codes mandate specific safeguards to prevent condensate backflow and preserve sanitary separation between HVAC drainage and domestic waste systems.
Codes require physical air gaps, trap primers or sealed traps, backflow preventers where appropriate, corrosion-resistant piping, and accessible cleanouts to inspect and maintain sanitary condition.
- Air gap minimums
- Approved backflow devices
- Trap integrity
- Corrosion standards
- Accessible cleanouts
Troubleshooting common problems
When issues arise after connecting an AC condensate drain to a sink, common symptoms include slow draining or clogs, water backing up into the air handler or sink, unpleasant odors from bacterial growth, and visible leaks at connections or along tubing.
Technicians should first inspect the line, fittings, and trap for blockages, loose joints, or standing water. If basic cleaning and tightening do not resolve the problem, further steps such as flushing with a safe cleaner, replacing damaged sections, or consulting a professional are warranted.
Slow draining or clogs in condensate line
Inspecting the condensate line for slow drainage or clogs reveals one of the most common maintenance issues affecting AC condensate systems.
Accumulated algae, debris, or mineral buildup restricts flow.
Recommend clearing with a wet/dry vacuum, flushing with distilled water or a diluted bleach solution, and installing a removable access port or inspection tee.
Regular monthly checks prevent recurrence and maintain proper drainage.
Water backing up into the air handler or sink
Water backing up into the air handler or sink indicates a drainage failure that can cause water damage, reduced system efficiency, and mold growth.
Immediate checks include verifying the P-trap orientation, ensuring the drain line slope, and inspecting for kinks or blockages.
If accessible, clear the trap and flush the line; replace damaged fittings.
Call a technician if backups persist or electrical components were exposed.
Odors or bacterial growth in the line
Detect foul or musty smells coming from the condensate drain as a sign of bacterial or mold growth within the line.
Promptly flush the drain with a diluted bleach or enzyme cleaner following manufacturer guidance, run water through the trap to clear biofilm, and inspect accessible tubing for slime.
Schedule periodic maintenance and consider installing a PVC cleanout or condensate trap-access for easier future cleaning.
Leaks at connections or along tubing
Start by tracing the condensate line from the unit to the sink connection to locate any wet spots, drips, or loose fittings that indicate leaks.
Inspect joints, slip fittings, and PVC glue seams.
Tighten clamps, replace cracked tubing, and reseal joints with appropriate couplings or plumber’s tape.
Test by running the unit, observing for persistent seepage, and rechecking after 24 hours.
Maintenance schedule and tips to prevent failures
A clear maintenance schedule helps keep the condensate drain flowing and prevents backups.
Regular cleaning and flushing, occasional safe use of algaecide tablets or line treatments, and seasonal inspections form the core of preventive care.
Components such as traps, hoses, and fittings should be checked each season and replaced when wear, clogs, or corrosion are found.
Routine cleaning and flushing procedures
Because mineral buildup and biological growth gradually narrow condensate lines, regular cleaning and flushing are essential to prevent backups and overflow into the sink or equipment.
Schedule monthly visual inspections, flush the line with warm water for 30–60 seconds, and clear accessible P-traps and strainers.
Quarterly deep flushes with a safe, manufacturer-approved cleaning solution and compressed-air blowouts reduce clogs and guarantee reliable drainage.
Using algaecide tablets and line treatments safely
After routine visual checks and periodic flushes, adding algaecide tablets or line treatments can help suppress biological growth that narrows condensate lines.
Use manufacturer-approved products at recommended intervals, place tablets in the drain pan or access ports, and avoid overuse which can corrode fittings.
Record treatments, inspect for residue or leaks, and stop use if unusual odors or material degradation appear.
Seasonal checks and when to replace components
When seasons change, scheduling quarterly visual inspections and biannual functional checks helps catch developing condensate-drain issues before they cause water damage or system shutdowns.
Recommendations focus on timely replacement and simple maintenance:
- Inspect traps and fittings for leaks or corrosion.
- Flush lines to remove buildup.
- Replace worn tubing annually.
- Swap clogged P-traps immediately.
- Service float switches and condensate pumps every two years.
Alternatives to routing condensate to a sink
Alternatives to running condensate to a sink include routing the line by gravity to an exterior outlet or a dedicated floor drain for direct disposal.
Where gravity is impractical, a condensate pump can be installed to lift and move condensate reliably and prevent backups.
For complex layouts or code-sensitive installations, hiring a qualified HVAC or plumbing professional guarantees compliant, durable solutions.
Gravity drain to exterior or floor drain
Gravity-fed condensate lines offer a simple, low-maintenance option by routing condensate downhill to an exterior grade or dedicated floor drain.
This method requires correct slope, secure fittings, and protection against debris and freezing. It avoids mechanical failure, reduces noise, and minimizes indoor plumbing alterations.
Local codes and proper termination clearances must be observed to prevent nuisance drainage or contamination.
Condensate pump installation and benefits
Consider installing a condensate pump to move wastewater from an air handler or drain pan when gravity routing to a sink, exterior, or floor drain is impractical.
A small electric pump collects condensate, activates at a float level, and discharges to a nearby drain or utility sink.
Benefits include flexible placement, reliable removal, reduced overflow risk, and compatibility with basements or rooftop units without gravity drainage.
Professional solutions for complex situations
When a condensate pump cannot address site constraints or code requirements, professional contractors can propose a range of engineered solutions for handling condensate without routing it to a sink.
They evaluate building codes, drainage capacity, and contamination risks, then recommend appropriate systems:
- Dedicated floor drain connection with backflow prevention
- Condensate neutralizer and oil separator
- Direct sanitary tie-in per code
- Roof scupper with proper permits
- Remote mechanical treatment and discharge
Cost estimates and time required
A basic homeowner DIY for routing an AC condensate drain to a sink typically costs between $20 and $100 for parts like tubing, adapters, clamps, and a P-trap.
It can take one to three hours depending on access and experience.
If the job requires cutting into cabinets, rerouting plumbing, or ensuring code compliance, hiring a professional may be more cost-effective when factoring labor, permits, and the risk of leaks or warranty issues.
The following section compares typical DIY itemized costs and time against contractor estimates and scenarios where a pro is recommended.
Typical homeowner DIY cost breakdown
Estimate materials between $20 and $100 and allow 1–3 hours for a homeowner with basic tools and plumbing familiarity. Typical costs: condensate line, fittings, trap kit, and sealant; inexpensive sink adapters reduce complexity. Time splits: prep, cutting/fitting, leak testing. Budget for small extras like clamps or primer.
| Item | Typical cost |
|---|---|
| Parts | $20–$60 |
| Extras | $5–$40 |
When hiring a pro is more cost-effective
Consider hiring a licensed HVAC or plumber when the condensate run requires modifications to existing drain lines, ceiling or cabinet penetrations, or when local codes demand trap or vent configurations.
Professionals typically charge $100–$300 for straightforward sink-adapter installs and $300–$800 (or more) for complex reroutes or repair work. Their jobs commonly take 1–4 hours depending on access and scope.
Skilled labor reduces risk, guarantees code compliance, and prevents water damage.
Safety checklist before finishing the project
Before completing the installation, verify all safety measures are confirmed to prevent leaks, electrical hazards, or code violations.
A final checklist guarantees compliance, functionality, and occupant safety before project closeout.
- Confirm secure, sloped condensate line and tight fittings
- Test for leaks under flow and pressure conditions
- Verify trap and venting meet plumbing code
- Guarantee separation from electrical components
- Document inspection and obtain required permits
Conclusion
Connecting an AC condensate drain to a sink can be a safe, inexpensive solution when done properly. One interesting statistic: poorly managed condensate drains contribute to indoor humidity issues that can increase mold growth risk by up to 50% in affected areas. Following proper checks, materials, and periodic maintenance reduces that risk considerably. When installed per local codes and using a trap or air gap, this routing provides reliable condensate disposal with minimal long‑term issues.