
How to Bolt a Toilet to the Floor: Step-by-Step Guide for a Secure, Leak-Free Installation
To bolt a toilet securely to the floor and prevent leaks, start by shutting off the water supply and draining the toilet. Clean the flange, then place a new wax ring on it. Set the closet bolts in the flange and lower the toilet bowl straight down onto the wax ring. Hand-tighten the nuts alternately, then snug them evenly without over-tightening. Finally, trim and cap the bolts, and check for any movement or leaks. This process includes details on flange repair, shimming, and troubleshooting to ensure a long-lasting installation.
What a Properly Bolted Toilet Looks Like and Why It Matters
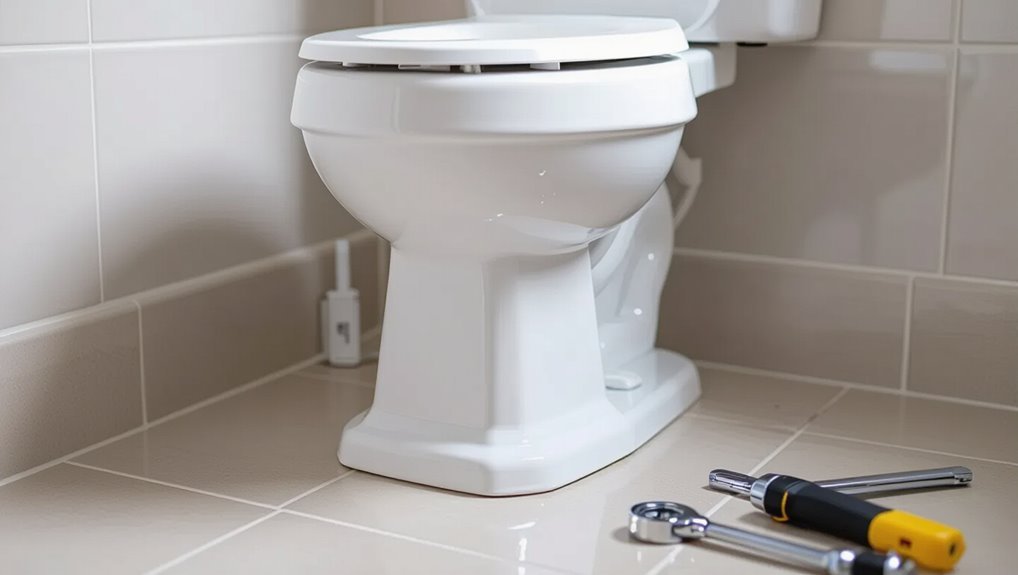
A properly bolted toilet sits level and immobile, with no visible gaps at the base and no water pooling around the flange.
Clear signs of a secure, leak-free installation include dry flooring, an intact wax or rubber seal, and firm bolt tension without over-tightening.
Improper bolting can cause wobble, water leaks, and stress on the waste pipe that leads to cracks or costly repairs.
Signs of a Secure, leak-free toilet installation
Several clear indicators reveal a properly bolted, leak-free toilet: no wobble when shifted, a continuous bead of sealant or firmly seated wax ring at the base, no water pooling or dampness around the flange, and bolts that are tight but not over-stressed.
Visual checks, gentle rocking, and inspecting for odor or stains confirm correct installation. Guides on how to bolt toilet to floor reinforce these checks.
Risks of improper bolting (leaks, wobble, pipe damage)
Many common problems trace back to improperly bolted toilets: loose or uneven bolts can allow rocking that breaks the wax or foam seal, letting wastewater leak onto the subfloor and into the joists.
Continued movement stresses flange connections, risking cracked soil pipes, sewer gas leaks, and mold growth.
Uneven mounting also causes premature porcelain cracks and noisy, unstable operation requiring costly repairs or full replacement.
Tools and Materials You Need
To bolt a toilet securely, the installer should gather essential tools—wrench, screwdriver, level, and putty knife—and the necessary materials: closet bolts, a flange, wax ring, bolt caps, and silicone.
For common complications, optional items like a flange repair kit, flange extenders, and rubber shims may be required. Having these on hand streamlines the job and prevents delays.
Essential tools (wrench, screwdriver, level, putty knife)
Equipped with a wrench, screwdriver, level, and putty knife, the installer can move efficiently through the steps of bolting a toilet to the floor.
A wrench secures nuts without rounding; a screwdriver drives and adjusts fasteners. A level confirms the bowl sits plumb to prevent rocking and leaks.
A putty knife removes old sealant and smooths surfaces for proper flange seating and gasket placement.
Necessary materials (closet bolts, flange, wax ring, bolt caps, silicone)
A short list of reliable materials is essential before starting: closet bolts and a compatible flange anchor the toilet, a wax ring (or wax-free gasket) seals the drain, bolt caps protect exposed hardware, and silicone provides a water-resistant bead where the base meets the floor.
Also include stainless or brass closet bolts, a flange sized to pipe, a quality wax ring, and matching caps.
Optional materials for problem scenarios (flange repair kit, flange extenders, rubber shims)
When standard fixtures and seals are in good condition, the basic list will suffice; however, common issues like a corroded flange, a flange set too low, or an uneven floor call for specialty items.
Recommended optional materials address these problems precisely:
- Flange repair kit: rebuilds or stabilizes damaged flanges.
- Flange extenders: raise low flanges to meet the toilet base.
- Rubber shims: level the bowl and prevent rocking.
Safety and Preparation Steps
Before beginning work, the water supply should be shut off and the toilet drained to prevent spills.
The floor and nearby fixtures should be protected with drop cloths or cardboard to avoid damage during the job.
The flange, subfloor, and existing closet bolts must be inspected for cracks, rot, or corrosion and noted for repair or replacement.
Shutting off water and draining the toilet
Locate the toilet shutoff valve and turn it clockwise to stop the water supply, then flush the toilet to remove most of the cistern water.
Close the valve fully, then hold the flush lever until the tank empties.
Use a sponge or towel to remove remaining water from the bowl and tank.
Disconnect the supply line carefully and inspect for residual leakage before proceeding.
Protecting the bathroom floor and surrounding fixtures
With the shutoff valve closed and the tank and bowl drained, attention turns to protecting the bathroom floor and nearby fixtures.
Lay down a waterproof drop cloth or thick cardboard, secure edges with painter’s tape, and pad exposed porcelain, trim, and cabinetry with soft cloths.
Remove rugs and cover vents.
Guarantee clear access and stable footing to prevent scratches, spills, and accidental damage.
Inspecting the flange, floor, and existing bolts for damage
A careful inspection of the flange, surrounding floor, and existing mounting bolts helps confirm a secure, leak-free reinstallation.
The flange should be intact, level, and free of cracks; the floor must be dry, rot-free, and structurally sound.
Bolts and washers require straightness, corrosion-free threads, and firm anchoring.
Replace any compromised components before proceeding to confirm a reliable seal and stable toilet mounting.
Removing an Old Toilet (if applicable)
Before unbolting, the water supply should be shut off and the tank bolts removed to prevent spills.
The bowl and tank are then lifted together and set aside on a protective surface.
Finally, the old wax ring and debris are scraped from the flange and surrounding floor to prepare for the new seal.
Disconnecting water supply and removing tank bolts
Shut off the toilet’s water at the shutoff valve and flush to drain the tank, then sponge or towel any remaining water from the bowl and tank to prevent spills.
Disconnect the supply line using an adjustable wrench, catching residual water.
Remove tank-to-bowl bolts by holding the interior nuts steady to avoid rotating the tank.
Keep hardware organized for reuse or replacement; inspect gaskets for wear.
Lifting and safely setting aside the toilet
Lift the toilet straight up using both hands at the bowl base to break the wax seal without rocking or twisting.
Once freed, tilt gently to clear bolts and lift over the floor flange.
Place the toilet on a tarp or cardboard, bowl downward to prevent tipping.
Pad edges with rags, keep bolts and caps together in a labeled bag, and move unit to a safe, stable storage spot.
Cleaning old wax and debris from the flange
Scrape away the hardened wax ring and loose debris from the flange using a putty knife or scraper, taking care not to gouge the flange surface or surrounding flooring.
Wear gloves and eye protection; dispose of residue in a sealed bag.
Clean remaining traces with a plastic scraper and a solvent-safe cleaner, then dry thoroughly.
Inspect flange for cracks, corrosion, or unevenness before installing a new wax ring.
Inspecting and Repairing the Flange and Floor
The flange and surrounding floor should be inspected for cracks, corrosion, and proper height relative to the finished floor to guarantee a watertight, secure seal.
Minor flange damage may be addressed with a replacement, a repair ring, or a flange extender, while extensive deterioration or rot under the subfloor requires more involved repairs.
If the flange or floor shows structural damage or the repair is beyond basic parts and tools, a professional should be consulted.
How to evaluate flange condition and height
A quick inspection of the toilet flange and surrounding floor establishes whether repairs are required and what type of flange height adjustment is necessary.
The inspector checks for cracks, corrosion, movement, and secure fastenings. Measure flange top relative to finished floor: flush, above, or recessed.
Verify subfloor integrity and rot. Note wax ring seating surface and any offset from drain centerline.
Repair options: replace flange, use flange repair ring, or extender
Several practical options exist for restoring a damaged or improperly positioned toilet flange: full replacement, installation of a repair ring, or fitting an extender/offset adapter.
Full replacement restores proper alignment and sealing when substrate is sound.
Repair rings patch cracked or broken flange sections.
Extenders raise or shift the flange for height or offset issues.
Choose based on damage extent, material, and toilet alignment.
When to call a professional (structural damage or hard-to-repair flange)
When repair rings, extenders, or full flange replacement cannot reliably restore a watertight, level connection to the waste pipe, a professional should be consulted.
Structural rot, compromised joists, sagging subfloor, or hidden sewer damage require a contractor or plumber with structural experience. They assess load-bearing issues, replace or sister joists, install proper subflooring, and guarantee correct flange alignment to prevent leaks and future failures.
Choosing the Correct Toilet Bolts and Wax Seal
Selecting the correct closet bolts—including proper length, diameter, and material such as brass or stainless steel—guarantees a secure flange-to-toilet connection.
The choice of wax ring or wax-free seal (with or without a sleeve) should match the toilet outlet and any offsets.
Finally, flange height must be compatible with the chosen seal type to prevent leaks and guarantee a proper compression fit.
Bolt types and sizes (closet bolts, brass vs. stainless)
A few key choices determine a secure toilet installation: bolt type, material, and matching wax seal profile.
Closet bolts come as L-shaped, round-head, or bolt-through kits; common lengths fit 1/4–3/8 inch flange holes.
Brass resists corrosion and deforms slightly for snug fit; stainless offers superior strength and rust resistance.
Choose washers and nuts to match thread size and material.
Wax ring choices and alternatives (wax with sleeve, wax-free seals)
After choosing bolts and matching washers, attention turns to the seal between toilet and flange: wax ring options and wax-free alternatives determine leak protection and alignment.
Traditional wax rings (with or without integrated plastic sleeve) compress to seal; sleeves aid inlet alignment.
Wax-free seals use rubber or foam gaskets offering reusability, forgiving installation, and less mess.
Selection depends on flange condition and installer preference.
Matching flange height to seal type
When the flange sits above or below the finished floor, flange height dictates which wax ring or wax-free seal will compress properly and whether longer or shorter bolts are required.
For flanges recessed below the floor, a thicker wax ring (or multi-ring wax with sleeve) or a wax-free gasket designed for gaps is necessary, while raised flanges often work with standard thin wax rings and shorter bolts.
Installers should measure flange-to-floor distance, select a seal matching that gap, and choose bolts long enough to secure the bowl without over-compressing the seal.
Step-by-Step Installation: Bolting a Toilet to the Floor
The installer first centers a new wax ring and places the bolts in the flange before lowering the bowl straight down onto those guides.
After seating the toilet, nuts are hand-tightened while checking that the bolts remain aligned.
Final work involves torquing the nuts evenly to prevent porcelain stress, trimming excess bolt length, and snapping on bolt caps.
Positioning the new wax ring and bolts on the flange
Carefully center the new wax ring over the flange so its tapered side faces the toilet outlet and the flat side rests against the flange; at the same time, align the closet bolts in the flange slots so they stand upright and parallel, providing firm guides for lowering the toilet.
Confirm bolt height suits the toilet base, replace broken bolts or flange spacers, and clear debris for a flush seal.
Setting the toilet bowl onto the flange correctly
Lower the toilet bowl straight down onto the flange, guiding it so the closet bolts pass through the mounting holes and the wax ring seats evenly under the outlet.
Apply steady, even pressure to compress the ring without rocking.
Confirm the bowl sits flush on the floor, aligned with the drain and bolts.
Pause to verify no lateral gaps or tilting before proceeding.
Hand-tightening nuts and checking bolt alignment
Position two nylon or brass nuts onto the exposed closet bolts and hand-tighten them alternately to draw the bowl down evenly.
Observe bolt alignment, ensuring both bolts remain vertical and centered in their slots.
Adjust the bowl slightly if bolts bind or the wax ring deforms.
Continue alternating hand-tightening until the bowl sits stable and flush with the floor, ready for final tightening.
Torquing bolts evenly to avoid cracking the porcelain
With the bowl now seated and the nuts hand-tightened alternately, final tightening must be done gradually and evenly to prevent stress on the porcelain.
Using a wrench, tighten each nut in small increments—quarter turns alternating sides—until snug.
Do not overtighten; stop at resistance and verify the bowl remains level.
Inspect for hairline cracks after torquing and adjust if any stress appears.
Installing bolt caps and trimming excess bolt length
After the nuts are snug and the bowl confirmed level, the installer caps the closet bolts and trims any protruding length for a finished look and to prevent snagging.
The process uses a sharp utility knife or bolt cutter to remove excess, then snaps on plastic caps or decorative covers.
Final inspection guarantees caps seat evenly and no sharp edges remain to catch clothing or cause injury.
Final Connections and Testing for Leaks
After the toilet is secured, the water supply is reconnected and the tank is refilled to its normal level.
The installation should be inspected for leaks at the base and along the supply line while the fill valve operates.
Finally, the fixture is checked for stability and any rocking corrected before full use.
Reconnecting water supply and refilling tank
Reconnect the water supply by aligning the fill valve inlet with the shutoff supply line and threading the supply nut onto the valve’s threaded shank by hand until snug.
Turn the shutoff valve open slowly, allowing the tank to fill.
Observe the fill valve operation, adjust the float for proper fill level, and cycle the flush to guarantee the fill mechanism refills correctly without overfilling.
Checking for leaks at the base and supply line
Carefully inspect the toilet base and supply line for any signs of water once the tank is full and the shutoff valve is open.
Look for drips, dampness, or puddling around the flange and supply connection.
Tighten nuts gently if minor seepage appears, then retest.
Monitor for several minutes to verify seals and fittings remain dry before concluding the job.
Verifying toilet stability and rocking correction
Confirm toilet stability by applying firm, even pressure near the bowl rim and checking for any rocking or movement.
If movement exists, tighten flange bolts incrementally; avoid over-torquing porcelain.
Remove the bowl and reset a compressed wax ring or install a flange repair/repair spacer as needed.
Use shims between base and floor, trim flush, and secure bolts.
Recheck stability and retest for leaks.
Common Problems and How to Fix Them
The section outlines frequent issues encountered after bolting a toilet—wobble after installation, persistent base leaks, stripped or broken bolts, and problems from a misaligned flange or uneven floor.
For each issue, it explains common causes and provides clear repair or replacement steps.
Practical tips cover diagnosis, appropriate materials, and when to call a professional.
Wobbling toilet after installation (causes and fixes)
Several factors can cause a newly installed toilet to wobble, and diagnosing the source quickly prevents leaks and further damage.
Common causes include uneven flooring, improper flange height, loose closet bolts, or missing shims.
Fixes: tighten bolts incrementally, install corrosion-resistant shims under the base, raise or replace the flange to sit flush, and guarantee a seated wax or rubber ring without overtightening.
Persistent leaks at the base (diagnosis and remedies)
A wobbling toilet often signals underlying issues that can also cause water to appear at the base; persistent leaks at the floor junction indicate a compromised seal, flange, or mounting.
Diagnose by checking for wax ring failure, cracked bowl, or flange misalignment.
Dry the area, run a controlled flush, inspect underneath if accessible, replace a damaged wax or flange, and reseat the bowl to restore a watertight joint.
Stripped or broken bolts (repair and replacement methods)
Loosened, stripped, or snapped closet bolts compromise a toilet’s secure mount and can lead to wobble, leaks, or damage to the flange and flooring; diagnosing the exact failure—corroded threads, rounded heads, or bolt studs sheared at the flange—determines whether repair, extraction, or full replacement is required.
Use a nut splitter or bolt extractor for rounded heads, heat plus vise grips for seized studs, and replace damaged anchors or install a flange repair ring when extraction fails.
Misaligned flange or uneven floor solutions
One common cause of a rocking or poorly sealed toilet is a misaligned flange or an uneven floor that prevents the base from sitting flush.
Diagnosing whether the flange sits too high, too low, or off-center guides the appropriate corrective method.
Solutions include shimming the base with composite shims, installing a flange extender or repair ring, or leveling subflooring and resetting the flange to guarantee a watertight seal.
Maintenance Tips for Long-Term Stability
Routine inspections of the toilet bolts, flange, and seal are recommended to catch loosening or leaks early, with a brief torque check every 6–12 months using the manufacturer’s recommended settings.
Wax rings and closet bolts should be replaced when persistent leaks, wobble, or corrosion appear, or during major repairs.
Careful tightening to specified torque values and using washers or torque-limiting tools helps prevent flange damage from over-tightening.
Periodic checks and torque recommendations
A wrench should be used to verify that the closet bolts remain snug at least twice a year and after any heavy use or shifting of the floor.
Torque values vary by bolt size and material; manufacturers’ recommendations should be followed, typically moderate hand-tightening plus a quarter turn.
Inspect for movement, corrosion, or loose nuts and document checks to maintain long-term stability and safety.
When to replace the wax ring or bolts
Check the wax ring and closet bolts whenever there are signs of leakage, toilet wobble, persistent odors, or after removing the toilet for repairs; replace the wax ring any time the toilet is lifted and reseated, and replace bolts if they show corrosion, stripped threads, or no longer secure the flange firmly to prevent future leaks and instability.
Routine inspection intervals depend on usage; replace components at first evidence of failure.
Preventing future damage from over-tightening
Prevent over-tightening by applying torque control and using proper hardware so the flange, bowl, and floor remain intact; excessive force can crack porcelain, warp flanges, strip threads, or compress wax seals, leading to leaks and costly repairs.
Use a torque-limited driver or calibrated wrench, tighten incrementally and evenly, replace corroded bolts, and inspect seals periodically to detect compression or deformation early.
Cost, Time, and When to Hire a Pro
Typical DIY bolting takes about 30–90 minutes and costs under $50 for hardware and basic tools, though replacing damaged flange or wax ring can raise expenses and time.
Persistent wobble, cracked flange, sewage odor, or recurring leaks indicate a professional plumber is needed. Homeowners should weigh their skill level and the potential for hidden damage before proceeding.
Typical DIY time and cost breakdown
A straightforward toilet bolting job usually takes an experienced DIYer 30–90 minutes and costs $10–$50 for supplies (wax ring, bolts, washers, and caulk). Time and cost vary by condition; extra repairs raise both. Labor savings depend on skill. Typical estimates:
| Item | Estimate |
|---|---|
| Supplies | $10–$50 |
| Time | 30–90 min |
| Minor repairs | $20–$100 |
| Replacement parts | $5–$60 |
Signs a professional plumber is needed
While many toilet-bolting jobs fit within the 30–90 minute, $10–$50 DIY window, certain signs indicate professional help is warranted.
Persistent leaks, damaged flange or flooring, corroded bolts, recurring wobble after reseating, sewer odor, water supply issues, or difficulty aligning bolts suggest complex repair.
If the homeowner lacks tools, time, or confidence, hiring a licensed plumber prevents costly mistakes and guarantees code compliance.
Quick Checklist Before Finishing
Before sealing and trimming, a final leak and stability checklist confirms the flange, bolts, and wax ring are secure and the toilet does not rock or drip under pressure.
The installer should operate the flush and inspect the water supply, tank fill, and floor for any signs of movement or moisture.
A small kit of spare bolts, caps, a replacement wax ring or gasket, and basic tools should be kept on hand after installation.
Final leak and stability checklist
Once the toilet is bolted and the seal cured, inspect for leaks and wobble systematically: visually check the flange area and water supply connection for moisture, press gently on the bowl in several directions to detect movement, listen for running water after shutting off the tank, and confirm bolts and caps are snug with no visible gaps at the base.
- Verify no dampness at flange or base.
- Guarantee bowl remains immobile.
- Recheck supply valve and tank for slow leaks.
Tools and spare parts to keep on hand after installation
A small, well-chosen kit of tools and spare parts guarantees quick fixes and prevents minor problems from becoming emergencies after the toilet is installed.
Include a crescent wrench, screwdriver, plunger, adjustable pliers, spare flange bolts and caps, closet bolts, wax ring or wax-free seal, tank-to-bowl gasket, extra supply-line washers, and a small tube of plumber’s silicone.
Store labeled in an accessible dry box.
Conclusion
Like a ship securely moored against a storm, a properly bolted toilet steadies the household against leaks and wobble. Following the outlined steps—inspection, flange repair, correct bolt placement, and careful sealing—ensures longevity and peace of mind. Attention to detail spares costly repairs and echoes the craftsmen’s maxim that small anchors yield great steadiness. When doubts persist, calling a professional preserves both function and the quiet dignity of a well-kept home.
