
How to Prevent Sediment in Water Heater: Simple Steps to Keep Your Tank Clean
To prevent sediment buildup in your water heater, regularly flushing the tank is essential. Homeowners should flush a few gallons monthly and conduct a complete tank flush annually, or quarterly if in areas with very hard water. Additionally, inspect and replace the anode rod every 1–3 years, install a sediment filter on the cold inlet, and opt for a brass drain valve to simplify flushing. Always follow safety precautions for gas or electric units, and refer to comprehensive maintenance guidelines for further steps.
Why Sediment Builds Up in Water Heaters
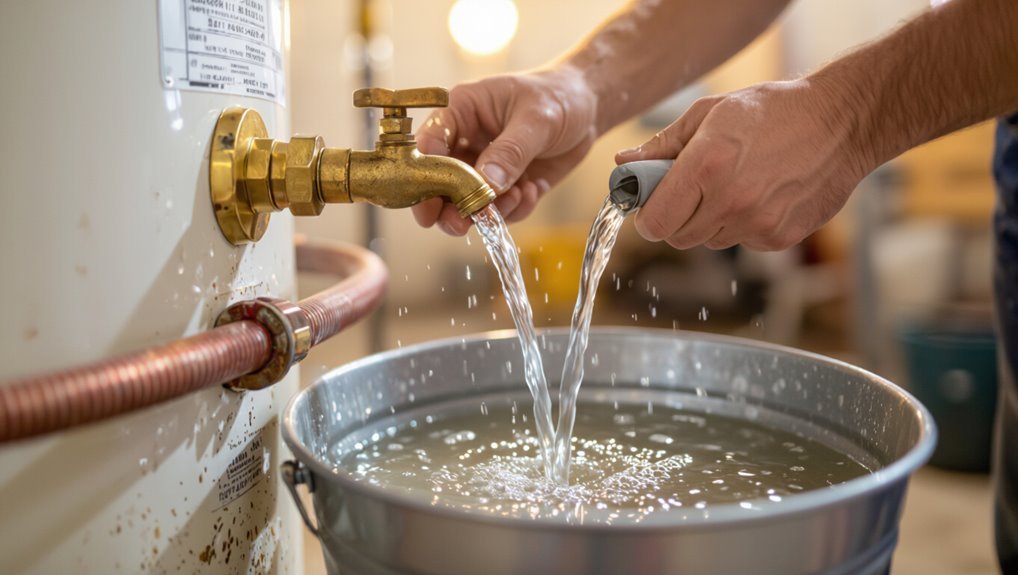
Mineral-rich and hard water gradually leave calcium and magnesium deposits that settle at the bottom of the tank.
Additional debris and contaminants can enter from municipal supply lines, corroding pipes, or household plumbing, accumulating alongside mineral scale.
This sediment reduces heating efficiency, causes noisy operation, and accelerates corrosion and element failure, shortening the heater’s lifespan.
How mineral content and hard water contribute to sediment
Hard water contains dissolved calcium and magnesium ions that precipitate when heated, forming fine particles that settle at the bottom of a water heater as sediment.
Mineral-rich supply increases scale formation and reduces heat transfer, accelerating tank corrosion and clogging drains.
Understanding this chemistry guides strategies on how to prevent sediment in water heater, such as water softening, routine flushing, and targeted maintenance.
Common sources of debris and contaminants
Because water sources and household systems introduce a variety of particulates, sediment accumulation in water heaters stems from more than just dissolved minerals.
Soil, rust from aging pipes, sand and silt entering through municipal or well supplies, and bits of corrosion or scale from plumbing fixtures all contribute.
Organic matter, debris from repairs, and particulate-treated water additives also settle in tanks over time.
How sediment affects heater performance and lifespan
Significant sediment accumulation in a water heater reduces heat-transfer efficiency and forces the unit to work harder and longer to reach set temperatures.
Sediment also promotes corrosion, clogs valves and drains, and causes uneven heating with cold spots.
These effects increase energy use, escalate repair needs, and shorten tank and component lifespan, making regular flushing and preventative maintenance essential.
Signs Your Water Heater Has Sediment
Sediment buildup in a water heater often announces itself through audible signs like rumbling or popping as pockets of water heat beneath the sediment.
Other indicators include reduced hot water capacity with longer recovery times, and discolored or gritty water coming from fixtures.
Persistent sediment can also raise energy bills and cause more frequent pilot or heating-element failures.
Noisy operation and rumbling sounds
Rumbling or popping sounds from a water heater often indicate that mineral buildup has accumulated on the tank bottom, trapping water beneath and causing localized boiling that produces noise.
These noises signal sediment layers disrupting heat transfer and creating steam pockets.
Routine flushing and sediment removal reduce loud operation, prevent overheating, and extend component life.
Prompt attention avoids escalating mechanical stress and potential failure.
Reduced hot water capacity and longer recovery times
Noticeably reduced hot water output and slower recovery times often indicate that mineral deposits have accumulated inside the tank, creating an insulating layer that lowers usable capacity and slows reheating.
Sediment reduces effective volume, forces burners or elements to work longer, and increases energy use.
Regular flushing and installing a sediment filter restore capacity, shorten recovery, and prevent premature wear on heating components.
Discolored or gritty hot water
When hot water runs brownish, cloudy, or leaves a sandy residue, it typically signals sediment buildup inside the water heater.
Discoloration and gritty particles indicate mineral accumulation detaching from the tank bottom or corroding components. This water may stain fixtures and laundry, clog aerators and showerheads, and deliver abrasive grit.
Prompt flushing or professional inspection prevents further contamination and protects plumbing and appliances.
Increased energy bills and frequent pilot or element failures
A sudden rise in energy bills or repeated pilot light outages and electric element failures often indicates sediment accumulation in the water heater tank.
Insulating mineral layers reduce heat transfer and force the system to run longer and harder. Trapped sediment can also coat or overheat components, causing premature malfunction and frequent resets or replacements.
Homeowners should monitor consumption, inspect burners and elements, and flush or schedule maintenance promptly.
Simple Routine Maintenance to Prevent Sediment
Routine maintenance focuses on a clear flushing procedure to remove settled particles from the tank.
Frequency recommendations vary with water hardness, from yearly in soft-water areas to several times a year where hardness is high.
The steps and precautions differ slightly for gas versus electric models, particularly when accessing the drain and protecting heating elements or burners.
Flushing the tank: step-by-step procedure
Begin by shutting off the heater’s power and closing the cold-water supply to prevent incoming water while draining.
Attach a hose to the drain valve, open a hot faucet to vent, then open the drain slowly.
Flush until clear, closing and reopening briefly to stir sediment if needed.
Close drain, remove hose, restore water, then restore power once tank refills.
Draining frequency: how often to flush based on water hardness
After flushing the tank, homeowners should establish a regular draining schedule tied to their water hardness.
In soft-water areas, annual flushing suffices.
Moderate-hardness areas benefit from biannual draining.
Hard-water locations require quarterly flushing or installation of a water softener.
Frequency should adjust after observing sediment during drains.
Maintain records and increase flushing if sediment reappears sooner than expected.
Sediment removal for gas vs. electric heaters
Although both gas and electric water heaters accumulate sediment, their removal procedures differ because of how each unit is heated and configured.
Gas units require caution around the burner and pilot assembly; draining and flushing via the drain valve while protecting the combustion area is essential.
Electric units need power shutoff and often element inspection or removal for thorough cleaning.
Both benefit from periodic flushing.
Tools and Materials Needed for Tank Cleaning
A concise list of tools and materials helps homeowners prepare for tank cleaning without unnecessary trips or delays.
Basic toolkit items include a wrench, hose, bucket, and gloves, while optional accessories such as a wet/dry vacuum, flushing wand, or specialty sediment filters can improve results.
Guidance should also note signs—stubborn buildup, leaks, or unfamiliar fittings—when calling a professional plumber is advisable.
Basic homeowner toolkit items
Basic, reliable tools and a few consumable materials make tank flushing safe and effective for most homeowners. A garden hose, adjustable wrench, flathead screwdriver, bucket, and pliers cover connections and drain tasks.
Consumables include towels, rubber gloves, and a garden hose washer. A flashlight and basic safety goggles help visibility and protection.
Keep tools organized and accessible before starting.
Optional accessories and specialty filters
Consider adding optional accessories and specialty filters to address persistent sediment, improve water quality, or simplify future maintenance.
Magnetic and sediment filters trap particles before entering the tank. Inline strainers, softeners, and whole-house filtration reduce buildup.
Hose-end vacuums and flushing kits make sediment removal easier. Pressure gauges and TDS meters monitor system performance, guiding timely cleaning and filter replacement.
When to call a professional plumber
When homeowners encounter signs of severe sediment buildup—such as rumbling noises, reduced hot water capacity, visible rust, or murky discharge—it may be time to consult a professional plumber rather than attempting tank cleaning alone.
A plumber assesses tank condition, checks anode rod and heating elements, safely drains and flushes heavy deposits, and advises on repairs or replacement to prevent recurrence and guarantee warranty compliance.
Installing and Maintaining Pre-Filtration Systems
A brief overview of pre-filtration options helps homeowners choose the right protection for their water heater, including sediment cartridge filters, water softeners, and magnetic conditioners.
Water softeners reduce mineral buildup by exchanging calcium and magnesium ions, which in turn lowers the rate of sediment formation in the tank.
Proper sizing and placement—installing point-of-entry filters sized for household flow and positioning sediment filters ahead of the heater—ensure ideal performance and longer heater life.
Types of pre-filters (sediment filters, water softeners, magnetic conditioners)
Pre-filtration choices determine how effectively particles and water chemistry are managed before water reaches a heater.
Sediment filters trap sand, rust, and debris via cartridge or pleated designs; choose micron ratings to match particulate size.
Water softeners exchange hardness ions to reduce scale precursors.
Magnetic conditioners claim to alter mineral behavior.
Selection depends on water analysis, flow requirements, maintenance capacity, and budget.
How a water softener reduces sediment formation
Installing a water softener ahead of a heater reduces sediment buildup by replacing calcium and magnesium ions with sodium or potassium. This prevents hard minerals from precipitating as scale and turning into abrasive particles.
This ion-exchange process yields dissolved, non-crystallizing minerals that pass through the tank, minimizing grit accumulation, lowering maintenance frequency, and protecting heating elements and piping from abrasive wear.
Additionally, it does so without altering overall water clarity or essential dissolved solids.
Sizing and placement of filters for optimal protection
Following softened water, attention shifts to mechanical filtration to capture remaining particulates before they reach the heater.
Filters should be sized for household flow rate and micron rating matched to sediment types.
Install a sediment pre-filter at main inlet, with a secondary finer cartridge near the heater.
Allow easy access for replacement, include isolation valves, and follow manufacturer pressure and flow specifications.
Preventive Upgrades and Replacement Parts
The next section addresses preventive upgrades and replacement parts that reduce sediment buildup and extend tank life.
It covers anode rod function, how and when to inspect or replace it, and recommends more durable dip tubes and high-flow drain valves.
Guidance will also note when corrosion or sediment damage makes full tank replacement the more practical choice.
Anode rods: function, inspection, and replacement
Inspecting and replacing anode rods is a simple, cost-effective way to prevent tank corrosion and reduce sediment buildup in water heaters. Anode rods attract corrosive elements, sacrificing themselves to protect the tank.
Periodic inspection—every 1–3 years—reveals excessive wear or depletion. Replace rods that are heavily corroded or less than half original diameter, using compatible materials and proper torque to guarantee longevity.
Recommended dip tube and drain valve upgrades
Upgrade dip tubes and drain valves to reduce sediment accumulation and extend water heater life.
Recommend replacing brittle plastic dip tubes with longer, reinforced models that direct incoming cold water to the tank bottom, minimizing mix and sediment buildup.
Install full-size, brass ball or flanged drain valves for reliable flushing and reduced clogging.
Choose corrosion-resistant materials and compatible fittings for easy maintenance.
When tank replacement is a better option
After considering dip tube and drain valve improvements, homeowners should also evaluate when replacing the entire water heater is the safer, more cost-effective choice.
Replacement is advisable for aging tanks with extensive corrosion, repeated sediment buildup despite maintenance, or persistent leaks.
New units offer improved insulation, sediment-resistant designs, and warranty protection.
A professional assessment balances upfront cost against long-term savings and reliability.
Troubleshooting Common Sediment-Related Problems
Troubleshooting sediment-related problems begins with identifying symptoms such as persistent rumbling after flushing, which often indicates trapped pockets of sediment or air and can require additional flushing or a professional inspection.
If hot water remains inadequate after maintenance, one of the first checks should be for partially closed valves, a failing heating element or burner, and remaining sediment in the tank.
Visible leaks or signs of corrosion near fittings and the tank bottom frequently point to long-term sediment buildup and may necessitate component replacement or tank removal.
Persistent rumbling after flushing: causes and fixes
Persistent rumbling after a flush signals that sediment remains in the tank or that trapped pockets of air and water continue to interact under heat.
Causes include compacted sediment layers, incomplete flushing, or loosened deposits settling again.
Fixes involve repeating controlled drains, using a garden hose to agitate deposits, inspecting and replacing a failing drain valve, and scheduling professional descaling if noise persists.
Inadequate hot water after maintenance: what to check
Why is hot water volume or temperature reduced immediately after maintenance?
Technicians should check airlocks, partially closed supply or outlet valves, and a misaligned dip tube.
Confirm thermostat settings and reset breakers or pilot if applicable.
Inspect for trapped cold water from incomplete flushing and verify sediment didn’t clog the outlet screen or heat exchanger.
Restore normal flow before further diagnostics.
Leaks and corrosion linked to sediment buildup
Sediment accumulation accelerates corrosion and can create pathways for leaks by trapping moisture against tank walls, abrading sacrificial anodes, and concentrating corrosive minerals at weak points.
Technicians should inspect areas around fittings, the drain valve, and the tank bottom for pitting, rust streaks, or mineral crusts that indicate sediment-related degradation.
Prompt flushing, replacing corroded anodes, and repairing compromised fittings prevent leaks and extend tank life.
Maintenance Schedule and Checklist
A clear maintenance schedule helps minimize sediment buildup and extends water heater life by assigning specific tasks at regular intervals.
The checklist below outlines monthly, quarterly, and annual actions, plus seasonal inspections and winterizing steps to prevent freeze-related damage. Following a concise routine reduces emergency repairs and preserves efficiency.
- Monthly: check pressure relief valve, inspect for leaks, and monitor temperature settings.
- Quarterly: flush a portion of tank, test anode rod condition, and clean inlet screens.
- Annual/seasonal: full tank flush, replace anode if needed, and winterize exposed pipes before cold weather.
Monthly, quarterly, and annual tasks
Regular inspections and scheduled maintenance—broken into monthly, quarterly, and annual tasks—keep a water heater functioning efficiently and minimize sediment buildup that reduces performance and shortens equipment life.
- Monthly: check pressure relief valve, inspect for leaks, drain a few gallons to remove loose sediment.
- Quarterly: test thermostat accuracy, clean inlet screen/filters.
- Annual: fully flush tank, inspect anode rod and replace if corroded.
Seasonal checks and winterizing tips
Following the monthly, quarterly, and annual checklist, seasonal checks and winterizing concentrate on steps timed to weather changes to prevent freezing damage and added sediment from intermittent use.
Inspect insulation, heat-trace tapes, and exposed pipes; drain and flush before prolonged vacancy; lower thermostat when appropriate; verify pressure relief valve operation; seal drafts around the tank; schedule a professional inspection pre-winter.
Cost and Time Estimates for Prevention vs. Repair
Cost and time comparisons help homeowners weigh routine maintenance against potential repairs. Typical DIY flush and anode replacement costs are low compared with professional service fees, while regular maintenance can yield measurable energy savings and a faster return on investment. The table below summarizes representative costs and time requirements for quick comparison.
| Item | Typical Range |
|---|---|
| DIY maintenance (parts + time) | $10–$100; 1–2 hours |
| Professional service (labor + parts) | $100–$400; 1–3 hours |
Typical DIY vs. professional service costs
One clear contrast for homeowners is the upfront expense and time commitment between DIY sediment prevention and hiring a professional: flushing a water heater and installing a simple inline sediment filter can often be completed in 30–90 minutes with basic tools and parts costing $10–75, whereas professional service calls for inspection, flush, and possible repairs typically run $150–500 and take 1–3 hours.
| Task | Typical cost/time |
|---|---|
| DIY flush | $10–30, 30–60 min |
| DIY filter install | $15–75, 30–90 min |
| Pro service | $150–500, 1–3 hr |
| Emergency repair | $200–800, variable |
Energy savings and ROI from regular maintenance
Efficiency gains from routine water heater maintenance translate directly into measurable energy and cost savings over time.
Regular flushing, anode replacement, and insulation reduce fuel consumption by up to 10–15%, lowering monthly bills.
Small preventive expenditures—tools, parts, or annual service—typically recoup within 1–3 years versus costly repairs or premature replacement.
ROI improves with consistent, documented maintenance.
Real-World Examples and Maintenance Scenarios
Two contrasting maintenance scenarios illustrate practical choices.
In a hard-water home, a recommended plan centers on a water softener, regular tank flushing, and occasional professional inspections.
For a rental property with limited access, low-maintenance options such as sacrificial anode checks, periodic flushes by property managers, and installing a sediment trap balance protection with minimal tenant intervention.
Scenario: hard-water home with high sediment recommended plan
In a hard-water household where mineral buildup accumulates rapidly, a recommended plan prioritizes preventive actions and scheduled maintenance to minimize sediment-related damage.
Implement a whole-house water softener, install a sediment pre-filter, flush the heater quarterly, and inspect the anode rod biannually.
Consider professional descaling annually and monitor pressure and temperature to detect early signs of clogging or corrosion.
Scenario: rental property with limited access low-maintenance options
Many rental-property owners and managers face restricted access to tenant-occupied units, so low-maintenance strategies that reduce sediment buildup without frequent entry are essential.
Options include installing magnetic or inline sediment filters at incoming lines, scheduling annual professional flushes during tenant turnover, fitting drain pans with accessible petcocks, and educating tenants on low-risk practices.
Prioritize durable, tamper-resistant equipment to minimize service calls.
Quick Do-It-Now Actions for Immediate Improvement
Quick, practical steps can yield immediate reductions in sediment buildup and help extend the heater’s life.
Before any action, basic safety checks—power/gas off and pressure relief verification—should be completed.
The following items outline simple, safe tasks to try right away:
- Flush a few gallons from the drain valve to clear loose sediment.
- Inspect and tighten fittings, and check the temperature/pressure relief valve for proper operation.
- Consider installing a sediment trap or screen on the cold-water inlet to catch particles.
Five simple steps to reduce sediment today
A few straightforward actions can considerably reduce sediment buildup in a water heater within minutes.
Drain a gallon or two from the tank to remove settled particles.
Flush the tank briefly until water runs clearer.
Install a sediment-catching inline filter or screen on incoming cold water.
- Drain a couple of gallons
- Briefly flush until clearer
- Add inline filter
Safety precautions before any maintenance task
After draining and flushing to reduce sediment, one should verify safety before any further maintenance.
The technician confirms power and gas are off, isolates the water supply, and relieves pressure by opening a hot tap.
Appropriate PPE—gloves, eye protection—is worn.
Adequate ventilation is guaranteed when working near gas fittings.
Tools are inspected, and a clear workspace is maintained.
Conclusion
Keeping sediment out of a water heater preserves efficiency, safety, and lifespan, and routine flushing, anode checks, and pre-filtration address the root causes. Homeowners who follow a simple schedule and keep basic tools on hand avoid costly repairs and downtime. Like sweeping crumbs under the rug only to find them later, neglect compounds problems; consistent, small efforts remove buildup before it becomes a major, expensive headache for the tank and household.
