How to Reset EcoSmart Tankless Water Heater: Step-by-Step Troubleshooting Guide
To reset your EcoSmart tankless water heater, simply unplug the unit or trip the circuit breaker for 30–60 seconds. This action restores power to the control board, clears transient fault codes, and restarts flow and temperature checks without changing your temperature settings. Before proceeding, ensure you cut off electrical and gas supplies, isolate the water supply, and wear appropriate personal protective equipment (PPE). For a factory reset, follow the specific steps for your model and check the LED indicators. If issues persist, inspect the sensors, filters, and wiring, or seek professional assistance. Further sections provide detailed diagnostics and preventive measures.
What “Reset” Means for an EcoSmart Tankless Water Heater
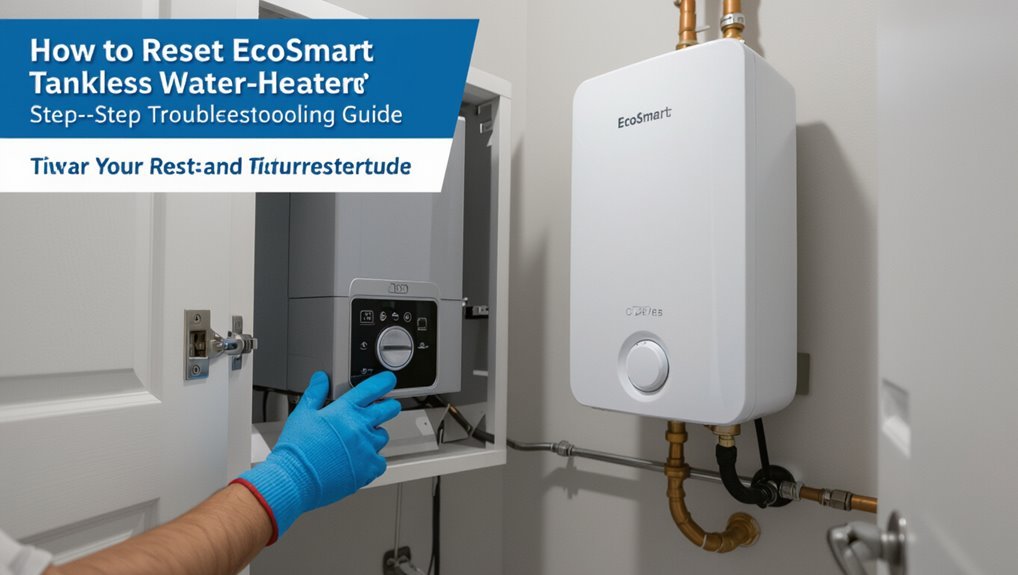
The reset function on EcoSmart tankless heaters interrupts power to the unit’s control board and clears certain fault codes, allowing the system to reboot and resume normal operation.
It is typically used after transient errors, power surges, or when the unit detects flow or temperature anomalies that temporary conditions caused.
Persistent faults or hardware failures, however, require diagnostic steps beyond a simple reset.
How the reset function works on EcoSmart models
Understanding the reset function clarifies how an EcoSmart tankless water heater clears fault conditions and restores normal operation: it forces the unit’s control board to restart, erases transient error codes, and reinitializes sensor and relay states without altering user-set temperature settings.
The process triggers firmware reruns, rechecks flow and temperature inputs, and returns the heater to standby.
Instructions for how to reset ecosmart tankless water heater vary by model.
Situations that commonly require a reset
When should a reset be attempted on an EcoSmart tankless water heater? A reset is appropriate after power interruptions, error codes that persist post-diagnosis, freezing or overheating events, and prolonged maintenance tasks (descaling, filter replacement).
It may also resolve intermittent flow or ignition failures. If problems recur after reset, professional inspection or contacting EcoSmart support is advised.
Safety Precautions Before Resetting
Before attempting a reset, the technician should first shut off electrical power and close the gas supply to the unit to eliminate ignition and shock risks.
Next, water supply isolation and a pressure check verify the system is not pressurized or leaking.
The technician should wear appropriate PPE—gloves and eye protection—and follow basic lockout/tagout procedures.
Power and gas shut-off steps
Turn off the EcoSmart unit’s electrical supply at the breaker panel and close the gas shut-off valve to isolate all energy sources.
Verify the breaker is labeled and switched to OFF. Confirm the gas valve is perpendicular to the pipe.
Wait several minutes for capacitors to discharge.
Use a non-contact voltage tester at the unit to guarantee no live electrical presence before proceeding with any inspection or reset.
Water supply and pressure checks
Several simple checks of the water supply and pressure confirm the EcoSmart unit can be safely reset without causing damage or scalding.
Verify main water valve is fully open, inspect inlet filter for debris, and confirm visible supply lines are intact.
Measure static and running pressure with a gauge; ascertain pressure falls within manufacturer specifications to prevent flow or ignition faults during reset.
Personal protective measures
Having confirmed water supply integrity and pressure, attention shifts to personal protective measures to reduce injury risk during a reset.
The technician dons insulated gloves, safety goggles, and non-slip footwear.
Verify power and gas switches are off; use a voltage tester to confirm.
Keep a fire extinguisher nearby and clear the work area of obstructions.
Avoid wet conditions and work with a partner when possible.
Quick Reset: One-Minute Method
For plug-in EcoSmart models, a quick power cycle involves unplugging the unit, waiting sixty seconds, and reconnecting to restore normal function.
For hardwired units, the one-minute method requires switching the appropriate circuit breaker off, waiting sixty seconds, then switching it back on.
Expected immediate indicators of a successful reset include the unit powering up, display lights returning to normal, and hot water flow resuming.
Step-by-step power cycle for plug-in models
Begin by unplugging the EcoSmart plug-in model from its power outlet to fully interrupt electrical supply.
Wait 30–60 seconds to clear residual charge, inspect cord and plug for damage, then reconnect firmly.
If unit fails to restart, consult error codes or the manual before further action.
- Wait 30–60 seconds for capacitors to discharge
- Check power cord and outlet
- Reconnect securely
- Verify unit powers on and heats normally
Step-by-step breaker reset for hardwired units
To perform a quick breaker reset on a hardwired EcoSmart tankless unit, switch off the dedicated circuit breaker to cut power. Wait about 60 seconds to allow capacitors to discharge, then restore the breaker and observe the unit for normal restart behavior.
- Confirm breaker labeling and isolation before switching.
- Use a non-contact voltage tester for safety.
- Avoid toggling other nearby breakers.
- Record any error codes shown after reset.
Expected immediate results and indicators
After restoring power and allowing the unit a full minute to stabilize, the EcoSmart tankless heater should attempt an automatic restart and display a brief sequence of LED or digital indicators confirming normal operation.
The water should warm within seconds of flow, error codes should clear, and any fan or relay sounds should stop.
Persistent faults or no heat indicate further diagnostics or professional service is required.
Full Factory Reset Procedure
The section outlines which EcoSmart models include a factory-reset option and how to verify the model number for compatibility.
It then provides clear, step-by-step instructions to perform a full factory reset on supported units.
Finally, it explains how to restore temperature settings and other preferences after the reset is complete.
Models that support factory reset and model identification
Identifying which EcoSmart tankless models permit a factory reset is essential before attempting any recovery steps, since reset capability and procedures vary by series and control interface.
EcoSmart i-series and some EL models commonly include factory reset options; older or basic units may not.
Users should check the model number on the unit label, consult the manual, or contact EcoSmart support for confirmation.
Step-by-step factory reset instructions
With the model confirmed, proceed to the factory reset steps appropriate for that series; procedures differ between i‑series touch controls and simpler EL units, so following the correct sequence prevents misconfiguration.
Disconnect power, wait one minute, reconnect and enter the reset code or press and hold the designated buttons per manual.
Verify LED or display confirms reset, then power cycle once more.
- Locate model-specific reset sequence
- Follow exact button timing
- Confirm reset confirmation on display
- Avoid altering other settings before reset
Reconfiguring temperature and settings after factory reset
After completing a full factory reset, the installer or homeowner must promptly restore temperature settings and user preferences to guarantee safe, efficient operation.
Verify model-specific default limits, set desired outlet temperature within recommended range, enable anti-scald or ECO modes if applicable, and reconfigure flow and remote controls.
Confirm error-free startup, run hot-water tests at multiple fixtures, and document settings for future reference.
Troubleshooting Before and After Reset
Before performing a reset, a technician should record any displayed error codes and note the state of LED indicators for reference.
If a reset does not clear the issue, the next steps include consulting the code chart, checking wiring and water/gas supply, and considering service.
Clear interpretation of diagnostic lights and LEDs helps distinguish transient faults from failures that require parts replacement.
Error codes to note before resetting
Noting specific error codes prior to attempting a reset helps pinpoint underlying issues and prevents unnecessary cycling. The technician records codes visible on the display, compares them to the manual, and prioritizes safety-related alarms. Common codes indicate flow faults, overheating, or electrical issues; documenting them guides targeted fixes and avoids repeated resets.
| Code | Likely cause |
|---|---|
| E1 | Flow fault |
| E2 | Overheat |
What to do if the reset doesn’t clear the error
If a reset fails to clear the error, the technician should proceed with a structured troubleshooting sequence to isolate the root cause rather than repeatedly cycling power.
Inspect inlet/outlet plumbing for obstructions or airlocks, verify supply voltage and breaker integrity, test flow sensor and temperature sensors for continuity, check wiring connections and ground, consult manufacturer documentation, and replace faulty components or contact certified support if diagnostics remain inconclusive.
How to interpret LED indicators and diagnostic lights
After confirming that a reset did not clear the fault and basic mechanical and electrical checks have been performed, the technician should analyze the unit’s LED indicators and diagnostic lights to narrow the problem.
Consult the manufacturer chart: steady green means normal, flashing codes indicate specific faults (overheat, ignition, flow, sensor).
Record blink patterns, count flashes, note color, then cross-reference manual for targeted repair steps.
Common Causes of Persistent Problems
Persistent issues after a reset often stem from mineral scale accumulation inside the unit, which requires regular descaling to restore heat transfer efficiency.
Faulty electrical supply or wiring, as well as a clogged inlet filter, malfunctioning flow sensor, or low water pressure, can prevent normal operation despite resetting.
Additionally, attempting to exceed the heater’s capacity through simultaneous high-demand fixtures can produce recurring temperature or flow problems.
Scale buildup and descaling recommendations
Scale buildup in EcoSmart tankless water heaters occurs when dissolved minerals—primarily calcium and magnesium—precipitate and adhere to heat exchanger surfaces, reducing heat transfer efficiency and triggering error codes or flow restrictions.
Regular descaling using a vinegar or diluted citric acid solution and a pump-assisted flush prevents deposits.
Follow manufacturer intervals, monitor inlet water hardness, install a water softener or scale inhibitor where hardness is high.
Electrical supply and wiring issues
Mineral buildup can be resolved with routine descaling, but many recurring EcoSmart faults originate from electrical supply and wiring problems that mimic thermal or flow-related failures.
Inspect breakers, connections, and wire insulation for looseness, corrosion, or overheating.
Verify correct voltage and dedicated circuit sizing per manufacturer specifications.
Faulty ground, neutral issues, or intermittent contact can cause resets, error codes, or unit failure requiring licensed electrical repair.
Flow sensor, inlet filter, and water pressure problems
Check the flow sensor, inlet filter, and incoming water pressure when unexplained shutdowns or erratic temperature occur, since these hydraulic elements commonly produce faults that mimic electrical or thermostat failures.
Inspect and clean the inlet screen, clear debris, and verify flow rate meets unit minimum. Test pressure at the inlet for drops or fluctuations.
Replace a faulty flow sensor to restore reliable operation.
Overloading and capacity-related issues
After inspecting hydraulic components, attention should turn to the unit’s capacity and loading patterns. Many recurring shutdowns and temperature swings stem from demand exceeding the heater’s design.
The installer or owner should verify simultaneous flow rates, compare them to the model’s GPM rating, stagger high-demand appliances, and consider upgrading to a higher-capacity unit or adding parallel units if sustained loads surpass rated performance.
Preventive Maintenance to Reduce Future Resets
A regular maintenance routine can minimize the need for future resets by addressing scale buildup and clogged filters.
Recommended tasks include following a yearly flushing and descaling procedure and checking the inlet filter at specified replacement intervals.
Clear schedules and brief how-to steps help owners keep the EcoSmart unit operating reliably.
Recommended maintenance schedule
Because regular upkeep prevents many common failures, a clear maintenance schedule helps minimize resets and prolongs the EcoSmart tankless water heater’s reliable operation.
Establish quarterly visual inspections, annual professional checkups, monthly filter and inlet screen checks, and replace sacrificial anode or parts per manufacturer intervals.
Follow usage and water-hardness adjustments to adapt frequency.
- Quarterly visual inspection
- Monthly filter/screen check
- Annual professional service
- Adjust schedule for water hardness
Flushing and descaling procedure overview
Perform regular flushing and descaling to remove mineral buildup that reduces efficiency and triggers overheating or flow-rate faults.
The procedure involves isolating water and power, connecting hoses to service ports, circulating a vinegar or manufacturer-recommended descaling solution through the heat exchanger, then flushing with clean water.
Inspect for scale, repeat if needed, and restore normal connections.
Schedule based on local water hardness and usage.
Filter cleaning and replacement intervals
Regular inspection and timely cleaning or replacement of the inlet and internal filters prevents debris and sediment from restricting flow, reducing heat exchanger stress and lowering the likelihood of resets.
Manufacturers typically recommend inspecting filters every three months, cleaning as needed, and replacing annually or sooner in hard-water or high-sediment areas.
Keep replacement parts on hand and document service dates for consistent preventive maintenance.
When to Call a Professional
Persistent error codes, no heat output, or visible damage to heating elements or the control board indicate a technician is needed.
Warranty status and contacting EcoSmart support should be checked before any repair to avoid voiding coverage.
To speed diagnosis, provide the model and serial number, recent error codes, a brief history of symptoms, and clear photos of the unit and any damaged components.
Signs of heating element or control board failure
Electrical faults and erratic behavior often indicate a failing heating element or control board in an EcoSmart tankless water heater.
Signs include intermittent heating, sudden temperature drops, error codes persisting after resets, unusual buzzing or burning smells, visible scorch marks, or tripped breakers tied to the unit.
If multiple symptoms appear simultaneously, cease use and contact a qualified technician for diagnostic testing and component replacement.
Warranty considerations and contacting EcoSmart support
When signs of heating element or control board failure appear, owners should consider warranty status and professional support before attempting further troubleshooting.
Verify model, purchase date, and warranty terms; avoid self-repair if coverage applies.
Contact EcoSmart support with serial and symptom summary to confirm authorized service options.
If out of warranty, request technician referral and estimate before authorizing repairs to prevent unnecessary costs.
What information and photos to provide to a technician
What specific details will a technician need to diagnose an EcoSmart tankless heater? Provide concise system data, observed symptoms, and troubleshooting already performed. Include clear photos and timestamps to speed diagnosis.
- Model and serial number label
- Error codes displayed on unit or app
- Photos of plumbing, electrical connections, venting
- Description of recent maintenance, resets, or power outages
Useful Tools, Parts, and Accessories
A list of recommended tools and consumables can streamline troubleshooting and resets.
Essential items include a multimeter for electrical checks, a pressure gauge for system diagnostics, and a descaling kit to prevent mineral buildup.
Common replacement parts to have on hand are inlet/outlet filters, flow sensors, and heating element components.
Multimeter, pressure gauge, and descaling kit recommendations
Essential tools for troubleshooting and maintenance include a reliable digital multimeter, a pressure gauge compatible with domestic plumbing, and a descaling kit sized for tankless systems.
Recommended specs: true RMS multimeter, 0–100 PSI gauge, citric-acid descaler, and inline pump for flushes. Proper tools reduce diagnostic time and prolong unit life.
- Digital multimeter (true RMS)
- 0–100 PSI pressure gauge
- Citric acid descaling kit
- Inline flushing pump
Replacement parts commonly required for repairs
After gathering the recommended diagnostic and flushing tools, attention shifts to the replacement parts most commonly needed for EcoSmart tankless repairs.
Common items include inlet and outlet filters, flow sensors, heating element cartridges, temperature control modules, pressure relief valves, O-rings and seals, and replaceable thermistors.
Stocking OEM-spec parts guarantees compatibility, reliability, and simplified troubleshooting during resets and maintenance.
Model-Specific Notes and Quick Reference
The section highlights key differences between popular EcoSmart models that affect reset steps and required safety checks.
It provides a concise, model-specific checklist for on-site technicians to follow during troubleshooting and reset.
Technicians are encouraged to consult the checklist before and after performing resets to guarantee proper procedure and documentation.
Differences between popular EcoSmart models regarding reset procedures
Model-specific differences determine how an EcoSmart tankless water heater is reset, with variations in control interfaces, diagnostic lights, and internal breaker or reset buttons across popular models such as the ECO 11, ECO 18, ECO 27, and ECO 36. Technicians should reference model labels for exact steps; common themes include power-cycle, button reset, and indicator-guided diagnosis.
| Model | Reset feature |
|---|---|
| ECO 11 | Internal breaker |
| ECO 18 | External switch |
| ECO 27 | Diagnostic LED |
| ECO 36 | Digital panel |
Quick reference checklist for on-site technicians
Begin each service call with a concise checklist that maps the specific EcoSmart model on-site to its reset method and visible indicators.
The technician confirms model number, checks power and error LEDs, notes temperature setting, and logs previous resets. Use this quick reference to speed diagnosis and guarantee consistent repairs:
- Model-specific reset location and procedure
- LED/error code interpretation
- Required tools and safety checks
- Post-reset verification steps
Conclusion
Like a lighthouse keeper tending a stubborn lamp, the homeowner resets the EcoSmart tankless unit—briefly extinguishing error signals to restore steady warmth. The ritual, whether a quick nudge or a full factory rebirth, mirrors mending a weathered compass: simple care steers clear of storms, while deeper faults demand an expert’s hand. In this way, timely maintenance and cautious troubleshooting keep the household’s quiet beacon burning reliably through cold nights.