How to Stop Water Dripping Into Washing Machine: Quick Fixes and Long-Term Solutions
If you’re dealing with water dripping into your washing machine, the issue often originates from worn inlet hoses, loose clamps, faulty fill valves, or damaged door seals. To address this, first, turn off the water supply, dry the area, and run a short cycle to identify when and where the leak occurs. For quick fixes, consider tightening hoses, replacing washers, or using overflow containers. For a long-term solution, you may need to replace inlet valves, seals, or hoses and inspect nearby plumbing. This guide provides detailed repair steps, prevention tips, and advice on when to call a professional.
Why water might be dripping into a washing machine
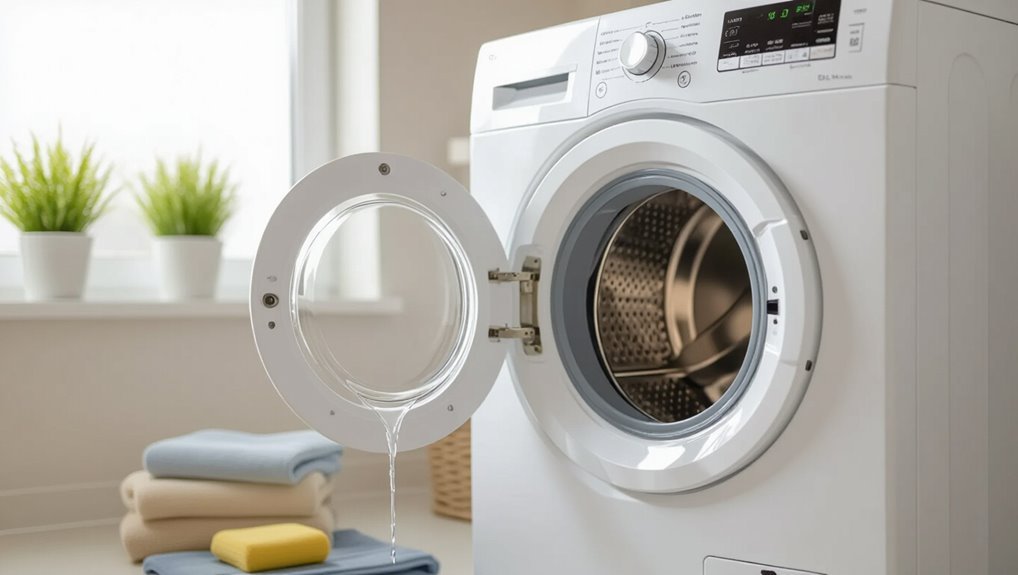
Common causes of water entering a washing machine include worn inlet hoses, faulty valves, or leaks from nearby plumbing and fixtures.
Identifying whether the drip originates inside the machine or from an external source typically requires inspecting hoses, connections, and the surrounding area during and between cycles.
Left unaddressed, persistent dripping can cause electrical hazards, mold growth, and structural damage to flooring and cabinetry.
Common sources of incoming water leaks
Several parts and connections can allow incoming water to drip into a washing machine, each producing distinct leak patterns and causes.
Common sources include worn inlet hoses, loose hose clamps, damaged fill valves, faulty water-level or pressure switches, cracked supply fittings, and corroded connectors.
Inspecting and replacing these components addresses how to stop water dripping into washing machine efficiently and prevents recurrent seepage.
How to determine whether the drip is internal or external
After checking external supply lines and fittings for worn hoses, loose clamps, or corroded connectors, the next step is to determine whether the observed dripping is entering the machine from outside sources or originating inside the cabinet.
Inspect the door seal, detergent drawer, and outer tub during a dry cycle; place paper towels to locate drip points.
Run a short fill and note where water first appears.
Safety and damage risks of untreated dripping
If left unaddressed, water dripping into a washing machine can quickly lead to hidden hazards and escalating damage: persistent moisture promotes mold and mildew growth that degrades seals and fabrics, corrodes metal components, and creates slippery floors that increase fall risk.
Electrical parts exposed to moisture can short circuit, posing fire and shock dangers, while continuous leaks may warp cabinetry and subflooring, leading to costly structural repairs.
Moldy odors foul laundry and indoor air quality, insulation and floor joists can rot, and untreated corrosion shortens appliance lifespan, raising replacement costs and safety liabilities.
Quick diagnostic checklist to locate the drip
A concise checklist helps identify where water is entering the machine before repairs begin.
It lists basic tools and materials for inspection, guides visual checks of hoses, valves, door seals and the detergent drawer, and describes running a short test cycle to reproduce and observe the leak.
The following steps enable systematic detection and faster fixes.
Tools and materials needed for inspection
Several basic tools and a few consumables make locating a washing machine drip faster and more reliable. A flashlight, small mirror, towel, bucket, and adjustable wrench are essential.
Add pliers, screwdriver set, and a flashlight with spare batteries.
Consumables: paper towels, leak-detection dye or food coloring, and disposable gloves.
A clipboard and pen help note findings and timestamps.
Step-by-step visual checks (hoses, valves, door seals, detergent drawer)
Begin by visually tracing the machine’s external plumbing and access points to spot obvious wetness, residue, or deterioration.
Inspect inlet and drain hoses for cracks, bulges, loose clamps or seepage.
Check water valves and connections for drips.
Examine door seals and gasket folds for tears, trapped debris or mildew.
Remove and inspect the detergent drawer for overflow marks, blockages or hardened residue.
How to run a test cycle to recreate and observe the drip
Start a short, controlled wash to reproduce the leak while minimizing water and time.
Observe the machine during fill, wash and drain phases with a flashlight and towel. Note drip timing, location and volume.
Pause cycle if safe to inspect seals, hoses and detergent drawer.
Record findings, photograph evidence, and compare to previous checks to pinpoint source before repairs or technician consultation.
Immediate temporary fixes to stop dripping
If a drip is found, start with simple temporary measures that can immediately reduce or stop water entry.
These include tightening or re-seating inlet hoses and clamps, shutting off inlet valves and placing an overflow container, and applying quick fixes to door seals, the detergent drawer, or the drain hose such as cleaning, silicone tape, or sealant patches.
These steps are meant as short-term remedies until a permanent repair or professional service can be arranged.
Tightening and re-seating water hoses and clamps
Tightening and re-seating the water hoses and clamps often stops small leaks quickly by restoring a secure connection at the washer’s inlet valves.
A technician or homeowner should disconnect power, inspect hose ends for cracks, straighten fittings, and snug clamps or replace worn ones.
After reattachment, run a short fill cycle to verify no drips. Replace hoses if deterioration persists.
Shutting off inlet valves and using overflow protection
Turn off the washing machine’s water supply at the inlet valves to immediately stop incoming drips and prevent further flooding; this quick action isolates the appliance so a temporary fix can be implemented or a repair scheduled.
After shutting valves, place a bucket beneath connections and attach an overflow tray or absorbent mat to catch residual leaks.
Monitor until a plumber arrives or parts are replaced.
Temporary door/seal fixes (cleaning, silicone tape, sealant patches)
Inspecting the door seal and surrounding area is the first practical step in stopping water that seeps from the machine’s front. Removing visible soap scum, lint, and mildew can restore a proper seal and often halts minor drips.
For persistent leaks, apply silicone tape or temporary sealant patches to gaps. Press firmly, let cure per instructions, and retest; these are short-term measures until permanent repair.
Quick detergent drawer and drain hose adjustments
After addressing the door seal, attention should shift to two other common sources of leaks: the detergent drawer and the drain hose.
The drawer should be removed, cleaned, checked for cracked channels, and reseated; damaged trays can be temporarily taped.
Inspect the drain hose for kinks, loose clamps, or split sections. Reseure with a new clamp or hose clip, and reposition to guarantee proper gradient.
Permanent repairs and replacements
Permanent solutions focus on replacing worn or faulty components rather than temporary patches.
Common tasks include swapping inlet hoses and washers, repairing or replacing the water inlet valve, renewing the door gasket and seal, and fixing the detergent drawer and internal siphon parts.
If leaks originate from the drum or tub, a qualified technician should be called to assess and repair or replace those internal components.
Replacing inlet hoses and hose washers
Begin by shutting off the water supply and unplugging the machine to guarantee safety; then disconnect the inlet hoses from both the wall valves and the washer, taking care to catch any residual water.
Inspect hoses for cracks, bulges, or mineral buildup and replace if damaged.
Replace rubber washers at both ends, hand-tighten connections, then test for leaks by restoring water and power.
Fixing or replacing the water inlet valve
Diagnose whether the inlet valve is leaking or failing to close by observing water flow when the washer is idle and listening for continuous trickling.
A faulty valve often causes persistent drips even after hoses and washers are replaced.
If confirmed, unplug the machine, shut off water, remove the valve assembly, inspect screens and solenoids, and replace the valve with a matching OEM part to restore reliable shutoff.
Repairing or replacing door gasket and seal
Repairing or replacing a washing machine door gasket and seal restores a watertight barrier that prevents leaks and protects internal components from water damage.
Inspect for tears, mold, or deformation; clean thoroughly. Small tears may be patched temporarily, but replacement guarantees reliability.
Match model-specific parts, follow manufacturer instructions, and verify proper seating and clamp tension to prevent recurrence and maintain appliance safety.
Repairing detergent drawer and internal siphon components
After addressing the door gasket and seal, attention should turn to the detergent drawer and internal siphon assembly, common sources of leaks when clogged, cracked, or improperly seated.
Remove the drawer, clean residue from compartments and siphon channels, inspect seals and clips for damage, replace cracked parts or worn seals, and reseat securely.
Test with a short cycle to confirm leak resolution.
Addressing internal drum or tub leaks (when to call a technician)
When leaks persist despite fixing door seals, hoses, and the detergent drawer, the problem may originate from the inner drum, tub, or bearings—locations that typically require permanent repairs or part replacement and usually call for a trained technician due to complex disassembly, specialized tools, and potential warranty considerations.
A technician will diagnose cracks, corroded tub seams, or bearing failures, recommend replacement parts, and guarantee safe, warranty-compliant repair.
Step-by-step guide for replacing a common leak source (example: inlet valve)
A step-by-step guide for replacing a leaky inlet valve begins with clear safety preparations: disconnect power, shut off the water supply, and clear a well-lit workspace.
It then lists the exact parts and compatible replacements with sourcing tips.
Following this, it includes disassembly steps and checkpoints to verify progress.
The sequence emphasizes checking seals and connections at each stage to guarantee a durable repair.
Finally, it concludes with reassembly and a systematic leak-testing procedure.
Safety preparations (power, water shutoff, workspace)
Before any repair begins, the technician should cut power to the washing machine, shut off both hot and cold water supplies, and clear the surrounding area to create a safe, well-lit workspace; these steps minimize electrical shock, flooding, and tripping hazards while replacing the inlet valve.
They should also disconnect the appliance, place towels or a tray to catch residual water, and wear gloves and eye protection.
Parts required and how to source compatible replacements
With power and water isolated and the area prepared, the technician can identify the parts needed to replace a leaking inlet valve and where to obtain them.
Required items include a model-specific inlet valve assembly, inlet hoses, new hose washers, mounting screws, and electrical connectors.
Sourcing: OEM parts from manufacturer or authorized dealers, verified by model number; reputable appliance parts retailers and online marketplaces with clear compatibility listings.
Disassembly steps with checkpoints
One clear sequence of disassembly steps guarantees the inlet valve can be removed safely and efficiently:
Power is isolated and water supply turned off. Hoses and clamps are documented, then detached.
Access panel removed and fasteners loosened. Electrical connectors are labeled and disconnected.
Valve mounting screws are removed and valve freed.
Checkpoints: confirm isolation, parts inventory, and no hidden fasteners before extraction.
Reassembly and leak-testing procedure
Begin reassembly by verifying the work area is dry, tools and replacement parts are organized, and the incoming water supply remains shut off and power isolated.
Install the inlet valve securely, reconnect hoses with new washers, and tighten fittings to specified torque.
Restore power briefly to run a controlled fill, inspect all joints for drips, then shut off, recheck fasteners, and confirm leak-free operation during full cycle.
When to call a professional versus DIY
If the leak involves wiring, motor components, or internal seals, it is generally beyond typical DIY skills and warrants professional attention.
Homeowners should weigh estimated repair costs and timeframes against replacement or service call fees before deciding.
Ask potential technicians about licensing, diagnosis fees, warranty on repairs, and an itemized estimate upfront.
Signs the problem is beyond DIY (electrical involvement, internal seals)
When visible leaks are accompanied by electrical symptoms — flickering lights, tripped breakers, burning smells, or the washer failing to power on — or when water appears to be escaping from internal seals, bearings, or components inaccessible without disassembly, the issue has likely moved beyond routine homeowner fixes and requires a trained technician.
Moisture near control boards, corroded wiring, hidden drum leaks, and damaged door boots warrant professional diagnosis and repair.
Estimated repair costs and timeframes
Costs and timeframes for washing machine leak repairs vary widely based on the fault: simple hose or clamp replacements can cost $20–$100 in parts and be completed in 20–45 minutes, pump or valve repairs typically run $80–$250 and take 1–2 hours, while drum, tub seal, or electronic control board work often demands $300–$800+ and several hours to a full day including diagnostics.
| Issue | Typical time/cost |
|---|---|
| Hoses/clamps | 20–45 min / $20–$100 |
| Pump/valve | 1–2 hrs / $80–$250 |
| Seals/board | Several hrs–full day / $300–$800+ |
Questions to ask a repair technician before hiring
After reviewing likely repair times and price ranges, homeowners should prepare a concise set of questions to determine whether a job is suitable for a DIY attempt or requires a professional.
Ask about technician credentials, diagnostic fees, estimated work duration, parts warranty, and hourly versus flat rates.
Request references or reviews, confirm insurance and licensing, and clarify expected guarantees and follow-up service.
Preventive maintenance to avoid future dripping
A simple preventive maintenance routine can greatly reduce the risk of future dripping by scheduling regular inspections of hoses, seals, and fittings for wear or leaks.
Ensuring correct installation and monitoring household water pressure help prevent stress on connections that can lead to drips.
Using appropriate detergents in the correct amounts also minimizes internal residue buildup that can cause blockages and overflow issues.
Regular inspection schedule for hoses, seals, and fittings
Establishes a concise inspection schedule to catch wear or loosening before leaks start.
Monthly visual checks of hoses, clamps, and seals are recommended; tactilely test for soft spots, cracks, or stiffness.
Every six months, tighten fittings and replace any degraded rubber or corroded connectors.
Record findings and dates.
Prompt replacement of suspect components prevents seepage and prolongs appliance reliability without requiring technical intervention.
Proper installation tips and water pressure considerations
Check that supply hoses, fittings, and the machine itself are installed squarely and securely, with inlet hoses tightened to manufacturer torque specifications and supported to prevent strain.
Confirm correct hose lengths, use braided or reinforced lines, and fit new washers where recommended.
Verify household water pressure (typically 20–80 psi) and install a pressure regulator or shock absorber if pressure spikes or surges risk damaging valves.
Best detergents and usage practices to prevent internal blockages
When using detergents and additives that match the machine’s type and local water hardness, buildup in hoses, valves, and dispensers is minimized and the risk of internal blockages that lead to dripping is reduced.
Regularly dose per manufacturer guidance, avoid excess liquid or powdered detergent, run periodic hot or descaling cycles, clean dispensers and filters, and use fabric-conditioner sparingly to maintain unobstructed water paths.
Troubleshooting uncommon causes
The guide now examines less obvious reasons for water appearing in or around a washing machine.
It explains how to tell condensation from an actual leak, identifies hidden household plumbing problems that can mimic machine failures, and outlines seasonal effects such as freezing or hard water that can cause or worsen dripping.
Practical checks and simple tests are suggested to distinguish and address these uncommon causes.
Condensation versus leak differentiation
Several small droplets inside or around a washing machine can stem from either simple condensation or an actual leak, and distinguishing between the two is essential for effective troubleshooting.
Condensation forms from humid air on cold surfaces, often after cycles and without pooled water.
Leaks yield steady drips, wet patches, or increasing puddles.
Inspect seals, hoses, pump area, and run short tests to identify the source.
Hidden household plumbing issues that mimic machine leaks
A homeowner distinguishing condensation from a direct appliance leak should also consider less obvious plumbing faults that mimic washing machine drips.
Slow sink or tub drains, loose drain traps, hidden supply line pinholes, and faulty shutoff valves can allow water to travel along floors or through joists, appearing as machine-originating drips.
Inspect adjacent fixtures, crawlspaces, and wall cavities for migrated moisture and staining.
Seasonal factors (freezing, hard water) and their effects
How can seasonal conditions cause water to appear to drip from a washing machine?
Cold weather can freeze external hoses or internal drain lines, causing ice blockages that later thaw and drip.
Hard water mineral buildup restricts valves and seals, leading to weeping once pressure changes.
Regular winterizing, insulating pipes, and descaling fittings reduce freeze-related leaks and mineral-induced seepage.
Checklist: What to do immediately after stopping a drip
Once the drip is stopped, the area and affected machine parts should be thoroughly dried and sanitized to prevent mold growth.
The repair should be documented and the appliance monitored for any reoccurrence to confirm the fix holds.
If leaks persist or repairs become frequent, consideration should be given to replacing the machine rather than continuing repairs.
Drying, sanitizing, and preventing mold
Begin by removing standing water and drying all accessible surfaces to halt moisture-driven mold growth.
Use towels, a wet/dry vacuum, and fans; open doors for ventilation.
Sanitize affected areas with a diluted bleach solution or EPA-registered cleaner, following product instructions.
Inspect seals, gaskets, and drain pans; replace damaged materials.
Apply mold-resistant paint or sealant on cured surfaces to prevent recurrence.
Monitoring for reoccurrence and documenting the repair
After the leak has been stopped, the next priority is systematic monitoring and thorough documentation to confirm the repair’s durability and to provide a clear record for future reference.
Inspect the area daily for several cycles, note dates, observed issues, and interventions.
Photograph fittings and affected areas, record part numbers and receipts, and log follow-up checks to establish timelines and support warranty or service claims.
When to replace the machine versus ongoing repairs
With daily inspections and documentation completed, the next consideration is whether continued repairs are practical or if replacement is warranted.
Consider age, repair frequency, cost-benefit, and safety to decide.
- Compare cumulative repair costs to replacement price.
- Note machine age and remaining lifespan.
- Assess safety risks (electrical, leaks).
- Prioritize reliability and warranty status.
Conclusion
In the end, the washing machine—stage left of domestic melodrama—sips no more unwanted rain. Homeowners, armed with wrenches and ironic calm, plug leaks like tiny diplomats negotiating peace with rubber seals and new valves. Temporary tapes and heroic towels bow out as durable parts step in. If pipes remain inscrutable, a plumber arrives like an oracle. The laundry resumes its quiet loop, socks spinning in oblivious, sudsy bliss.