How to Fix a Water Heater Pipe Leak: Step-by-Step Repair Guide for Homeowners
If you’ve discovered a leak in your water heater pipes, act quickly: first, shut off the water supply and power or gas to the heater. Contain any escaping water and evaluate the leak’s location and severity. Common repair methods include tightening or replacing compression fittings, soldering or replacing corroded copper joints, and swapping out flexible supply lines or a malfunctioning temperature and pressure (T&P) valve. After making repairs, gradually restore the water supply and check for any drips. Simple fixes can often be done yourself at minimal cost, but for complex issues or gas-related problems, it’s best to consult a professional. Follow these steps for effective leak repair.
What to Do Immediately When You Find a Water Heater Pipe Leak
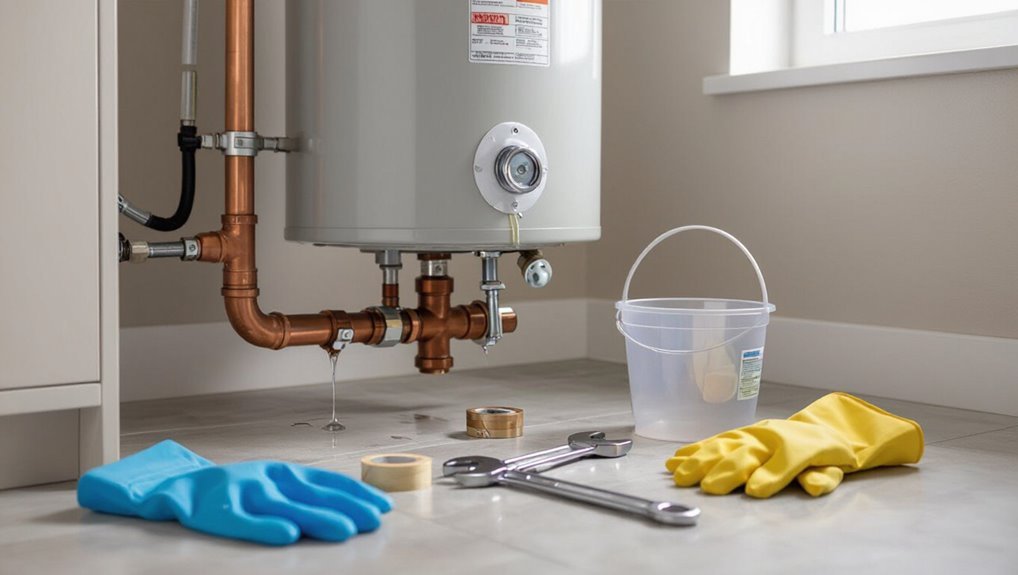
Upon discovering a water heater pipe leak, the first actions are to shut off the cold-water supply to the tank and cut power or gas to the unit to prevent further flow and hazards.
Next, contain escaping water with towels, buckets, and by directing drains to minimize property damage.
If the leak is large, cannot be stopped, or involves gas, contact an emergency plumber immediately.
How to shut off the water supply safely
When a water heater pipe begins to leak, the immediate priority is to stop the flow of water to prevent damage and flooding.
Locate the water shutoff valve on the heater’s cold-water inlet and turn it clockwise until fully closed. If unavailable, shut the home’s main water valve.
Drain excess water via a nearby faucet.
These steps are essential for how to fix water heater pipe leak.
How to turn off power or gas to the water heater
Cut power or gas to the water heater immediately to eliminate electrical shock and combustion risks.
For electric units, switch off the dedicated breaker at the main panel and label it.
For gas models, turn the gas control valve to “OFF” or rotate the shutoff knob perpendicular to the pipe; if uncertain, shut the house gas main and call a professional before proceeding.
Containing water and minimizing damage (drains, towels, bucket placement)
Act quickly to limit water spread and protect surrounding areas.
Place buckets beneath leaks, position towels to absorb drips, and route water toward a floor drain or sump.
Elevate valuables and electronics.
Use mops to push water into drains and wring towels into buckets frequently.
Monitor overflow and replace soaked towels to prevent mold.
Continue until leak is contained or further action is taken.
When to call an emergency plumber
A sudden leak from a water heater pipe that cannot be contained with towels and buckets calls for immediate professional help.
If water reaches electrical components, gas connections, or threatens structural elements, evacuate the area and shut off power and fuel if safe.
Persistent leaks, rising water levels, or visible corrosion also warrant an emergency plumber to prevent flooding, fire, or carbon monoxide hazards.
Quick assessment: Identifying the type and source of the leak
A quick visual inspection helps pinpoint common leak locations on the heater—pipe fittings, valves, tank seams, and connection points—so the source can be identified.
The assessor should note whether water is dripping, spraying, or pooling to gauge severity and repair urgency.
They must also scan for corrosion, the smell of gas, or exposed electrical hazards before proceeding.
Visual inspection: common leak locations on a water heater
When inspecting a water heater, begin with a focused visual sweep to locate obvious wet spots, corroded fittings, or mineral buildup that indicate leak origins.
Check around inlet and outlet pipe joints, temperature/pressure relief valve area, drain valve, and condensation on tank body.
Look for rust at seams, damp insulation, or pooling on the floor.
Note streaks tracing downward from sources.
Determining whether the leak is from pipe fittings, valves, tank, or connections
How can one quickly tell whether the leak originates from pipe fittings, a valve, the tank, or a connection?
Inspect wet areas: dripping at threaded joints indicates fittings; steady seepage beneath a temperature/pressure relief or drain valve suggests valve failure; rust, bulging, or weeping directly from cylinder metal points to the tank; moisture at hose ends or unions signals loose or corroded connections.
How to check leak severity and estimate repair urgency
With the source narrowed—fittings, valve, tank, or connection—the next step is a rapid assessment of leak severity to set repair priority.
Inspect drip rate, pooling, and water pressure impact. Distinguish hairline seep, steady drip, or active spray.
Note nearby damage risk and heating interruption. Assign urgency: monitor, repair soon, or immediate shutdown and professional help if uncontrolled or tank-compromised.
Safety checks for corrosion, gas smell, or electrical hazards
Because leaks can signal more than a simple plumbing fault, a quick safety scan should check for corrosion, the scent of gas, and electrical hazards before any repair attempts.
Inspect pipes and fittings for rust, pitting, or flaking.
Smell for gas; if present, evacuate and call the gas company.
Look for wet electrical components, tripped breakers, or burning odors; shut power if needed.
Tools and materials needed for common pipe leak repairs
The following list outlines the basic tools, safety gear, and common replacement materials useful for most water heater pipe repairs.
It also notes the typical connection methods and when each is appropriate. This prepares the reader to choose the right parts and techniques for a given leak.
- Adjustable wrench, pipe cutter, soldering torch, tubing brush, safety goggles and gloves
- Replacement pipe sections (copper, CPVC, or PEX) and matching fittings
- Thread sealants: Teflon tape and pipe dope for threaded connections
- Use compression fittings for temporary or non-soldered joins on rigid pipe
- Use soldering for permanent copper joints and PEX fittings for flexible, quick repairs
Hand tools and safety gear
Gathering the right hand tools and safety gear guarantees plumbing repairs proceed efficiently and without unnecessary risk.
Essential hand tools include adjustable wrenches, pipe wrenches, basin wrench, slip-joint pliers, tubing cutters, deburring tool, and a propane torch for soldered joints.
Safety gear: safety glasses, heat-resistant gloves, flame-retardant work gloves, respirator for soldering, and a fire extinguisher nearby.
Replacement parts and materials (pipe, fittings, Teflon tape, pipe dope, sealants)
Stock the correct replacement parts and materials before beginning repairs to minimize downtime and prevent repeat leaks.
Common items include matching pipe sections (copper, CPVC, or PEX), appropriate fittings, and proper connectors.
Use plumber’s Teflon tape for threaded joints, compatible pipe dope where specified, and approved sealants for joints and threads.
Carry spare nuts, washers, and clamps.
When to use compression fittings, threaded fittings, soldering, or PEX connections
When deciding between compression fittings, threaded joints, soldering, or PEX connections, match the method to the pipe material, pressure requirements, accessibility, and local code.
Compression suits copper or soft metal for accessible, temporary repairs.
Threaded fittings work for iron or galvanized pipes under high pressure.
Soldering gives durable copper joins but needs skill and heat.
PEX offers flexible, quick connections with crimp or push-fit fittings.
Step-by-step repairs for different leak types
The following section provides clear, step-by-step procedures for common leak types encountered on water heaters.
It covers repairing threaded pipe connections, compression fittings, sweat/soldered copper joints, flexible supply lines and braided connectors, and leaks at the temperature-and-pressure (T&P) relief valve.
Each repair lists required actions, safety checks, and when to replace components or call a professional.
Repairing a leaking threaded pipe connection
Start by isolating the threaded connection and draining any residual water to reveal the exact source of the leak—threads, joint face, or adjoining fittings.
Then determine whether the leak is caused by loose threads, damaged sealing material, or cross-threading.
Tighten with proper wrenching; if persistent, disassemble, clean threads, inspect for damage, apply PTFE tape or pipe dope, reassemble squarely, and test under pressure.
Repairing a leaking compression fitting
Isolate the section and relieve pressure before addressing a leaking compression fitting to guarantee a dry, safe work area and to reveal whether the leak originates from a loose nut, a deformed ferrule, or a damaged pipe end.
Tighten the compression nut slightly; if leaking persists, disassemble, inspect and replace the ferrule and nut, deburr or cut back tubing, then reassemble and test under pressure.
Repairing a leaking sweat/soldered copper joint
When a sweat (soldered) copper joint leaks, determine whether the failure stems from a pinhole in the tubing, a cracked fitting, poor solder coverage, or separation at the joint; each cause requires a different repair approach involving cleaning, reflowing or replacing components, and pressure testing.
Cut out damaged section, clean with emery cloth and flux, reflow solder or replace fitting, cool, test under pressure, and inspect for weeps.
Repairing leaks on flexible supply lines and braided connectors
Addressing leaks in flexible supply lines and braided connectors requires identifying the leak type—end fitting failure, hose body breach, or loose connection—because each demands a different repair method.
For loose fittings, tighten or replace the compression nut; for failed end fittings or visible hose damage, shut off water, drain, and replace the flexible line; always verify connections and test for leaks.
Repairing leaks at the temperature and pressure (T&P) relief valve
Several common causes produce leaks at the temperature-and-pressure (T&P) relief valve: a failing valve seat, excessive system pressure or temperature, mineral buildup, or a loose connection.
The valve should be inspected, drained, and tested; replace if it fails to seat or leaks continuously.
Tighten or re-seat fittings, flush mineral deposits, and verify system pressure and thermostat settings.
Use a correctly rated replacement.
Temporary fixes for emergency stops (pipe clamp, epoxy putty, rubber and hose clamp) and limitations
Stop the leak quickly with temporary measures designed to buy time until a permanent repair can be made.
A pipe clamp, epoxy putty, or rubber patch secured with a hose clamp can sever active drips.
These solutions suit emergencies but are short-term: pressure limits, heat exposure, and corrosion reduce effectiveness.
Schedule a certified plumber for durable replacement to avoid failure or safety hazards.
Replacing sections of pipe or fittings
Decisions to replace versus repair hinge on the extent of corrosion, recurring leaks, and code or safety concerns.
The process can include cutting out and soldering a damaged copper section, installing or swapping in a PEX supply line with proper crimp fittings, and replacing isolation valves or inlet/outlet fittings as needed.
Clear steps, correct tools, and adherence to local plumbing codes guarantee a reliable, long-lasting repair.
When to replace vs. repair
When is a leak best fixed with a new section of pipe rather than a simple patch?
Replacement is recommended for extensive corrosion, multiple pinhole leaks, compromised fittings, or recurring leaks after patches.
Choose replacement when the damaged area is long, inaccessible for reliable sealing, or when water pressure and safety demand durable repair.
Minor surface flaws may still accept patches.
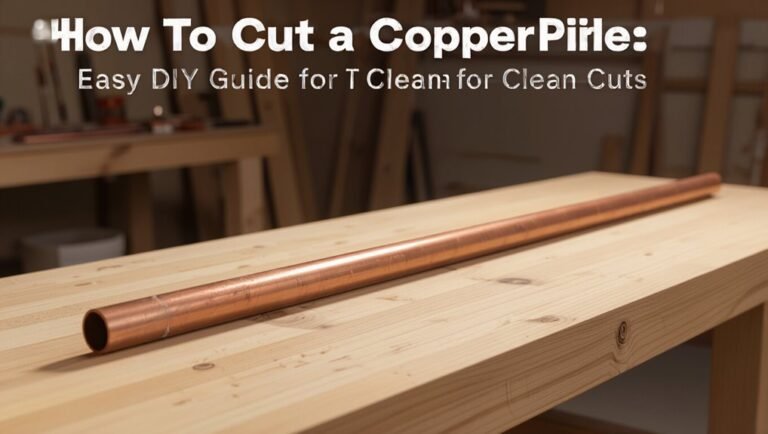
How to cut out and replace a damaged section of copper pipe
Begin by shutting off the water supply and draining the pipe to prevent residual flow; then isolate the damaged section and clear enough surrounding space to work safely.
Measure and mark cut points beyond corrosion. Use a tubing cutter for clean cuts, deburr and clean ends.
Fit a new copper section with compression fittings or sweat joints, solder or tighten per method, then pressure-test for leaks.
How to install or replace a PEX line to the heater
Install a PEX line to the water heater by first shutting off the water and draining the tank.
Then, remove the damaged section or old fittings and prepare the existing copper or CPVC stub-outs for a secure PEX connection.
Measure and cut PEX to fit, deburr ends, and choose compatible fittings (crimp, clamp, or push-fit).
Secure connections, test with pressurized water, and inspect for leaks.
Replacing isolation valves and inlet/outlet fittings
Replace isolation valves and inlet/outlet fittings by first isolating and depressurizing the water heater.
Then, drain enough water to access the connections safely.
Remove corroded valves or fittings and clean mating surfaces.
Measure and select compatible replacements (brass, sweat, or compression).
Install new fittings with proper seals, flux, or PTFE tape.
Refill, pressurize, and test for leaks before restoring service.
Testing and finishing the repair
After replacing pipes or fittings, the water supply is slowly restored while closely inspecting joints and fittings for any signs of leakage.
Any trapped air is bled from the lines and the tank is flushed to remove debris before restoring power or gas and confirming the heater reaches normal operating temperature.
Finally, periodic checks over the following weeks are recommended to catch slow leaks and guarantee a lasting repair.
How to slowly restore water and check for leaks
Begin by slowly reintroducing water to the repaired section: open the main supply valve or the isolated shutoff a quarter turn, then pause and watch the joint for any signs of weeping.
Gradually open further in small increments, inspecting fittings, threads, and soldered areas.
After full pressure returns, check again for drips and dampness around insulation, mounting brackets, and nearby surfaces before restoring normal use.
Bleeding air and flushing the water heater after repair
With water pressure restored and the repaired joint confirmed dry, air trapped in the system must be removed and the heater flushed to clear debris and prevent sputtering or damage.
Open nearby hot taps one at a time until steady flow with no sputtering occurs.
Flush the tank via the drain valve briefly to remove sediment, then close valves and guarantee all supply fittings are tight and dry.
Restoring power/gas and verifying heater operation
Restore power or relight the gas pilot according to the manufacturer’s instructions, then observe the heater through a full heat cycle to confirm normal operation.
Check for proper ignition, steady burner flame or heating element activation, and expected temperature rise at fixtures.
Inspect repaired joints for any new dampness.
Verify pressure relief valve behavior and listen for abnormal noises before declaring the repair complete.
Long-term leak monitoring recommendations
After confirming the heater operates correctly and repaired joints show no immediate dampness, attention shifts to monitoring the repair over time to guarantee lasting integrity.
Periodic inspections—24 hours, one week, one month—should check for moisture, corrosion, or thermal stress. Note any changes, tighten fittings if needed, and record observations.
Install a drip pan and moisture alarm for early detection and schedule annual professional inspections.
Common causes of water heater pipe leaks and how to prevent them
Common causes of water heater pipe leaks can be grouped into a few predictable categories that point to specific prevention measures.
Addressing these causes early reduces the risk of sudden failure and costly water damage.
Typical issues include:
- Corrosion and age-related failures
- High pressure and thermal expansion issues
- Poor installation or incorrect materials
- Freezing and environmental causes
- Lack of regular maintenance
Corrosion and age-related failures
Many water heater pipe leaks stem from long-term corrosion and age-related wear, which gradually thin metal, weaken joints, and compromise fittings.
Mineral buildup, electrochemical corrosion, and deteriorating solder or compression fittings create pinhole leaks or joint failures.
Regular inspections, timely replacement of aged piping and sacrificial anode maintenance reduce risks.
Promptly addressing visible rust or damp spots prevents escalating damage and costly replacements.
High pressure and thermal expansion issues
Excessive water pressure and unchecked thermal expansion place repeated stress on a water heater’s piping and fittings, causing seams to leak, relief valves to discharge, or joints to loosen over time.
Regular pressure checks, installation of an expansion tank, and a properly set pressure-reducing valve mitigate these stresses.
Routine inspection of relief valves and piping connections prevents progressive damage and sudden failures.
Poor installation or incorrect materials
Poorly executed installations and the use of inappropriate materials frequently lead to persistent leaks around a water heater’s pipes and connections.
Improper fittings, incompatible metals causing galvanic corrosion, loose joints, and inadequate sealant or thread tape accelerate failure.
Preventive measures include correct pipe sizing, approved materials, proper joint techniques, and post-installation pressure testing.
Regular inspections catch installation-related issues before they worsen.
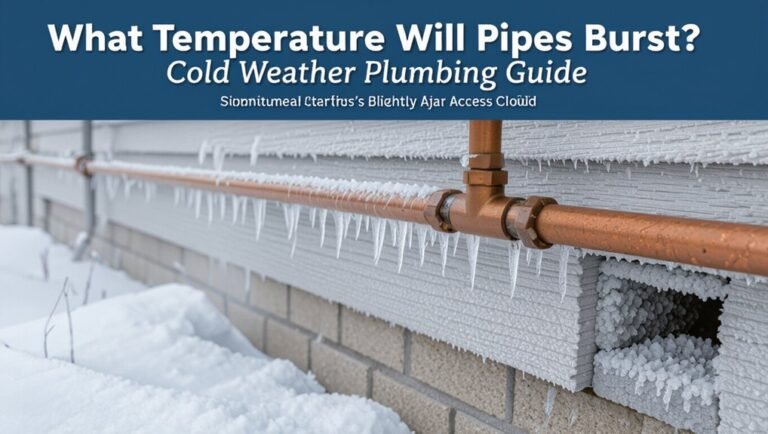
Freezing and environmental causes
When exposed to freezing temperatures or harsh environmental conditions, water heater piping can crack, joint seals can fail, and insulation can degrade, all of which lead to leaks and reduced system reliability.
Homeowners should insulate exposed pipes, apply heat tape in cold zones, maintain adequate ventilation to prevent condensation, and protect outdoor components from UV and moisture to minimize corrosion and freeze damage.
Troubleshooting persistent or recurring leaks
When leaks continue despite basic repairs, the next step is systematic troubleshooting to locate slow or hidden sources such as pinhole corrosion, fittings, or condensation.
Persistent dampness around the tank itself may signal internal failure and the need to contemplate full replacement rather than patching.
Any signs involving the gas line, extensive corrosion, or electrical faults warrant immediate professional inspection.
Diagnosing hidden or slow leaks
How can a homeowner tell if a water heater leak is hidden or slow?
Inspect for unexplained wetness, puddles, or dampness around the tank, fittings, and nearby floors or walls.
Check the pressure relief valve, drain pan, and supply lines.
Monitor the water meter with all fixtures off for movement.
Note mineral deposits, rust, or gradual drops in tank water level.
When a tank leak indicates replacement is necessary
If leaks persist despite repairs or originate from the tank itself rather than fittings, replacement should be considered.
Continuous seepage, spreading rust, bulging or visible cracks signal structural failure. Temporary fixes will recur and risk water damage.
Evaluate age, cost of repeated repairs, and warranty status; when corrosion compromises the tank wall or leaks are multiple and diffuse, install a new water heater.
Signs that require professional inspection (gas line issues, major corrosion, electrical faults)
Persistent or recurring leaks that resist standard fixes or accompany visible tank failure warrant a professional inspection for underlying hazards such as gas-line damage, extensive corrosion, or electrical faults.
Immediate evaluation is needed when there is gas odor, hissing near fittings, heavy rust flaking, bulging metal, repeated shorted breakers, or arcing sounds.
Technicians assess safety, prevent explosions, and recommend repair or replacement.
Cost estimates and deciding whether to DIY or hire a pro
When evaluating whether to tackle a water heater pipe leak personally or hire a professional, cost, time, required skill, and warranty implications should be weighed. Typical DIY parts and tools are often cheaper upfront, while professional service carries higher labor costs but may include guarantees. The table below summarizes common cost and decision factors to guide the choice.
| Item | DIY Estimate | Pro Service Range |
|---|---|---|
| Parts & materials | $20–$150 | Included/+$50–$200 parts |
| Labor/time | 1–4 hours | 1–3 hours on-site (plus scheduling) |
| Skill/warranty | Basic plumbing skills; no warranty | Licensed tech; service warranty |
Typical DIY repair costs vs. professional service ranges
Repair costs for a leaking water heater pipe vary widely depending on the leak’s location, severity, and whether parts or a full unit replacement are required.
Typical DIY fixes (sealant, replacement fittings, basic tools) often run $20–$150.
Professional service ranges from $150 for minor repairs to $800+ for complex jobs or panel replacements.
Compare cost, confidence, and potential for hidden damage.
Time, skill level, and warranty considerations
Evaluating whether to tackle a leaking water heater pipe involves balancing time, skill level, and warranty implications.
Homeowners should assess required tools, plumbing experience, and estimated repair time versus professional scheduling.
DIY saves labor costs but risks improper repair, code violations, or voiding warranties.
When warranty coverage, complex fittings, or safety concerns exist, hiring a licensed plumber is the prudent choice.
Maintenance checklist to extend water heater and piping lifespan
A concise maintenance checklist helps preserve a water heater and its piping while reducing the risk of leaks and costly replacements.
Key actions include routine checks, tank care, pressure control, and targeted upgrades:
- Regular inspection schedule
- Flushing the tank and testing the T&P valve
- Installing an expansion tank and pressure regulator
- Recommendations for materials and upgrades to prevent future leaks
- Prompt repair of minor corrosion or loose fittings
Following these steps on a set schedule keeps performance reliable and extends service life.
Regular inspection schedule
When scheduled consistently, a concise inspection checklist helps identify corrosion, leaks, and pressure issues before they cause failures.
It should specify monthly visual checks, quarterly valve and connection tests, and an annual thorough assessment by a qualified technician to extend the service life of the water heater and piping.
Record findings, note trends, tighten loose fittings, replace worn components, and schedule professional service when deterioration appears.
Flushing the tank and testing the T&P valve
Flush the water heater annually and test the temperature-and-pressure (T&P) relief valve to prevent sediment buildup and guarantee safe overpressure discharge.
Drain until clear, close the drain, then refill.
Lift the T&P valve lever briefly to confirm water and proper reseating; replace if it leaks or sticks.
Document dates and observations for ongoing maintenance and warranty records.
Installing an expansion tank and pressure regulator
Install an expansion tank and a pressure regulator to control thermal expansion and incoming supply pressure that together protect the water heater, relief valves, and household plumbing from excessive stress.
Mount the expansion tank near the heater on the cold inlet, using a shutoff and union for service.
Set the regulator to recommended psi, check for leaks, and test system pressure after installation.
Recommendations for materials and upgrades to prevent future leaks
Consider upgrading to corrosion-resistant materials and adding preventive components to reduce leak risk and extend service life; prioritize dielectric unions, brass or stainless-steel fittings, and PEX or copper piping upstream and downstream of the heater.
Recommend installing a temperature/pressure relief valve with periodic testing, sacrificial anode replacement, insulating pipe sleeves, accessible isolation valves, and routine visual inspections to catch corrosion or wear early.
When to replace the water heater instead of repairing pipes
When recurring pipe leaks coincide with an aging water heater, replacement often makes more sense than repeated repairs due to decreased reliability and efficiency.
Evaluating expected energy savings from modern, higher-efficiency models and available technology upgrades helps determine long-term value.
A clear replacement plan should include budgeting, selecting an appropriately sized unit, and steps to safely decommission and dispose of the old heater.
Age, efficiency, and recurring repair indicators
If a water heater is over a decade old, shows declining efficiency, or needs frequent pipe repairs, replacement often becomes the more practical and cost-effective option than continued patchwork.
Recurrent leaks, corrosion on fittings, sediment buildup reducing output, and rising utility bills indicate systemic wear. When repair frequency and costs approach replacement estimates, prioritize installing a new unit to restore reliability and avoid further disruptions.
Energy savings and new technology considerations
How much can a new water heater reduce operating costs compared with repeated pipe repairs?
A modern, high-efficiency model—especially tankless or heat-pump units—lowers energy use and standby losses, cutting bills noticeably versus older, leaky systems.
Upgrading also reduces maintenance frequency and unplanned repair costs.
Calculate payback by comparing installation expense, expected fuel savings, and projected repair avoidance over useful life.
How to plan for replacement and safely decommission the old unit
Following consideration of energy savings and maintenance trade-offs, homeowners should establish clear criteria for replacing a water heater rather than repeatedly repairing leaking pipes.
Planning includes evaluating age, repair frequency, efficiency, safety, and cost.
Key steps:
- Verify unit age and corrosion.
- Compare repair vs replacement costs.
- Inspect safety features.
- Schedule professional removal.
- Arrange responsible disposal and permits.
Conclusion
In the end, the leaky water heater pipe that once threatened to flood the house now seems like a tiny, defeated dragon—slain with a wrench, a patch, and stubborn optimism. Homeowners who follow sensible assessment, timely fixes, and routine maintenance will feel invincible—until the next drip reminds them plumbing really is alive. Still, with the right tools and judgement, most leaks bend to repair rather than replacement, saving money and peace of mind.