
How to Repair a Soil Pipe: Step-by-Step DIY Guide for Leaks, Cracks, and Blockages
To effectively repair a soil pipe, start by identifying the issue—leaks, cracks, or blockages—through inspection and flow tests. Basic fixes include using rubber patches, hose clamps, solvent-welded PVC couplers, or resin sleeves for clay pipes. For more serious damage, consider replacing sections, using mechanical sleeves for cast iron, or rerouting the pipe with camera inspection. Always prioritize safety, wear appropriate PPE, and ensure compliance with local codes. While temporary fixes can help, ongoing issues should be addressed by a licensed plumber. Detailed procedures for each repair method are provided below.
Overview of Soil Pipe Repair: When to DIY and When to Call a Professional
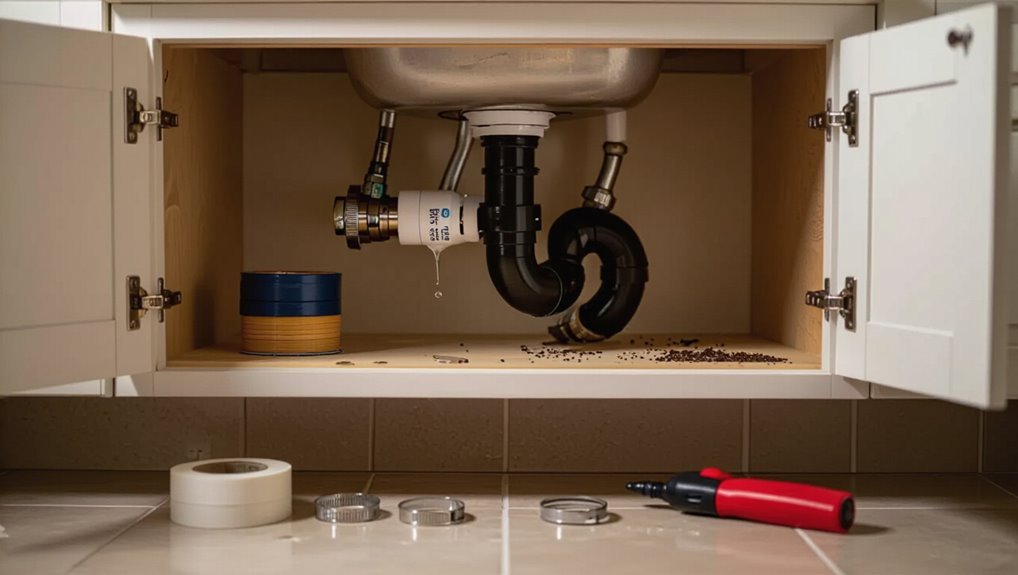
Soil pipe problems commonly arise from leaks, cracks, and blockages, each presenting different repair challenges.
Indicators such as persistent odors, slow drains, visible moisture, or sudden loss of function help determine urgency and whether a homeowner can address the issue.
Safety risks, local building codes, and permit requirements should guide the decision to attempt a DIY fix or to hire a licensed professional.
Common causes of soil pipe problems (leaks, cracks, blockages)
When aging materials, ground movement, or improper installation are present, leaks, cracks, and blockages commonly develop in underground waste pipes.
Causes include root intrusion, corrosion, freeze-thaw cycles, settlement, and chemical attack. Poor jointing, unauthorized loads, and abrasive solids exacerbate damage.
Understanding these mechanisms helps determine how to repair soil pipe, select materials, and decide between DIY patches or professional excavation and replacement.
Signs your soil pipe needs repair
After identifying common causes like root intrusion, corrosion, and settlement, homeowners and tradespeople should watch for clear signs that a buried waste line requires attention.
Persistent slow drains, recurring backups, foul odors near drains or in the yard, unexplained damp or sinkholes, gurgling sounds, lowered water pressure, and sudden lawn saturation signal repair is needed.
Document symptoms before intervention.
Safety, legal, and building-code considerations
Many homeowners and contractors must balance safety, legal requirements, and building-code compliance before attempting soil-pipe work.
Permit requirements, licensed-plumber mandates, and local codes determine allowable repairs. Proper PPE, ventilation, and sewage handling prevent hazards.
Failure to comply risks fines, voided warranties, or insurance denial.
When uncertainty, extensive damage, or structural impact exists, hiring a certified professional is prudent.
Tools, Materials, and Preparations for Soil Pipe Repair
Before beginning a soil pipe repair, a clear list of essential tools and the specific materials or spare parts required for the anticipated repair type should be assembled.
The workspace must be prepared by protecting fixtures, laying out tools on a stable surface, and ensuring adequate lighting and ventilation.
Finally, the soil pipe must be isolated and water flow stopped using appropriate valves, plugs, or temporary shutoffs before any cutting or joint work begins.
Essential tools list
A compact, well-organized set of tools and materials is essential for efficient soil pipe repair; the right items reduce downtime and guarantee proper seals.
Essential tools enable safe, accurate diagnosis and intervention while minimizing damage.
Recommended basic kit includes:
- Pipe cutter and hacksaw
- Adjustable wrench and pliers
- Plumber’s snake and drain rod
- Pipe deburring tool and file
- Sealant, tape, gloves, flashlight
Materials and spare parts by repair type
Identify parts and materials specific to the failure mode to guarantee efficient, lasting repairs; cracked clay, corroded cast iron, fractured PVC, and leaking joints each require different spares and compounds.
For each repair type, stock compatible sections, couplings, sealants, and fasteners, plus appropriate primers and corrosion inhibitors.
- Clay repair rings or mortar
- Cast iron clamps and epoxy
- PVC couplers and primer
- Rubber repair sleeves
- Replacement gaskets and bolts
Preparing the work area and protecting fixtures
With compatible parts and sealants gathered for the specific failure mode, the work area must be prepared and fixtures protected to prevent damage and contamination during repair.
Clear surrounding surfaces, remove fragile items, and cover sinks, countertops, and appliances with waterproof sheeting.
Lay absorbent pads and drop cloths, position adequate lighting and ventilation, and arrange tools for safe, unobstructed access to the pipe.
How to isolate the soil pipe and stop water flow
Shut off water to the affected branch and relieve pressure before cutting or disassembling any joints: close the nearest fixture shutoffs, isolate the building or unit supply if necessary, and open faucets or drain valves downstream to evacuate standing water.
Use gate or ball valves, pump or bucket out residual water, and cap or plug pipe ends.
Verify isolation with a pressure gauge and visual check.
How to Diagnose Soil Pipe Issues Step-by-Step
The diagnostic process begins with a systematic visual inspection of accessible soil pipe runs to note corrosion, misalignment, or visible cracks.
For concealed issues, the technician employs leak-detection tools and techniques—pressure testing, acoustic listening, or tracer gases—to locate hidden leaks and blockages.
Once leaks and obstructions are found, severity is assessed by examining crack size, joint separation, and flow restriction to prioritize repairs.
Visual inspection techniques for accessible pipes
A careful visual inspection of accessible soil pipes begins by observing joints, fittings, and visible runs for cracks, corrosion, misalignment, staining, or moisture trails that indicate leaks or failures.
Lighting, mirror, and close-range examination can reveal hairline fractures, displaced seals, and early signs of material degradation that are not apparent from a distance.
Note any soft spots, mineral buildup, loose hangers, or surface pitting and document locations.
Detecting hidden leaks and using leak-detection tools
Begin by isolating sections and listening for subtle signs such as hissing, gurgling, or water movement that suggest concealed leaks.
Then proceed methodically through pressure tests, dye tracing, and acoustic or thermal scanning to pinpoint locations not visible during a surface inspection.
Record findings, map probable leak sites, verify with CCTV or endoscopic inspection, and mark access points for targeted repair.
Assessing the severity of cracks and joint failures
Once hidden leaks have been mapped and access points identified, attention shifts to evaluating cracks and failed joints to determine repair scope and method.
Inspection notes crack length, width, location relative to fittings, and whether joint separation allows movement.
Small hairline fissures or loose sealant may be patched; structural cracks, multiple adjacent failures, or offset joints typically require section replacement or coupling and possible pipe realignment.
Identifying and locating blockages
Diagnose blockages by systematically narrowing their location and cause through observation, testing, and targeted inspection.
Inspect fixtures and drains for multiple affected points, note slow drains versus backups, and check external cleanouts.
Use a plunger, drain snake, or camera to confirm obstruction depth.
Smell and water tests indicate organic or grease blockages.
Record findings before choosing repair or removal methods.
Repairing Leaks and Small Cracks in Soil Pipes
The section outlines quick temporary measures to stop active leaks and small cracks while a permanent fix is planned.
It then compares durable repair options for PVC and cast-iron pipes and gives step-by-step instructions for using epoxy compounds, repair clamps, and rubber sleeves.
Finally, it covers replacing severely damaged sections, including cutting, measuring, and joining new pipe.
Temporary fixes to stop active leaks quickly
When an active leak appears in a soil pipe, quick temporary measures can limit water damage and buy time for a permanent repair.
The guide recommends shutting off water, drying the area, and applying a rubber patch or hose clamp over the leak.
Epoxy putty or repair tape can seal small cracks temporarily.
Monitor the patch and arrange professional replacement promptly.
Permanent repair methods for PVC and cast-iron pipes
Begin by evaluating the extent and location of the damage to determine whether a localized repair will suffice or a section replacement is required.
PVC typically allows solvent-welded or slip-coupling repairs for small cracks, while cast-iron often needs mechanical sleeves, hub-and-spigot repairs, or section replacement due to corrosion and brittle fractures.
Choose materials matching pipe class, guarantee proper alignment, prepare ends, and follow manufacturer cure and torque specifications.
Step-by-step: using epoxy, repair clamps, and rubber sleeves
Several common tools and materials—epoxy putty, stainless repair clamps, and neoprene rubber sleeves—enable targeted fixes for small leaks and hairline cracks in soil pipes without full section replacement.
The procedure: clean and dry the area, sand or file rough edges, apply epoxy putty to seal thin cracks, fit rubber sleeve over defect, and secure with a stainless clamp.
Test for leaks and retighten as needed.
Replacing damaged sections: cutting, measuring, and joining
Cut the damaged section out cleanly and measure precisely to confirm the replacement fits without strain. A straight cut at sound pipe ensures proper seating.
Select matching material and length, allow for sealant or coupling depth, then deburr edges.
Use appropriate couplings or solvent welds per pipe type, align sections, tighten clamps evenly, and test for leaks under normal flow pressure.
Repairing Major Cracks, Fractures, and Collapsed Soil Pipes
When a soil pipe has major cracks, fractures, or has partially collapsed, the repair may require section replacement or a reroute rather than simple patching.
Options include trenchless methods and pipe relining for less invasive repairs, followed by a clear, step-by-step approach to excavating and replacing the buried section when needed.
After replacement, attention must focus on stabilizing the surrounding soil and implementing measures to prevent future collapse.
When a section replacement or reroute is required
Major structural failures such as wide fractures, collapsed sections, or severe pipe displacement necessitate replacing a soil pipe segment or rerouting the line entirely.
Assessment includes camera inspection, alignment checks, and soil stability evaluation.
Replacement involves cutting back to sound pipe, installing compatible fittings, and ensuring proper slope and bedding.
Reroutes avoid unstable trenches, follow code, and restore venting and access for maintenance.
Trenchless options and pipe relining overview
Although trenchless methods require specialized equipment and assessment, they offer an effective alternative to open excavation for repairing significant cracks, fractures, and collapsed soil pipes. Trenchless relining and pipe-bursting restore flow, limit surface disruption, and suit varied pipe materials; professional inspection determines suitability and lifespan expectations.
| Method | Benefit | Limitation |
|---|---|---|
| Cured-in-place | Minimal disruption | Access pits needed |
| Pipe-bursting | Full replacement | Soil compaction issues |
| Sliplining | Cost-effective | Reduced bore diameter |
| UV cure | Fast cure | Material compatibility |
| Inspection CCTV | Accurate assessment | Requires operator skill |
Step-by-step: replacing a buried soil pipe section
Begin by exposing the failed pipe segment and establishing a safe, dry work area: excavate to reach the damaged section, shore the trench as needed, and divert or plug flow to prevent sewage escape.
Cut out the defective length, inspect adjoining joints, prepare and align replacement pipe and fittings, apply appropriate seals or solvent welds, support new run, test for leaks, backfill in layers compacting properly.
Stabilizing surrounding soil and preventing future collapse
When a soil pipe shows deep cracks, fractures, or evidence of collapse, the surrounding ground must be stabilized before any permanent repairs can proceed; this prevents further movement that would stress new joints or backfill.
Assess soil composition, remove loose material, and install compacted granular bedding.
Use geotextile, mechanical compaction, or engineered fill, plus proper drainage and temporary shoring to prevent recurrence.
Clearing and Preventing Blockages in Soil Pipes
Addressing blockages in soil pipes begins with selecting the right clearing method—mechanical tools like plungers, drain snakes, and augers for localized obstructions, chemical or enzymatic cleaners when compatible with pipe material, and hydro-jetting or professional services for stubborn or extensive build-up.
Each approach carries benefits and risks, so proper use and awareness of potential pipe damage or environmental impact are essential.
Regular preventative maintenance, including routine inspections and grease- and debris-control measures, helps reduce the frequency of recurring blockages.
Mechanical methods: plungers, drain snakes, and augers
Mechanical methods—plungers, drain snakes, and augers—offer direct, non-chemical options for dislodging or extracting blockages from soil pipes, suitable for many common obstructions such as hair, grease build-up, and small debris.
Proper tool selection depends on pipe diameter and blockage location: plungers for traps, hand snakes for shallow clogs, and powered augers for deeper, tougher obstructions.
Use steady technique and protective gear.
Chemical and enzymatic cleaners: appropriate use and risks
Many homeowners and plumbers rely on chemical and enzymatic cleaners to dissolve organic buildup in soil pipes, but these products differ markedly in composition, effectiveness, and safety.
Chemical caustics act fast on hair and grease but can damage older clay or PVC joints and harm septic systems.
Enzymatic formulations work slower, are pipe- and eco-friendlier, yet may require repeated applications and patience.
Using hydro-jetting and professional cleaning services
After discussing chemical and enzymatic options, attention turns to high-pressure hydro-jetting and professional cleaning services as alternatives for stubborn or recurring blockages.
Hydro-jetting uses concentrated water jets to dislodge scale, grease, and roots, restoring flow without chemicals. Licensed technicians assess pipe condition, choose appropriate pressure, and inspect with cameras.
Costs, risks to fragile pipes, and necessary permits should be reviewed beforehand.
Preventative maintenance to reduce recurring blockages
Effective preventative maintenance minimizes recurring soil-pipe blockages by combining regular inspection, routine cleaning, and targeted user habits.
Periodic checks detect slow drains and root intrusion early; simple habits and scheduled cleanouts reduce buildup and emergency repairs.
- Avoid grease and large solids
- Install strainers on drains
- Flush with hot water weekly
- Use enzyme cleaners monthly
- Trim nearby roots promptly
Repair Techniques by Pipe Material
Repair methods vary with material, so the guide outlines specific approaches for PVC, cast iron, and clay or terra-cotta soil pipes.
It compares common fixes—such as solvent welding and patching for PVC, sealing and section replacement for cast iron, and careful joint repair or lining for clay—and notes when replacement is preferable.
The section also summarizes modern alternatives and upgrade options for aging systems.
PVC soil pipe repair specifics
Focuses on fusion-friendly, solvent-weld, and mechanically joined techniques specific to PVC soil pipe, emphasizing the material’s chemical properties, sizing standards, and typical failure modes such as cracks, bell-joint separations, and root intrusion.
Guidance covers compatible solvent selection, proper chamfering, clear cure times, socket vs. spigot fit tolerances, mechanical couplings for repairs, and cutting/cleaning best practices.
Cast-iron soil pipe repair specifics
Addressing cast-iron soil pipe requires techniques suited to its heavy, brittle nature and common failure modes—corrosion, fractured hubs, worn bell-and-spigot joints, and root or mechanical damage.
Repair options include section replacement with flange or bell adaptors, sleeve repairs with stainless bands, epoxy pipe liners for short runs, and cathodic protection consideration.
Excavation planning, proper support, and safety for lead-containing joints are essential.
Clay and terra-cotta pipe repair specifics
After outlining methods for cast-iron soil pipe, attention shifts to clay and terra-cotta systems, which present different challenges due to brittle composition, tapered socketed joints, and susceptibility to root intrusion and ground movement.
Repair emphasizes careful excavation, avoiding further breakage, using flexible seals or resin-sleeves for socket gaps, replacing shattered sections with matching fittings, and addressing surrounding soil compaction to prevent recurrence.
Modern alternatives and upgrading old pipes
Consideration of modern alternatives and upgrade options becomes essential when aging soil-pipe systems show repeated failures or when renovation projects require compliance with current codes.
Choices vary by material and include replacing brittle clay or terra-cotta with PVC or HDPE, relining cast iron with cured-in-place pipe (CIPP) or epoxy coatings, and using flexible junction couplings to join dissimilar materials.
Professionals evaluate flow capacity, longevity, compatibility, and installation cost.
Cost, Time, and Decision Guide
Typical cost ranges for DIY repairs and professional services are outlined next, giving homeowners a quick sense of expected expenses.
Time estimates for common fixes—patches, section replacements, and full runs—are then summarized to set realistic schedules.
A concise decision checklist follows to help determine when a repair is suitable for DIY and when a plumber should be hired.
Typical cost ranges for DIY vs professional repairs
A clear comparison of DIY versus professional soil pipe repairs helps homeowners weigh cost, time, and risk before choosing a route. DIY materials and rental tools often range low but carry hidden risks; professionals cost more yet offer guarantees and diagnostics. Typical ranges:
| Option | Low | High |
|---|---|---|
| DIY | $20 | $300 |
| Professional | $200 | $1,500 |
Time estimates for common repair types
Repair times for soil pipe work vary widely by problem type and access conditions, so homeowners should match expected durations to both scope and skill level before deciding.
Small leaks: 30–90 minutes (patch or coupling).
Localized cracks requiring section replacement: 2–6 hours.
Clogged pipes needing snaking or hydro-jetting: 1–3 hours.
Major relines or full replacements: 1–3 days, depending on excavation and curing.
Decision checklist: DIY or hire a plumber
When should a homeowner tackle a soil pipe problem themselves and when is it wiser to hire a plumber?
Assess severity, tools required, permit needs, and personal skill. Small leaks, simple sealant or trap replacements, and minor blockages suit DIY.
Major cracks, collapsed sections, sewer-line work, persistent odors, or unclear causes warrant a licensed plumber.
Factor estimated cost, time, safety, and potential damage risk.
Common Mistakes and How to Avoid Them
Common mistakes in soil pipe repair can exacerbate leaks or blockages when improper materials, poor joints, or incorrect techniques are used.
Failure to follow local codes or manufacturer instructions may void warranties and create compliance problems.
Clear, code-compliant procedures and durable materials reduce repeat failures and simplify inspections.
Errors that worsen leaks or blockages
Ignoring proper diagnostics or rushing into fixes often transforms a minor soil-pipe issue into a much larger problem.
Common errors include using incorrect sealants or adhesives, forcing tools that damage fittings, improper temporary patches, and neglecting source isolation.
Each mistake can enlarge leaks, create misalignments, or trap debris.
Accurate assessment, correct materials, gentle technique, and staged testing prevent escalation.
Compliance and warranty issues to watch for
After addressing diagnostic and repair errors that can worsen leaks, attention must shift to compliance and warranty pitfalls that can negate repairs or incur fines.
Homeowners should verify local plumbing codes, permit requirements, and material approvals before repair. Unauthorized alterations can void manufacturer warranties and homeowner insurance.
Retain receipts, photos, and permits; document professional inspections when required to preserve coverage and avoid penalties.
Tips for durable, code-compliant repairs
Start with a clear plan that aligns repair steps, materials, and permits to local plumbing codes to guarantee durability and compliance.
Common mistakes and avoidance:
- Using incompatible materials; verify pipe type and fittings.
- Skipping permits; check local requirements.
- Poor joint prep; clean and dry surfaces.
- Overreliance on temporary fixes; use permanent solutions where required.
- Ignoring manufacturer instructions; follow torque and cure times.
Post-Repair Testing, Inspection, and Maintenance
After repairs are completed, technicians perform pressure testing and systematic leak verification to confirm joint integrity and water-tightness.
Visual inspections and camera surveys are recommended to identify hidden defects or improper alignments.
A defined maintenance schedule and accurate record-keeping guarantee long-term performance and provide a reference for future interventions.
Pressure testing and leak verification steps
Begin by isolating the repaired soil pipe section and preparing for testing to confirm a watertight seal and proper flow.
Seal ends with test plugs, pressurize with water or air to manufacturer-recommended PSI, monitor gauge for pressure drop over specified dwell time, inspect joints for seepage, release pressure slowly, and document results.
Repeat testing if any loss or doubt arises.
Visual and camera inspection recommendations
Several focused visual and camera inspections should be conducted to verify the integrity of the repaired soil pipe and to detect any remaining defects.
Inspect joints, seals, and surrounding soil for seepage, displacement, or sagging.
Use a push or robotic CCTV to confirm interior smoothness, joint alignment, and absence of cracks or debris.
Document findings with time-stamped images for follow-up actions.
Ongoing maintenance schedule and record-keeping
With inspection data and time-stamped imagery confirming repairs, a structured ongoing maintenance schedule and record-keeping protocol should be established to preserve pipe performance and document long-term outcomes.
Records should log inspection dates, camera findings, cleaning, repairs, materials used, and responsible parties.
Schedule periodic inspections (annual or biannual), post-storm checks, and preventative cleaning.
Retain records digitally and in backup for warranty and compliance verification.
Emergency Action Plan for Major Failures
When a major soil pipe failure occurs, the first priorities are to shut off the water supply, isolate sewage flow, and protect unaffected areas to minimize damage.
Temporary containment such as sandbags, tarps, and portable pumps should be used to control leaks and prioritize cleanup of floors, utilities, and sanitary fixtures.
Emergency plumbing services and the insurer should be contacted immediately if flooding, structural risk, or significant contamination is present.
Immediate steps to minimize water and sewage damage
Act quickly to contain leaks and sewage overflow by shutting off the building’s main water supply and isolating affected fixtures; this limits further damage and reduces contamination risk while emergency repairs are arranged.
Notify occupants, evacuate contaminated areas, and prevent access.
Record leak locations and times, photograph damage, and switch off electrical circuits near wet zones.
Contact a licensed plumber and, if needed, emergency services.
Temporary containment solutions and cleanup priorities
Containment materials and prioritized actions are essential to limit spread and hazards after a major soil-pipe failure.
Deploy absorbent pads, sandbags, and temporary plugs to stem flow; isolate affected zones and ventilate.
Remove valuables from contamination and mark unsafe areas.
Prioritize stopping active leakage, preventing cross-contamination of clean water, and initiating disinfectant-safe cleanup.
Document damage for records.
When to contact emergency plumbing or insurance
Several clear thresholds should trigger contacting emergency plumbing or an insurer after a major soil-pipe failure: uncontrollable flooding, sewage backup into living spaces, visible structural damage, gas or persistent odors, and failed temporary repairs.
Document damage with photos, record times, shut off water and electricity if unsafe, and retain receipts for emergency measures.
Prompt professional assessment and insurer notification minimize loss and liability.
Additional Resources and Templates
The article provides a compact checklist outlining a step-by-step repair workflow to guide each phase of soil pipe restoration.
A quick reference is included for common pipe fittings and connectors to aid identification and parts selection.
A concise DIY vs professional contact template offers wording and fields for soliciting comparative quotes.
Checklist: Step-by-step repair workflow
Begin by assembling a concise, ordered checklist that guides technicians through diagnosis, isolation, repair, testing, and documentation stages; each step should list required tools, parts, safety precautions, estimated time, and pass/fail criteria so the workflow is repeatable and verifiable.
- Inspect and diagnose issue
- Isolate system and guarantee safety
- Gather tools, materials, PPE
- Execute repair and perform leak/blockage test
- Record results, cleanup, and sign-off
Quick reference: common pipe fittings and connectors
A compact visual and text glossary lists the most common pipe fittings and connectors used in soil-pipe repair—couplings, tees, elbows, reducers, traps, cleanouts, adapters, and compression or solvent-weld joints—each entry noting typical materials, size ranges, orientation, common failure modes, and when to prefer replacement over repair. The table below summarizes function, failure signs, and typical fix.
| Fitting | Signs | Fix |
|---|---|---|
| Coupling | Leak at joint | Replace/gasket |
| Elbow | Hairline crack | Patch/replace |
DIY vs professional contact template for quotes
Compare options before committing: a clear DIY vs professional contact template helps homeowners solicit accurate quotes, document scope, and decide whether to attempt a repair or hire a tradesperson.
The template should remain concise, outlining issue, photos, access, desired timeline, and budget.
Suggested fields:
- Brief problem description
- Photo attachments
- Access and restrictions
- Preferred completion date
- Budget or bid deadline
Conclusion
When a tired soil pipe finally speaks, the DIYer becomes both detective and medic—mending small wounds with clamps and sealant, or calling in reinforcements for deeper fractures. This guide lights the lantern on common faults, tools, and steps so repairs flow from caution, not panic. With careful diagnosis, correct materials, and a calm, methodical approach, a weary drainage system can be coaxed back to steady breath and quiet service.

