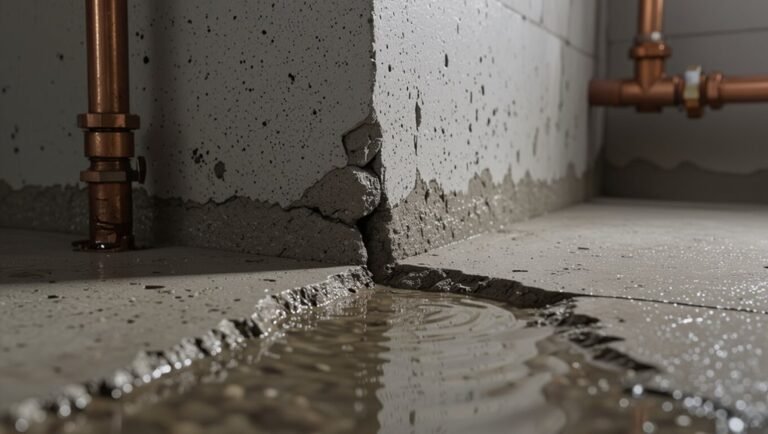
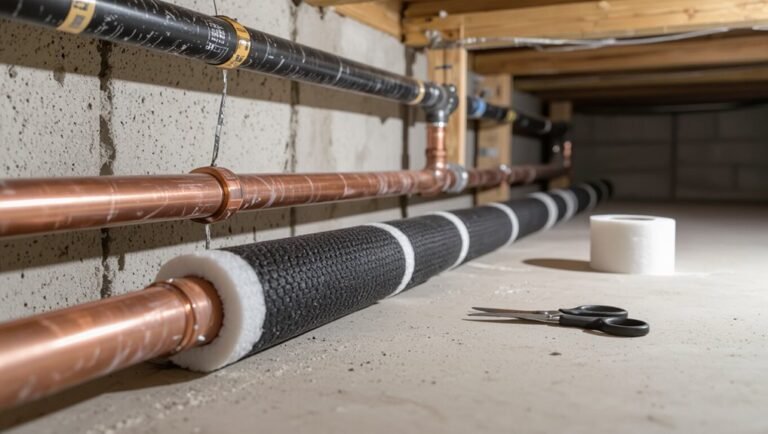
How to Prevent Electrolysis in Copper Pipes: Proven Methods to Stop Corrosion
To effectively prevent electrolysis in copper pipes, you can implement several proven methods. Start by isolating dissimilar metals using dielectric unions, ensuring proper grounding and bonding throughout your system. Additionally, install nonconductive couplings or sleeves, apply protective coatings, and manage water chemistry with inhibitors. Regularly inspect your pipes for signs of corrosion, such as green patina or pitting, and measure pipe-to-ground voltage to catch issues early. For immediate leaks, temporary clamps or caps can provide a quick fix, but it’s advisable to seek a professional assessment for long-term solutions and guidance on next steps.
What causes electrolysis in copper pipes and why it matters
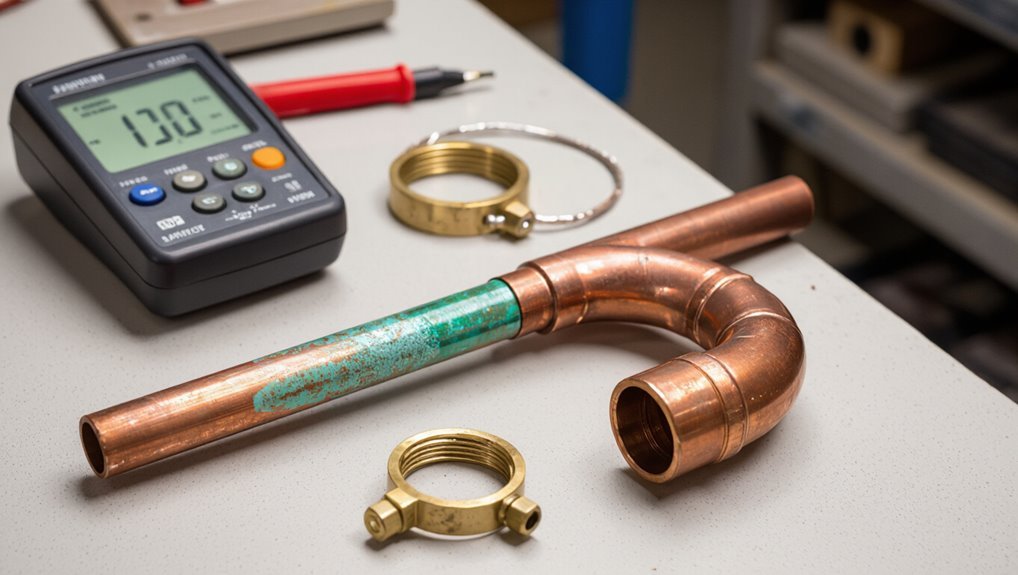
Electrolysis in copper pipes occurs when stray electrical currents flow through the plumbing, causing metal loss that is distinct from galvanic corrosion driven by dissimilar metals in direct contact.
These currents can arise from grounding faults, nearby electrical wiring, or impressed currents on plumbing systems.
The resulting effects include degraded pipe integrity, potential contamination of potable water, and increased risk of electrical hazards in the home.
Electrolysis vs galvanic corrosion key differences
Although both involve metal deterioration in wet environments, electrolysis and galvanic corrosion arise from different electrical mechanisms and consequently require different prevention strategies.
Electrolysis involves stray currents causing metal loss along a conductor; galvanic corrosion occurs when dissimilar metals contact via an electrolyte.
Distinguishing them guides practical measures like insulation, bonding, and material selection—essential components of how to prevent electrolysis in copper pipes effectively.
How electrical currents form in plumbing systems
When stray electrical currents enter a plumbing system—typically from nearby buried metallic structures, faulting electrical equipment, or improper bonding—they travel along the conductive copper pipes and can drive metal loss where current exits the metal into the water or soil.
Voltage differentials, grounding faults, and induced currents from nearby power lines create paths; junctions, coatings, and electrolyte chemistry influence current flow and localized corrosion rates.
Risks to water quality, pipe integrity, and household electrical safety
Any stray electrical current flowing through copper plumbing can degrade water quality, weaken pipe walls, and create household shock hazards.
Electrolysis accelerates metal loss, releasing copper ions that discolor water and pose health risks. Structural pitting increases leak and rupture likelihood.
Faulty bonding, stray currents from nearby equipment, and galvanic couples drive these processes, so detection and remediation protect potable water, infrastructure, and occupant safety.
Quick actionable summary: How to stop electrolysis in copper plumbing
A concise set of steps can halt active electrical leakage quickly: isolate affected circuits, disconnect stray bonding or metallic paths, and install temporary insulation or an isolating clamp until a technician arrives.
For lasting protection, replace or install dielectric unions, add proper grounding and bonding per code, and use corrosion-resistant fittings or sacrificial anodes where appropriate.
These measures prioritize immediate safety first, then durable system integrity and compliance.
Immediate temporary fixes for active electrical leakage
Begin by isolating the affected plumbing section and cutting power sources that could be introducing stray voltage.
Temporarily cap or clamp the pipe, apply a corrosion-inhibiting paste to exposed areas, and install a non-conductive coupling or rubber sleeve to interrupt current paths.
Use a portable ground fault interrupter on nearby equipment, mark the area, and schedule professional inspection and permanent repairs promptly.
Long-term solutions for prevention and system safety
Several practical measures reduce long-term electrolysis risk in copper plumbing: isolate and electrically bond dissimilar metals, install dielectric unions where copper meets steel or iron, maintain continuous grounding to a common earth point, use sacrificial anodes or impressed-current cathodic protection where appropriate, control water chemistry to minimize conductivity and corrosive ions, and guarantee regular inspection and monitoring for stray voltages or current leakage.
Additionally, implement surge protection, document system grounding, and schedule periodic testing.
Inspecting your plumbing for signs of electrolysis
A visual inspection can reveal green or pitted copper, white crust at joints, and unusual corrosion patterns on pipes and fittings.
Homeowners may also notice discolored water, gurgling or whining noises, and unexplained leaks or accelerated fixture wear that suggest electrochemical activity.
A clamp meter or continuity tester can confirm stray electrical currents and help localize the problem before repairs.
Visual indicators on copper pipes and fittings
When inspecting copper pipes and fittings for electrolysis, visual cues offer the quickest initial assessment: look for greenish-blue or whitish crystalline deposits at joints, rapid pitting or pinhole corrosion, discolored (darkened or blackened) metal near connections, and evidence of localized staining on adjacent materials.
Also note fresh verdigris buildup, flaky corrosion products, cracked solder joints, and any unusual dulling or texture changes along suspect runs.
Symptoms at fixtures and appliances (discolored water, noises, leaks)
Visual signs on pipes often correlate with symptoms at fixtures and appliances, since electrolysis effects travel with the water and electrical currents.
Discolored water (greenish or brown), metallic taste, unexplained staining, intermittent noises (pings, hissing), reduced flow, and small persistent leaks at faucets, toilets, or appliances indicate active corrosion.
Noting timing and locations helps isolate affected branches for targeted repair.
Using meters and testers to detect stray electrical currents
Many plumbers rely on a few key meters and testers to confirm stray electrical currents in copper plumbing.
Technicians use a clamp meter to measure AC leakage, a multimeter for voltage between pipe sections, and a continuity tester to find unintended ground paths.
Pipe-to-soil potential tests and polarized corrosion probes quantify risk.
Results guide corrective actions like bonding, isolation, or locating stray sources.
Proven methods to prevent and stop electrolysis
To prevent and stop electrolysis, practitioners first eliminate stray DC and AC currents feeding the plumbing and guarantee proper bonding and grounding.
They then install dielectric unions and insulating fittings, apply protective coatings or corrosion inhibitors, and replace incompatible metals with compatible materials.
These combined measures address both the electrical and chemical causes of pipe corrosion.
Eliminate stray DC and AC currents feeding the plumbing
Isolate and neutralize unintended electrical sources that can drive corrosive currents through copper plumbing.
Technicians should inspect for stray DC from nearby rectifiers, solar inverters, or energized grounding conductors and measure pipe-to-earth voltages.
Corrective actions include rerouting fault currents, bonding isolated metallic systems properly, repairing damaged insulation, and eliminating inadvertent neutral-to-ground connections.
Verify results with periodic monitoring to prevent recurrence.
Install dielectric unions and insulating fittings
A small but critical set of components—dielectric unions and insulating fittings—serves to interrupt galvanic paths between dissimilar metals in plumbing systems.
These devices physically separate metals and include nonconductive sleeves, gaskets, or coatings. Properly selected and installed, they prevent direct metal-to-metal contact, reduce electrochemical corrosion at joints, and extend service life without altering hydraulic performance or requiring electrical grounding changes.
Use proper bonding and grounding techniques
Having interrupted direct metal-to-metal contact with dielectric unions and insulating fittings, attention turns to bonding and grounding practices that address stray electrical currents and external electrical influences.
Properly bond copper piping to the building electrical grounding system using appropriately sized conductors and approved clamps.
Verify continuity, minimize potential differences between metal systems, and correct any faulty appliance or stray voltage sources to prevent electrolytic corrosion.
Apply protective coatings and corrosion inhibitors
Apply protective coatings and corrosion inhibitors to create barriers that limit metal exposure to electrolytes and neutralize aggressive ions.
Coatings such as epoxy, polyurethane, or silicone resist moisture and electrical pathways; surface preparation guarantees adhesion.
Corrosion inhibitors added to water systems form protective films or adjust chemistry to reduce conductivity.
Regular inspection and reapplication maintain effectiveness, extending copper pipe service life and reducing electrochemical attack.
Replace problematic metals and upgrade to compatible materials
Replace or upgrade dissimilar metals that create galvanic couples to materials with compatible electrochemical potentials, thereby eliminating the driving force for electrolysis.
Assess fittings, valves, and adapters; substitute stainless steel, brass, or copper-alloy components chosen for similar potentials.
Use dielectric unions only when compatibility cannot be achieved.
Document material choices and installation practices to guarantee long-term galvanic stability and reduce corrosion risk.
Install sacrificial anodes where appropriate
Install sacrificial anodes to provide a controlled, preferred site for corrosion that protects copper piping by sacrificing a more active metal—typically zinc, magnesium, or aluminum—thereby diverting anodic current away from the copper.
Proper selection, sizing, placement, and periodic inspection guarantee effectiveness. Anodes should match water chemistry and system voltage; replace depleted anodes promptly to maintain protection and prevent undercutting or accelerated copper corrosion.
Step-by-step guide to diagnosing and fixing electrolysis in a copper system
Before any testing or repairs, personal protection and power isolation are confirmed to guarantee safety.
Technicians then measure pipe-to-ground voltage, interpret readings to identify stray currents, and systematically trace sources such as appliances, wiring, or adjacent systems.
Repairs follow a set sequence—isolate the affected section, add insulation and proper bonding, then retest and perform verification checks to confirm the issue is resolved.
Safety precautions before testing or repairs
Any person preparing to test or repair a copper piping system should first prioritize safety by de-energizing electrical sources, isolating water flow, and confirming system depressurization.
They should wear insulated gloves and eye protection, lock out/tag out electrical panels, verify absence of hazardous gases, use non-conductive tools, post warning signage, and guarantee a qualified electrician or plumber is available for complex tasks before proceeding.
How to measure pipe-to-ground voltage and interpret results
How should a technician measure pipe-to-ground voltage to diagnose electrolysis?
A technician uses a digital multimeter set to AC/DC volts, connects the black lead to a verified earth ground and the red lead to exposed copper pipe, recording steady and fluctuating readings at multiple locations.
Interpret: under 0.5 V is acceptable; 0.5–2 V suggests stray current risk; above 2 V indicates active electrolysis needing correction.
Tracing the electrical source (appliances, stray wiring, nearby systems)
Which nearby electrical source is imposing voltage onto the piping system?
A technician systematically inspects appliances, motors, and heating elements, disconnecting candidates while measuring pipe-to-ground voltage.
Visual checks trace stray wiring, junctions, and bonded equipment.
Isolation helps identify contributors; nearby grounding systems and shared neutrals are evaluated.
Documented findings guide targeted corrections without altering repair sequencing.
Correct sequence for repairs: isolation, insulation, bonding, testing
After isolating and documenting external electrical sources imposing voltage on the piping, the repair sequence proceeds in a defined order: isolate the affected piping, install electrical insulation, establish proper bonding, then perform thorough testing.
Technicians isolate sections, fit dielectric unions or sleeves, connect bonding conductors to an approved grounding point, and then use meters to confirm continuity and absence of stray voltages before restoring service.
Verification checks after repairs
Begin by performing a systematic set of verification checks to confirm the repair successfully eliminated electrolysis risks.
Inspect physical isolation and dielectric fittings for proper installation.
Re-measure stray voltage and bonding continuity; compare to pre-repair baselines.
Check water quality for increased conductivity or corrosion indicators.
Monitor affected joints over several weeks for leaks or renewed pitting.
Document findings and schedule follow-up testing.
Materials, tools, and products to use
Recommended meters, clamp-on ammeters, and portable testers are described to help quantify stray currents and confirm repairs.
The section then outlines best dielectric fittings, insulating bushings, tapes, suitable coatings, primers, and pipe wraps to prevent galvanic contact and corrosion.
Finally, approved bonding clamps, conductors, and grounding rods are listed for safe and code-compliant electrical continuity and grounding.
Recommended meters, clamp-on ammeters, and testers
Several essential meters and testers are useful for diagnosing and preventing electrolysis in copper piping, including digital multimeters, clamp-on ammeters, earth/ground resistance testers, and sacrificial anode test probes.
Recommended features include true RMS measurement, low-voltage continuity, high sensitivity for microamps, noninvasive current clamps, and ground loop detection.
Durable, waterproof housings and clear calibration records improve reliability for routine inspections.
Best dielectric fittings, insulating bushings, and tape
Choose dielectric fittings and insulating bushings rated for the specific pipe material, water chemistry, and operating pressure to reliably interrupt stray currents and prevent galvanic corrosion.
Use non-conductive unions, dielectric nipples, and polymer bushings compatible with copper and mating metals.
Apply PTFE or silicone tape on threaded joints for sealing without creating conductive bridges.
Select UL/CSA-listed products and follow manufacturer installation torque and temperature limits.
Suitable coatings, primers, and pipe wraps
Protect surfaces with coatings, primers, and wraps selected for compatibility with copper, the surrounding environment, and any contact metals to prevent electrolysis and corrosion.
Use epoxy or polyurethane pipe coatings, copper-compatible primers, and solvent-free touch-up paints.
Apply self-fusing silicone tape, polyethylene pipe wrap, or rubberized asphalt tape for buried or exterior lines.
Follow manufacturer cure times and surface-prep instructions to guarantee durable, non-conductive barriers.
Approved bonding clamps, conductors, and grounding rods
After coating and wrapping, attention turns to approved bonding clamps, conductors, and grounding rods that provide the electrically continuous path required to control stray currents and prevent electrolysis.
Use listed copper or bronze clamps, tinned-copper conductors sized per local code, and galvanized or copper-bonded grounding rods.
Guarantee secure mechanical connections, corrosion-resistant fittings, and compliance with electrical and plumbing codes for reliable, long-term protection.
When to call a professional and what to expect
Clear guidelines help homeowners decide whether to call an electrician for stray-current or grounding issues, a plumber for leaks and pipe replacement, or a corrosion specialist for advanced electrochemical damage.
Typical diagnostics include electrical continuity and grounding tests, pipe inspection with cameras and corrosion assays, followed by corrective services such as grounding repairs, dielectric fittings, sacrificial anode installation, or targeted pipe repair or replacement.
Expected costs and timeframes vary by scope—from a few hundred dollars and same-day fixes for simple grounding or fitting changes to several thousand dollars and multi-day work for extensive pipe replacement or specialist remediation.
Signs that require an electrician vs a plumber vs corrosion specialist
When should a homeowner call an electrician, a plumber, or a corrosion specialist for suspected electrolysis in copper pipes?
An electrician is needed for stray current, grounding or bonding faults and meter readings.
A plumber handles leaks, visible pitting, joint failures and immediate water damage.
A corrosion specialist is appropriate for complex electrochemical analysis, long-term monitoring plans and material compatibility assessments.
Typical diagnostics and corrective services performed
Diagnosing electrolysis-related damage typically begins with targeted tests and inspections to identify stray currents, corrosion patterns, and compromised joints.
Professionals will use multimeters, clamp-on ground fault detectors, visual pipe inspection cameras, and water chemistry analyses to pinpoint causes and severity.
Technicians then recommend corrective services: electrical bonding or isolation, installation of sacrificial anodes or dielectric unions, targeted pipe repairs or replacements, and ongoing monitoring plans.
Estimated costs and timeframe for common repairs
Cost and time estimates for repairing electrolysis damage to copper pipes vary widely based on the cause, extent of corrosion, and required corrective action.
Minor repairs—isolating grounding faults or replacing short sections—often cost $150–$600 and take a few hours.
Major work—replacing runs, repiping, or installing sacrificial anodes—can cost $1,000–$5,000+ and require days.
Call a licensed plumber for assessment.
Common mistakes that worsen electrolysis and how to avoid them
Common errors can accelerate electrolysis and reduce pipe lifespan if not addressed promptly.
Key issues to watch for include:
- Mixing incompatible metals without insulation
- Poor or missing grounding/bonding
- Using temporary fixes as long-term solutions
- Ignoring low-level stray currents
Each point raises specific risks and simple preventive steps that should be applied consistently.
Mixing incompatible metals without insulation
Mixing dissimilar metals in a plumbing system creates a galvanic cell that accelerates corrosion when electrical contact and an electrolyte (like water) are present.
Direct copper-to-steel, brass, or aluminum connections without dielectric fittings promote rapid deterioration of the more anodic metal.
Proper use of insulated couplings, dielectric unions, or compatible materials prevents galvanic currents.
Regular inspections guarantee insulation remains intact and corrosion is detected early.
Poor or missing grounding/bonding
Failing to properly ground or bond a plumbing system leaves copper piping vulnerable to stray electrical currents that accelerate electrochemical corrosion.
Inspectors should verify continuous bonding straps, correct grounding at service equipment, and isolation from nonbonded metallic systems.
Remedial measures include installing proper bonds, repairing damaged conductors, and consulting a licensed electrician to guarantee compliance with codes, preventing accelerated pipe deterioration and leaks.
Using temporary fixes as long-term solutions
Relying on temporary patches—such as tape, sealants, or jumper grounds—can mask underlying electrolysis issues and accelerate copper deterioration when used as long-term fixes.
These measures may hide leaks, obstruct proper bonding, or create false security.
Recommended practice is to diagnose and correct root causes: install proper dielectric unions, restore solid grounding, replace damaged sections, and document repairs to prevent recurrence.
Ignoring low-level stray currents
Although stray currents are often low in magnitude, they can steadily corrode copper piping when left unaddressed.
Small leakage currents from nearby electrical systems or improper grounding accelerate pitting and joint failure. Assuming insignificance delays detection; regular insulation testing, proper grounding, and stray-current monitoring prevent progressive damage.
Professionals should trace sources, correct bonds, and apply cathodic protection where needed to stop deterioration.
Maintenance checklist to prevent future electrolysis
A concise maintenance checklist helps prevent recurring electrolysis by establishing what to inspect, when, and what to record.
Recommended items include:
- Schedule regular inspections and log pipe condition, readings, and anomalies.
- Perform seasonal checks and re-inspect after any home modifications.
- Retest for electrical leakage after repairs, major weather events, or annually as a baseline.
Routine adherence and clear records enable timely corrective action.
Regular inspection schedule and what to record
Regular inspections at set intervals form the foundation of preventing electrolysis in copper piping systems.
Inspectors should note date, inspector name, section inspected, visible corrosion, discoloration, loose fittings, stray voltage readings, and grounding integrity.
Record water chemistry parameters, ambient conditions, and any recent repairs.
Maintain digital logs with photos and trend charts to track changes and schedule corrective actions promptly.
Seasonal checks and after-home-modification checklist
When seasons change or after any home modification, a concise checklist guarantees copper piping remains protected from electrolysis:
Inspect visible joints, fittings, and grounding straps; verify dielectric unions intact; confirm insulation and conduit continuity; check stray-current sources near plumbing; make certain bonding and grounding connections are secure; document changes, dates, and corrective actions; schedule follow‑up inspections after significant electrical or plumbing work to confirm stability.
When to retest electrical leakage
How often should electrical leakage be retested to keep copper piping safe from electrolysis?
Routine retesting is recommended annually, immediately after grounding or electrical work, and following any corrosion signs or plumbing changes.
Frequency may increase in areas with stray current concerns or older wiring.
Record results, compare against previous measurements, and act promptly on deviations to prevent progressive pipe deterioration.
Comparison of prevention methods by cost, effectiveness, and longevity
A concise table follows to clarify column meanings and to guide selection of prevention methods by balancing cost, effectiveness, and longevity. The left column names the item and the right column briefly explains how to interpret cost, performance, or lifespan for decision making. Use lower-cost, short-term options for temporary fixes and invest in higher-cost, longer-lasting solutions when system permanence or high risk justifies it.
| Item | Explanation |
|---|---|
| Cost | Indicates upfront and installation expenses relative to alternatives. |
| Effectiveness | Describes expected reduction in electrolysis risk under normal conditions. |
| Longevity | Estimates service life before replacement or major maintenance is needed. |
Short explanation of table columns and selection guidance
To clarify the comparison table, each column labels a key decision factor: estimated upfront and maintenance cost, relative effectiveness at preventing electrolysis, expected service life, typical installation complexity, and common failure modes.
Readers should prioritize effectiveness and longevity for long-term systems, balance cost for short-term fixes, and consider installation skill available.
Select methods matching budget, system age, and failure risk.
Case examples: real scenarios and how they were resolved
Several brief case examples illustrate common electrolysis problems and practical remedies.
One describes household stray-current corrosion corrected by proper grounding.
Another shows localized fitting corrosion resolved with dielectric unions and replacement of compromised sections.
A commercial/industrial instance highlights use of sacrificial anodes to protect long runs of copper piping.
Household stray-current corrosion resolved by grounding
Investigating household stray-current corrosion reveals how unintended electrical paths accelerate copper pipe deterioration and how simple grounding fixes stop the damage.
In one case, bonding a water service to the electrical panel halted pitting near a meter; another home required separate ground rod installation to remove voltage on branch lines.
After verification with a voltmeter, localized corrosion ceased and fittings remained sound.
Corrosion at fittings fixed with dielectric unions and replacement
Technicians replaced corroded copper fittings with dielectric unions and new sections of pipe in multiple homes, stopping electrolytic attack where dissimilar metals met and where fittings had deteriorated.
In one case, galvanized adapters were removed and brass-to-copper joints isolated; in another, pinhole leaks prompted targeted replacement and pressure testing.
Follow-up inspections confirmed halted corrosion and restored water quality.
Industrial/commercial case with sacrificial anode implementation
In one industrial facility, corrosion control specialists addressed widespread copper pipe degradation by installing sacrificial anodes at strategic branch points and near feed-water inlets to intercept galvanic currents before they reached critical joints.
Post-installation monitoring showed voltage reduction, halted pinhole leaks, and extended service life.
Periodic anode inspection and scheduled replacement were instituted, saving downtime and reducing maintenance costs across the plant.
Resources and standards for safe plumbing and electrical practices
Relevant national and local plumbing and electrical codes, such as the IPC, NEC, and applicable municipal ordinances, should be consulted to guarantee proper materials and bonding practices.
Manufacturer installation instructions and product certifications (e.g., NSF, UPC, UL) provide specific compatibility and testing information for fittings, dielectric unions, and anode systems.
For complex cases, qualified plumbers and licensed electricians, trade organizations, and technical publications offer authoritative guidance and situational assistance.
Relevant plumbing and electrical codes to consult
Consult local and national codes to guarantee installations prevent galvanic corrosion and meet electrical safety requirements; primary references typically include the Uniform Plumbing Code (UPC) or International Plumbing Code (IPC) for piping materials and installation, the National Electrical Code (NEC) for bonding and grounding, and applicable local amendments that may supersede national standards.
Inspectors should also reference municipal ordinances, utility company rules, and documented inspection checklists.
Manufacturer guidance and product certification to check
Review manufacturer guidance and product certifications early in the planning stage to verify that fittings, dielectric unions, insulating materials, and bonding hardware meet performance claims and are certified for use with potable water and electrical grounding systems.
Inspect datasheets, NSF/ANSI, UL, and CSA marks, torque and installation instructions, material compatibility, and warranty limits.
Confirm traceability, batch codes, and lab test reports before procurement and installation.
Where to find professional help and technical references
A concise list of authoritative resources and qualified professionals provides the foundation for safe plumbing and electrical work to prevent electrolysis in copper systems.
Refer to national plumbing and electrical codes (e.g., IPC, NEC), ASTM standards, local utility guidelines, and manufacturer datasheets.
Engage licensed plumbers and electricians experienced in grounding/isolation.
Consult technical papers, trade associations, and accredited testing laboratories for verification.
Conclusion
Electrolysis in copper plumbing quietly undermines system integrity, yet it can be controlled with targeted measures. Like a small leak that foretells a storm, early detection and timely intervention—bonding, proper grounding, dielectric fittings, and sacrificial anodes—prevent costly damage. Regular inspections, electrical diagnostics, and adherence to codes guarantee lasting protection. Implementing proven practices transforms a vulnerable network into a resilient one, preserving functionality and safety for the long term.