How to Paint a Swivel Table: Step-by-Step Guide for a Smooth, Durable Finish
To paint a swivel table for a smooth rotation and long-lasting finish, start by carefully prepping the surface. Remove any hardware, clean and degrease the table, then sand or scuff the surface based on the material—wood, metal, or laminate. Next, apply a compatible primer followed by two to three thin coats of durable paint or lacquer, allowing each coat to fully cure before reassembly. Proper masking and light lubrication will help prevent binding. Follow these detailed steps for the best results.
Overview: What a Swivel Table Is and Why Proper Finish Matters
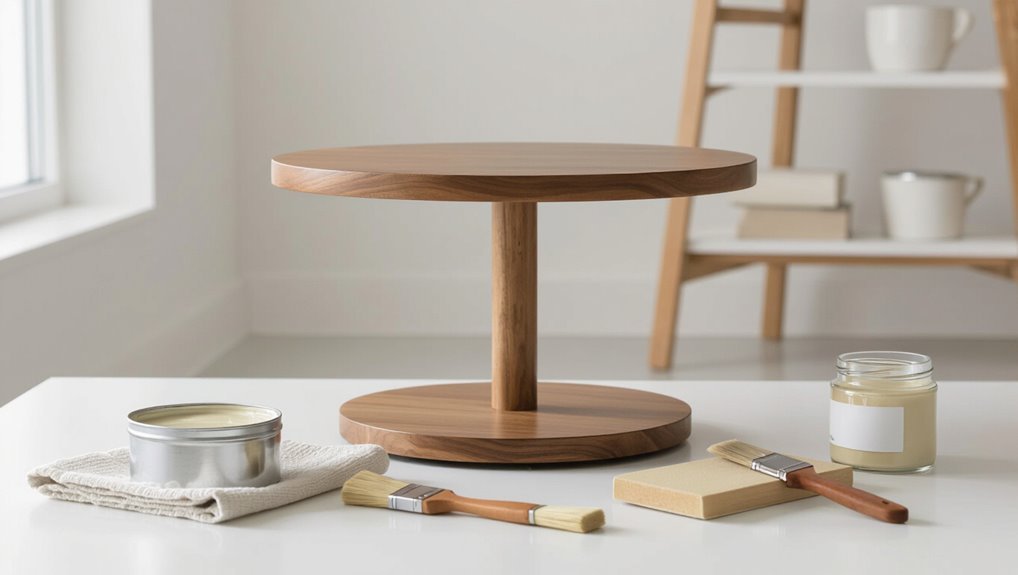
A swivel table typically combines a rotating mechanism with tops made from wood, laminate, metal, or engineered composites. Its construction influences how paint adheres and wears.
Achieving a smooth, even finish prevents binding at the rotation point and resists chipping from repeated motion and contact. Selecting appropriate preparation, primer, and topcoat materials is thus essential for both appearance and long-term function.
Common materials and construction of swivel tables
Swivel tables combine a rotating top, a central pivot, and a supporting base, typically assembled from woods like oak, maple, or plywood, metals such as steel or brass for the swivel mechanism, and sometimes engineered composites for lightweight designs.
Materials affect paint adhesion, preparation, and fastener access; understanding substrate, hardware, and disassembly informs how to paint a swivel table effectively and safely.
Goals of a smooth, durable finish for swivel surfaces
Make certain a swivel table’s surface turns smoothly and resists wear, because the finish directly affects function, longevity, and user experience.
A proper finish minimizes friction, prevents paint buildup, and resists scratches, moisture, and abrasion. Goals include even coverage, low-profile texture for unobstructed rotation, chemical resistance, and easy maintenance.
Achieving these preserves mechanism alignment and reduces repair frequency.
Quick Answer: Can You Paint a Swivel Table Successfully?
A swivel table can be painted successfully with a straightforward approach: clean, sand lightly, prime, and use a durable topcoat formulated for high-contact surfaces.
When these steps are followed and the swivel mechanism is protected during painting, the finish should resist chips and wear for years under normal use.
For heavier traffic or outdoor exposure, a tougher marine or industrial-grade coating is recommended to extend durability.
Short recommended approach and expected durability
Yes; painting a swivel table is straightforward when limited to a concise, proper procedure and realistic expectations.
Begin with thorough cleaning and light sanding, apply primer suited to the material, use thin even coats of paint, and finish with a clear protective topcoat.
Proper prep and quality products yield a durable finish resisting chips and wear for several years under normal indoor use.
Tools and Materials Needed
A correct paint job begins with the right tools and materials: cleaners and degreasers, sanding tools with recommended grits, and primers matched to wood, metal, or laminate.
Selection of paint—latex, oil-based, spray, or enamel—and an appropriate sheen should follow the substrate and desired finish.
Finally, choose a compatible topcoat or sealer such as polyurethane, conversion varnish, or wax to protect the surface.
Cleaning and degreasing supplies
Begin by assembling the essential cleaning and degreasing supplies: a quality degreaser (citrus- or solvent-based depending on finish and contamination), lint-free rags or microfiber cloths, a stiff nylon brush for textured areas, disposable gloves, and a bucket of clean water for rinsing.
Include a plastic scraper for old residue, a small spray bottle for spot treatment, and paper towels for final blotting before priming.
Sanding tools and abrasives (grit recommendations)
Several specific sanding tools and a range of abrasives are required to prepare a swivel table properly.
A random-orbit sander speeds large flat areas; detail sanding blocks and sanding sponges reach edges and curves.
Recommend starting with 80–120 grit to remove old finishes, follow with 150–180 grit for smoothing, and finish with 220–320 grit before painting.
Replace worn discs regularly.
Primers suitable for wood, metal, and laminate
Multiple primers are needed to guarantee adhesion and durability across the swivel table’s different surfaces: oil- or shellac-based primers for raw or stained wood to block tannins, high-adhesion epoxy or zinc-rich primers for bare metal to prevent rust, and specialized bonding primers or deglossing primers for laminate to promote paint grip.
Choose compatible primers, follow manufacturer cure times, and apply thin, even coats for best adhesion.
Paint types (latex, oil-based, spray paint, enamel) and recommended sheens
With primers selected and cured, choosing the appropriate paint and sheen completes the coating system: latex (water-based) offers easy cleanup, fast drying, and flexibility for wood and primed laminate; oil-based provides harder, more durable films suited to high-wear surfaces and metal when compatibility with primer is confirmed;
spray paints (available in both solvent- and water-based formulas) deliver smooth, even coverage for intricate swivel parts but require proper ventilation and thin passes; and enamels—formulated as either oil- or water-based—give a tough, long-lasting finish often recommended for tabletops and hardware.
For sheens, satin or semi-gloss balances durability and appearance on tabletops; gloss suits hardware and high-traffic trim; flat or matte hides imperfections on bases.
Topcoats and sealers (polyurethane, conversion varnish, wax)
Seal the painted swivel table with a durable topcoat appropriate to use and appearance:
polyurethane for rugged, water- and scratch-resistant protection;
conversion varnish for an exceptionally hard, chemical-resistant factory-style finish (typically applied by pros);
or paste wax for a softer sheen and added moisture resistance on low-traffic pieces.
Choose oil- or water-based polyurethane, spray or brush application for varnish, or soft cloth waxing.
Hardware, masking, and safety equipment
A concise kit of hardware, masking supplies, and safety equipment guarantees the painting stage proceeds smoothly and safely.
Essential hardware: replacement screws, washers, and small brushes for hinges.
Masking: low-tack painter’s tape, kraft paper, and disposable drop cloths.
Safety: NIOSH-rated respirator, safety goggles, nitrile gloves, and a ventilated workspace.
Include a small screwdriver set and tack cloth for final prep.
Preparing the Swivel Table for Painting
Before painting, the swivel table is methodically prepared by removing or securing any detachable parts and hardware and masking the swivel mechanism and underside to prevent clogging.
Surfaces are cleaned and degreased step by step, inspected to determine substrate and any previous finishes, and assessed for damage.
Cracks, veneer lift, and loose joints are repaired or stabilized so the surface is sound for priming and paint.
How to disassemble or secure removable parts and hardware
Remove or secure all movable components and loose hardware to prevent damage and guarantee a clean, even paint job.
Detach knobs, casters, screws, and brackets with appropriate tools, labeling and bagging fasteners.
For nonremovable pieces, tape and cover them to shield from paint.
Photograph assembly for reference.
Store removed parts in a safe, dry place until reassembly after finishing and curing.
Cleaning and de-greasing step-by-step
Begin by clearing loose dust and debris from the table using a soft brush or vacuum.
Then wipe all surfaces with a lint-free cloth to reveal areas needing deeper cleaning.
Apply a mild detergent solution, scrub greasy spots with a non-abrasive pad, rinse thoroughly, and dry.
For persistent oil, use a recommended degreaser, follow label instructions, rinse, and allow complete air drying before priming.
Identifying substrate type and checking for previous finishes
Identifying the table’s substrate and any existing finishes is essential to selecting the right primer, paint, and preparation method.
Examine edges, underside, and exposed areas to distinguish solid wood, veneer, MDF, or metal.
Test small hidden spots with solvent to detect lacquer, shellac, or polyurethane.
Note coatings and substrate to determine sanding level, primer adhesion, and compatible topcoat choices.
Repairing damage: filling cracks, veneer lift, and loose joints
After confirming the substrate and any existing coatings, attention shifts to structural and surface repairs that will affect adhesion and the final appearance.
Cracks are routed slightly and filled with matching wood filler or epoxy; veneer lifts are reglued with PVA or contact adhesive and clamped until set.
Loose joints are disassembled if needed, cleaned, glued, and clamped, then sanded flush for repainting.
Proper masking to protect swiveling mechanism and underside
Before any paint is applied, the swiveling mechanism and underside receive careful masking to prevent buildup that could impede movement or contaminate surrounding surfaces.
Painter’s tape and low-tack paper cover bearings, screws, and gaps; plastic sheeting shields the underside. Cut openings allow inspection.
Masking is secured without adhesive contact on precision parts. Remove masks promptly after final dry time to avoid residue or binding.
Surface Preparation: Sanding and Scuffing
Deciding whether to sand to bare wood or merely scuff-sand hinges on the existing finish and desired durability: remove old paint or damaged finish, but scuff-sand glossy or intact surfaces to promote adhesion.
Use a progression from coarse to fine grits (e.g., 80–120 for strip work, 150–220 for smoothing), easing edges and curves with hand sanding or sanding sponges to avoid beveling.
For laminates and veneers, chemical deglossers or a light abrasive scuff with a Scotch-Brite pad offer alternatives when aggressive sanding risks damage.
When to sand to bare wood vs. just scuff sand
Knowing whether to sand to bare wood or simply scuff sand depends on the table’s current finish, the paint system to be used, and the desired durability; solid, flaking, or glossy finishes and bare wood repairs require sanding to bare wood, while sound, adhesion-friendly finishes generally only need a light scuff to promote bonding.
Choose bare sanding for compromised or stained surfaces; scuff for intact, well-adhered coatings.
Recommended grit progression and technique for edges and curves
Work through progressively finer grits to establish a smooth, durable profile: start with 80–100-grit to remove old finish or level repairs.
Follow with 120–150-grit to feather edges and eliminate deep scratches.
Then finish with 220-grit for a uniform surface ready to accept primer or paint.
Use a sanding block on flats; hand-sand edges and curves with folded paper or flexible sanding sponges, keeping strokes with the contour.
Deglossing alternatives for laminates and veneers
Laminates and veneers resist paint differently than solid wood, so deglossing requires methods that abrade or chemically etch the surface without damaging the thin face.
Gentle scuffing with 220–320 grit abrasive pads, light sanding at edges, or a dedicated liquid deglosser/etching solution can promote adhesion.
Test an inconspicuous area, follow manufacturer directions, and clean thoroughly before priming to avoid lift or staining.
Priming for Longevity
For long-lasting results, the primer choice should match the tabletop material—wood, metal, or composite—since each requires different adhesion and corrosion resistance.
Application can be by brush, roller, or spray, with method selected for surface texture and desired finish smoothness.
Observe manufacturer drying times and recommended recoat windows to guarantee proper cure and avoid adhesion failures.
Choosing the right primer for wood, metal, and composite tops
Primer selection is a small but critical decision that determines adhesion, durability, and finish across different swivel-table tops.
For wood, a stain-blocking, oil- or shellac-based primer seals tannins and knots.
For metal, an anti-corrosion, etch-priming product prevents rust and promotes bonding.
For composites, a high-adhesion or bonding primer designed for plastics guarantees flexibility and long-term adhesion before topcoating.
Application methods: brush, roller, and spray
Begin by selecting the method that best matches the surface, project scale, and desired finish: brushing offers control for edges and detailed areas, rolling speeds coverage on flat tops, and spraying delivers the smoothest, thinnest films for a professional look.
Use quality brushes for cutting in, short-nap rollers for smooth tops, and fine-tip spray settings for even primer distribution; maintain consistent overlap and proper distance.
Drying times and recommended recoat windows
Patience guarantees durability: after application, primer and topcoat drying times depend on product chemistry, temperature, humidity, and film thickness.
Follow manufacturer recoat windows—typically 1–4 hours for fast-dry primers, 8–24 hours for conventional primers, and 24–48 hours for oil-based or high-build coatings.
Recoating too soon risks lifting; waiting too long may require light sanding to guarantee adhesion and an even finish.
Painting the Swivel Table: Step-by-Step
The section outlines practical steps for applying paint with brushes and rollers, including stroke direction and pressure to avoid lap marks.
It then compares spray technique for smooth, even coverage on the swivel mechanism and offers guidance on masking and distance.
Finally, it specifies recommended coat counts, drying intervals, and strategies for edges, undersides, and hardware clearance.
Best practices for brush and roller application
For smooth, even coverage when painting a swivel table, focus on technique: load brushes and rollers correctly, maintain a consistent stroke pattern, and match tool choice to paint type and surface texture.
Work from tabletop center toward edges, use light pressure to avoid streaks, overlap passes by 30%, and tip out brush marks.
Clean tools between coats and sand lightly for adhesion.
Spray painting technique for even coverage on swivels
After brushing and rolling the tabletop to a smooth base, move on to spray painting the swivel for an even, factory-like finish.
Hold the can or gun 8–12 inches away, maintain steady parallel passes, and overlap each pass by about 50%.
Rotate the swivel slowly to reach all angles. Keep movements continuous to prevent runs; finish with light, uniform misting for consistent texture.
Number of coats and drying time between coats
Apply multiple thin coats rather than a single heavy one to guarantee durability and an even finish; typically two to three coats of spray paint are ideal for a swivel table depending on color and coverage.
Allow recommended flash times between passes (usually 5–15 minutes), then 30–60 minutes before recoat.
Full cure typically requires 24–72 hours; follow manufacturer instructions for best results.
Handling tricky areas: edges, underside, and around hardware
Address tricky spots methodically to guarantee complete, even coverage without buildup.
Edges require thin, angled strokes; sand between light coats to prevent drips.
Flip the table, support it on padded blocks, and paint the underside in sections for airflow.
Remove or mask hardware; use a fine brush to cut in around bolts and hinges, blending edges into adjacent surfaces for a seamless finish.
Finishing and Sealing for Durability
The section contrasts oil-based polyurethane with water-based topcoats, outlining when each is appropriate for a painted swivel table.
It then explains technique for applying thin, even layers to prevent drips and runs.
Finally, it specifies recommended curing times before reassembly and regular use to guarantee durable protection.
When to use polyurethane vs. water-based topcoats
When deciding between oil-based polyurethane and water-based topcoats, consider the project’s exposure, desired look, and drying time.
Oil-based offers tougher abrasion resistance and ambering suited to warm tones, ideal for high-traffic or outdoor pieces.
Water-based dries clear, has lower odor, and recoats faster, preferred for light colors, quick projects, or areas sensitive to fumes.
Applying thin, even topcoat layers without drips
Apply each topcoat thinly and deliberately to prevent sagging, runs, or uneven buildup that compromise both appearance and durability.
Use a high-quality synthetic brush or foam applicator, maintain a wet edge, and work in long, light strokes.
Inspect edges and undercuts for drips, smooth immediately with the tip of the brush.
Allow recommended flash time between coats and lightly de-nib with fine grit if needed.
Curing time before reassembly and use
Before reassembly, allow the finish to cure fully so solvents evaporate and polymers cross-link to their rated hardness.
Consult product datasheets for recommended cure times—often 24–72 hours for surface handling, up to seven days for full cure.
Reassemble only when tack-free and hard; test discreet areas before regular use.
Environmental factors (temperature, humidity, ventilation) can extend required curing periods.
Reassembling and Adjusting the Swivel Mechanism
When reattaching the swivel hardware, care is taken to protect the fresh finish by using soft cloths or tape under tools and fasteners.
Once assembled, the mechanism is lubricated and adjusted for smooth, even rotation without play.
Finally, protective pads or bumpers are installed to prevent metal-on-wood wear and extend the tabletop’s finish.
Reattaching hardware without scratching fresh finish
A few simple precautions prevent scratched paint while reattaching the swivel hardware: protect the fresh finish with soft barriers, use the correct-sized tools, and tighten fasteners gradually to maintain alignment.
Place felt, tape, or cloth between metal and painted surfaces, handle parts with clean gloves, start screws by hand to avoid cross-threading, and check fit visually before final tightening to preserve the coating.
Lubrication and adjustment for smooth rotation
Apply a light, appropriate lubricant and make incremental adjustments to guarantee the swivel turns smoothly without play.
The painter reinstalls cleaned bearings, bushings, or race plates, applying grease or graphite per manufacturer guidance.
Tighten fasteners gradually, testing rotation and load at each step.
Remove excess lubricant to prevent drips; confirm alignment and even clearance before final torque and recheck operation under normal tabletop weight.
Protective pads and bumpers to prevent future wear
Although often overlooked, installing protective pads and bumpers at contact points greatly reduces metal-on-metal wear and dampens shock to the swivel mechanism.
Select thin felt, neoprene, or silicone pads sized to avoid binding. Install bumpers where the table meets stops to absorb impact.
Replace pads periodically and inspect for compression or adhesive failure. Proper placement preserves finish and prolongs swivel performance.
Paint Choices for Different Look and Function
The section compares high-gloss, satin, and matte sheens for their look and scratch resistance, noting how sheen affects perceived depth and durability.
It also covers textured and specialty options—chalk, milk, and metallic finishes—and when they suit a swivel table’s use and style.
Practical color tips explain how darker tones and patterned finishes conceal wear while neutral or coordinating hues help the piece blend with existing decor.
High-gloss vs. satin vs. matte: visual and durability trade-offs
When choosing a finish for a swivel table, the level of gloss determines both the appearance and how well the surface withstands wear.
High-gloss shows reflections and resists cleaning abrasion but highlights flaws and scratches.
Satin balances sheen and concealment, offering moderate durability.
Matte hides imperfections and reduces glare but is more prone to scuffs and harder to clean without marking.
Textured and specialty finishes (chalk, milk paint, metallic)
After selecting a sheen, consideration of textured and specialty paints opens new aesthetic and functional possibilities for a swivel table.
Chalk and milk paints offer matte, velvety surfaces and age beautifully when distressed; they require sealing for durability.
Metallics create reflective accents or full finishes but need proper primers and multiple thin coats.
Texture additives can mask imperfections yet may complicate cleaning and refinishing.
Color selection tips for hiding wear and matching decor
How can color choices both conceal daily wear and coordinate with surrounding decor?
Neutral mid-tones and muted greens, blues, or charcoals mask fingerprints and minor scratches better than stark white or glossy black.
Consider low-sheen finishes and tonal contrasts for edges to hide chips.
Match undertones to nearby fabrics or metals to create cohesion; test samples under room lighting before committing.
Troubleshooting Common Problems
Common painting flaws such as brush marks, drips, and orange peel can usually be prevented with proper technique and corrected with light sanding and recoat.
Adhesion failures and peeling require diagnosing surface contamination or inadequate priming before spot-priming and repainting.
Minor scratches and chips can be repaired with touch-up paint and clear coat without refinishing the entire swivel table.
Preventing and fixing brush marks, drips, and orange peel
Recognize that brush marks, drips, and orange peel are surface defects caused by application technique, paint viscosity, and environmental conditions; addressing them requires identifying the root cause before attempting fixes.
To prevent, use proper thinning, high-quality brushes or spray, even strokes, and appropriate temperature/humidity.
To fix, sand lightly between coats, remove drips with a scraper and sand smooth, then apply thin, even finish coats.
What to do for paint adhesion failures and peeling
Inspect the surface closely to determine why paint is failing: adhesion problems and peeling result from poor surface preparation, incompatible coatings, moisture, or contamination such as oil or wax.
Remove loose paint, sand to feather edges, clean with degreaser, and allow complete drying.
Test compatibility with a small primer and topcoat; if needed, apply appropriate bonding primer before repainting to guarantee durable adhesion.
Repairing scratches and chips without refinishing entire table
Addressing scratches and chips without refinishing the entire swivel table focuses on targeted repairs that restore appearance and protect the surface.
Clean area, sand lightly, and apply matching wood filler or epoxy for chips.
Sand smooth once cured, prime small spots, and touch up with matching paint using fine brush.
Finish with clear coat to blend repair and protect against wear.
Maintenance and Care to Extend Finish Life
Routine maintenance preserves the painted finish and guarantees smooth swivel operation.
Recommended care includes gentle cleaning with pH-neutral cleaners, scheduled touch-ups using matching paint and clear protective coats, and protective measures such as felt pads, mats, or limiting heavy impacts on high-use tables.
Brief instructions for each method follow to guide safe, long-lasting results.
Cleaning methods safe for painted surfaces
Maintain painted swivel tables with gentle, consistent cleaning to preserve the finish and prevent damage.
Use a soft microfiber cloth and mild, pH-neutral soap diluted in water. Wring cloth well to avoid excess moisture.
For stubborn grime, a soft-bristled brush and gentle agitation suffice.
Avoid abrasive pads, ammonia, solvent-based cleaners, and high-pressure washing to prevent coating breakdown.
Dry thoroughly after cleaning.
Periodic touch-up techniques and products
After cleaning and drying the painted swivel table, periodic touch-ups preserve the finish and prevent small blemishes from worsening.
Inspect for chips, scratches, and scuffs. Lightly sand damaged areas, remove dust, then apply compatible primer and matching paint in thin coats.
For minor nicks, use touch-up pens or brushes. Finish with a compatible clear coat and allow full cure before use.
Preventative measures for high-use swivel tables
When regularly used swivel tables are protected proactively, their finishes resist wear and require fewer repairs.
Simple measures—such as applying durable topcoats, fitting protective pads and coasters, and controlling exposure to sunlight and moisture—significantly extend finish life.
Regular cleaning with mild cleaners, periodic resealing, prompt spill management, and limiting abrasive contact preserve appearance and function, reducing the need for refinishing and prolonging swivel mechanism health.
Time, Cost, and When to Consider Professional Refinishing
A clear estimate of time for each step—prep, priming, drying, painting, and sealing—helps plan a swivel table project and typically ranges from a few hours of active work to several days including curing.
DIY material costs commonly fall between $20 and $150 depending on paint quality and tools, while professional refinishing can run several hundred dollars but may be justified for complex restorations, valuable pieces, or time-constrained owners.
Evaluating the table’s condition, desired outcome, and budget will indicate whether a DIY approach or hiring a pro is the better choice.
Estimated time breakdown for each step
Estimating time, cost, and when to hire a professional lets a homeowner plan a swivel-table repainting project with realistic expectations. Typical DIY timelines span 3–8 hours for a small table and 1–2 days for larger pieces. Costs range from $20–$100 for supplies versus $150–$500+ for professional refinishers.
Professional help should be considered for structural damage, complex finishes, or when consistent, long-lasting results are required.
Disassembly and cleaning: 30–60 minutes.
Sanding: 30–90 minutes.
Priming: 15–30 minutes plus 1–4 hours dry time.
Painting: 30–90 minutes per coat, 1–3 coats.
Clearcoat and cure: 1–3 hours active, 24–72 hours full cure.
Touchups and reassembly: 30–60 minutes.
Adjust for drying conditions and complexity.
Typical DIY material cost ranges
With a clear timeline established, attention turns to the typical material costs homeowners can expect for a swivel-table repainting job.
Basic supplies—sandpaper, primer, paint, brushes/rollers, tack cloths—typically total $25–$75. Higher-quality paints or specialty primers raise costs to $80–$150.
Optional items like masking, new hardware, or rust treatment add $10–$40. Small projects rarely exceed $200 in materials.
When professional services are worth the investment
When does hiring a pro make more sense than tackling a swivel-table refinish as a DIY?
Professionals are worth it when time is limited, surface damage requires expert repair, or a guaranteed durable finish matters.
Consider labor cost versus personal time, complexity of swivel hardware, and desired warranty.
For valuable antiques or high-visibility pieces, professional refinishing often yields better long-term value.
Project Checklist
A concise checklist guides the project from initial prep through final cure, ensuring no step is missed.
It outlines necessary materials, surface prep, painting sequence, and drying/curing stages. The list below breaks the process into clear, actionable steps.
- Gather materials and set up a ventilated workspace
- Prep the table: clean, sand, and mask hardware
- Apply primer and paint in recommended coats with proper drying times
- Allow full cure, reassemble hardware, and perform a final inspection
Step-by-step checklist from prep to final cure
Begin by laying out a clear, sequential checklist that guides the project from initial prep through final cure, listing each task, required materials, estimated time, and quality checkpoints.
Include:
- inspect and clean (15 min)
- strip/repair (30–60 min)
- sand (20–40 min)
- prime (coat, dry 2–4 hrs)
- paint (2 coats, 1–2 hrs each)
- cure (24–72 hrs)
- final inspection and reassembly.
Comparison of Paint Systems for Swivel Tables
A concise comparison of common primer, paint, and topcoat combinations helps determine the best system for a swivel table’s material and use. The table below summarizes typical pairings and their main advantages or drawbacks for quick reference. Readers can use this as a starting point when choosing a system for durability, finish, and maintenance needs.
| System | Pros / Cons |
|---|---|
| Oil-based primer + oil paint + polyurethane topcoat | Durable and smooth finish; longer cure time and stronger fumes |
| Latex primer + latex paint + water-based polyurethane | Easier cleanup and faster drying; slightly less hardness than oil systems |
| Shellac primer + alkyd enamel + urethane topcoat | Excellent stain blocking and adhesion; more costly and requires solvent cleanup |
| Epoxy primer + epoxy paint + polyaspartic topcoat | Extremely durable and chemical-resistant; more complex application and longer prep |
| Self-priming paint + wax topcoat | Simplest application for quick projects; lower long-term protection and harder to repair |
Quick reference: primer + paint + topcoat combinations and pros/cons
Choosing the right combination of primer, paint, and topcoat determines a swivel table’s durability, appearance, and maintenance needs. This quick reference summarizes common systems—water-based acrylic, oil-based alkyd, spray-applied enamel, and conversion varnish—then lists their key pros and cons so readers can match performance to use and budget.
Water acrylic: easy cleanup, low odor; less durable.
Alkyd: durable, smooth; higher VOCs, yellowing.
Spray enamel: factory finish, fast; equipment needed.
Conversion varnish: toughest, chemical cure; professional application, cost.
Conclusion
A carefully executed paint job can revive a swivel table, combining aesthetics with durable protection when steps are followed precisely. For example, a small café refurbished ten mismatched swivel tables by stripping old lacquer, priming with rust-inhibiting primer, and applying two coats of durable enamel; they now withstand daily use and frequent cleanings without chipping. With attention to preparation, correct materials, and regular maintenance, painted swivel tables can look professional and last for years.