How to Replace the Cartridge in a Delta Kitchen Faucet: Step-by-Step Repair Guide
To replace the cartridge in a Delta kitchen faucet and stop leaks, restore temperature control, and fix stiff handles, follow these steps: shut off the water supply, remove the handle and retaining clip or nut, extract the old cartridge, clean the valve, lubricate the O-rings, install the new cartridge ensuring proper alignment, and reassemble the faucet. Finally, test for leaks and smooth operation. For detailed instructions and troubleshooting tips, continue reading.
What a Cartridge Replacement Fixes in a Delta Kitchen Faucet
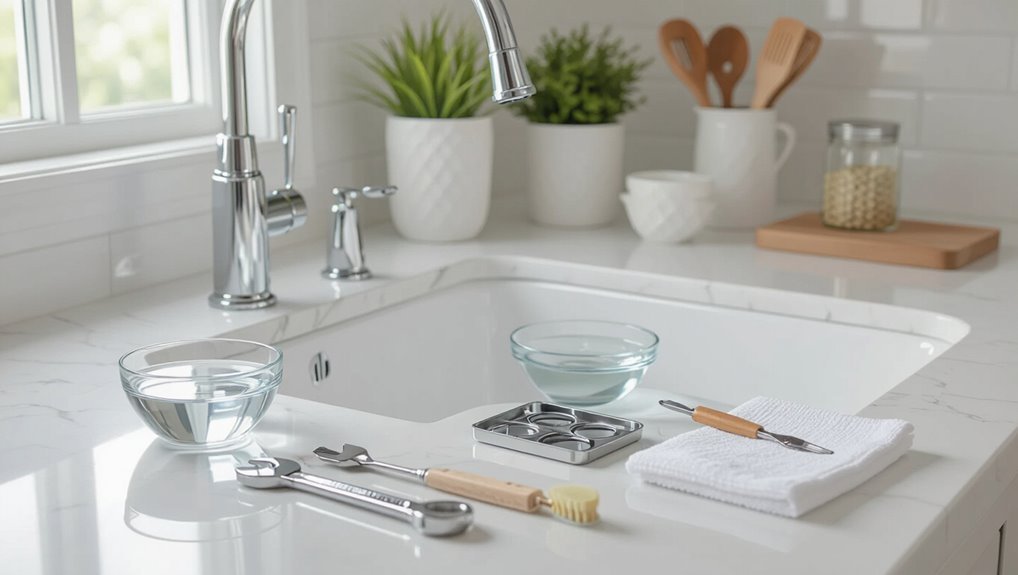
A failing Delta cartridge commonly presents as persistent dripping, difficulty controlling water temperature, uneven flow, or a stiff handle.
These signs point specifically to worn seals, damaged O-rings, or internal valve wear rather than issues with supply lines, aerators, or mounting hardware.
Distinguishing cartridge symptoms from other faucet problems helps determine whether a replacement will resolve the fault or further diagnosis is needed.
Common symptoms signaling a bad cartridge
When a Delta kitchen faucet begins to show performance issues, the cartridge is often the culprit; recognizing these symptoms helps determine whether a replacement will restore proper function.
Common signs include persistent dripping, uneven water flow, difficulty adjusting temperature or handle stiffness, sudden pressure loss, and leaking at the base.
These indicate the need to learn how to replace the cartridge in a delta kitchen faucet.
How cartridge issues differ from other faucet problems
Recognizing the symptoms of a failing cartridge helps narrow the diagnosis, but not all faucet problems originate with the cartridge.
Cartridge faults typically cause dripping, reduced flow, erratic temperature control, or stiff handle movement.
Other issues—worn seals, aerator clogs, mineral buildup, loose connections, or valve body damage—produce overlapping signs but require different fixes.
Correct diagnosis prevents unnecessary cartridge replacement.
Tools, Parts, and Safety Precautions
A concise list of tools—adjustable wrench, Phillips and flat drivers, Allen keys, pliers, and a basin wrench—will be needed to access and remove the Delta cartridge.
The correct replacement part should be identified by the Delta model number or cartridge code to guarantee an exact match.
Before beginning, the water supply must be shut off, the area cleared, and appropriate eye and hand protection used.
Tools required
Successful cartridge replacement depends on having the right tools, correct replacement parts, and basic safety gear prepared before starting.
Necessary items focus on access, removal, and reassembly while protecting surfaces and hands. Use quality tools to prevent damage and guarantee proper torque during installation.
- Adjustable wrench, basin wrench, and Allen keys
- Screwdriver set, pliers, and cartridge puller
- Safety gloves, towel, and bucket
Parts to buy: Delta cartridge identification and model matching
With tools and safety gear laid out, the next step is identifying the correct Delta cartridge and ordering matching parts.
Locate model number on faucet or underside of sink, compare cartridge shape and inlet configuration, and confirm finish match.
Order genuine Delta replacement or exact aftermarket equivalent to guarantee fit and function.
- Verify model number
- Compare cartridge type
- Purchase matching part
Safety and preparatory steps before starting
Begin by assembling all necessary tools, parts, and safety gear and placing them within easy reach to minimize interruptions once work begins.
Turn off water supply and relieve pressure by opening faucet.
Clear under-sink area and protect cabinet surfaces.
Use gloves and eye protection.
Have replacement cartridge, O-rings, plumber’s grease, adjustable wrench, and flashlight ready.
Verify parts match before installation.
How to Identify Your Delta Faucet Type and Cartridge Model
Recognizing the Delta family begins with visual cues and handle styles—single-handle ball, cartridge, and Diamond Seal configurations each have distinct shapes.
Model numbers and serials are usually stamped on the underside of the spout or escutcheon, or recorded on original paperwork.
Confirming cartridge compatibility requires matching that model/serial information to Delta’s parts charts or consulting the removed cartridge for part markings.
Visual cues and handle styles for Delta families
Identifying a Delta faucet starts by noting visible features and handle shapes that correspond to specific product families and cartridge types.
Single-handle lever, ball-style knobs, and dual-handle widespread designs each hint at distinct cartridges.
Trim details—spout arc, escutcheon shape, and set-screw location—further narrow identification.
Photographs aid comparison to Delta family diagrams before ordering replacement parts.
Where to find model numbers and serials
When locating a Delta faucet’s model number and serial, consult the underside of the spout, the escutcheon base, or the faucet body behind the handle where stamped or printed tags are commonly placed.
Additional information often appears on the original installation manual, purchase receipt, or packaging. Photographs of labels, receipts, or box markings aid identification.
For older fixtures, check beneath the sink, on supply lines, or on mounting hardware for etched codes.
How to confirm cartridge compatibility
After locating model numbers and any serials, the next step is to confirm which cartridge fits the faucet by matching those identifiers with Delta’s cartridge listings and physical cartridge features.
Cross-reference model or 5-digit numbers on Delta’s website, parts diagrams, or retailer listings.
Compare stem shape, O-ring sizes, retaining clip style, and port alignment.
When uncertain, photograph parts and consult customer support.
Step-by-Step Cartridge Replacement Procedure
The procedure begins by shutting off the water supply and relieving any pressure to prevent leaks.
Next, the handle and decorative trim are removed so the retaining clip, bonnet nut, or cam assembly can be accessed and extracted.
With those components out of the way, the old cartridge is removed and the valve housing and O-rings are inspected and cleaned before installing the replacement.
Step 1 Shut off water and relieve pressure
Begin by shutting off both the hot and cold supply valves beneath the sink to prevent water flow to the faucet.
Next, open the faucet to drain remaining water and relieve line pressure.
Close any downstream fixtures and place a towel or small bucket under the work area to catch drips.
Verify flow has stopped before proceeding with disassembly.
Step 2 Remove handle and decorative trim
Loosen the set screw or cap to free the handle, then lift it straight off to expose the escutcheon and trim components.
Remove any decorative caps, collars, or sleeves by hand or with a soft tool to avoid scratching finishes.
Keep fasteners and small parts organized.
Note the orientation of decorative pieces for correct reassembly and place them on a clean surface away from the work area.
Step 3 Extract retaining clip, bonnet nut, or cam assembly
With the handle and trim removed and parts laid out, attention shifts to the internal retaining elements that hold the cartridge in place.
The technician locates and removes the U-shaped retaining clip with needle-nose pliers or unscrews the bonnet nut using an adjustable wrench.
For Delta models with a cam assembly, the cam and spring are lifted out.
Removed parts are kept organized for reassembly.
Step 4 Remove the old cartridge safely
Carefully lift the cartridge straight up to avoid damaging the valve seat or O-rings; depending on the model it may slide out easily or require a firm, even pull.
Support the cartridge with fingertips, extracting it slowly to prevent sudden drops.
Note orientation and any wear.
Place the removed cartridge on a clean towel for inspection or replacement and avoid contaminating internal passages.
Step 5 Inspect and clean valve housing and O-rings
Inspect the valve housing and O-rings for mineral buildup, corrosion, or physical damage before installing the new cartridge.
The technician should remove debris with a soft brush and vinegar solution, dry thoroughly, and evaluate O-rings for cracks or flattening.
Replace any compromised seals.
Lightly lubricate new or inspected O-rings with plumber’s grease to guarantee proper seating and prevent leaks.
Step 6 Install new cartridge and align correctly
Place the new cartridge into the valve body, matching the tabs and slots so it seats fully and sits flush against the housing.
Rotate the cartridge until alignment marks (or guide notches) line up with the valve body.
Make certain O-rings remain seated and that the cartridge moves smoothly when actuated.
Confirm correct orientation for hot/cold before securing retaining clip or nut.
Step 7 Reassemble the faucet and reinstall handle
With the cartridge properly seated, reassembly proceeds by reversing disassembly steps: reinstall the retaining clip or nut, slide the escutcheon or trim back into position, and secure any decorative collars or screws that hold the valve cover.
Reattach the handle, tighten its set screw or cap, replace any lever caps, and guarantee movement is smooth and aligned before restoring supply lines.
Step 8 Turn water back on and test for leaks and proper operation
Open the main shutoff and any under-sink valves slowly to reintroduce water to the faucet while watching for immediate leaks.
Operate the handle through full hot and cold range, checking for smooth motion and proper temperature.
Inspect connections and the spout for drips.
Tighten fittings if needed, dry surfaces, and recheck.
Confirm steady flow and no leaks before finishing.
Visual Aids and Troubleshooting During Repair
The section provides clear photos and diagrams to clarify common points of confusion during disassembly, such as hidden retaining clips and orientation marks.
It explains methods for freeing a stuck cartridge, including appropriate penetrating oil, gentle prying techniques, and when sealing components should be replaced.
Finally, it outlines quick tests for temperature and pressure after installation and criteria for stopping the repair and contacting a professional.
Common points of confusion during disassembly
Carefully documenting each step reduces mistakes when disassembling a Delta kitchen faucet, since several small parts look similar and can be reinstalled incorrectly.
Labels, photos, and a shallow parts tray help maintain order. Common confusions involve retaining clips, springs, and orientation of the cartridge.
- Retaining clips: shape and placement
- Springs: size and seating
- Cartridge: alignment marks
What to do if the cartridge is stuck
If the cartridge resists removal, begin by evaluating visible obstruction and corrosion around the valve body and retainer clip; this quick inspection helps determine whether lubrication, heat, or gentle persuasion is appropriate.
Apply penetrating lubricant, wait, then use pliers with cloth for controlled grip. Tap around the cartridge base lightly to break mineral seals.
If immobile, document assembly and consult OEM guidance before increasing force.
How to test for proper temperature and pressure after installation
After reinstalling the cartridge and reassembling the faucet, verify temperature and pressure by running both hot and cold water separately and together.
Observe flow consistency, spout aeration, and shift smoothness between settings.
Check for steady pressure without sputtering or hammer.
Confirm hot reaches expected warmth and cold stays cool.
Inspect connections for leaks under load.
Repeat tests while adjusting handle range.
When to stop and call a professional
When should work stop and a plumber be summoned?
If leaks persist after tightening and replacing the cartridge, if water damage or mold appears, if supply lines or valve bodies are corroded, or if water pressure and temperature issues remain unresolved, the repairer should stop.
Complex internal damage, unfamiliar tools, or unclear diagnostics warrant professional evaluation to prevent further damage and guarantee proper seals.
Preventive Maintenance and Longevity Tips
Routine cleaning to remove mineral buildup and use of mild descalers can prevent stiffness and leaks.
Attention to water quality, such as installing a softener or sediment filter, helps extend cartridge life.
Seals, springs, and other internals should be inspected and replaced at the first sign of wear to avoid full cartridge failure.
Routine cleaning and mineral buildup prevention
Because mineral deposits can quickly impair a Delta cartridge’s performance, regular cleaning and simple preventive steps keep the faucet operating smoothly and extend its service life.
Follow concise routines to remove scale, protect seals, and reduce buildup.
- Soak aerator and spray head in vinegar monthly to dissolve deposits.
- Wipe exterior and handles weekly to prevent residue accumulation.
- Flush lines after prolonged disuse.
Best practices for water quality and cartridge lifespan
Although often overlooked, water quality is the single most important factor affecting a Delta cartridge’s lifespan; testing for hardness, pH, and chlorine guides mitigation.
Installing a sediment prefilter and a water softener or ion exchanger reduces abrasive particles and mineral scaling.
Periodic flushing after supply work and using corrosion-inhibiting treatments in aggressive water preserves seals and metal surfaces, extending cartridge service life.
When to replace seals, springs, and other internal parts
Inspect seals, springs, and other internal components at predictable intervals—typically every 2–3 years for moderate-use households and sooner in hard-water or high-chlorine areas—to catch wear before leaks or performance loss occur.
Replace parts when visible cracks, flattening, corrosion, or stiffness appear, or when drip, reduced flow, or handle resistance develops.
Use OEM kits and document dates to track future maintenance.
Comparing Delta Cartridge Types and Replacement Costs
A brief comparison of Delta cartridge types and their replacement costs frames choices between professional labor and DIY effort, noting estimated time and difficulty for each approach. Below is a simple, emotive table to guide quick decisions and point to sources for genuine Delta cartridges and reliable aftermarket alternatives.
| Consideration | Feeling evoked |
|---|---|
| Professional labor: 30–60 min, higher cost | Relief |
| DIY: 15–45 min, variable difficulty | Empowerment |
| Genuine Delta cartridges: OEM fit, warranty | Confidence |
| Trustworthy aftermarket: Lower cost, mixed reviews | Caution |
Estimated labor vs DIY time and difficulty
Comparing labor estimates and DIY time for replacing Delta cartridges clarifies whether hiring a pro or doing it oneself makes sense:
Professional labor typically costs 1–2 hours plus service fees; a homeowner with basic tools can finish in 30–60 minutes.
Difficulty varies by model and access. Consider parts, tools, and confidence before deciding.
- Pro: time, cost, warranty
- DIY: savings, tools, risk
- Hybrid: consult then DIY
Where to buy genuine Delta cartridges and trustworthy aftermarket options
Where can homeowners find authentic Delta cartridges and reliable aftermarket alternatives without risking fit or function?
Genuine Delta parts are sold through Delta’s official website, authorized plumbing wholesalers, and major retailers; OEM guarantees compatibility and warranty.
Quality aftermarket cartridges from known brands may offer cost savings but require matching model numbers and positive reviews.
- Delta official website/authorized dealers
- Licensed plumbing supply stores
- Reputable aftermarket brands with confirmed model fitment
Troubleshooting Guide: Problems After Replacement
After replacing a Delta cartridge, common issues may still appear and require systematic checks.
Technicians or homeowners should inspect for persistent leaks at the spout or base, handle misalignment or stiffness, continued dripping, and no or reduced water flow.
Each symptom often points to specific causes such as improper seating, damaged seals, debris in the lines, or incorrect cartridge type.
Persistent leaks at spout or base
Inspect the faucet for leaks at the spout or base immediately after cartridge replacement, as these are common signs of improper seating, damaged seals, or installation errors.
Verify O-rings and seals are correctly seated and undamaged, guarantee the cartridge is fully seated and rotated to lock, tighten retaining hardware to spec, and confirm supply lines and spout connections are secure.
Test under normal pressure.
Handle hard to move or misaligned
A stiff or misaligned handle often signals issues distinct from leaks, such as incorrect cartridge orientation, a displaced retaining clip, or debris caught between the cartridge and valve body.
Inspect cartridge seating and alignment, verify the retaining clip is fully engaged, and clear any sediment.
Confirm handle adapter and set screw alignment, then test rotation.
Replace worn cam or springs if binding persists.
Dripping continues after replacement
If dripping persists after cartridge replacement, the leak usually stems from an installation issue or a faulty part rather than the cartridge alone.
Check that the retaining clip and O-rings are seated correctly, seals are undamaged, and the cartridge aligns properly.
Inspect the valve body for debris, verify supply shutoff and water pressure, and confirm the new cartridge matches the model specifications.
No water flow or reduced flow
Check for blockages, alignment errors, and supply issues when there is no water or noticeably reduced flow after replacing the cartridge.
Inspect inlet screens and aerator for debris, flush lines before reinstalling.
Verify cartridge orientation and seating; confirm O‑rings aren’t pinched.
Guarantee shutoff valves are fully open and supply lines energized.
If low pressure persists, test upstream plumbing and replace defective components.
Quick Reference: Step Checklist and Parts Diagram
Begin by gathering the required tools and parts—cartridge kit, adjustable wrench, Phillips screwdriver, plumber’s grease, and replacement O-rings—then shut off the water supply and clear the sink area.
A concise checklist and labeled parts diagram guarantee efficient replacement: confirm model, remove handle and trim, extract cartridge.
Follow reassembly sequence and test for leaks.
- Prepare
- Remove
- Reinstall
Conclusion
Replacing a Delta kitchen faucet cartridge restores smooth operation and stops leaks when the correct model and careful technique are used. For example, a homeowner who first tried a generic cartridge still experienced drips until switching to the exact Delta RP19804 replacement and following torque and alignment steps; the leak stopped and handle action returned to normal. Proper identification, the right tools, and patience prevent repeat visits and extend faucet life.