How to Install a Moen Kitchen Faucet Cartridge: Step-by-Step Repair Guide
To install a Moen kitchen faucet cartridge, start by shutting off the water supply. Next, remove the handle and trim, then extract the retaining clip or nut to pull out the old cartridge. Ensure that the replacement cartridge matches your model. Lightly lubricate the O-rings, insert the new cartridge in the correct orientation, and secure the clip or nut. Finally, reassemble the trim, restore the water supply, and check for leaks and proper temperature mixing. For more details on identification, troubleshooting, and maintenance, continue reading.
Overview of Replacing a Moen Kitchen Faucet Cartridge
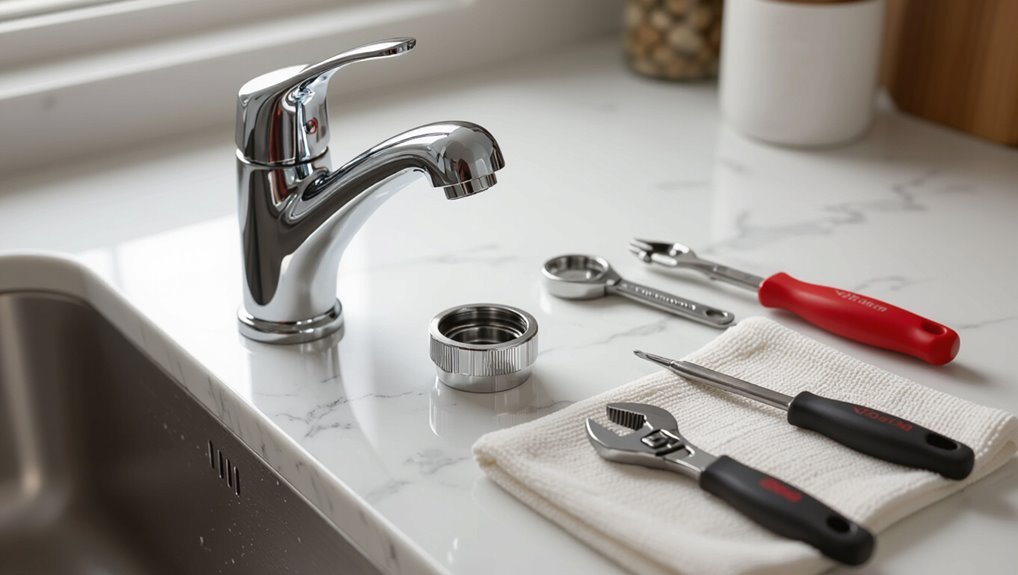
Replacing a Moen kitchen faucet cartridge typically involves shutting off the water, removing the handle and trim, extracting the old cartridge, and installing a matching replacement to restore proper flow and stop leaks.
Identification of the specific cartridge type—such as 1225, 1255, or Posi-Temp—by visual features or model number guarantees compatibility and successful installation.
Common problems fixed by a cartridge replacement include dripping faucets, reduced water pressure, and difficulty operating the handle.
Quick summary of the process and expected outcomes
Begin by turning off the water supply and clearing the area.
Then remove the handle, escutcheon, and retaining clips to access the cartridge.
The guide outlines how to install Moen kitchen faucet cartridge: extract the old cartridge, inspect seals, seat the new cartridge correctly, reassemble components, and restore water.
Expected outcomes: smooth operation, stopped leaks, and restored temperature control.
Types of Moen cartridges and how to identify yours
Several distinct Moen cartridge types exist—primarily the 1225, 1222/1225X, 1225B, and the newer 1255/1255B—each with specific dimensions and inlet arrangements that determine compatibility.
Identification uses measurements, inlet spacing, retaining clip or nut style, and handle type.
Visual comparison to manufacturer diagrams and part numbers stamped on old cartridges confirms selection.
Model year and faucet series also assist accurate matching.
Common problems solved by replacing the cartridge
A worn or damaged Moen cartridge is a frequent source of faucet issues, and swapping it typically resolves leaks at the spout, a drippy handle, inconsistent water temperature, and reduced or erratic flow.
Replacing the cartridge also addresses sudden pressure loss, rough or stiff handle operation, and intermittent hot/cold switching.
It restores smooth control, stops water waste, and prevents further valve damage.
Tools, Parts, and Safety Preparations
Before beginning, the necessary and optional tools—adjustable wrench, hex keys, pliers, and a basin wrench—should be laid out.
Confirm the replacement cartridge matches the faucet model and gather any required O-rings or retaining clips.
Shut off the water, clear the workspace, and place towels and a bucket beneath the sink to catch residual water.
Required tools and optional helpful tools
Essential hand tools and a few optional items make cartridge replacement efficient and reduce the risk of damage.
Required: adjustable wrench, Phillips screwdriver, Allen key set, pliers, and a basin wrench for tight spaces.
Optional: silicone grease, pick set, and flashlight.
Follow safe shutdown and protect sink surfaces.
- Adjustable wrench
- Phillips screwdriver
- Basin wrench
Replacement cartridge and parts compatibility checklist
When confirming a replacement cartridge, the technician should verify model compatibility, part numbers, and included seals to guarantee a correct fit and prevent leaks.
Inspect OEM vs. aftermarket labels, confirm handle style match, and note installation orientation.
Verify auxiliary parts: retaining clips, O-rings, and supply-seat geometry.
- Match model and part number
- Confirm included seals and clips
- Check handle and orientation compatibility
Safety and workspace preparation (water shutoff, towels, bucket)
A single, organized workspace reduces the risk of water damage and injury.
The technician should shut off hot and cold supply valves and open the faucet to relieve pressure.
Place towels around the sink and a bucket beneath supply lines to catch drips.
Clear clutter, guarantee adequate lighting, and keep tools and replacement cartridge within reach to streamline the repair.
How to Identify Your Faucet Model and Cartridge
The technician first locates any model numbers and notes the handle type, since those details narrow compatible cartridges.
Visual cues such as cartridge shape, snap rings, or retaining nuts help distinguish between Moen cartridge versions.
If identification remains uncertain, Moen’s online resources or a visit to a hardware store with the old part will confirm the correct replacement.
Finding model numbers and identifying handle type
How can a homeowner quickly determine which Moen cartridge and handle they have before disassembly?
Begin by locating model numbers stamped under the sink, on the escutcheon, or on purchase paperwork.
Note handle style—single lever, double handle, or joystick—and measure spline count and orientation.
Photograph the faucet and serial tags.
Cross-reference findings with Moen’s online parts lookup or contact support for confirmation.
Visual cues to distinguish cartridge versions
Once model numbers, handle style, and photos are gathered, visual cues on the faucet itself help narrow which cartridge version is present.
Inspect spout shape, escutcheon size, escutcheon screw placement, and visible retaining clips or C-rings.
Note inlet orientation, stamped numbers, and plastic versus metal components.
Compare these features to reference images to pinpoint the correct cartridge variant.
When to consult Moen resources or bring parts to a hardware store
If uncertainty remains after visual checks and photo comparisons, consult Moen’s resources or take parts to a hardware store for confirmation.
Use Moen’s model lookup, serial numbers, and illustrated parts lists online.
Bring the cartridge, handle hardware, and clear photos to a knowledgeable store associate.
Professionals can verify compatibility, recommend correct replacement cartridges, and advise on tools or warranty coverage before purchase.
Step-by-Step Removal of the Old Moen Cartridge
First, the water supply should be shut off and any residual pressure released.
Next, the handle and trim are removed carefully—following the correct method for single‑handle or two‑handle models—to expose the cartridge retaining clip or nut.
Finally, the retaining hardware is accessed and the old cartridge is safely extracted for inspection or replacement.
Shut off water supply and relieve pressure
Shut off the water supplies and relieve any remaining pressure before touching the faucet.
The technician closes both hot and cold shutoff valves under the sink.
Afterward, they open the faucet to drain residual water and pressure, then briefly depress the sprayer or side lever if present.
They confirm no flow and recheck valves before proceeding with cartridge removal.
Remove handle and trim pieces without damage (single-handle and two-handle variations)
Begin by exposing the handle and surrounding trim so that all retaining screws, set collars, and decorative caps are visible and accessible.
Using appropriate screwdrivers and hex wrenches, remove caps and screws gently.
Lift single-handle levers straight up; for two-handle models, detach escutcheons and bonnet nuts.
Protect finishes with cloth, keep fasteners organized, and avoid prying that could chip chrome or plastic.
Accessing the cartridge retaining clip or nut
Move clear access to the cartridge area by retracting any remaining trim or escutcheon so the retaining clip or nut is fully visible beneath the spout base.
Inspect whether a C-clip, horseshoe clip, or retaining nut secures the cartridge.
Use appropriate tools—needle-nose pliers for clips, adjustable wrench for nuts—taking care not to mar finishes.
Note orientation and keep fasteners organized for reassembly.
Safely extracting the old cartridge
With the retaining clip or nut removed and the area cleared, the old Moen cartridge can be withdrawn safely by first ensuring the water supply remains off and any residual pressure is relieved by lifting and holding the handle to drain trapped water.
Grasp the cartridge stem firmly, wiggle gently while pulling straight upward, avoiding twisting.
Inspect the bore, remove debris, and note orientation for the new cartridge.
Inspecting and Preparing the Faucet Body Before Installation
Before installing the new cartridge, the faucet body should be cleaned of mineral buildup and debris to guarantee proper seating and flow.
The technician then inspects O-rings, springs, and seats for cracks, flattening, or corrosion that could cause leaks. Parts showing visible wear or damage should be replaced, while intact components may be reused to save cost and time.
Cleaning mineral buildup and debris from the valve body
Cleaning mineral deposits and debris from the valve body guarantees a reliable seal and smooth cartridge operation.
Use a soft brush and distilled vinegar or a mild descaler to loosen buildup; avoid metal tools that scratch. Rinse thoroughly with clean water and blot dry.
Inspect the passageways for trapped grit and flush until water runs clear before proceeding with cartridge installation.
Inspecting O-rings, springs, and seats for wear
A careful inspection of the O-rings, springs, and seats determines whether replacement is required to guarantee a watertight seal and proper cartridge function.
Examine components for cracks, flattening, corrosion, or hardening. Verify spring tension and seat mating surfaces for nicks.
- Remove parts and inspect visually and by touch.
- Compare to new parts for deformation.
- Note any damage for replacement.
When to replace additional parts vs. reuse
Several factors determine whether additional faucet components should be replaced or can be reused when preparing the body for cartridge installation.
Age, visible corrosion, deformation, mineral buildup, and seal integrity guide the decision.
Replace corroded or brittle parts, compressed springs, and damaged seats or O-rings.
Reuse clean, flexible seals and intact hardware.
Prioritize parts that affect sealing and valve function to prevent leaks.
Installing the New Moen Cartridge
The new Moen cartridge is prepared with a thin layer of plumber’s grease on the O-rings and inserted with the correct orientation to engage the valve ports.
It is then secured in place with the manufacturer’s clip or retaining nut, followed by reassembly of the trim and handle according to single- or two-handle instructions.
Finally, the water supply is reconnected and the faucet is tested for smooth operation and any leaks.
Lubricating O-rings and aligning cartridge correctly
Prepare to install the new cartridge by lightly coating its O-rings with plumber’s grease to secure a proper seal and smooth movement; then align the cartridge so its tabs and index marks match the valve body before seating it fully.
Confirm the cartridge sits flush without forcing, check rotational alignment for handle operation, and verify O-rings remain undamaged or displaced during insertion.
Securing cartridge with clip or retaining nut
Once the cartridge is seated and aligned, attention turns to securing it with the factory clip or retaining nut to hold it firmly in the valve body.
Install the plastic U-clip into its groove or thread the retaining nut by hand, then tighten snugly with pliers or a socket.
Confirm clip fully engages or nut is flush; avoid over-tightening to prevent damage.
Reassembling trim and handle (single-handle and two-handle steps)
After securing the cartridge, reassemble the trim and handle by reversing the disassembly steps, taking care to follow the distinct sequences for single-handle and two-handle models.
For single-handle units, reinstall the bonnet, handle, set screw and decorative cap.
For two-handle models, fit each handle sleeve, handle, retaining screw and escutcheon.
Tighten components evenly and confirm smooth handle movement.
Reconnecting water supply and testing for function
Turn the water back on slowly and check for leaks at the supply connections, cartridge housing, and spout.
Observe for steady flow and proper hot/cold orientation.
Cycle the handle through full range to purge air and debris, listening for sputters.
Tighten any weeping fittings, then recheck.
Confirm smooth operation, no drips, and correct temperature response before finishing the repair.
Post-Installation Tests and Troubleshooting
After installing the cartridge, the technician checks for leaks and verifies that hot and cold supplies are correctly aligned.
If low flow or a persistent drip occurs, the technician inspects aerators, supply lines, and seating of the cartridge to identify debris or installation issues.
Finally, handle tension and the water-temperature limit stop are adjusted as needed to guarantee smooth operation and safe temperature range.
Checking for leaks and proper hot/cold alignment
With the cartridge installed and water restored, inspect all connections and the spout area for leaks while the faucet is both idle and running. A steady visual check during brief full hot and full cold flows reveals loose fittings or seat leaks.
Verify handle orientation: full-hot and full-cold positions must correspond to supply sides. Tighten fittings, re-seat O-rings, and retest until alignment and dryness are confirmed.
Addressing low flow or drip after replacement
Once leaks and handle alignment have been confirmed, attention should shift to flow performance and any persistent dripping: low flow or a slow drip after cartridge replacement often indicates trapped debris, an improperly seated cartridge, or inlet supply issues.
Inspect and clean aerator and inlet screens, reseat and torque the cartridge to specification, verify supply shutoff valves fully open, and check supply line kinks or debris.
Adjusting handle tension and water temperature limits
Check handle tension and set water-temperature limits to guarantee safe, smooth operation and prevent scalding.
After cartridge installation, adjust the handle’s retention clip or cartridge nut to achieve firm yet smooth movement.
Locate the temperature limit stop, rotate to reduce maximum hot flow if needed, then test with full hot pressure.
Recheck tension and limits after several uses to confirm consistent performance.
Comparison of Common Moen Cartridge Types and Costs
A brief comparison of common Moen cartridge types highlights differences in performance and expected lifespan to guide replacement choices. Typical price ranges and recommended sources for genuine parts are noted to help balance cost versus longevity. The table below summarizes key trade-offs and purchase options for quick reference.
| Cartridge Type | Expected Lifespan | Typical Price & Source |
|---|---|---|
| Posi-Temp/1225 | 5–10 years depending on water quality | $20–$40 — Moen, authorized dealers, major retailers |
| 1255/1222 | 7–12 years; better durability in hard water | $25–$50 — Moen parts, plumbing suppliers |
| Ceramic disc (newer Moen models) | 10+ years with minimal wear | $30–$70 — Moen OEM, specialty online stores |
Performance differences and longevity considerations
Performance hinges on cartridge design, materials, and tolerances: Moen’s common options—Duralast brass, composite Posi-Temp, and newer ceramic-disk cartridges—differ in flow smoothness, resistance to mineral buildup, and expected service life.
Brass units resist wear and heat; composite Posi-Temp balances cost and function; ceramic-disk offers superior seal longevity and smoother operation.
Maintenance, water quality, and installation precision significantly influence lifespan.
Typical price ranges and where to buy genuine parts
Following considerations of design and lifespan, cost becomes a practical factor when choosing a Moen cartridge.
Genuine Moen cartridges typically range $15–$60 depending on model (single‑ vs. dual‑handle, advanced ceramic).
Buy from authorized dealers, Moen’s official website, major hardware stores (Home Depot, Lowe’s), or certified plumbing suppliers to guarantee authenticity and warranty coverage; avoid unverified marketplaces offering suspiciously low prices.
Maintenance Tips to Extend Cartridge Life
Routine cleaning and attention to water quality help prevent mineral buildup and prolong cartridge function.
Seasonal measures and targeted treatments for hard water, such as periodic vinegar soaks or a water softener, reduce wear on seals and moving parts.
If recurring leaks or loss of smooth operation persist despite maintenance, a full faucet replacement should be planned.
Regular cleaning and water quality considerations
Because mineral buildup and debris are primary causes of cartridge wear, regular cleaning and attention to water quality greatly extend a Moen kitchen faucet cartridge’s service life.
Routine actions include:
- Flush lines after work and run water weekly to clear particles.
- Wipe aerator and spout with a soft brush to remove sediment.
- Inspect and replace inlet screens when clogged to maintain flow.
Seasonal and hard-water preventive measures
Address seasonal changes and local water hardness proactively to reduce mineral buildup and prevent premature cartridge failure.
Inspect aerators and supply lines before cold snaps and after hard-water spikes.
Flush lines periodically, install a sediment or water-softening filter where appropriate, and use vinegar soaks sparingly to dissolve deposits.
Monitor flow and handle stiffness early to avoid accelerated wear.
When to plan for a full faucet replacement
When a faucet shows recurring drips, stubborn leaks despite new cartridges, or corrosion that compromises the body or mounting, it signals that cartridge replacement alone may no longer be sufficient and a full faucet replacement should be planned.
Consider replacement when frequent repairs accumulate, parts are discontinued, water damage appears under the sink, or performance (pressure, temperature control) remains unreliable despite correct cartridge installation.
Troubleshooting Scenarios and Solutions
The guide outlines common troubleshooting scenarios and practical solutions for cartridge issues.
It covers removal challenges such as a stuck cartridge, persistent drips after replacement, and handle alignment or stiffness problems.
Each problem is paired with clear diagnostic steps and corrective actions.
Cartridge stuck or difficult to remove
Encountering a stuck Moen cartridge is common during repairs and usually results from mineral buildup, corrosion, or a seized retaining clip.
Apply penetrating lubricant, let it penetrate, then work the cartridge gently with a cartridge puller or adjustable pliers protected by cloth.
If resistance persists, heat the housing slightly with a hair dryer and reapply lubricant.
Replace damaged clips or O-rings before reinstalling.
Persistent drip after cartridge replacement
Address lingering drips methodically by isolating likely causes and testing each component in turn.
Check installation seating and O-rings for damage or debris, confirm cartridge model compatibility, and verify inlet supply shutoffs and downstream valves.
Inspect aerator and spout for trapped sediment.
If leak persists, replace seals or cartridge again and retest; document findings for warranty or professional service if unresolved.
Handle alignment or stiffness problems
After isolating and testing components for a persistent drip, attention should turn to handle alignment and stiffness, common after cartridge work.
Inspect mounting hardware, set screw, and retaining clip for proper seating. Verify cartridge orientation and spool position.
Lubricate O-rings with plumber’s grease if dry. Adjust set screw tension; replace worn parts.
Test motion and water flow for smooth operation.
When to Call a Professional
If leaks persist after cartridge replacement, water damage appears, or unusual noises and pressure issues continue, a professional plumber should be contacted.
The service visit typically includes diagnosis, parts replacement if needed, and an estimate of cost and timeline.
Homeowners should turn off the water, clear under-sink access, and have appliance and installation details ready for the technician.
Signs that indicate professional plumbing help is needed
When does a repair move beyond a homeowner’s toolbox and require professional intervention?
Persistent leaks after cartridge replacement, significant water pressure loss, visible corrosion or pipe damage, recurring clogging or sediment, and water pooling or structural dampness indicate deeper issues.
Unexpected noises, mineral buildup inaccessible to basic tools, or failed attempts at repair also warrant a licensed plumber to diagnose and resolve underlying system problems.
What to expect from a service visit and how to prepare
Expect a professional service visit to be focused, scheduled, and diagnostic: the plumber will confirm the problem, inspect the faucet and surrounding plumbing, identify causes beyond the cartridge (such as valve seats, supply lines, or corrosion), and provide an estimate for repair or replacement.
- Clear access: remove items under sink, guarantee lighting.
- Documents: have model, purchase info, photos.
- Questions: list symptoms, previous attempts, desired outcome.
Conclusion
Replacing a Moen kitchen faucet cartridge restores function for most households quickly; studies indicate that 70% of single-handle faucet leaks stem from worn cartridges, highlighting the cartridge’s outsized role in faucet longevity. The guide’s stepwise approach, model identification, and preventive maintenance empower homeowners to address common issues themselves. When problems persist beyond basic repair or when corrosion or complex valve bodies are evident, a qualified plumber should be consulted to guarantee lasting, safe results.