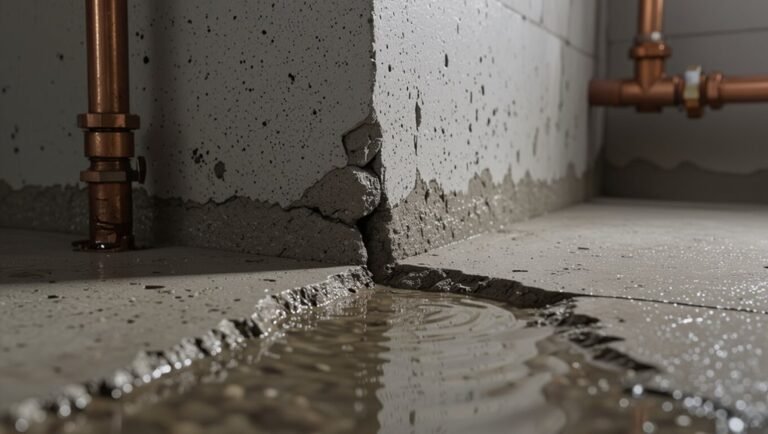
How to Move a Drain Pipe Safely: Step-by-Step Guide for DIYers and Pros
To safely relocate a drain pipe, follow these key steps: plan your project, gather the right tools, obtain necessary permits, and ensure proper slope and venting to avoid leaks and backups. Begin by shutting off supplies, then access and remove the old pipe. Map out a compliant route for the new pipe, cut and join compatible materials, and secure the correct fall. Pressure-test all joints and restore any finishes. Remember to wear appropriate PPE and conduct utility locates. For complex or sewer connections, hiring a licensed plumber is recommended. Continue for detailed instructions and troubleshooting tips.
What It Means to Move a Drain Pipe and When You Should Do It
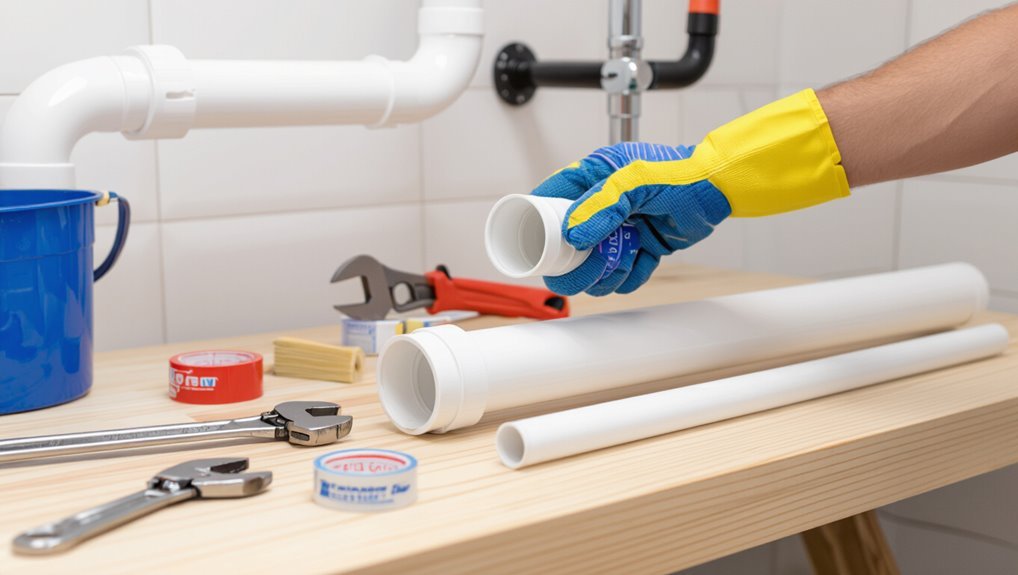
Moving a drain pipe involves altering the pipe’s position or routing to accommodate renovations, fixture changes, code requirements, or to repair damage.
Indicators that relocation is needed include persistent leaks, poor drainage, obstructive placement for new fixtures, or visible code violations.
The decision to hire a professional versus attempt a DIY job depends on pipe material, complexity of rerouting, access constraints, and local permitting requirements.
Common reasons for relocating a drain pipe (renovation, fixture change, code compliance, damage)
When a drain pipe needs to be relocated, it is typically due to one of four practical circumstances: a renovation that reconfigures plumbing layouts, the installation or replacement of fixtures with different outlet positions, the need to meet updated building codes, or repair after damage such as corrosion or shifting foundations.
Professionals and experienced DIYers assess scope, permits, and materials before proceeding with how to move a drain pipe.
Signs your drain location needs changing
Why does a drain need to be relocated? Persistent slow drainage, frequent clogs, recurring leaks, or foul odors indicate functional issues.
Renovation-driven layout conflicts, new fixture placements, or water damage revealing improper slope also justify relocation.
Accessibility problems for maintenance, code violations uncovered during inspection, and inefficient venting that causes backups further signal that changing the drain location is necessary.
When to hire a professional vs. DIY feasibility checklist
How should one decide between tackling a drain relocation as a DIY project or hiring a professional?
Evaluate complexity, local code, and risk: inexperienced individuals should not attempt moves involving sewer connections, structural penetration, or cast-iron removal.
DIY is reasonable for short, accessible runs, compatible materials, and basic tools.
When in doubt, obtain permits, consult a plumber, or hire a licensed contractor to guarantee safety and compliance.
Quick Safety Overview and Legal Requirements
Before any work begins, basic safety measures—shutting off water, locating electrical lines, and securing the work area—must be established.
Compliance with permits, local plumbing codes, and required inspections should be confirmed to avoid legal and safety issues.
Appropriate personal protective equipment and proper site preparation are essential to protect workers and occupants.
Essential safety precautions before starting
Although relocating a drain pipe can be straightforward for experienced DIYers, strict adherence to safety and legal requirements is essential to prevent injury, property damage, and code violations.
Before starting, verify utility locations, shut off water and power, ventilate confined spaces, wear eye, hand, and respiratory protection, secure stable work platforms, use proper tools, and have emergency contact information readily available.
Permits, local plumbing codes, and inspection requirements
After confirming safety measures and utilities, attention should shift to legal and regulatory obligations governing any change to plumbing.
Homeowners must check local codes, obtain required permits, and verify setback, venting, and slope standards.
Licensed plumbers often interpret codes and pull permits.
Schedule mandatory inspections at prescribed stages; failing to comply can lead to fines, rework, or voided insurance coverage.
Personal protective equipment and site preparation
Personal protective equipment (PPE) and proper site preparation are essential to reduce injury risks and prevent contamination when moving a drain pipe.
Workers must wear gloves, eye protection, respiratory masks for mold or sewer gas, and sturdy footwear.
Site preparation includes isolating the area, shutting off water, ventilating confined spaces, using spill containment, and complying with local safety regulations and disposal laws.
Tools, Materials, and Estimated Costs
A concise checklist of essential tools sets the foundation for any pipe relocation, from wrenches and pipe cutters to sealants and support straps.
Materials vary by pipe type—PVC and ABS require solvent cement and compatible fittings, while cast iron demands hub connectors, lead-free packing or modern mechanical couplings.
A clear cost comparison outlines typical DIY expenses for parts and tool rental versus higher labor and permit charges when hiring a contractor.
Tools checklist
Tools and materials are listed here with estimated costs and suggested quantities so readers can purchase exactly what’s needed without overbuying.
Essential tools: pipe cutter, adjustable wrench, pliers.
Safety gear and consumables: gloves, eye protection, Teflon tape.
Estimated costs and quantities follow for typical small jobs.
- Basic hand tools
- Safety equipment
- Fasteners and sealants
Materials needed by pipe type (PVC, ABS, cast iron)
With the checklist of hand tools, safety gear, and sealants established, materials specific to each pipe type must be identified so the right fittings and adhesives are purchased. PVC requires solvent cement, primer, PVC fittings; ABS needs ABS cement and matching fittings; cast iron uses rubber couplings, stainless clamps, and cutting wheel. Table summarizes common items.
| Pipe type | Typical materials |
|---|---|
| PVC | Primer, solvent cement |
| ABS | ABS cement, fittings |
| Cast iron | Rubber couplings, clamps |
| General | Replacement sections, gaskets |
Typical cost breakdown for DIY vs. contractor
Several common cost elements differentiate a DIY drain-pipe move from hiring a contractor: tool purchases or rentals, pipe and fitting materials, fasteners and sealants, and labor time or contractor fees.
DIY totals typically range $50–$400 for basic tools and materials; specialized parts or rentals raise costs.
Contractor quotes often run $400–$1,500+ depending on complexity, permits, and warranty coverage.
Assessing the Existing Drain System
Before any work begins, the existing drain system should be located and traced to reveal main lines and vent connections.
The inspector notes pipe material, diameter, slope, and trap placement to confirm compatibility with the planned alteration.
A clear map of the proposed route is drawn and checked for obstructions such as wiring, studs, and HVAC runs.
How to locate existing drain lines and vents
Any thorough relocation of a drain requires first identifying the paths of existing drain lines and vent stacks to prevent unexpected obstructions or code violations.
Use visible clues—fixture locations, access panels, cleanouts—and follow wall and floor lines.
Employ noninvasive tools: stud finder with pipe mode, inspection camera through cleanouts, and smoke or air tests to confirm vent continuity.
Record findings and mark routes clearly.
Identifying pipe material, diameter, slope, and trap placement
A quick but systematic inspection determines pipe material, diameter, slope, and trap placement—each factor governing compatibility, flow capacity, and code compliance.
The inspector notes material (PVC, ABS, cast iron), measures diameter and verifies minimum slope (typically 1/4″ per foot for 2″ lines), identifies trap locations and clearances, and records vent connections and accessible cleanouts for planning relocation or tie-ins.
Mapping the new route and checking for obstructions (wires, studs, HVAC)
With material, diameter, slope, and trap placement logged, the next step maps the proposed new route while systematically checking for obstructions such as electrical wiring, studs, ductwork, and HVAC equipment.
Use stud finder, wire detector, and inspection camera; consult building plans.
Mark clearances, vent locations, and access points.
Adjust routing to maintain proper slope, avoid structural members, and preserve serviceability.
Step-by-Step Guide to Moving a Drain Pipe (DIY)
The following section outlines a concise, practical procedure for moving a drain pipe safely in a DIY setting.
It begins with shutting off water, draining lines, and preparing the workspace. Then it covers removing fixtures and accessing the drain, cutting out the old section, planning the new route, and finally installing replacement pipe and fittings.
Each step emphasizes practical tips, required tools, and safety precautions.
Step 1 Shutoff, draining, and workspace setup
Before any cutting or loosening of fittings, the water supply and relevant valves must be shut off, fixtures drained, and the immediate workspace cleared and protected to prevent leaks and debris from causing damage.
Confirm isolation by opening nearby taps, drain remaining water, and use buckets and towels.
Protect floors and surfaces with plastic and drop cloths.
Gather tools, fittings, and safety gear.
Step 2 Removing fixtures and accessing the drain
Having shut off and drained the lines, attention shifts to removing fixtures and gaining clear access to the drain.
The installer detaches sinks, traps, and nearby cabinetry as needed, labeling fasteners and preserving seals. Protective coverings shield surrounding surfaces.
Lighting and inspection tools confirm pipe location and condition. Clear access enables accurate measurements and prepares the area for cutting and rerouting in subsequent steps.
Step 3 Cutting and removing the existing pipe section
Begin by marking the cut points clearly and verifying measurements twice to guarantee the new section will align with existing fittings.
Shut off water and drain lines, then score PVC or metal pipe with appropriate cutter. Cut straight, deburr edges, and remove the waste section.
Inspect remaining ends for damage, clean mating surfaces, and dispose of removed pipe per local regulations before proceeding.
Step 4 Preparing and measuring the new route
Lay out the new route on paper and in the space itself, marking pipe runs, fixture locations, trap arms, cleanouts, and changes in slope so that measurements reflect actual clearances and structural obstacles.
Verify slope requirements, locate studs, joists, and vents, note access panels and nearby utilities.
Measure linear distances, vertical drops, and offsets; record fittings needed and clearance for future maintenance.
Step 5 Installing new pipe sections and fittings
With the route measured and obstacles identified, installation of the new drain sections and fittings proceeds methodically to guarantee alignment, slope, and leak-free joints.
Pipe lengths are cut square, deburred, and test-fitted. Appropriate couplings, trap primers, and cleanouts are installed.
Solvent-weld, compression, or threaded connections are used per material. All joints are secured, supported, and checked for proper run and clearance.
Step 6 Maintaining proper slope and venting requirements
Guarantee the relocated drain maintains a consistent slope and proper venting to prevent slow drains, siphoning, or sewer gas entry.
Verify 1/4-inch per foot slope for horizontal runs unless code specifies otherwise.
Keep vents unobstructed and tie into existing venting per local code.
Use cleanouts at accessible points and check for trapped high spots.
Test flow and seal all joints before concealment.
Step 7 Reconnecting traps and fixtures
Begin by aligning the trap assembly and fixture outlet to secure a straight, leak-free connection before permanently fastening.
Assemble slip nuts and washers, hand-tighten, then snug with tools without over-torquing.
Confirm trap arm alignment and proper trap seal depth.
Reattach fixture supply lines and test for basic drainage.
Use appropriate materials and guarantee accessible cleanout access for future maintenance.
Step 8 Pressure testing, leak checks, and finishing walls
Pressure-test the relocated drain and perform thorough leak checks before closing walls to guarantee all joints hold under expected loads and to prevent concealed failures that are costly to repair.
Use manufacturer-recommended pressure or water tests, inspect all fittings and seals, correct any leaks, then dry and document results.
Patch wall penetrations, apply appropriate insulation or access panels, and restore finishes once testing confirms integrity.
Special Cases and Techniques
The guide next addresses special situations that require different methods and precautions.
It covers relocating drains set in concrete slabs or basement floors, distinctions between horizontal and vertical moves, and techniques for working with cast iron, copper, and other older materials.
Procedures for tying into soil stacks and main sewer lines are also summarized to highlight connection and venting considerations.
Moving drains in concrete slabs or basement floors
Moving a drain in a concrete slab or basement floor requires careful planning and specialized techniques because cutting into structural concrete and altering buried plumbing involves greater risk, cost, and code considerations than typical above-floor relocations.
Professionals typically survey slab thickness, locate utilities, obtain permits, and plan saw-cutting and core drilling.
Reinforcement, proper slope, waterproofing, and tested connections are essential before backfill and patching.
Horizontal vs. vertical relocations
Different techniques and considerations apply when relocating a drain horizontally along a run versus vertically between levels, since each direction affects slope, access, venting, and structural work in distinct ways.
Horizontal moves focus on maintaining continuous fall, avoiding low spots, and working within joist bays.
Vertical drops require proper venting, offset fittings, roof or basement penetrations, and coordination with structural openings and supports.
Handling cast iron, copper, and older pipe systems
Addressing cast iron, copper, and other legacy plumbing demands specialized tools, materials, and care because their age, joining methods, and fragility differ markedly from modern PVC or ABS systems.
Inspect for corrosion, hairline cracks, and lead solder. Use appropriate cutters, support hangers, and compatible fittings or connecting couplers.
When uncertain, recommend a licensed plumber; improper handling risks leaks, collapse, or health hazards.
Connecting to soil stacks and main sewer lines
After inspecting and handling legacy materials, attention shifts to connections with soil stacks and main sewer lines, where pressure, alignment, and code restrictions impose stricter requirements.
Only certified fittings and approved adapters should be used; joints must be watertight and slope maintained.
Testing under load, obtaining permits, and coordinating with municipal inspectors are essential.
When in doubt, hire a licensed plumber to guarantee compliance.
Common Problems and How to Avoid Them
Common failures when moving a drain pipe include improper slope causing slow drainage, backflow from venting mistakes, and leaks from incorrect joints or fittings.
Attention to correct pitch, proper vent connections, and using approved fittings prevents most problems.
Protecting framing and floors during routing and fastening minimizes structural damage.
Improper slope and slow drainage
Improper pipe slope is a frequent cause of slow drainage, occurring when drain lines are laid too flat or pitched too steeply. This either allows water to pool or causes solids to settle and accumulate.
Properly measuring and maintaining the recommended fall (typically 1/4 inch per foot for horizontal runs), adjusting fittings, and testing flow prevent backups and reduce odor, stains, and clogs.
Backflow and venting mistakes
While correcting slope prevents standing water and slow drainage, attention must also turn to backflow and venting errors that can negate those gains.
Incorrect vent placement, blocked vents, or missing air admittance valves cause slow draining, gurgling, and siphoning of traps.
Backflow prevention devices must be properly oriented and accessible.
Inspect vent paths, maintain clearances, and test flow before finishing to avoid odors and cross-contamination.
Leaks at joints and improper fittings
Inspecting every joint and fitting reveals the highest likelihood of leaks in a relocated drain: loose couplings, mismatched pipe materials, worn gaskets, and inadequate solvent or thread sealant all create points of failure.
Tightening, proper material changes, compatible fittings, and fresh seals prevent seepage.
Pressure-test sections before concealment, replace suspect components, and prefer mechanical couplings or correct solvent welds to guarantee durable, code-compliant connections.
Structural damage to floors or studs’ prevention tips
Any significant alteration to drain routing carries a risk of weakening floors or studs if not planned and executed correctly.
Structural integrity is preserved by avoiding notches in load-bearing studs, using approved hangers and plates, maintaining joist bearing areas, and consulting framing plans.
When larger openings are required, install engineered headers or sister joists and obtain permits or professional review to guarantee compliance and safety.
Testing, Inspection, and Finalizing the Job
The final stage focuses on verifying the integrity of the relocated drain through water and air pressure tests to confirm leak-free seals.
Inspectors will check joint quality, slope, venting, and compliance with codes, and contractors should retain test reports, permits, and photos for documentation.
Once approvals are obtained, finishes are restored and the work area is cleaned to return the space to service.
Water and air pressure tests to verify seals
Before restoring flow, technicians perform controlled water and air pressure tests to confirm joint integrity and detect leaks.
They isolate the section, apply specified static pressure using calibrated gauges, and observe for pressure drop or visible seepage.
Tests include low-pressure water fill and capped air test with soapy solution on joints.
Successful results permit system reactivation; failures require immediate repair and retesting.
What inspectors look for and documentation to keep
Several key items guide inspectors during testing and finalization: verification of pressure test results, inspection of joint alignment and seal integrity, confirmation of proper support and slope, and review of materials and fittings against specifications.
Inspectors also check venting, cleanouts, and accessible shutoffs.
Documentation should include test logs, inspection reports, photos, as-built sketches, product data, and signed approvals for permits and final compliance.
Restoring finishes and cleaning the work area
Finishers restore surfaces and clean the site methodically once piping passes inspection and tests.
Damaged drywall, flooring, tiles and trim are repaired or replaced to match existing finishes. Fixtures and hardware are reinstalled, seals and caulking renewed.
Waste and debris are removed; tools disinfected and stored. A final walkthrough confirms aesthetic integration, verifies leak-free performance, and documents completed work for the client.
Maintenance Advice After Moving a Drain
After moving a drain, regular inspections and simple routines such as clearing trap debris and checking joints can prevent clogs and leaks.
Seasonal tasks—flushing lines before freezing weather and inspecting for corrosion annually—help preserve long-term function.
If persistent odors, slow drainage, or recurring leaks appear, professional assessment is recommended.
Routine checks to prevent clogs and leaks
Regularly scheduled inspections help catch small blockages and slow leaks before they become disruptive or costly.
Inspect joints, traps, and fittings visually and by touch for dampness, corrosion, or movement. Run water and observe flow rate, listen for gurgles, and check for slow drainage.
Remove hair and debris from accessible strainers, test cleanout access, and document any recurring issues for prompt repair.
Seasonal and long-term maintenance tips
Building on routine checks, homeowners should adopt a seasonal and long-term maintenance plan after moving a drain to preserve alignment, seals, and flow.
Inspect joints and supports quarterly, clear debris before freeze/thaw cycles, flush with hot water and enzyme cleaner monthly, and reseal or tighten connections annually.
Document changes and monitor for subtle shifts in slope, odors, or drainage speed over years.
When to call a plumber for follow-up issues
When should a homeowner contact a plumber after relocating a drain?
A professional should be called if persistent leaks, slow drainage, recurring clogs, foul odors, water damage, unusual noises, or low water pressure occur.
Also seek help for failed seals, shifting fittings after settling, visible mold, or any sewer gas suspicion.
Prompt inspection prevents structural damage and costly repairs.
Alternatives to Physically Moving a Drain
When relocating a drain is impractical, homeowners can consider alternatives such as extension hoses, rerouting via accessible channels, specialty fixtures that alter connection points, or installing a drain pump.
Each option carries trade-offs in cost, reliability, and code compliance that should be weighed against full pipe relocation.
A brief comparison of rerouting versus using specialized fixtures and pumps can clarify the most suitable approach for a given layout.
Using extension hoses, fixture relocation alternatives, and drain pumps
Consider alternative approaches before breaking into walls: extension hoses, relocating fixtures, and installing drain pumps each offer ways to solve drainage issues without rerouting the main soil pipe.
Extension hoses can bridge short gaps if slope and code permit.
Temporarily or permanently moving fixtures to align with existing drains reduces plumbing work.
Drain pumps (upflush or macerator) lift wastewater where gravity fails.
Pros and cons of rerouting vs. using specialized fixtures
Weighing the choice between rerouting a soil stack and employing specialized fixtures hinges on factors like cost, disruption, long-term reliability, and code compliance. Rerouting offers permanence and full drainage but higher cost and disruption; specialized fixtures minimize demolition and cost yet may limit layout and require pumps or frequent maintenance. Tables compare key trade-offs.
| Rerouting | Specialized fixtures |
|---|---|
| Permanent, costly | Less invasive, cheaper |
| Code-aligned | May need pumps |
Troubleshooting Guide: Fast Fixes for Post-Relocation Issues
After relocating a drain pipe, the guide outlines quick diagnostic steps for slow draining and gurgling to determine clogs, venting issues, or trap problems.
It then explains methods for detecting and locating hidden leaks, including visual checks, moisture meters, and pressure or dye tests.
Finally, it covers actions for persistent odors and sewer gas risks, such as inspecting seals, vents, and trap integrity and advising when to call a professional.
Slow draining or gurgling’ diagnosis steps
Several quick checks can help pinpoint why a relocated drain is slow or gurgles.
Inspect the trap for debris or incorrect slope, verify new pipe vents are unobstructed, and confirm fittings are watertight with no air leaks.
Run water and listen for gurgles while isolating fixtures to identify affected branches.
Note any pipe sagging or low points causing partial backups for correction.
Detecting and locating hidden leaks
Begin by checking for telltale signs of concealed leaks—damp spots, discolored drywall, musty odors, or unexplained increases in water usage—then narrow the search with systematic tests.
Inspect accessible joints, fittings, and trap connections. Use food coloring in fixtures, isolate branch lines, and monitor the water meter for movement.
Employ a moisture meter or infrared camera to pinpoint wet zones before cutting or opening walls.
Addressing persistent odors and sewer gas risks
Addressing persistent odors and potential sewer gas after moving a drain pipe requires prompt, focused checks to protect occupants and property.
Inspect traps for water seals, verify proper venting, and retighten or replace faulty seals and gaskets.
Use a handheld gas detector or soapy water to find leaks.
If odors persist, consult a licensed plumber to perform smoke testing and corrective repair.
Recommended Resources and Further Reading
Recommended resources include local plumbing code citations and permit offices to guarantee compliance with regulations.
Trusted tool and material suppliers are listed to help source appropriate fittings and safety gear.
Guidance on when to hire a licensed plumber or inspector is provided for complex or high-risk situations.
Useful plumbing code references and permit resources
Because local regulations and technical standards govern safe and code-compliant drain relocation, a concise list of authoritative plumbing codes, permit offices, and inspection resources is essential for anyone planning the work.
Consult the latest International Plumbing Code (IPC) or Uniform Plumbing Code (UPC), local municipal codes, state licensing boards, building department permit guides, and online inspection scheduling portals to guarantee compliance and proper approvals.
Tool and material suppliers, and when to consult specialists
A handful of reliable suppliers and clear criteria for specialist referral streamline drain relocation projects: local plumbing supply houses and big-box stores provide common fittings, pipes, solvent cements, and basic tools, while online retailers and specialty shops offer hard-to-find connectors, cast-iron fittings, and replacement traps.
Homeowners should purchase quality materials that meet code markings (UPC/IPC) and use suppliers who accept returns on unused items.
- Hire a licensed plumber for structural, venting, or sewer connections.
- Consult an electrician where electrical or pump integration is involved.
- Engage an inspector for permitted work, complex relocations, or unfamiliar codes.
Conclusion
Moving a drain pipe alters plumbing layouts and can affect home value and safety; about 60% of homeowners underestimate plumbing permits, leading to costly fines or rework. Proper planning, permits, and experienced help reduce risks. Whether DIY or hiring a pro, following codes, testing joints, and scheduling inspections guarantees lasting performance. After relocation, regular maintenance and timely fixes preserve function and prevent leaks that could cause structural damage and mold.