
How to Test Faucet Seat Wrenches: A Step-by-Step Guide to Check Fit, Function, and Wear
To effectively test faucet seat wrenches for fit, function, and wear, follow these essential steps. A technician should begin by inspecting the wrenches for any visible damage, focusing on splines, flats, and signs of corrosion. Next, secure the fixture and properly align the wrench to ensure full engagement. Use calipers or feeler gauges to measure clearance, and apply torque gradually while observing for any slippage or play. If you notice worn teeth, rounded edges, or excessive gaps, it’s time to replace or recondition the tool. Regular cleaning, lubrication, and proper storage will significantly extend the life of your wrenches. Additional steps for detailed testing and sourcing are also available for further guidance.
Why Testing Faucet Seat Wrenches Matters for Repairs and Maintenance
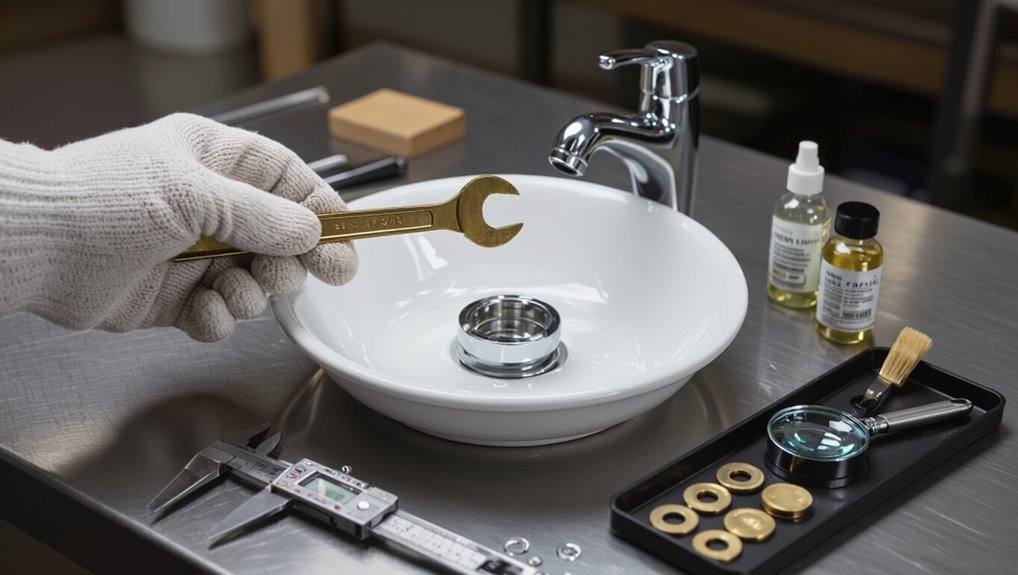
Worn or ill-fitting faucet seat wrenches can strip seats, cause leaks, or damage valve components, creating costly repairs.
Testing tools before use protects the technician and prolongs wrench life by identifying defects or improper fit. A proper test yields a secure fit, smooth engagement, and confidence that the wrench will not compromise the repair.
Common problems caused by worn or ill-fitting faucet seat wrenches
A compromised or poorly fitting faucet seat wrench can cause stripped seats, rounded flats, and damaged valve stems, increasing repair difficulty and parts replacement costs.
Technicians who learn how to test faucet seat wrenches identify slop, incorrect sizing, and metal fatigue early. Such defects lead to leaks, improper sealing, longer labor, and the need for seat reconditioning or full valve assembly replacement.
Safety and tool preservation reasons to test before use
Problems such as stripped seats and rounded flats make clear why pre-use inspection matters, but there are additional safety and tool-preservation reasons to test faucet seat wrenches before each job.
Testing prevents sudden slippage that can cause injury or damage finishes, verifies torque reliability to avoid overstrain, and identifies corrosion or cracks early, extending tool life and ensuring predictable, safe repairs.
Overview of expected outcomes from a proper test
Confidence in tool performance stems from a concise, repeatable test that confirms a faucet seat wrench will engage and turn seats without slipping, deforming flats, or failing under expected torque.
Expected outcomes include precise fit to seat geometry, smooth rotation under working torque, no visible wear or distortion, maintained grip after multiple cycles, and predictable failure margins, enabling reliable repairs and informed replacement decisions.
Tools and Materials Needed to Test Faucet Seat Wrenches
A concise list of essential tools and supplies sets the baseline for testing faucet seat wrenches, including common hand tools and replacement parts.
Optional diagnostic tools and measurement aids can improve accuracy and help identify subtle wear or fit issues.
Preparing a safe, organized workspace with proper lighting, knee protection, and water shutoff procedures reduces risk and speeds testing.
List of essential tools and supplies
Preparation guarantees efficient, accurate testing of faucet seat wrenches by assembling the right tools and supplies before work begins.
Essential items include basic hand tools, cleaning supplies, replacement seats, and lubricants. A minimal checklist:
- Adjustable wrench, pliers, screwdrivers
- Wire brush, rags, vinegar or descaler
- Replacement seats and O-rings
- Silicone grease, plumber’s grease, thread sealant
Optional diagnostic tools and measurement aids
While not strictly required for basic repairs, optional diagnostic tools and measurement aids can speed troubleshooting and confirm seat condition with greater precision.
Recommended items include a precision caliper for measuring seat and valve stem diameters, a small inspection mirror and LED penlight for visual checks, a borescope for internal views, feeler gauges for gap assessment, and thread pitch gauges for verifying damaged threads.
How to prepare a safe testing workspace
Following the optional diagnostic tools, set up a compact, well-lit workspace that isolates the faucet components and prevents small parts from being lost or contaminated.
Provide padded tray, magnetic parts dish, and labeled containers. Guarantee good lighting, steady bench or table, and a non-slip mat.
Keep basic cleaning supplies, pliers, adjustable wrench, lubricants, and inspection magnifier within reach to streamline testing and minimize risk.
Understanding Faucet Seat Wrench Types and Compatibility
The text outlines common faucet seat wrench types—such as socket, tubular, and keyed designs—and notes how each suits different valve styles.
It also summarizes material and size variations that influence fit and durability.
Guidance is provided for identifying a faucet seat type and the key measurement points needed for proper wrench selection.
Common wrench types used for faucet seats and valves
Plumbers rely on a handful of wrench types when servicing faucet seats and valves, each designed for specific access, grip, and torque needs.
Common choices include seat wrenches (slim, square-ended), basin wrenches for confined spaces, adjustable wrenches for variable nuts, box-end wrenches for secure engagement, and hex/Allen keys for cartridge fasteners.
Selection prioritizes reach, clearance, and control.
Material and size variations that affect fit
After outlining the common wrench types for seats and valves, attention shifts to how material and size differences influence fit and function.
Hardened steel wrenches resist wear but may damage softer brass seats; bronze or coated tools reduce marring.
Dimensional tolerances, wall thickness and tip profile determine engagement.
Slight size mismatches cause slippage or binding, affecting torque transfer and longevity.
Identifying your faucet seat type and measurement points
A quick visual inspection usually reveals whether a faucet seat is removable, integral, recessed, or straight-bodied. Recognizing these basic types guides which wrench profile and access path to use.
Measurements should record seat diameter, depth, and face angle; measure across flats for noncircular seats.
Note accessibility constraints, nearby obstructions, and material hardness to match wrench size, reach, and tip geometry.
Quick Pre-Test Inspection Checklist
Before testing begins, a technician conducts a visual inspection of the wrench for damage, wear, and corrosion.
They confirm markings, sizes, and manufacturer specifications against the job requirements.
Measurement tools are checked for calibration and overall condition to guarantee accurate results.
Visual inspection for damage, wear, and corrosion
Inspection begins with a systematic visual check for cracks, gouges, worn threads, deformations, and surface corrosion on the wrench head, shank, and handle.
Any pitting, rust flakes, bent or mushroomed edges, or loose joints should be noted. Surfaces that compromise engagement, alignment, or grip indicate repair or retirement.
Document findings and prioritize hazards before functional testing.
Checking markings, sizes, and manufacturer specifications
When confirming a faucet seat wrench’s readiness, the technician verifies stamped or etched markings, exact jaw sizes, and any manufacturer specifications against the job requirements and tool inventory records.
They confirm model numbers, material grade, torque limits, and approved use cases, ensuring compatibility with valve seats. Discrepancies prompt tagging, notation in records, and replacement or supplier consultation before testing proceeds.
Verifying calibration and condition of measurement tools
Confirm calibration and condition of measurement tools using a concise pre-test checklist that lists required instruments, their calibration dates, last service records, and physical condition.
Inspect gauges, calipers, micrometers, and torque tools for damage, zeroing accuracy, and traceable calibration labels. Record discrepancies, quarantine nonconforming items, and schedule recalibration.
Verify batteries and accessories are functional before testing to maintain measurement integrity.
Step-by-Step Procedure to Test Fit of a Faucet Seat Wrench
The technician first secures the faucet or test fixture in a vise or clamp to prevent movement during fitting.
They then align the seat wrench with the valve seat, engage it carefully, and note whether the teeth seat evenly without slipping or binding.
Finally, the technician checks for proper fit by observing contact points, feeling for play or misalignment, and measuring clearance against specified gap tolerances.
How to secure the faucet or test fixture for fitting
Begin by stabilizing the fixture on a solid surface to prevent movement during fitting; clamping the faucet body or test fixture in a bench vise with protective jaws preserves finish and aligns the seat access.
Guarantee secure, vibration-free positioning; use soft pads to avoid marring. Verify accessibility for tools, adequate lighting, and a clean workspace.
Confirm seals, retainers, and removable components are secured before testing.
Aligning wrench to seat and performing initial engagement
Align the seat wrench so its splines or flats match the faucet seat profile, keeping the handle centered on the access axis to prevent canting; inspect visually and by feel to verify full seating of the driver into the seat recess before applying torque.
With steady, controlled pressure, advance engagement incrementally, confirming even contact around the circumference and noting any resistance or binding prior to conducting torque or rotation tests.
Signs of proper fit versus slippage and misalignment
How can one tell that a seat wrench fits correctly rather than slipping or riding off-center? A correct fit shows uniform contact around the seat, minimal wobble when lightly torqued, and smooth transfer of turning force without skipping.
Slippage produces audible clicks, uneven pressure points, visible tool edge marks, or lateral movement. Immediate correction prevents damage and guarantees accurate testing.
Measuring clearance and gap tolerances
Several simple measurements establish whether a faucet seat wrench seats within acceptable clearances before any torque is applied.
The inspector measures radial and axial gaps with feeler gauges or calipers, records maximum clearance, and compares to manufacturer tolerances.
Any gap beyond spec indicates improper engagement, potential wear, or wrong size.
Documented values guide repair, replacement, or re-machining decisions.
Step-by-Step Procedure to Test Function and Torque Transfer
The technician applies controlled torque to the seat wrench while observing how the tool and seat respond under load.
A calibrated torque wrench or torque-limiting adapter is used to guarantee accurate input and to detect rounded edges, stripped splines, or visible deformation.
Torque values are recorded and compared to specified acceptable ranges to determine serviceability.
How to apply controlled torque and observe response
Begin by securing the faucet assembly and attaching the seat wrench so that the operator can apply torque in a controlled, repeatable manner; this guarantees any measured resistance or movement reflects the part interface rather than fixture slippage.
Apply gradual, steady torque while watching for rotation, binding, or play. Note angular displacement, resistance changes, and any audible or tactile anomalies.
Record results and compare to acceptance criteria.
Using a torque wrench or torque-limiting adapter for accuracy
Clamp the seat wrench assembly firmly to the test fixture. Attach a calibrated torque wrench or a torque-limiting adapter to the wrench head, and verify zeroing and scale readability before applying load.
Increase torque incrementally to specified values. Record peak and slip events, note angular displacement, and repeat cycles to confirm consistency.
Compare readings to manufacturer torque specs for pass/fail.
Detecting rounded edges, stripped splines, and deformation
Inspect the wrench head and seat interface visually and by feel for rounded edges, stripped splines, and any deformation before applying torque.
Check contact surfaces for shiny wear patterns, burrs, or mushrooming.
Rotate the wrench on the seat; note slippage, play, or uneven contact.
Measure against an undamaged reference if available.
Mark or retire components exhibiting compromised engagement.
Recording torque values and acceptable ranges
When recording torque values and acceptable ranges, the tester first verifies that the torque measurement device is calibrated and compatible with the wrench and seat under test.
Then, with the assembly secured and free of contaminants, incremental torques are applied while readings are logged for each step.
- Record peak and steady-state torque.
- Compare to manufacturer limits.
- Note hysteresis and repeatability.
- Flag deviations for further inspection.
Assessing Wear and End-of-Life Criteria
Visual inspection focuses on distorted, rounded or chipped teeth and worn sockets that no longer seat securely.
Functional signs for retirement include slipping under load, excessive play, or loss of torque transfer despite proper technique.
Clear thresholds—such as measurable tooth deformation, repeatable slippage at specified torque, or failed reconditioning trials—should guide whether a wrench is reconditioned or replaced.
Visual indicators of excessive wear on wrench teeth and sockets
Because wrench teeth and sockets transmit torque directly to the valve, observable changes in their contact surfaces reliably indicate excessive wear: rounded or mushroomed tooth profiles, deep gouges or pitting, pronounced scalloping inside sockets, visible deformation at corners, and uneven wear patterns that prevent full seating all signal compromised engagement and an increased risk of slippage or fastener damage.
Discoloration, burrs, and metal fatigue cracks further confirm end-of-life.
Functional signs that a wrench should be retired
Several measurable performance changes indicate a faucet seat wrench has reached end of life.
Reduced torque transfer, slipping under rated load, and inconsistent engagement with seat profiles are core functional signs.
Increased play, frequent cam-out, and inability to maintain alignment during use compromise serviceability.
Persistent deformation or loss of spring tension in adjustable models also signals retirement to prevent damage to valves and fittings.
Thresholds for reconditioning or replacing wrenches
Define clear, measurable thresholds to determine when a faucet seat wrench should be reconditioned or replaced, using quantifiable metrics such as torque retention, dimensional tolerances, and engagement reliability.
Specify numeric limits: e.g., torque drop >15%, dimensional deviation beyond ±0.2 mm, or engagement failure rate >5% per 100 cycles.
Combine inspection results and usage history to decide reconditioning or disposal.
Comparison of Common Wrench Materials and Their Durability
Different steel grades and surface coatings greatly influence a wrench’s corrosion resistance and wear characteristics. Below is a concise comparison to frame how material choice affects lifespan and performance. The following table summarizes typical options and their practical implications.
| Material/Coating | Corrosion Resistance | Expected Lifespan/Performance |
|---|---|---|
| Carbon steel (uncoated) | Low | Shorter life; prone to rust under moisture |
| Chrome-vanadium with plating | Medium–High | Good durability; balanced strength and corrosion protection |
| Stainless steel (e.g., 304/316) | High | Long life; excellent corrosion resistance but higher cost |
Steel grades, coatings, and corrosion resistance
A concise comparison of common wrench materials highlights how steel grade and protective coatings determine longevity and performance in moist, corrosive environments.
High-carbon and alloy steels offer strength; stainless grades resist rust.
Coatings—chrome, nickel, phosphate, and polymer—add sacrificial or barrier protection.
Electroplating quality, passivation, and coating thickness influence corrosion resistance and maintenance needs without discussing overall lifespan or performance trade-offs.
Impact of material choice on lifespan and performance
Material selection directly shapes a wrench’s usable life and functional reliability under real-world conditions.
Hardened tool steel offers high wear resistance but needs coatings to resist corrosion. Stainless steel trades some hardness for superior corrosion resistance.
Brass and aluminum resist rust but deform under torque. Composite and chrome-plated options balance weight and durability.
Appropriate material choice aligns expected service life with application demands.
Troubleshooting Common Testing Issues
When a wrench slips or jumps out of the seat, the tester should first check alignment and handle tension before assuming tool failure.
Small burrs or minor deformations can often be smoothed or removed with a file or fine emery cloth to restore proper seating.
If the fit still seems off, the source may be the faucet seat rather than the wrench, and the tester should inspect and measure the seat for wear or distortion.
What to do if the wrench slips or jumps out of the seat
If the wrench slips or jumps out of the seat during testing, pause and inspect the tool and seat alignment before applying more force.
Verify correct wrench size, seating depth, and clean contact surfaces.
Reposition carefully, guarantee steady grip, and use controlled, gradual torque.
If slipping persists, mark the seat and document the issue for further evaluation or potential replacement.
Fixes for minor deformations and burrs
Address minor deformations and burrs promptly to preserve seat integrity and guarantee accurate wrench seating.
Small burrs are removed with a fine file or deburring tool, working gently and testing fit frequently.
Light dents can be smoothed with a brass punch and soft mallet or polished with fine abrasive.
Clean debris, recheck alignment, and repeat until the wrench seats evenly without lateral play.
When an apparent fit problem is actually a faucet issue
After removing burrs and correcting minor seat deformities, apparent misfits sometimes stem from the faucet rather than the wrench or seat.
Corroded or warped valve bodies, misaligned cartridges, and loose escutcheons can prevent proper engagement. Inspect faucet geometry, thread integrity, and mounting flatness.
Verify alignment with gauges or test adapters before discarding wrenches or seats as defective.
Best Practices for Maintaining Faucet Seat Wrenches
Routine maintenance of faucet seat wrenches includes thorough cleaning, light lubrication of moving parts, and proper storage to prevent corrosion and damage.
A scheduled inspection cadence with concise record keeping helps track wear and identify tools needing attention.
Tools exhibiting excessive wear, damaged teeth, or persistent fit issues should be sent for professional refurbishment or replacement.
Cleaning, lubrication, and storage recommendations
Keep faucet seat wrenches clean, lightly lubricated, and stored properly to extend service life and guarantee accurate fits.
Remove debris after use, wipe with a lint‑free cloth, and avoid solvents that harm finishes.
Use a light machine oil on moving parts sparingly.
Store in a dry, padded case to prevent corrosion and impact damage.
- Clean
- Lubricate
- Dry storage
- Protective case
Regular inspection schedule and record keeping
Building on proper cleaning, lubrication, and storage practices, a defined inspection schedule and accurate record keeping guarantee faucet seat wrenches remain reliable and traceable over their service life.
Inspect before and after use, perform monthly detailed checks for wear, alignment, and corrosion, and log dates, findings, measurements, and corrective actions.
Retain records for warranty and maintenance planning.
When to send tools for professional refurbishment
When should a faucet seat wrench be sent for professional refurbishment depends on measurable signs of degradation rather than arbitrary timelines.
Signs include persistent loss of fit after adjustment, rounded or chewed edges, fractured or bent shafts, recurring slippage under rated torque, visible corrosion through plating, and failed hardness or straightness tests.
If more than two criteria are met, professional refurbishment is recommended.
Safety Precautions and PPE When Testing and Using Wrenches
The article outlines essential personal protective equipment for hand and eye safety when testing and using faucet seat wrenches, including gloves and safety glasses.
It also summarizes safe handling and proper torque application methods to prevent slippage and fastener damage.
Finally, it addresses environmental and disposal considerations for damaged tools, advising on recycling or safe discard to prevent hazards.
Personal protective equipment for hand and eye safety
Although often overlooked, appropriate personal protective equipment is essential to prevent common injuries—cuts, abrasions, pinches, and eye strikes—when testing and using faucet seat wrenches.
Gloves with good dexterity and cut resistance protect hands; safety glasses shield against flying debris and splashes. Closed-toe footwear prevents dropped-tool injuries.
Inspect PPE before use and replace damaged items to maintain protection and guarantee safe testing.
Safe handling and torque application techniques
Start by establishing a stable work position and secure grip before applying force to a faucet seat wrench.
Use controlled, steady pressure; avoid sudden jerks.
Apply torque within manufacturer limits and use calibrated torque tools when precision matters.
Position body to avoid pinch points and slipping.
Release tension slowly after adjustment.
Inspect handles for damage and replace compromised tools immediately.
Environmental and disposal considerations for damaged tools
Any damaged faucet seat wrench should be treated as potential environmental and safety risk and handled accordingly.
Contaminants like grease, metal shavings, or plating require containment. Segregate damaged tools from clean inventory, label them, and store in sealed containers.
Follow local hazardous-waste regulations for disposal or recycling. Use PPE when handling, document disposal, and prefer certified scrap recyclers to minimize environmental impact.
Quick Reference: Testing Checklist and Decision Flow
A concise, step-by-step checklist presents the essential on-the-job tests for faucet seat wrenches, enabling consistent inspection and documentation.
A simple decision flow chart then maps outcomes to required actions—pass, repair/recondition, or replace—so technicians can proceed without hesitation.
This quick reference condenses criteria and next steps into an immediate field tool for efficient decision-making.
Compact step-by-step checklist for on-the-job use
Refer to the compact checklist and decision flow when testing a faucet seat wrench on-site to guarantee consistent, rapid evaluation and clear pass/fail outcomes.
- Inspect tip geometry and signs of wear.
- Verify secure fit on multiple seat sizes.
- Check torque transfer and handle stability.
- Record measurements, photos, and immediate observations for report and traceability.
Decision flow for pass/fail and next actions (repair, recondition, replace)
With inspection data, fit checks, torque tests, and documented observations completed, the decision flow directs the technician to a clear pass/fail outcome and subsequent action.
If all criteria meet tolerance, mark as pass and return to service. If marginal, flag for recondition (clean, lap, retest).
If failed—excess wear, damage, or out-of-spec—recommend replacement and record disposition for inventory and warranty.
Additional Resources and Where to Source Replacement Wrenches
The article lists reputable manufacturers and distributors of faucet seat wrenches to aid sourcing decisions.
It also points readers to relevant standards, calibration services, and concise repair tutorials for maintaining tool accuracy and proficiency.
Links and contact information are provided for quick access to suppliers and technical resources.
Reliable brands and suppliers for faucet seat wrenches
Reliable sourcing begins with manufacturers and suppliers known for consistent fit, durable materials, and clear sizing information.
Recommended vendors include established plumbing-tool brands, specialty valve-part retailers, and reputable online marketplaces with verified reviews.
Prioritize suppliers offering material specifications, size charts, and return policies.
Professional plumbing distributors and local supply houses often provide higher-quality options and technical guidance for selecting appropriate faucet seat wrenches.
Links to standards, calibration services, and repair tutorials
After identifying trustworthy brands and suppliers, attention should shift to standards, calibration services, and repair tutorials that support proper use and maintenance of faucet seat wrenches.
Relevant resources include standards bodies, certified calibration labs, and concise repair guides for seat and valve work.
- ANSI/ASME references
- ISO tool standards
- Accredited calibration labs
- Step-by-step repair tutorials
Conclusion
Testing faucet seat wrenches guarantees reliable repairs and longer faucet life, so who wants a leaky valve after careful work? Regular inspection, correct fit checks, and wear assessment prevent stripped seats and wasted time. By following compatibility guides, stepwise fit tests, and safety precautions, technicians and DIYers can decide when to reuse, repair, or replace tools. Maintaining clean, undamaged wrenches and consulting replacement resources preserves repair quality and reduces future maintenance needs.
