How to Make a Swivel Table: Step-by-Step DIY Plan for a Smooth, Durable Rotating Top
To create a swivel table, start with stable hardwood or plywood, select a bearing-rated turntable or a ball-bearing assembly, and plan your dimensions for proper load and balance. Cut and sand the tabletop and base, recessing and centering the swivel plates. Pilot and fasten the hardware, then reinforce and finish the surfaces for durability and moisture resistance. Finally, conduct load testing, lubrication, and wobble correction. For detailed measurements, hardware specifications, and troubleshooting tips, continue reading.
Overview of Building a Swivel Table Top
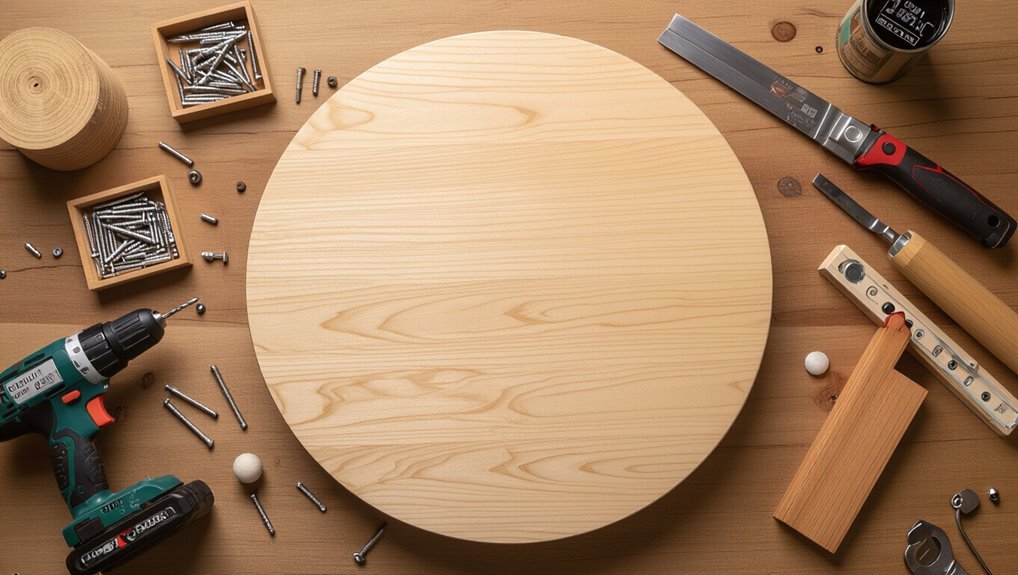
A swivel table features a top mounted on a rotating mechanism, often used for dining, display, or work surfaces where easy access is needed.
A well-built rotating top improves usability, load distribution, and longevity while reducing wobble and wear.
Common approaches include single- or double-bearing turntables, lazy susan hardware, and ball-bearing or raceway assemblies suited to different load and design requirements.
What a swivel table is and common uses
Swivel tables are rotating tabletops mounted on a fixed base that allow objects or people to access items around the perimeter without moving the base itself.
Common uses include dining lazy Susans, conference room turntables, craft stations, display stands, and workshop turntables.
Instructions on how to make a swivel table often focus on a sturdy base, smooth bearing, balanced top, and durable finish for frequent rotation.
Key benefits of a high-quality rotating top
Having a well-made rotating top enhances the functionality described earlier by providing smooth, reliable motion and improved access without moving the base.
A high-quality top increases durability, resists warping, and guarantees consistent balance. It minimizes noise and maintenance, supports heavier loads safely, and improves user experience by offering predictable, effortless rotation for dining, crafting, or display applications.
Typical designs and rotation mechanisms
Designers typically choose among several proven top layouts and bearing systems when planning a rotating table top, balancing load capacity, smoothness, and construction complexity.
Common layouts include single-plate, double-layer, and lazy Susan styles.
Rotation mechanisms range from simple felt washers and ball bearings to precision turntables and tapered roller bearings.
Choice hinges on expected load, desired friction, alignment needs, and budget constraints.
Materials, Tools, and Hardware Required
This section lists the recommended wood species and top materials, from hardwoods to plywood and veneer, suited for a durable swivel top.
It also covers suitable fasteners, bearing and swivel hardware options, the essential power and hand tools, and optional finishing supplies.
Safety equipment and best-practice precautions for assembly and finishing are noted.
Recommended wood types and top materials
Wood selection and top material choices determine strength, appearance, and longevity of a swivel table.
Hardwoods like oak, maple, and walnut offer durability and attractive grain; birch and poplar are stable, affordable options.
Plywood with hardwood veneer balances stability and cost for larger tops.
For modern looks, consider engineered MDF with veneer or solid-edge laminate; seal all surfaces for moisture resistance.
Fasteners, bearings, and swivel hardware options
Select fasteners and swivel components that match the table’s load, use, and expected lifespan. Choices affect smoothness, durability, and maintenance.
Consider corrosion resistance and torque capacity.
- Ball-bearing lazy susans — smooth rotation, higher load rating.
- Thrust bearings — compact, handle axial loads for heavier tops.
- Heavy-duty screws/bolts and lock washers — secure assemblies, resist loosening over time.
Power and hand tools needed
A concise set of power and hand tools is essential to assemble a swivel table accurately and safely.
Required tools focus on cutting, joining, and aligning parts without excess.
- Corded or cordless drill/driver, circular saw or jigsaw, random-orbit sander.
- Clamps, chisels, combination square, tape measure.
- Screwdrivers, mallet, adjustable wrench, small file.
Optional finishing supplies and safety equipment
Several small but useful finishing supplies and safety items help guarantee a professional-looking swivel table and a safe work process.
Recommended optional items include fine-grit sandpaper, tack cloths, and wood filler for smooth surfaces; finishing oil, polycrylic, or wax; respirator, safety glasses, and hearing protection for noisy or chemical steps.
- Sanding and cleanup
- Finishing materials
- Personal protective equipment
Choosing the Right Swivel Mechanism
Selecting a swivel mechanism requires comparing options such as ball-bearing turntables, lazy susans, and custom pivot solutions to match desired function.
Attention must be paid to weight capacity and load distribution to guarantee stable rotation under expected loads.
Final selection hinges on specifying appropriate bearing size, bolt pattern, and mounting plates for secure installation.
Ball-bearing turntable vs. lazy susan vs. custom pivot
When deciding how a swivel table should rotate, the mechanism choice—ball-bearing turntable, lazy susan, or a custom pivot—determines load capacity, smoothness, durability, and installation complexity.
Ball-bearing turntables offer precise, quiet rotation and long life.
Lazy susans are affordable and easy to fit but less refined.
Custom pivots permit tailored aesthetics and compact profiles yet require machining and careful alignment.
Weight capacity and load distribution considerations
Evaluate the swivel mechanism’s rated weight capacity and how the tabletop will distribute loads across it before committing to a design.
Consider concentrated versus evenly spread loads, anticipated maximum static and dynamic loads, and potential off-center weighting.
Factor tabletop material, overhangs, and accessory attachments that shift center of gravity.
Include a safety margin and plan structural reinforcement where needed to prevent binding or premature wear.
Selecting bearing size, bolt pattern, and mounting plates
A properly sized bearing and compatible bolt pattern form the core of a reliable swivel mechanism, dictating load capacity, rotational smoothness, and long-term durability. Select bearings rated above expected load, match bolt circle to plate, and use hardened bolts with locking washers. Confirm plates distribute forces evenly and align precisely to prevent wobble.
| Bearing size | Bolt pattern | Plate thickness |
|---|---|---|
| Small (≤50mm) | 4-bolt | 6mm |
| Medium (50–150mm) | 8-bolt | 10mm |
| Large (>150mm) | 12-bolt | 12mm |
Design and Measurement Planning
For a stable swivel table, the builder must determine the tabletop diameter and appropriate overhang relative to the base to prevent tipping.
They should calculate the center of gravity and support requirements, then produce a cut list and a template for both top and base.
Finally, a simple materials layout diagram helps verify dimensions and quantities before cutting.
Determining diameter and overhang for stability
Stability hinges on the relationship between tabletop diameter and overhang: a larger diameter distributes weight and resists tipping, while allowable overhang defines how far the edge can extend beyond the base before leverage causes instability.
Designers balance usable surface and footprint, matching diameter to base size, material stiffness, and expected loads. Conservative overhangs and incremental testing reduce tipping risk.
Calculating center of gravity and support requirements
Following the diameter and overhang assessment, attention shifts to locating the combined center of gravity (CG) of tabletop, fixtures, and anticipated loads to define support placement and bearing specifications.
Calculate CG by summing moments of components; mark its projection on the base.
Specify bearing type and load rating to resist torque and off-center loads.
Verify support spacing prevents tilt and minimizes deflection.
Creating a cut list and template for the top and base
Begin by laying out all required dimensions and materials to convert design intent into a precise cut list and full-size template.
Record top diameter, thickness, edge profile, base footprint, column height and attachment allowances. Include hardware clearances and swivel bearing size.
Translate measurements into material quantities and sheet layouts. Draft full-size templates for top and base, marking cut lines, grain direction, and fastener locations.
Preparing a simple materials layout diagram
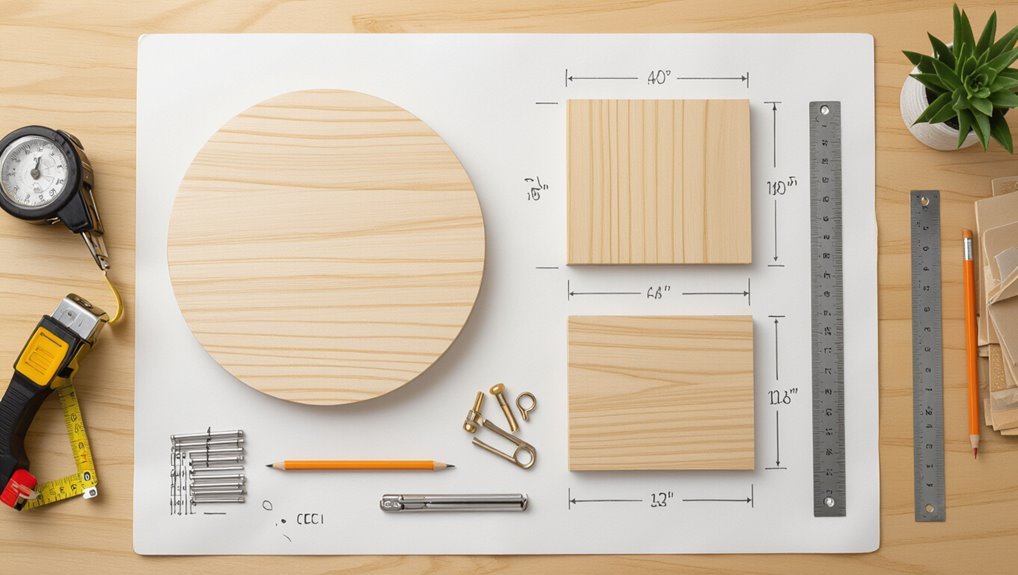
With the cut list and full-size templates defined, the next step is to arrange all parts and offcuts into a clear materials layout diagram that shows how panels, blanks, and hardware will be nested on available stock.
The diagram indicates grain direction, defect avoidance, cutting sequence, and waste estimates.
Include panel dimensions, orientation arrows, and labeled hardware positions to streamline cutting and minimize material cost.
Step-by-Step Construction Process
The construction process begins with preparing and cutting the tabletop and base pieces to the planned dimensions.
Next comes sanding, edge treatment, and surface preparation before installing the swivel hardware and aligning the bearing plates.
Finally, the tabletop is secured to the swivel mechanism and the base is attached and reinforced to guarantee smooth, stable rotation.
Preparing and cutting the tabletop and base pieces
Measure and mark each tabletop and base component precisely on the chosen material, accounting for grain direction, edge allowances, and the swivel mechanism’s clearance.
Cut pieces with appropriate saws, using guides or fences for straight, repeatable edges.
Label parts, test-fit assemblies, and trim for alignment.
Confirm bearing mounting recesses and bolt holes are accurately located before moving to finishing steps.
Sanding, edge treatment, and surface preparation
Begin by sanding all tabletop and base components to create a uniform surface free of mill marks, glue squeeze-out, and saw fuzz; start with a coarse grit to remove high spots and progress through finer grits to achieve the desired smoothness while keeping edges square and profiles crisp.
Round or chamfer edges as planned, clean dust thoroughly, fill defects, and finish-sand before applying sealer or topcoat.
Installing the swivel hardware and aligning bearing plates
Install the swivel hardware with deliberate care, positioning the bearing plates so the tabletop rotates smoothly and the base remains stable.
The assembler centers plates, marks pilot holes, and verifies alignment with a spacer to maintain even clearance.
Fasteners are tightened incrementally, checked for binding, and adjusted until rotation is free but without wobble.
Final checks confirm parallelism and secure seating.
Securing the tabletop to the swivel mechanism
With the swivel hardware aligned and bearing plates verified for smooth, wobble-free rotation, the assembler moves on to secure the tabletop to the mechanism.
They center the tabletop over the carriage, mark mounting points, predrill pilot holes, and attach using machine screws with lock washers into threaded plates.
Final torque checks and a test spin confirm firm, even engagement without binding or preload stress.
Attaching and reinforcing the base for smooth rotation
Attach the swivel assembly to a stable base plate sized to distribute load and prevent tipping, ensuring the plate’s material and thickness match the table’s designed weight and use.
Center and clamp the assembly, fasten with appropriately rated bolts and lock washers, and add reinforcing brackets or gussets to the underside.
Verify secure, flush mating surfaces and apply threadlocker to critical fasteners.
Final checks for wobble, clearance, and smoothness
Begin by placing the table upright on a level surface and visually inspecting the swivel assembly, base plate, and table top for gaps, misalignment, or uneven contact points.
Rotate the top slowly, noting resistance, binding, or noise. Check lateral wobble by applying gentle pressure at edges.
Verify clearance between moving parts and floor. Adjust fasteners, shims, or lubrication until rotation is smooth and wobble eliminated.
Finishing and Protective Treatments
Finishing choices—stain, paint, or clear coat—should be matched to the table’s materials to achieve the desired appearance and protection.
A durable sealant protects joints and surfaces from wear and moisture.
Non-slip surface treatments and edge guards can be added for safety and stability.
Stain, paint, and clear-coat options by material
Choose a finish that matches the table’s material and designed use, since wood species, MDF, metal, and laminate each accept stains, paints, and clear coats differently and have distinct durability needs.
Solid woods suit oil or gel stains and polyurethane; MDF takes primer and paint; metal requires rust-inhibiting primer and enamel; laminate accepts bonding primer then paint.
Clear coats vary: satin, semi-gloss, or high-gloss for protection and appearance.
Applying sealant for durability and moisture resistance
Apply a durable sealant to protect the swivel table from wear, spills, and humidity, focusing on penetration and surface film appropriate to the material.
Select a compatible sealer—penetrating oil for porous woods, polyurethane or conversion varnish for durable topcoats, or clear epoxy for heavy use.
Sand between coats, follow manufacturer cure times, and apply even thin layers to guarantee long-lasting moisture resistance and abrasion protection.
Non-slip surface options and edge guards
Prevent slips and protect edges by adding textured surface treatments and fitted guards tailored to the table’s material and use.
Options include rubberized spray, anti-slip tapes, textured paint, or thin silicone mats for the top.
Edge protection can be achieved with rubber or PVC guards, rounded hardwood trim, or leather binding.
Choose UV-resistant, adhesive-backed products compatible with sealant and maintenance needs.
Testing, Adjustment, and Troubleshooting
Once assembled and finished, the swivel table should be tested under realistic load to confirm smooth rotation and reveal any binding or uneven wear.
Troubleshooting should target common faults—wobble, squeak, and binding—with adjustments to fasteners, lubrication, or alignment as first remedies.
Bearings or mounting components should be replaced or reinforced when play, persistent noise, or structural stress persists after basic adjustments.
How to test rotation under load and detect issues
Begin by placing a calibrated test weight on the tabletop and rotating the top through its full range while observing for smoothness, binding, or irregular noise.
Note torque changes, stall points, and uneven resistance. Repeat at multiple positions and with varying weights. Record rotation angle versus force.
Inspect bearing clearance, fastener tightness, and alignment where anomalies appear, then plan targeted adjustments.
Common problems and fixes (wobble, squeak, binding)
After documenting torque curves and pinpointing angles with issues, proceed to diagnose common problems: wobble, squeak, and binding.
Consider causes and targeted fixes:
- Wobble: tighten uneven fasteners, shim mounting plate, verify parallel faces.
- Squeak: clean contact surfaces, apply appropriate lubricant to bearings and threads.
- Binding: check for debris, realign races, adjust preload or clearances for smooth travel.
When to replace bearings or reinforce mounting
Evaluate bearing condition and mounting integrity whenever recurring issues persist despite basic adjustments and lubrication.
Inspect for play, rust pitting, rough rotation, or audible grinding; these indicate bearing wear and warrant replacement.
Check mounting fasteners, compressed or cracked wood, and uneven load distribution; reinforce with heavier screws, plywood backing, metal plates, or epoxy as needed.
Re-test rotation and stability after repairs.
Variations and Customizations
Design variations expand the basic swivel table into multi-tier tops, extendable sections, or units with built-in storage, lighting, or locking mechanisms.
Material and finish choices should be contrasted for indoor versus outdoor use, with specific weatherproofing and fastener recommendations for exterior applications.
Trade-offs in complexity, cost, and maintenance guide which customizations are most practical for a given project.
Multi-tier swivel tops and extendable sections
Several practical variations expand a basic swivel table into multi-tiered units or models with extendable sections, increasing storage, display area, and functionality without sacrificing rotation.
Designers stack concentric rotating tiers with staggered bearings for independent motion, or incorporate telescoping leaves and fold-out panels supported by sliding tracks.
Careful weight distribution, durable pivots, and synchronized stops guarantee smooth operation and user safety.
Integrated storage, lighting, or locking mechanisms
Many swivel tables incorporate built-in features—hidden drawers, recessed compartments, integrated lighting, or locking mechanisms—to enhance utility without compromising rotation.
Designers route wiring and recess hardware beneath the top, balance mass to preserve smooth spin, and use low-profile latches or magnetic catches for secure closure.
LED strips and touch switches add subtle illumination; keyed or cam locks prevent unwanted movement or access when needed.
Outdoor vs. indoor materials and weatherproofing tips
Material choice determines a swivel table’s longevity and required maintenance: outdoor pieces demand weather-resistant woods (teak, cedar), powder-coated metals, or marine-grade plastics, while indoor tables may prioritize aesthetics with veneers, untreated hardwoods, or brushed metals.
Seal outdoor woods with spar varnish or penetrating oil, use stainless or galvanized hardware, apply UV-resistant finishes, and provide covers or elevated feet to prevent moisture damage.
Cost, Time Estimates, and Project Difficulty
A concise overview of expected costs, time commitments, and difficulty helps readers plan the swivel table project effectively.
Typical budget items and cost-saving tips, estimated build times for beginners versus experienced DIYers, and the necessary skill level with suggested learning resources will be summarized.
This information enables realistic expectations and informed decisions before starting construction.
Typical budget breakdown and cost-saving tips
Typical projects require a modest budget allocation covering lumber, hardware, finish, and a swivel mechanism, with costs varying by size and material choice.
A concise breakdown highlights essentials and savings:
- Lumber and top: choose reclaimed or mid-grade for savings.
- Swivel and fasteners: compare suppliers for discounts.
- Finish and tools: reuse brushes, buy small sample finishes to reduce waste.
Estimated build time for beginners vs. experienced DIYers
Several factors—skill level, tool familiarity, and design complexity—determine time estimates for building a swivel table.
An experienced DIYer with proper tools can complete the project in 4–8 hours over a single day, including assembly and finishing touches.
A beginner should plan 2–3 weekend sessions (12–20 hours) to allow for learning, careful measuring, and dry fits to avoid mistakes.
Skill level required and recommended learning resources
Skill level for a swivel table ranges from basic woodworking competence to intermediate joinery, depending on the chosen design and materials.
Necessary skills include accurate measuring, safe power tool use, drilling, sanding, and basic finishing.
Recommended resources: concise how-to guides, targeted video tutorials on bearing installation and joinery, community workshop classes, and a reputable woodworking reference.
Practice on scrap stock is advised.
Safety Considerations and Maintenance Schedule
Before beginning construction, the builder should observe standard workshop safety practices, including eye, ear, and respiratory protection and secure tool handling.
After assembly, a simple maintenance schedule—periodic lubrication of the swivel mechanism, inspection of fasteners, and surface care—will preserve performance.
Unused or damaged components and scrap materials should be disposed of or recycled according to local regulations to minimize hazard and waste.
Workshop safety during construction
A clear, enforced set of safety protocols is essential whenever constructing the swivel table, covering PPE requirements, tool operation, workspace layout, and emergency procedures.
The workshop should maintain clean floors, secured workpieces, proper lighting, and clear egress. Only trained operators may use power tools; guards and dust extraction must be active.
A stocked first-aid kit and fire extinguisher must be accessible at all times.
Routine maintenance tasks to ensure long-term performance
Establishing a regular maintenance routine preserves the swivel table’s function and prevents common failures. Scheduled checks should cover fasteners, bearings, swivel mechanism lubrication, tabletop surface condition, and mounting integrity.
Routine tasks:
- Inspect and tighten fasteners, check mounting brackets for play.
- Clean and lubricate bearings and swivel pivot per manufacturer guidance.
- Repair surface damage, reseal finishes, and replace worn components promptly.
Disposal or recycling options for parts and scrap
Many components of a swivel table can be reclaimed or disposed of responsibly by separating materials—metal bearings and brackets, wooden tabletops, and plastic or composite parts—and directing each to appropriate recycling streams or hazardous-waste channels.
Metals go to scrap or municipal recycling; treated wood may require special disposal or reuse as firewood if safe; plastics follow local sorting; lubricants, batteries, and solvents must go to hazardous-waste facilities.
Conclusion
Like a well-oiled compass guiding a ship, this swivel table project brings form and function into gentle rotation. The builder completes a durable, smooth top by selecting the right mechanism, measuring precisely, assembling with appropriate fasteners, and testing for balance and clearance. With basic tools, modest time, and attention to safety and maintenance, the result rewards with practical elegance and customizable charm, ready to serve gatherings, work, or display for years.