How to Fix a Hard-to-Flush Toilet: 7 Quick DIY Fixes That Work
If your toilet is hard to flush, follow these quick DIY fixes to restore its functionality. First, ensure safety by shutting off the water supply and wearing gloves. Observe the symptoms, then perform a test flush. Check for visible clogs, inspect the tank water level, and examine the flapper, chain, and rim jets. You can try plunging firmly, using a toilet auger, unclogging rim holes, adjusting the flapper chain, or raising the tank water level. Regular cleaning and enzyme treatments help prevent buildup. If issues continue or if multiple fixtures are affected, it may be time to consult a professional.
What to Do First When a Toilet Is Hard to Flush
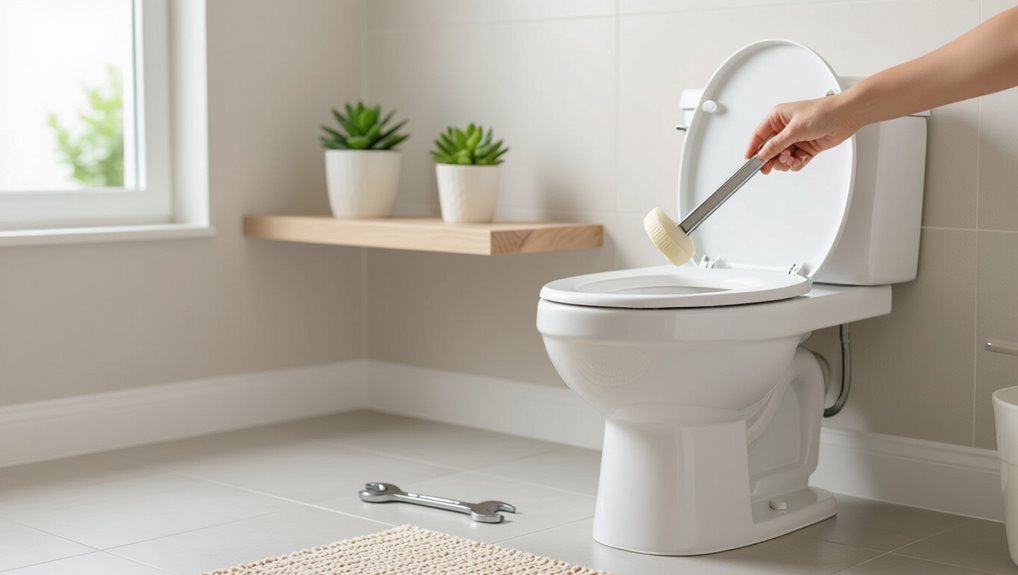
Before beginning any repairs, the area should be secured by turning off the water supply and wearing gloves to prevent contact with waste and cleaning chemicals.
A few basic tools and materials—plunger, adjustable wrench, bucket, sponge, and replacement flapper or seal—should be gathered so work can proceed efficiently.
Confirming these safety and preparation steps and assembling the necessary tools will minimize delays and reduce the risk of spills or damage.
Quick safety and preparation steps
A homeowner should first secure the area and minimize mess: turn off the toilet’s water supply at the shutoff valve, remove any rugs or items from around the base, and place absorbent towels or a small bucket nearby in case of overflow.
Then they should ventilate the room, wear gloves, avoid chemical mixing, and document observed symptoms to aid diagnosing how to fix a hard to flush toilet.
Tools and materials to have on hand
With the area secured and symptoms noted, gather the tools and materials needed to diagnose and fix a hard-to-flush toilet so work proceeds efficiently and safely.
Essential items include basic cleaning supplies, small replacement parts, and tools for inspections and adjustments:
- Plunger (flange or cup)
- Toilet auger
- Adjustable wrench
- Screwdrivers (Phillips and flat)
- Rubber gloves and rags
Fast Checks to Diagnose the Problem
A quick, systematic inspection helps pinpoint why a toilet is hard to flush. The writer suggests testing a flush while noting weak flow or gurgling, checking the bowl and trap for visible clogs, and confirming the tank water level.
Next steps include examining the flapper, chain, and handle for proper operation and evaluating for partial drain-line blockages.
Test the flush and observe symptoms
Flush the toilet and watch closely for what happens.
Note water surging slowly, noisy gurgles, weak bowl draw, incomplete tank refill, or prolonged running.
Observe whether multiple flushes improve performance or if flushing causes nearby drains to bubble.
Record frequency and conditions of symptoms to guide targeted fixes or when to escalate to plumbing tools or professional help.
Check for visible clogs in the bowl and trap
Several quick visual checks can reveal an obvious obstruction: peer into the bowl under bright light and scan the visible trap area for toilet paper, sanitary items, wipes, or other debris.
Then use a gloved hand or a toilet brush to remove anything reachable without forcing it deeper.
If nothing is visible, note water height and bubbling during a test flush to guide next steps.
Inspect the water level in the tank
How high is the water sitting in the tank when the lid is removed? The person inspects the fill line relative to the overflow tube or manufacturer mark.
Low water reduces flush force; adjust the float or fill valve to raise the level to the recommended mark, typically about an inch below the overflow.
Confirm the refill stops properly and no slow leaks lower the level.
Examine the flapper, chain, and handle operation
Lift the tank lid and observe the flapper, chain, and handle as the toilet is operated to check for common mechanical faults.
Note whether the flapper seals fully, the chain has proper slack, and the handle returns smoothly without sticking.
Replace a warped flapper, shorten or lengthen the chain to avoid binding, and tighten or lubricate the handle linkage for reliable flushing.
Look for partial blockages in the drain line
If the tank mechanisms operate correctly, the next quick step is to check for partial blockages in the drain line that can slow or weaken the flush.
Inspect the trapway and toilet outlet for visible debris, use a plunger with firm, controlled strokes, and try a toilet auger for obstructions beyond reach.
Persistent resistance suggests a deeper clog or sewer line issue requiring professional service.
7 Quick DIY Fixes That Often Restore Full Flush Power
A set of straightforward DIY steps often restores a toilet’s full flush power without calling a plumber.
Common actions address blockages, worn parts, mineral buildup, and insufficient water level.
Quick options include:
- Use a plunger correctly
- Augment plunging with a toilet auger (snake)
- Clear mineral buildup from rim holes and jet
- Adjust or replace the flapper and chain
- Raise the tank water level for stronger flush
1) Use a plunger correctly
A plunger should be used with a firm, steady seal over the drain and rhythmic pushes and pulls to create strong pressure pulses that dislodge clogs.
If water begins to drain after several vigorous attempts, continued plunging in short sets can complete the job.
However, if there is no progress after about 10–15 strong thrusts, it is reasonable to stop and try a different method.
Repeating briefly with pauses prevents overexertion and helps assess whether professional help is needed.
Proper plunging technique for toilets
Begin by seating the plunger to form a tight seal over the toilet bowl’s drain opening, ensuring the rubber flange (for flange plungers) is unfolded and inserted if present.
Use steady, forceful vertical thrusts—push then pull—maintaining the seal. Start with 5–10 firm pumps, watching water movement; adjust angle or reseal if air leaks.
Clear debris afterward and sanitize the plunger.
When to repeat or stop
How often should someone repeat plunging before moving on to other fixes?
The user should try firm, controlled plunges for two to three minutes, evaluating progress after each minute. If water level drops and flow improves, continue up to five minutes total.
If no improvement after five minutes or persistent backups occur, stop and try a snake, enzyme cleaner, or call a plumber to avoid damage.
2) Augment plunging with a toilet auger (snake)
A toilet auger can be used after plunging to reach and dislodge obstructions deeper in the trap and drain.
The article will outline a clear step-by-step technique for inserting, extending, rotating, and retracting the snake without damaging the porcelain.
It will also list the signs that the auger fixed the problem, such as restored water flow, a complete flush, and no recurring gurgling.
How to use a toilet auger step-by-step
Reach for a toilet auger when plunging fails to clear a stubborn clog; this tool reaches deeper into the trap and bends of the toilet without damaging porcelain.
Insert the rubber boot into the bowl, feed the cable slowly while turning the handle, feel for resistance, crank to break or hook the obstruction, retract while maintaining tension, flush to confirm flow, disinfect and store.
Signs the auger solved the issue
After using the auger as described, there are clear, observable signs that the obstruction has been cleared and normal flushing power is restored.
Water drains swiftly without gurgling, the bowl returns to baseline water level, and multiple test flushes succeed.
No lingering odors or slow swirls appear.
The auger cable retracts smoothly and the trap feels unobstructed when inspected.
3) Clear mineral buildup from rim holes and jet
Mineral deposits often appear as white, crusty buildup around rim holes and the flush jet, and reduced water flow during a flush can signal clogging.
The recommended approach is to remove visible scale with a small brush or wire and use safe cleaners—vinegar or a mild citric-acid solution—rather than harsh acids that can damage parts.
After cleaning, inspect flow to confirm restoration and repeat treatment as needed.
How to identify mineral deposits
How can one tell if hard-water buildup is sabotaging a toilet’s flush?
Look for chalky white, gray, or rusty mineral crust around rim holes, the main jet at the bowl’s front, and inside the trapway.
Reduced water flow, irregular spray patterns, and slow refill can accompany visible deposits.
Remove the tank lid and inspect the flush valve and overflow for scale accumulation before cleaning.
Safe cleaning solutions and methods
Several simple, safe methods can remove scale and restore flush power without special tools.
Vinegar soaks dissolve calcium; pour into bowl, let sit several hours, then scrub with a brush.
A baking soda paste helps stubborn spots.
Use a small wire or a toothbrush to clear rim holes and the jet.
Rinse thoroughly and test the flush, repeating if needed.
4) Adjust or replace the flapper and chain
A worn or improperly seated flapper and a misadjusted chain can prevent the tank from releasing enough water, producing a weak flush.
Identifying the correct flapper size and type guarantees a proper seal and full lift. Installation typically involves snapping the new flapper onto the flush valve and adjusting the chain length for a slight slack at rest.
Replacing a deteriorated flapper or shortening/lengthening the chain often restores flush power with minimal tools and time.
How flapper problems reduce flush power
Flapper issues frequently sap a toilet’s flush power by preventing the tank from fully opening or closing at the right time; a warped, deteriorated, or misaligned flapper can seal poorly or lift insufficiently.
A chain that’s too short or tangled can restrict movement. Reduced lift shortens water release, while poor sealing causes slow refill and weak siphon action, lowering flush effectiveness.
How to size and install a replacement flapper
One clear step toward restoring flush power is selecting the correct replacement flapper and installing it so the seal and lift are consistent.
Measure valve seat diameter, note trip lever type, and choose a compatible flapper material.
Remove old flapper, clean seat, attach new flapper to pegs or chain, adjust chain slack for full lift without binding, then test several flushes.
5) Raise the tank water level for stronger flush
Next, attention turns to raising the tank water level to increase flush force by adjusting the float mechanism, whether a traditional ballcock or a modern float cup.
The homeowner is advised to set the water line about 1 inch below the overflow tube and adjust the screw or clip on the float to reach that level.
After adjustment, multiple test flushes should confirm a stronger, reliable flush without water spilling into the overflow.
How to adjust float mechanisms (ballcock, float cup)
Adjusting the float mechanism to raise the tank water level can restore flush power by allowing more water into the bowl during each flush.
Inspect the ballcock or float cup, shut off water, drain the tank, then bend the ballarm slightly or turn the float-cup adjustment screw/clip upward to permit higher fill.
Reopen supply, observe fill, and make minor tweaks until desired operation is achieved.
Recommended water level and testing
What level should the tank reach for a reliable flush? The water should sit at the marked fill line or about one inch below the overflow tube top.
After adjusting the float, perform several test flushes, observing bowl clearance and refill speed.
If performance lags, recheck for leaks, partial obstructions, or insufficient supply pressure before further adjustments or component replacement.
6) Clean or remove a partially blocked trap using household methods
When a toilet’s trap is partially blocked, homeowners can often clear it with household remedies like enzyme cleaners, a baking soda and vinegar mix, or repeated pours of hot (not boiling) water.
Chemical or enzymatic methods are best for organic clogs and when the blockage is out of mechanical reach, while mechanical approaches (plunging, a toilet auger) are preferable for stubborn or solid obstructions.
Care should be taken to choose methods that won’t damage porcelain or plumbing and to switch to mechanical removal if repeated treatments fail.
Enzyme cleaners, baking soda + vinegar, and hot water
Try household remedies before calling a plumber: enzyme cleaners, a baking soda-and-vinegar reaction, and carefully poured hot water can dissolve or dislodge organic buildup in a partially blocked toilet trap and often restore full flush power without tools.
Follow product directions, allow enzymes overnight, pour vinegar into baking soda foam, then add hot (not boiling) water slowly.
Repeat once if needed; ventilate the room.
When chemical methods are appropriate vs. mechanical
Although chemical treatments can dissolve organic buildup without tools, mechanical methods are preferable for physical obstructions or when rapid results are required.
Use enzymes or baking soda/vinegar for slow clogs, routine maintenance, or septic-safe cleaning.
Choose plungers, augers, or manual removal for paper, toys, mineral scale, or persistent blockages.
Prioritize safety, ventilation, and manufacturer recommendations when combining approaches.
7) Inspect and clear the vent stack and external blockages
A clogged vent stack can restrict air flow in the drain system, causing slow or weak flushes and gurgling sounds.
Homeowners can safely inspect the roof vent from a ladder to look for obvious debris like leaves, bird nests, or ice buildup.
If blockages are visible, they can be cleared carefully with a plumber’s snake or by dislodging debris with a gloved hand or long rod, and the results checked by flushing.
How a blocked vent affects flushing
When the vent stack becomes blocked—by leaves, bird nests, or debris—it prevents air from entering the plumbing system, which reduces the pressure differential needed for a full, rapid flush.
Water then moves slowly or weakly because suction and proper drainage are impaired. A blocked vent also traps sewer gases, increases gurgling, and causes partial siphoning, all of which undermine bowl evacuation and consistent flush performance.
Basic safe steps to check and clear vents
Start by visually inspecting the vent stack on the roof for obvious obstructions—leaves, bird nests, or a buildup of debris—and note any damage or loose flashing that could allow material to enter.
From ground level, check other vent openings for blockages. Use a long pole or garden hose to dislodge debris safely; avoid climbing alone.
Replace damaged flashing and retest the toilet’s flush.
When to Call a Professional Plumber
If flushing remains weak after attempting the quick fixes, a professional plumber should be contacted to diagnose the underlying cause.
Immediate help is also warranted when multiple fixtures are affected or a persistent sewer smell is present.
Visible signs of sewer line collapse or evidence of a deep blockage require prompt professional assessment and repair.
Persistent slow flush after DIY attempts
Persistent slow flushing that resists common DIY fixes signals a problem beyond simple adjustments and warrants professional assessment.
A licensed plumber can diagnose concealed obstructions, partial drain line collapse, venting failures, or septic issues using camera inspection, pressure testing, and specialized clearing tools.
Prompt professional evaluation prevents recurring clogs, water damage, and costly repairs by identifying root causes rather than temporary symptoms.
Multiple fixtures affected or sewer smell
When multiple fixtures slow at once or a sewer odor permeates the home, these signs point to a systemic plumbing issue that exceeds typical toilet repairs and merits a professional plumber’s attention.
A licensed plumber can diagnose mainline blockages, venting failures, or septic problems using cameras and tests. Immediate professional assessment prevents health risks, property damage, and escalating repair costs.
Signs of sewer line collapse or deep blockage
Although less common than simple clogs, a collapsed sewer line or a deep blockage produces distinct, often severe symptoms that require immediate professional intervention.
Signs include multiple fixtures backing up simultaneously, persistent foul sewer odors, slow drains throughout the home, gurgling sounds, soggy patches or sinkholes in the yard, and sewage backups.
Prompt inspection and repair by a licensed plumber prevent health hazards and structural damage.
Preventive Maintenance to Keep Flushes Strong
Preventive maintenance keeps flushes strong by addressing minor issues before they become blockages.
Monthly tasks include cleaning rim jets and checking the flapper and fill valve for wear, while avoiding flushing items like wipes, feminine products, and grease prevents buildup.
Recommended products (toilet-safe enzymatic cleaners, a quality flapper, and a reliable fill valve) and suggested replacement intervals will be reviewed.
Monthly tasks to prevent clogs and buildup
Regularly scheduling a few simple monthly tasks helps keep toilets flushing strongly and reduces the chance of stubborn clogs.
A detached homeowner or maintenance worker can perform brief actions to prevent buildup and spot problems early.
- Flush once after adding a toilet-safe cleaner
- Inspect and clean rim jets with a brush
- Check flapper and chain for wear
- Run a drain-safe enzyme treatment
- Verify tank components operate smoothly
What not to flush: common mistakes that cause hard flushes
Why does a toilet begin to flush weakly? Clogs and partial blockages reduce siphon action.
Preventive avoidance helps maintain strong flushes.
- Paper towels and wipes (even “flushable”)
- Feminine hygiene products
- Cotton swabs and balls
- Dental floss and hair
- Grease, cooking oil, and heavy solids
Proper disposal prevents buildup and preserves drain flow.
Recommended products and replacement intervals
Maintenance intervals and the right replacement parts keep toilets flushing strongly: recommended items include flapper valves (replace every 3–5 years), fill valves (5–7 years), and flapper seals or flush valve gaskets (inspect annually and replace at first sign of wear).
Use silicone or rubber components rated for potable water, low-friction fill valves, and universal-fit flappers; test performance after replacement and stock spare seals for quick fixes.
Comparison of DIY vs. Professional Solutions
A comparison of DIY and professional fixes highlights trade-offs in cost, time, effectiveness, and risk to inform the appropriate choice for a stubborn toilet. The table below summarizes key differences to guide decision-making. Weigh immediate savings against possible long-term costs or complications when choosing an approach.
| Aspect | DIY vs Professional |
|---|---|
| Cost | Lower upfront for DIY; higher for pros |
| Time | DIY can be quicker if simple; pros require scheduling |
| Effectiveness | Adequate for minor issues; pros better for complex problems |
| Risk | Higher risk of mistakes with DIY; pros reduce risk |
| Long-term outcome | May need repeat DIY attempts; pros often provide lasting fixes |
Cost, time, effectiveness, and risk factors compared
When weighing DIY methods against hiring a professional, homeowners should consider cost, time, effectiveness, and potential risks to plumbing. DIY is cheaper and faster for simple clogs but may be less effective and risk worsening damage; pros cost more, take longer, but diagnose and fix complex issues reliably.
| DIY | Professional |
|---|---|
| Low cost, quick | Higher cost, thorough |
| Moderate risk | Low risk |
Quick Troubleshooting Flowchart
A compact flowchart guides the user from observed symptom to likely fix in a few clear steps.
It presents yes/no checkpoints—such as weak flush, slow refill, or gurgling—to narrow probable causes.
The chart directs toward specific actions or when to call a professional.
Stepwise decision guide from symptom to solution

What symptom appears first—weak flush, partial bowl emptying, or repeated clogging—determines the next diagnostic step. Follow a three-branch flow: weak flush → check tank water level, flapper, and siphon jet; partial emptying → inspect trapway and rim holes, test venting; repeated clogging → clear trap, snake drain, assess sewer line. After repair, perform test flushes and monitor performance.
Conclusion
A stubbornly weak toilet can often be revived with simple inspections and seven practical DIY remedies, each a small key revealing better performance. After quick checks of the tank, flapper, fill valve, trap, and venting, most clogs or adjustments yield to basic fixes; however, persistent problems warrant a professional. Regular maintenance prevents recurrence, and weighing DIY effort against plumber expertise helps homeowners choose the wisest, cost-effective path forward.