Keep Pipes From Freezing in Crawl Space: Expert Winter Tips
To prevent pipes from freezing in your crawl space during winter, insulate pipe runs with foam or closed-cell insulation, seal gaps at rim joists and vents, and install a polyethylene vapor barrier to minimize cold and dampness. Additionally, use self-regulating heat tape on exposed pipes, consider raising or rerouting lines into heated areas, and let a trickle of warm water flow during extreme cold. Regularly inspect your plumbing and document any damage. For detailed step-by-step instructions, diagnostics, and emergency measures, continue reading.
Quick Fixes to Stop Crawl-Space Pipes From Freezing
In tight crawl spaces, homeowners can often prevent pipe freezes with a few targeted, low-cost measures: insulating exposed pipes with foam sleeves, sealing air leaks in the foundation and rim joists, and installing heat tape where cold exposure is unavoidable.
Professionals recommend prioritizing visible vulnerabilities: wrap fittings and bends, secure insulation with tape or zip ties, and route heat tape along the most exposed runs.
Add inexpensive vent covers and a programmable thermostat for any sub-slab heaters.
Schedule a quick inspection each fall to identify new gaps or damaged insulation.
Consistent, simple maintenance reduces freeze risk and repair costs.
How Freezing Happens in Crawl-Space Pipes
Crawl-space pipes freeze when ambient temperatures drop enough for the water inside to reach 32°F and latent cold penetrates pipe walls faster than heat can be replenished. Freezing begins at contact points where metal or plastic conducts cold inward; ice forms, expanding and restricting flow.
Reduced circulation and trapped pockets accelerate temperature decline. Moisture in surrounding soil and air lowers thermal buffering, while wind-driven drafts through vents increase heat loss.
Heat transfer dynamics, pipe material, insulation presence, and water movement determine freezing speed. Once ice blocks a pipe, upstream pressure rises and ruptures can occur if thawing is uneven or delayed.
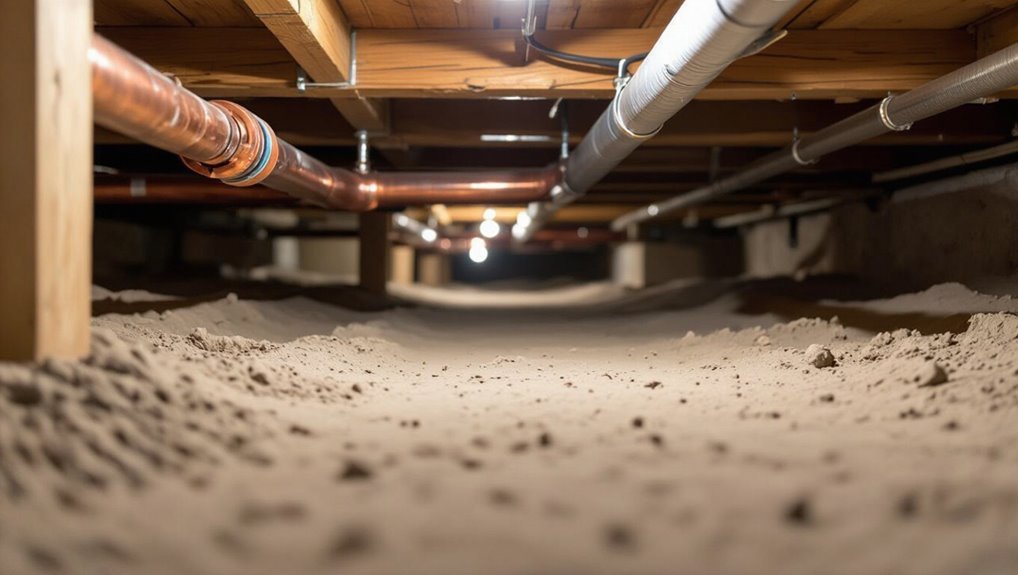
Which Crawl-Space Pipes Are Most at Risk
Identifying which pipes are most vulnerable begins with recognizing exposure and thermal isolation: those running along exterior walls, near vents or foundation openings, and under uninsulated floors face the greatest risk because they lose heat rapidly to cold air and ground.
A focused assessment highlights materials, position, and service.
- Copper and PVC lines exposed on or just above the ground — conductive and easily chilled.
- Supply lines to exterior spigots and irrigation controls — often routed along perimeter.
- Older galvanized pipes with thin insulation or gaps — deteriorated protection.
- Short, dead-end branches and seldom-used fixtures — minimal flow and heat retention.
Signs Your Crawl-Space Pipes Are Freezing
Several clear signs indicate crawl-space pipes are beginning to freeze: reduced or intermittent water flow at fixtures, visible frost or ice on exposed pipe surfaces, and bulging or cracked insulation where moisture has accumulated and frozen.
Additional indicators include unusually cold walls or floors above the crawl space, rhythmic ticking from contracting pipe metal during temperature shifts, and localized dampness from melting frost.
Discolored water, sputtering faucets, or pressure loss suggest partial blockages from ice formation.
Routine inspections should note these symptoms early to prioritize preventative measures and targeted repairs before pipes fully block or burst.
Emergency Steps When a Pipe Starts to Freeze
Act quickly when a pipe in the crawl space begins to freeze: shut off the water supply at the main valve to reduce pressure and open nearby faucets to relieve trapped water and allow melting ice to flow out.
Then inspect accessible pipe sections for bulging or cracks without attempting forceful manipulation.
If visible damage exists, keep the system off and evacuate water-using appliances. Contact a licensed plumber immediately and document conditions for repairs and insurance.
If no obvious rupture is found, maintain low-level heat to the area and monitor.
Follow utility safety protocols to avoid electrical hazards near wet areas.
- Isolate water
- Relieve pressure
- Inspect visually
- Call plumber
How to Thaw a Frozen Crawl-Space Pipe Safely
First, the frozen section should be located by checking exposed runs and feeling for cold spots or bulging pipes.
Next, heat should be applied only with safe methods such as electric space heaters, heating tape, or warm towels—open flames and unapproved devices must be avoided.
Finally, once water flow resumes, the pipe and surrounding area should be inspected for cracks, leaks, or other damage before restoring normal use.
Locate The Frozen Section
Begin by tracing the coldest points along the plumbing—listen for air in the lines, tap pipes to detect solid (frozen) versus hollow (thawed) sections, and inspect exposed runs in the crawl space where frost or ice may cling. The observer documents temperature differences and visible indicators, marking suspected frozen spans. Access points and valve positions are noted before intervention. If multiple runs exist, prioritize main supply lines. Record findings for repair or insulation upgrades.
- Visually inspect exposed pipe surfaces for frost or condensation.
- Tap sequentially to map solid sections.
- Note nearby drafts or gaps.
- Mark frozen segment endpoints.
Apply Safe Heat Sources
Using controlled, low-intensity heat sources, the responder gently raises the pipe temperature to melt ice without causing damage to the plumbing or surrounding materials.
Portable electric space heaters, infrared lamps, and heat guns set to low or warm settings are employed at safe distances. Heat tape designed for pipes and thermostatically controlled cable heaters offer targeted, consistent warming.
Insulation is replaced or augmented as warming proceeds to retain heat. Open access panels and monitor temperature progress, avoiding open flames, direct high heat, or combustible materials.
Power must be used with care; cords and devices stay dry and monitored until flow resumes.
Check For Damage
Inspect the visible section of the pipe and surrounding crawl-space area for signs of stress or failure before applying heat: look for bulging, cracking, frost lines, water stains, or corrosion that indicate a compromised wall or joint.
If damage appears, halt heating and isolate water supply to prevent pressure-driven rupture. Document locations and take photos for repairs. Follow a methodical thaw: apply gentle heat away from joints, monitor for leaks, and have tools ready to contain water.
If uncertainty exists, contact a licensed plumber. Safety and repair planning reduce further damage and make certain proper restoration.
- Stop water supply
- Photograph damage
- Apply gentle heat
- Call a plumber
Temporary DIY Fixes Before Professional Help Arrives
When immediate professional help is not yet available, simple temporary measures can reduce further risk.
Exposed pipes may be wrapped with insulation or heat tape, and gentle heat application can be used cautiously.
Running a trickle of warm water helps keep flow and prevent re-freezing until a plumber arrives.
Insulate Exposed Pipes
Seal off immediate risk by applying simple insulation to exposed crawl-space pipes until professional repairs can be made. Temporary insulation reduces heat loss and delays freezing, buying time before experts arrive. Use materials on hand or inexpensive shop-bought wraps for quick coverage.
- Measure pipe lengths and select foam sleeves or fiberglass wrap sized to fit snugly.
- Clean surfaces, then slide or wrap insulation, sealing seams with duct tape or zip ties.
- Insulate fittings and joints with extra wrap or small foam pieces to prevent weak points.
- Check periodically for shifts or moisture; replace saturated material promptly.
Apply Heat Tape
After insulating exposed pipes, applying electric heat tape offers a more active short-term defense against freezing until a professional can perform permanent repairs.
Heat tape must match pipe material and diameter; self-regulating types are safer because they adjust output and reduce overheating risk.
Install per manufacturer instructions: clean pipe surface, wrap tape with recommended overlap, secure with approved fasteners, and cover with thermal insulation to retain warmth.
Plug into a grounded outlet or a GFCI-protected circuit.
Regularly inspect for damage, fraying, or moisture.
Heat tape is a temporary measure; prolonged use without professional assessment risks electrical hazards and improper protection.
Run Warm Water
Frequently, running a steady trickle of warm water through vulnerable faucets provides a quick, temporary way to lower freeze risk in crawl-space plumbing until professional repairs are made.
The measure reduces standing water, raises pipe temperature slightly, and buys time during cold snaps.
It is best used only as a short-term precaution and combined with insulation or heat sources when possible.
Monitor water use and shut off if crew arrives. Consider meter readings if concerned about waste.
- Open a faucet nearest the crawl space.
- Use warm, not scalding, water.
- Maintain a thin, continuous flow.
- Stop when pros take over.
Why Crawl-Space Insulation Protects Pipes
By adding insulation to the crawl space, the air around water pipes is kept closer to the home’s interior temperature, reducing the risk of freezing. Insulation slows heat loss, moderates temperature swings, and limits cold drafts that contact pipes. It creates a thermal buffer, making brief outdoor cold snaps less likely to drop pipe temperatures below freezing. Properly installed insulation also reduces moisture infiltration that can exacerbate freezing and corrosion. The result is fewer freeze-related ruptures and longer pipe life, with energy savings from reduced heat transfer between the house and the ground.
| Benefit | Effect on Pipes | Practical Result |
|---|---|---|
| Thermal buffer | Slows heat loss | Fewer freezes |
| Draft control | Reduces cold air contact | Stable temps |
| Moisture reduction | Limits condensation | Less corrosion |
| Energy saving | Lowers heating load | Cost savings |
| Damage prevention | Avoids ruptures | Less repair cost |
Best Pipe Insulation Types for Crawl Spaces
Several common insulation types suit crawl-space piping, each balancing cost, ease of installation, and thermal performance.
Closed-cell foam (rubber or polyethylene) offers high R-value per inch and resists moisture.
Fiberglass sleeve works where pipes are dry and accessible, economical but requires vapor barrier.
Foam pipe wrap is flexible for bends and simple repairs, moderate insulation value.
Spray foam seals gaps and adheres to irregular surfaces, offering both insulation and air-sealing.
- Closed-cell foam
- Fiberglass sleeve
- Foam pipe wrap
- Spray foam
Selection depends on pipe material, moisture conditions, and maintenance access.
How to Add Pipe Insulation Step-by-Step
Before beginning work, gather the right materials and confirm safety: measure pipe lengths, choose insulation suited to the pipe material and moisture conditions, and have a utility knife, tape, adhesive or tape closures, and safety gear on hand. The installer cuts insulation to length, opens seams, fits halves around pipes, and aligns seams upward. Joints and fittings receive extra wraps or pre-formed pieces. Seal seams with specified tape or adhesive, secure with zip ties where recommended, and label insulated runs. Inspect for gaps and compressions, adjust as needed, and document completed sections for seasonal checks.
| Step | Action | Tip |
|---|---|---|
| 1 | Measure and cut | Allow extra length |
| 2 | Fit and align | Seam upward |
| 3 | Seal and secure | Use specified tape |
| 4 | Inspect and document | Note problem areas |
Crawl-Space Vapor Barriers to Cut Moisture and Cold Spots
Under the floor, a continuous vapor barrier is the most effective way to reduce ground moisture and the cold spots that lead to frozen plumbing; it blocks soil evaporation, evens out temperature gradients, and protects insulation from dampness.
A properly installed polyethylene sheet, taped and sealed at seams, limits humidity-driven heat loss and reduces condensation on pipes.
Selection of thickness, overlap, and anchor methods depends on soil conditions and access. Maintenance includes periodic inspection for tears and secure fastening.
Benefits include lower relative humidity, fewer mold concerns, and steadier temperatures adjacent to plumbing.
- Choose durable 6-mil+ material
- Seal seams with compatible tape
- Extend up foundation walls
- Inspect seasonally
How to Seal Air Leaks That Bring Cold Into the Crawl Space
The discussion begins by identifying common leak paths such as rim joists, foundation seams, utility penetrations, and gaps around windows and vents.
It then outlines effective air-sealing materials and methods—caulk, spray foam, weatherstripping, and rigid board insulation—matched to different gap sizes and substrates.
Finally, attention turns to inspecting and sealing duct penetrations with mastic or foil tape and properly insulating exposed ductwork to prevent cold air migration.
Identify Common Leak Paths
In evaluating crawl-space vulnerabilities, attention focuses on the specific air pathways that allow cold to reach pipes: rim joists, sill plates, utility penetrations, foundation vents, and gaps around ductwork and chimneys.
Inspection targets visible cracks, neglected access panels, and seams where building materials meet. Identifying locations guides prioritized sealing and insulation work.
Common leak paths include:
- Rim joist cavities and gaps at floor framing.
- Sill plate interfaces with foundation walls.
- Plumbing, electrical, and HVAC penetrations.
- Foundation vents, crawlspace doors, and duct/chimney junctions.
Documentation of each breach and its size informs repair sequencing and risk mitigation.
Air-Sealing Materials And Methods
Focused on stopping cold air before it reaches pipe runs, air-sealing uses a mix of flexible and rigid materials chosen for the gap size, movement, and exposure conditions.
Small cracks around sill plates, utility penetrations, and rim joists suit high-quality acrylic or silicone caulk; larger gaps require closed-cell spray foam or foam backer rod plus sealant.
For irregular or moving joints, use compressible gaskets, weatherstripping, or canned low-expansion foam to avoid distortion.
Rigid sheet materials like plywood or exterior-grade sheathing block wide openings and should be sealed at edges.
All materials must be compatible with local codes and moisture management strategies.
Inspect And Seal Duct Penetrations
Beginning at each HVAC run, attention turns to duct penetrations where unsealed gaps can draw cold air into the crawl space and undermine pipe protection.
A systematic inspection locates loose connections, torn boots, and missing drywall or subfloor seals.
Once identified, durable sealing restores thermal continuity and reduces freeze risk.
Recommended steps:
- Remove insulation debris and clean the area.
- Apply foil-backed mastic or high-quality HVAC tape to seams.
- Seal gaps around boots and chases with low-expansion foam.
- Add metal flashing or collar plates where ducts pass framing.
Follow with a smoke or incense test to confirm airtightness.
How to Insulate Crawl-Space Walls and Rim Joists
When insulating crawl-space walls and rim joists, selecting the right materials and sealing details is essential to prevent heat loss and freeze damage to pipes.
Closed-cell spray foam on rim joists provides air sealing and high R-value in a thin layer; rigid foam board insulated and taped to foundation walls adds continuous thermal resistance.
Seal gaps around penetrations, seams, and sill plates with compatible caulk or foam.
Protect insulation from moisture and pests with a vapor-retardant finish or mechanical protection where required.
Make sure ventilation strategy and local code compliance guide material choices and installation to maintain pipe protection and structural health.
Upgrade Your Crawl-Space Door or Hatch: When and Why
A crawl-space door or hatch should be inspected for air leaks that undermine conditioned air and allow cold infiltration.
When gaps or thin materials are found, upgrading to thicker, insulated materials reduces conductive heat loss.
Adding properly fitted, weatherproof seals completes the upgrade and prevents drafts that can freeze pipes.
Inspect For Air Leaks
Why check the crawl-space door or hatch for air leaks? Air infiltration through gaps heats or cools the crawl space unpredictably, raising freeze risk for exposed pipes. A focused inspection targets seals, frames, hinges, and vents.
- Examine perimeter gaps with a flashlight for daylight or drafts.
- Test seals by feeling for airflow and using smoke or incense.
- Inspect hardware alignment; warped doors prevent proper compression of gaskets.
- Note vent flaps and weatherstripping condition; replace cracked or compressed materials.
Recording findings guides targeted repairs or door replacement to maintain stable crawl-space temperatures and protect plumbing.
Upgrade Insulation Material
Consider replacing thin or deteriorated insulation on the crawl-space door or hatch to reduce heat transfer and lower freeze risk for exposed pipes.
Upgrading to closed-cell foam board, rigid foam panels, or spray foam improves R-value in a compact area and resists moisture and compression.
Make certain materials are compatible with surrounding framing and noncombustible clearances.
Add a layer sized to fit tightly, fastening with adhesive or mechanical fasteners and sealing edges with tape designed for foam.
Periodically inspect for compression, animal damage, or moisture intrusion and replace degraded sections promptly to maintain thermal performance and protect vulnerable plumbing.
Install Weatherproof Seals
When exposed framing and gaps around a crawl-space door allow cold air, moisture, and pests to enter, upgrading seals and weatherproofing becomes an effective line of defense; properly fitted gaskets, threshold seals, and insulated trim reduce heat loss, prevent drafts that encourage pipe freezing, and limit humidity that promotes corrosion and mold.
A durable, weatherproof hatch extends thermal continuity and eases maintenance. Selection should prioritize compressible seals, corrosion-resistant hardware, and an insulated core. Installation must guarantee full compression without warping. Periodic inspection and replacement of degraded seals preserves performance.
- Choose materials rated for freeze–thaw cycles
- Guarantee airtight compression
- Use rustproof fasteners
- Inspect annually
How to Raise or Reroute Vulnerable Pipes Out of the Cold
To keep pipes from freezing in crawl spaces, homeowners can raise or reroute vulnerable lines to warmer, less exposed areas or above the cold air layer within the crawl space; this often involves lifting pipes to the joist area, running them through conditioned parts of the house, or relocating them along interior walls where ambient temperatures stay higher.
A professional assessment identifies low points, slope, and connections needing adjustment. Secure piping with hangers or brackets, maintain proper pitch for drainage, and avoid sharp bends.
When rerouting, use appropriate materials and insulation continuity. Document changes and test for leaks before closing access.
Heat Tape & Cable: What to Buy and How to Use It
Select heat tape or heat cable based on pipe material, length, and power source, then match the product’s temperature rating and installation method to the crawl space conditions. Heat cables self-regulate for variable temperatures; constant-watt tape provides uniform warmth. Verify compatibility with copper, PEX, or PVC and confirm grounded cords and GFCI-protected circuits.
Follow manufacturer spacing: run cable along the pipe, secure with listed clips, and insulate over the cable with appropriate foam. Avoid overlapping. Test after installation and inspect seasonally for damage.
- Choose cable type by pipe material
- Measure run length accurately
- Use listed attachment hardware
- Protect with insulation and GFCI
Safe Thermostats and Controls for Heat Cables
A check of thermostat compatibility with the chosen heat cable guarantees safe operation and prevents damage from mismatched controls.
Recommended temperature settings are stated clearly to maintain pipe protection without excessive energy use.
Inclusion of fail‑safe options such as automatic shutoffs and alarms provides backup if a thermostat or cable malfunctions.
Thermostat Compatibility Check
Many homeowners underestimate how critical compatible thermostats and controls are for heat cable systems in crawl spaces.
A compatibility check confirms voltage, amperage, and sensor type match the cable specifications, preventing failures or hazards. Controls should support ground-fault protection and outdoor-rated wiring.
Verification avoids warranty voids and ensures reliable activation during freeze conditions.
- Confirm voltage and current ratings match cable labels.
- Verify sensor type (ambient vs. clamp-on) suits installation.
- Make certain thermostat or controller supports GFCI and moisture resistance.
- Check manufacturer compatibility lists and installation instructions before purchase or installation.
Proper Temperature Settings
Often overlooked, correct temperature settings for thermostats and controls are essential to balance freeze prevention with energy efficiency and equipment safety. The recommended setpoint for heat cables typically maintains pipe surface temperatures above freezing without excessive runtimes. Controls should allow manual override, simple schedules, and clear temperature calibration. Thermostats must match cable type and ambient conditions; incompatible settings risk damage or wasted energy. Regular monitoring confirms setpoints achieve desired results. Below is a quick reference comparing common setpoint approaches and their tradeoffs.
| Setpoint Approach | Typical Outcome |
|---|---|
| Constant low heat | Prevents freeze, higher energy use |
| Thermostat-controlled | Energy efficient, responsive |
| Ambient sensor | Adjusts to space, precise |
| Pipe sensor | Most accurate, requires installation |
Fail‑Safe Control Options
Implementing fail-safe control options guarantees heat cable systems in crawl spaces protect pipes without introducing new hazards. The discussion outlines reliable thermostats and controllers that limit overheating, detect faults, and maintain required temperature bands. Controllers with built‑in ground fault protection, automatic shutoff on short or open circuits, and lockout on prolonged high current are preferred. Remote monitoring and alerts reduce response time. Recommended practices include professional installation and periodic testing.
- Ground fault interrupter controllers
- Automatic overheat cutoff thermostats
- Dual‑sensor controllers (pipe and ambient)
- Remote monitoring with alarm notifications
Zone and Heat a Crawl Space to Protect Pipes
When treating a crawl space as a distinct thermal zone, targeted heating strategies can keep water lines above freezing without overconditioning the rest of the building. Partitioning with insulated barriers and sealing penetrations isolates the zone. Add controlled heat sources, thermostat zoning, and monitored airflow to maintain minimum safe temperatures. Combine with pipe insulation and vapor control to reduce heat loss. Regular temperature logging and alarmed setpoints prevent unnoticed drops. Maintenance access and clear labels guarantee reliable operation. Evaluate energy cost versus freeze-risk to choose appropriate setpoints and equipment.
| Strategy | Benefit |
|---|---|
| Insulated barrier | Reduces heat exchange |
| Thermostat zoning | Precise temperature control |
| Temperature logging | Early problem detection |
Portable Heaters in Crawl Spaces: Pros, Cons, Safety
Portable heaters can offer localized warmth in crawl spaces, with common types including electric fan heaters, infrared units, and propane models.
Each type requires attention to clearance, ventilation, and ignition-source rules to prevent fire and carbon monoxide hazards.
Energy consumption and the availability of thermostatic or timer controls determine both operating cost and the ability to maintain safe, consistent pipe protection.
Heater Types Overview
In crawl spaces, small, direct-heat units are a common option for localized thawing and temperature maintenance; these heaters include electric fan-forced units, ceramic heaters, infrared models, and propane or kerosene torches.
Portable heaters offer rapid warming, targeted placement, and low upfront cost.
Downsides include fuel dependence for combustion units, limited coverage, and potential moisture effects on components.
Selection should match crawl-space size, power availability, and ventilation constraints.
Maintenance needs and operating costs vary by type.
Consider monitoring and timed use to prevent overrun.
Typical choices:
- Electric fan-forced
- Ceramic space heaters
- Infrared radiant heaters
- Propane/kerosene torches
Safety And Clearance
Frequently, operators must balance effective heat delivery with strict clearance and fire-safety requirements when using small heaters under crawl spaces.
Portable electric and propane units offer targeted warmth but require firm clearance from insulation, wood, and wiring.
Placement on noncombustible pads, stable leveling, and avoiding airflow obstructions reduce ignition risk.
Fuel-powered models need sealed connections, CO detectors outside the crawl space, and routine leak checks.
Electrical heaters demand GFCI protection and intact cords.
Maintenance, documented manufacturer clearances, and adherence to local codes minimize hazards.
When doubts arise, consultation with a qualified technician guarantees compliant, safe operation.
Energy Use And Controls
How much energy a small heater uses and how its controls are configured can determine both operating cost and safety in crawl-space applications. Portable electric heaters provide fast localized warming but increase utility bills and require grounded circuits. Thermostatic control limits runtime; tip-over and overheat shutoffs reduce fire risk. Fuel-fired units pose ventilation and carbon-monoxide concerns and are generally unsuitable. Regular inspection of cords and outlets is essential. Consider using smart plugs for scheduling and remote monitoring. Choices should balance energy budget, reliability, and code compliance.
- Energy draw
- Control type
- Safety features
- Ventilation requirements
Manage Crawl-Space Ventilation to Avoid Pipe Freezing
When outdoor air is allowed to flow freely through a crawl space, temperatures can drop enough to freeze exposed plumbing. Proper ventilation management balances moisture control with thermal protection.
Sealing unnecessary vents and installing adjustable vent covers reduces cold drafts while preserving airflow for humidity control. Where local code permits, consider converting to conditioned crawl space by insulating rim joists and adding a vapor barrier; this raises baseline temperatures around pipes.
Maintain clearances around lines, insulate exposed pipes, and monitor with temperature sensors. Periodic inspections guarantee seals remain intact and mechanical vents operate.
Decisions should align with climate, building codes, and moisture risks.
Temporary Power and Safety Tips During Prolonged Freezes
When prolonged freezes threaten pipe integrity, homeowners should evaluate backup power options such as portable generators, standby units, or battery-based inverters to keep crawl-space heaters and pumps operational.
Proper generator placement, grounding, and use of carbon monoxide detectors are essential safety precautions to prevent fire and poisoning.
A clear plan for fuel storage, transfer, and regular maintenance reduces risk during extended outages.
Backup Power Options
Prepare for power interruptions by identifying reliable backup power options and clear safety practices tailored to crawl-space pipe protection. Options should prioritize steady heat to prevent pipe freezing without introducing hazards. Evaluate capacity, run time, and fuel or charging logistics before winter.
- Portable battery power stations: quiet, emission-free, suitable for small heaters or circulation pumps.
- Solar with battery storage: continuous recharge during daylight; pair with inverter sized for heater loads.
- Whole-house battery systems: automatic switching, sufficient for longer outages when properly sized.
- Dual-fuel or propane standby units: higher capacity; plan safe installation and fuel supply.
Safety Precautions For Generators
In the event of a prolonged freeze, generators provide critical temporary power but require strict safety measures to protect occupants and prevent property damage. Operators should place generators outdoors on level ground, away from windows and vents, to avoid carbon monoxide buildup.
Fuel must be stored safely in approved containers and refilled only when engines are cool. Electrical connections should use proper transfer switches installed by a qualified electrician to prevent backfeed.
Routine checks for oil, coolant, and battery condition reduce failure risk. Noise, ventilation, and local codes should guide placement and operation to assure legal and safe use.
When to Call a Plumber vs. a Crawl-Space Contractor
Deciding whether to call a plumber or a crawl-space contractor depends on the nature and location of the problem: plumbing professionals are best for pipe repairs, leaks within finished areas, or issues requiring water-safe certifications, while crawl-space contractors handle structural, access, insulation, drainage, and vapor-barrier solutions that affect the environment around the pipes.
- Call a plumber for active leaks, burst pipes, or water-quality concerns.
- Call a crawl-space contractor for standing water, collapsed supports, or missing vapor barriers.
- Coordinate both when repairs span finished spaces and subfloor systems.
- Prioritize safety and permit needs; document conditions before hiring.
Typical Costs to Fix Frozen Crawl-Space Pipes
Repairing frozen crawl-space pipes typically ranges from modest to substantial depending on the severity and required services. Costs vary by thawing method, leak repair, insulation, access difficulty, and emergency response. Minor thawing and patching may be inexpensive; burst pipes and full replacement raise costs. Labor, permits, and drying or mold mitigation add to totals. Homeowners should get itemized estimates and consider contractor experience and warranty.
| Service | Typical Range | Notes |
|---|---|---|
| Thaw only | $75–$250 | No visible leak |
| Patch repair | $150–$600 | Small leaks, local access |
| Replacement | $300–$2,000+ | Multiple sections or fittings |
| Emergency/after-hours | +25–100% | Rapid response premium |
Material Upgrades That Resist Freezing (Pipe Types, Fittings)
After outlining how repair scope and labor drive costs, attention turns to materials that reduce freeze risk and long‑term expense.
Durable materials and thoughtful fittings lower rupture probability and simplify future maintenance. Recommended upgrades balance cost with performance:
- PEX tubing — flexible, resists bursting, easier to insulate.
- Copper with proper insulation — durable, conductive but effective when wrapped.
- Frost‑rated valves and ball fittings — minimize leak points and tolerate freeze cycles.
- Insulated, heat‑traced assemblies — electric tape or factory jackets for vulnerable runs.
Selection should consider local climate, accessibility, and compatibility with existing systems to maximize freeze resistance and lifespan.
Insurance, Warranties, and Documenting Freeze Damage
How should homeowners document freeze damage and navigate insurance and warranty claims to avoid costly disputes? Homeowners should immediately photograph and video affected areas, note dates and temperatures, and preserve damaged materials for inspection.
They must review policy exclusions, coverage limits, and required timelines for claims, then contact insurers promptly and request written claim references. For warranties, retain purchase records, installation receipts, and manufacturer contact details; follow prescribed maintenance to avoid voiding coverage.
Keep a dated log of communication with contractors and adjusters. Clear, chronological documentation and timely notification reduce dispute risk and strengthen chances of favorable claim resolution.
Monthly Winter Prep Checklist for Crawl-Space Pipes
When temperatures begin their seasonal drop, a concise monthly checklist helps homeowners keep crawl-space pipes protected and problems caught early. Inspect insulation for gaps or compression; repair or replace damaged sections.
Verify vapor barrier integrity and seal tears to reduce moisture and cold infiltration.
Test pipe heating elements and thermostats; replace faulty components promptly.
Check for new leaks, corrosion, or condensation and document locations with photos and notes for follow-up.
- Inspect insulation and seal gaps.
- Confirm vapor barrier condition.
- Test heat tape and controls.
- Survey for leaks, document findings.
Common Mistakes That Make Pipe Freezing Worse
Why do well-intended fixes sometimes worsen pipe freezing problems? Homeowners and DIYers often rely on quick remedies—insufficient insulation, using indoor-space heaters aimed at pipes, or wrapping pipes with improper materials.
Blocking crawl-space vents for warmth can trap moisture, promoting corrosion and ice formation. Throttling water flow to save heat increases stagnation and freeze risk.
Over-reliance on temporary heat tapes without proper installation creates hot spots and damaged insulation. Ignoring air leaks and plumbing saddle points leaves vulnerabilities.
Professionals note that piecemeal fixes frequently shift the problem rather than resolve thermal bridging, moisture control, and consistent temperature maintenance.
Conclusion
Preventing crawl-space pipes from freezing requires attention, preparation, and timely action. Could a few simple, consistent steps spare homeowners costly repairs and disruption? Homeowners who insulate vulnerable lines, maintain proper crawl-space ventilation and temperature, monitor for early warning signs, and act quickly on freezes greatly reduce damage risk. Upgrading materials, documenting conditions for insurance, and following a monthly winter checklist further protect plumbing. Avoid common mistakes to keep pipes flowing all season.