How to Turn Off a Water Heater Leak Fast: Step-by-Step Emergency Guide
How to Turn Off a Water Heater Leak Fast: Step-by-Step Emergency Guide
If you’re dealing with a water heater leak, act quickly to minimize damage. Start by shutting off the water supply at the cold-water valve on the tank or the main house valve. Next, cut the power: for electric units, flip the dedicated breaker; for gas units, turn the gas to “off” and close the gas valve. Open a nearby hot faucet to relieve pressure, and use buckets and towels to contain any escaping water. Document any damage for insurance purposes. Inspect fittings and the T&P valve for visible leaks. Follow these steps for temporary fixes and safety guidance.
How to Stop a Water Heater Leak Immediately
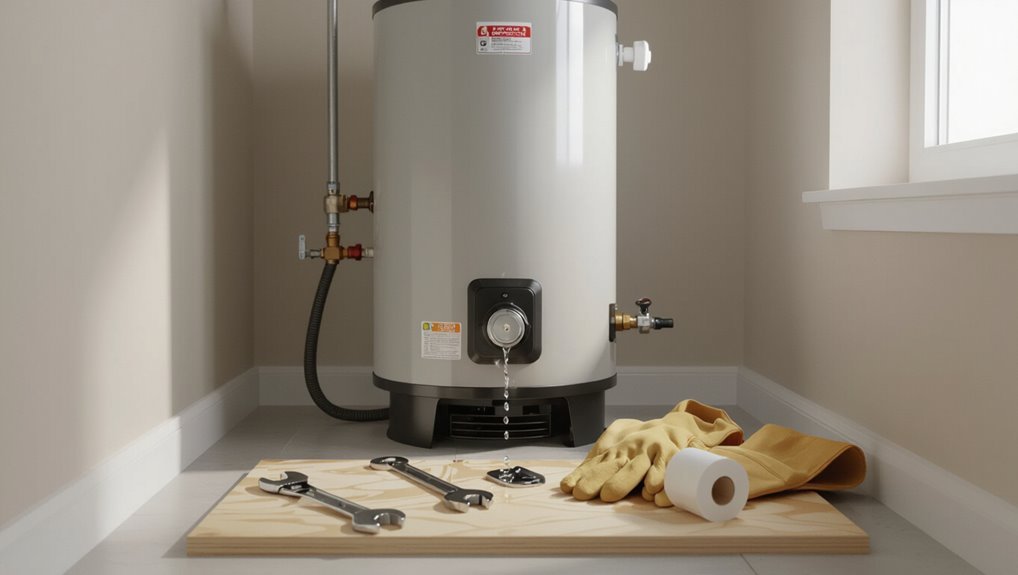
The immediate priority is to stop water flow and limit damage with quick emergency actions such as towel placement and shutting main valves.
The discussion will explain where to shut off the water supply for tank and tankless systems and how to isolate the heater.
It will also cover safe procedures for cutting power—turning off electric breakers and shutting the gas supply.
Quick emergency actions to prevent water damage
Act quickly: shut off the water supply and power to the heater to halt incoming flow and reduce hazards.
Then contain escaping water with buckets, towels, or a drain pan while evaluating the leak source.
The person assesses visible fittings, drains nearby areas, elevates valuables, uses a wet vacuum or mop, and documents damage.
This outlines urgent steps for how to turn off a water heater leak.
Where to shut off the water supply fast (tank vs. tankless)
Where should the water be shut off first depends on the heater type: for tank units, close the cold-water shutoff valve at the top of the tank; for tankless systems, locate and turn off the incoming water isolation valve near the unit.
After isolating, open a nearby hot faucet to relieve pressure and drain residual water.
If unsure, shut the main house water.
How to turn off the power safely (electric and gas units)
Cut power immediately to prevent electrical shock or gas hazards.
For electric heaters, shut off the dedicated breaker at the panel and verify power is off with a noncontact tester.
For gas units, turn the thermostat/control to “pilot” or “off” and close the gas valve on the supply line.
If unsure, evacuate, call the gas company, and avoid operating electrical switches.
Identify the Source of the Leak
The next step is to identify where the water is coming from by inspecting visible components such as inlet/outlet fittings, shutoff and drain valves, supply pipes, and the temperature/pressure relief valve.
The tank should be checked for corrosion, rust flakes, or hairline cracks that indicate a failing shell.
Hidden leaks may show as wet floors, ceiling stains below the heater, or a noticeable drop in household water pressure.
Inspect visible components: valves, fittings, pipes, drain valve, temperature/pressure (T&P) relief valve
Begin by visually scanning all external components for obvious signs of leakage: threaded fittings, supply and return pipes, inlet/outlet valves, the drain valve at the tank base, and the temperature-and-pressure (T&P) relief assembly.
Note drips, corrosion, mineral buildup, or wetness beneath joints.
Tighten or hand-snug accessible fittings, replace faulty washers, and mark components requiring professional repair or immediate isolation.
How to check for tank corrosion or cracks
Several visible signs can indicate tank corrosion or a crack: rust streaks, flaking metal, bubbling paint, bulges, or a steady wet spot on the tank surface that cannot be traced to external fittings.
Inspect the entire tank visually and by touch (when cool) for soft areas, pits, or perforations.
Use a flashlight and mirror for rear areas; document locations and shut off water if found.
Signs of hidden leaks (floor wetness, ceiling stains, low water pressure)
After inspecting the tank surface for visible corrosion or cracks, attention should shift to subtler indicators that a leak may be hidden from plain sight.
Check for persistent floor wetness or pooling near the heater, unexplained ceiling stains beneath upstairs tanks, and sudden low water pressure or frequent reheating cycles.
These signs pinpoint concealed leaks in lines, fittings, or internal tank failure.
Step-by-Step Emergency Shutoff Procedure
The emergency shutoff procedure follows a clear sequence to stop flow, relieve pressure, and eliminate ignition sources.
First, the incoming cold-water supply is closed and the tank is partly drained to reduce pressure and volume.
Power is then cut (electric breaker or gas valve) and any leaking pipes or fittings are isolated and temporarily capped.
Step 1 Shut off incoming cold-water supply
Locate and close the incoming cold-water shutoff valve to stop flow into the tank immediately.
The person identifies the valve on the cold inlet pipe—usually at tank top or nearby—and turns it clockwise until tight (ball valve quarter-turn or gate valve multiple turns).
Confirm flow ceases at nearby fixtures.
If inaccessible, shut the house main water supply to isolate the heater.
Step 2 Drain the tank to reduce pressure and volume
Open a hot-water faucet on the highest floor and attach a hose to the water heater’s drain valve.
Then place the hose end where the discharge can safely flow. Open the valve slowly to release water and relieve pressure.
Monitor flow and temperature; stop if backflow or clogging occurs.
Drain until reduced volume limits leak risk, then close valve and remove hose.
Step 3 Turn off power (electric breaker or gas shutoff)
After water has been reduced in the tank to lower pressure and volume, power to the heater must be shut off to prevent electrical shock or ongoing heat input.
For electric units, locate and switch off the dedicated breaker at the panel.
For gas units, turn the gas valve to “OFF” or follow manufacturer instructions.
Confirm power is off before proceeding.
Step 4 Isolate and cap leaking pipes or fittings temporarily
Begin by shutting off any remaining water supply lines feeding the leaking section—this stops additional flow so repairs can proceed.
Then isolate the damaged pipe or fitting, drain residual water, and apply an appropriate temporary cap, compression fitting, or rubber patch with hose clamps.
Verify the seal, monitor for continued seepage, and arrange for permanent repair or professional service as soon as possible.
Temporary Fixes to Control Leaks Until Repair
Temporary fixes can buy time until a professional repair is made, such as wrapping threaded connections with plumber’s tape, applying a rubber patch with a clamp, or using a purpose-made pipe clamp over a hairline crack.
Minor drips from fittings and valves may be reduced by carefully tightening or temporarily replacing the affected component.
For larger leaks or pooling, a wet vac, buckets, and absorbent towels should be positioned to contain water and protect surrounding areas.
Using plumber’s tape, pipe clamps, and rubber patch methods
When a water heater develops a small leak, quick temporary measures—plumber’s tape for threaded joints, stainless steel pipe clamps, or rubber patches secured with hose clamps—can stem flow long enough to arrange a permanent repair.
Apply plumber’s tape by removing the fitting, wrapping threads clockwise, and reassembling snugly.
Clamp or patch over the wet area, monitor for seepage, and replace with a proper repair promptly.
How to replace or tighten leaking fittings and valves temporarily
Loosened or corroded valves and fittings can often be rendered watertight for the short term by tightening, replacing accessible components, or swapping in temporary parts until a permanent repair is made.
Isolate power and water, drain pressure, then tighten packing nuts, slip on a compression sleeve, or swap a faulty valve for a replacement ball or gate valve.
Check for immediate leaks and re-test pressure.
When to use a wet vac, buckets, and towels for containment
A few basic tools—wet vac, buckets, and absorbent towels—allow immediate containment of a water heater leak to minimize water damage and buying time for a permanent repair.
Use buckets for active drips, towels to soak small spreads and protect floors, and a wet vac for pooled water or slow seepage.
Prioritize electrical safety and prompt professional repair.
Assessing Whether the Heater Needs Repair or Replacement
A quick assessment should consider the heater’s age and visible condition, since tanks older than 8–12 years or showing corrosion and widespread pitting usually justify replacement.
The decision also weighs repair costs—thermostats, valves, and the anode rod are inexpensive fixes, while a leaking tank or repeated failures often make full replacement more economical.
Finally, safety implications—risk of scalding, flooding, and gas or electrical hazards—must factor into choosing immediate replacement over continued use.
Age and condition indicators that warrant replacement
When evaluating whether a leaking water heater should be repaired or replaced, the unit’s age and visible condition are primary indicators:
Units older than 10–15 years, extensive rust on tank exterior, widespread corrosion around fittings, persistent sediment buildup, or multiple prior repairs typically justify replacement.
Minor surface rust, a single failed component, or recent installation favor targeted repair instead of full unit replacement.
Cost vs. benefit: repair common components vs. full replacement
Although immediate fixes can be cheaper, a cost-versus-benefit assessment should weigh the price of replacing common components—such as thermostats, heating elements, anode rods, and pressure-relief valves—against the remaining service life and efficiency of the tank. Repairs suit newer units with limited damage; full replacement benefits very old or corroded tanks.
| Option | Typical Cost | Lifespan Impact |
|---|---|---|
| Component repair | Low–Medium | Short–Medium |
| Full replacement | High | Long |
Safety risks of continuing to use a leaking water heater
Having weighed repair costs against replacement benefits, attention must turn to the immediate safety risks posed by a leaking water heater.
Continued use risks electrical shorting, fire from gas connections, scalding from uncontrolled temperature, structural water damage, and accelerated corrosion leading to sudden tank rupture.
Evacuation of electrical/gas supply and professional assessment are prudent to prevent injury, property loss, and escalating repair costs.
How to Safely Drain and Move a Water Heater (If Necessary)
A concise list of required tools and personal protective equipment frames the safe approach to handling a leaking water heater.
A clear, step-by-step draining procedure for tank heaters outlines how to shut off power, close water supply, attach a hose to the drain valve, and fully empty the tank.
If relocation is needed for repair or replacement, practical guidelines cover securing the unit, using proper lifting equipment, and transporting it to a service area or disposal site.
Tools and safety gear needed
Begin by assembling a compact kit of tools and personal protective equipment tailored to draining and, if necessary, moving a water heater: adjustable wrenches, a flathead screwdriver, a hose rated for hot water, a pump or wet/dry vacuum for faster emptying, sturdy straps or a dolly, and non-slip work gloves.
Also include eye protection, a respirator if mold/odor present, knee pads, and waterproof boots.
Step-by-step draining procedure for tank heaters
Shut off power and water before any work begins: turn the circuit breaker or gas supply off, then close the cold-water inlet valve at the top of the tank.
Attach a hose to the drain valve, route it to a safe drain, open a hot faucet to prevent vacuum, open the drain valve slowly, and monitor flow until empty.
Close valves when finished.
Guidelines for relocating a leaking unit for repair or replacement
Once the tank is drained and disconnected from power and water, the next step is to prepare the unit for safe relocation to a repair or replacement area.
Inspect for residual water, cap lines, and secure loose fittings.
Use equipment: dolly, straps, gloves, and two helpers.
Protect floors with plywood.
Transport upright, avoid jerks.
Place on stable surface for technician access or disposal.
When to Call a Professional Plumber or HVAC Technician
If water is pouring from the tank, gas is leaking, electrical components are sparking, or structural damage is evident, a professional should be called immediately.
When contacting emergency service, concise details such as make and model of the heater, symptoms observed, any gas smell, and whether the unit has been shut off will speed response.
Selecting a qualified technician quickly means prioritizing licensed plumbers or HVAC specialists with good emergency reviews, clear pricing, and verified insurance.
Situations requiring immediate professional intervention
When visible flooding, persistent dripping despite shutoff, or signs of corrosion and compromised electrical components occur, a homeowner should contact a licensed plumber or HVAC technician immediately.
These conditions indicate active damage or safety risks that require professional diagnosis and repair.
Immediate intervention is warranted for gas leaks, exposed wiring, structural undermining, contaminated water, major valve or tank failure, or inability to isolate the heater.
What information to provide when requesting emergency service
What details should be ready when calling for emergency service:
- the heater type (gas, electric, or tankless)
- model and age
- exact location of the unit
- a clear description of the problem (leak size, presence of water, smell of gas, sparking)
- whether the unit has been shut off and how
- any visible corrosion or damage
- recent maintenance or repairs
- access constraints or safety hazards at the site.
Provide contact and entry instructions.
How to choose a qualified technician quickly
After gathering all relevant details for the emergency call, the next step is selecting a qualified technician quickly to stop the leak and guarantee safety.
Choose by certification, verified emergency response, and clear pricing. Prioritize licensed plumbers for tank or piping failures and HVAC technicians for integrated systems.
Confirm availability, insurance, and references before dispatch.
- License and certifications
- Emergency response time
- Insurance and transparent pricing
Preventing Future Leaks and Prolonging Water Heater Life
A regular maintenance schedule — including annual inspections, periodic flushing to remove sediment, and testing the temperature-and-pressure (T&P) valve — helps prevent failures and extends tank life.
Simple homeowner tasks like flushing sediment and exercising the T&P valve are effective while larger concerns warrant professional service.
Adding a drip pan, water sensors, or a pressure-reducing valve further reduces leak risk and limits damage if a failure occurs.
Recommended maintenance schedule and tasks
Regular, systematic maintenance greatly reduces the risk of leaks and extends a water heater’s service life.
Inspect anode rods, fittings, valves, and connections every 6–12 months.
Check for corrosion, drips, and unusual noises quarterly.
Maintain proper temperature and pressure settings, and guarantee adequate ventilation.
Schedule professional inspection annually to catch hidden issues and replace worn components promptly.
How to flush sediment and test the T&P valve
Periodic inspections and professional tune-ups should be paired with routine flushing and T&P valve testing to keep a water heater operating safely and efficiently.
Drain the tank annually to remove sediment: turn off power/gas, close cold supply, attach hose to drain valve, open hot tap, flush until clear.
Lift the T&P valve lever briefly to confirm flow and reseal; replace if leaking or stuck.
Upgrades and accessories to reduce leak risk (drip pan, water sensors, pressure-reducing valve)
Consider installing targeted upgrades and accessories to catch leaks early and reduce failure triggers: a properly sized drip pan with a drain line protects floors from slow leaks.
Water sensors placed near fittings and the tank provide immediate alerts to escaping water.
A pressure-reducing valve (PRV) limits excessive inlet pressure that strains tank seams and valves.
- Drip pan with dedicated drain
- Wireless or wired water sensors
- Pressure-reducing valve (PRV) installation
Cost Estimates and Materials Checklist for Emergency Repair
Typical emergency fixes—such as replacing a leaking valve, a pressure relief valve, or a short section of pipe—usually range from modest DIY costs (under $50) to several hundred dollars if professional labor is required.
A concise materials and tools checklist to keep on hand should include a replacement shut-off valve, Teflon tape, pipe fittings, a wrench set, plumber’s tape, and a bucket.
The following section will provide estimated price ranges and a prioritized checklist for quick access during a leak.
Typical costs for common emergency fixes and parts
When a water heater leak demands immediate attention, knowing likely expenses and required parts helps prioritize actions and budget for a swift fix. Typical emergency costs vary by repair: minor valve replacements run low, tank repairs cost more, and full replacements are highest. Common parts and rough prices:
| Part/Service | Estimated Cost |
|---|---|
| Temperature/pressure valve | $20–$80 |
| Drain valve | $10–$40 |
| Small tank patching | $50–$150 |
| Full tank replacement | $500–$1,200 |
Immediate materials and tools checklist to keep on hand
A compact emergency kit can halve response time and limit water damage until professional help arrives.
The homeowner should store essential items for quick isolation, containment, and temporary repair. Prioritize durability, compatibility with common heater fittings, and clear labeling to streamline action under stress.
- Adjustable wrench, channel-lock pliers, pipe tape
- Garden hose, shutoff tag, bucket
- Rubber gloves, rags, waterproof tape
Safety Precautions and Health Concerns During a Water Heater Leak
When a water heater leaks, attention must first turn to electrical and gas hazards, including shutting off power and gas lines to prevent shock or ignition.
The next focus should be on stopping moisture spread to avoid mold growth and evaluating water contamination risks to potable supplies.
Finally, arrangements for safe removal and proper disposal of a failed tank should be considered to prevent environmental and health hazards.
Electrical and gas safety warnings
Because water conducts electricity and gas can accumulate unnoticed, any leak near electrical panels, outlets, or gas appliances creates an immediate hazard that demands prompt, informed action.
Keep clear distance, shut off circuit breakers if safe and dry, and turn off gas at the appliance valve only if trained.
Evacuate if smell of gas persists and contact professionals; do not operate switches.
Preventing mold and water-contamination hazards
Several liters of leaked water can quickly saturate surrounding materials, creating conditions conducive to mold growth and microbial contamination that pose respiratory and infection risks.
Promptly remove water, dry affected areas with fans and dehumidifiers, and discard porous, contaminated materials.
Wear gloves, masks, and eye protection.
Ventilate the space, sanitize hard surfaces with appropriate disinfectants, and monitor for lingering dampness or odor indicating regrowth.
Proper disposal of a failed tank
After addressing immediate water removal and sanitization, attention should shift to safe disposal of a failed tank to prevent ongoing hazards.
The article recommends draining remaining water, disconnecting power and fuel, and contacting licensed waste haulers or recycling centers.
Corroded, punctured, or contaminated tanks require professional removal to avoid chemical, electrical, or environmental risks; document condition for insurance and local code compliance.
Signs a Leak Is Getting Worse and What to Do Next
Worsening leaks often show progressive signs such as increasing drip rate, pooling around the base, unusual noises, or sudden loss of hot water, which can indicate imminent tank or fitting failure.
When these symptoms appear, escalation should be immediate: shut off power and water at the heater, move valuables away, and contain spreading water with towels or a drain pan.
If the leak accelerates or structural damage is suspected, contact a licensed plumber or emergency services and avoid using the heater until repaired.
Progressive symptoms indicating imminent failure
When a water heater leak advances, specific, escalating signs often appear that indicate imminent failure and require prompt action.
Observation reveals pooling beneath the tank, increasing drip frequency, and widening corrosion spots.
Hot-water supply becomes inconsistent; unusual noises—popping, rumbling—intensify.
Pressure relief valve discharges repeatedly.
Rust-colored water, visible bulging, or rapid temperature fluctuations signal an urgent need for professional assessment and likely replacement.
Emergency escalation steps and temporary mitigation strategies
Act promptly: escalating leaks demand a clear sequence of actions to limit damage and preserve safety.
Shut power/gas to the heater, close the water supply, and open nearby drains to relieve pressure.
Contain spreading water with towels, buckets, and a wet vac.
Elevate valuables, document damage, and call a qualified plumber or emergency services if leaks worsen, gushing occurs, or electrical hazards appear.
Long-Term Options After an Emergency Leak
After the immediate danger is addressed, the homeowner must weigh repair, retrofitting, or full replacement with a tankless unit based on cost and long-term needs.
Energy efficiency gains and remaining warranty coverage should be compared alongside expected lifespan.
Financing options and insurance implications for replacement projects may affect the final decision.
Choosing between repair, retrofitting, or replacing with tankless
Evaluate the extent of damage and the age of the unit to determine whether repair, retrofitting, or replacing with a tankless system is the most practical long-term choice.
Consider cost of parts and labor versus remaining lifespan.
Retrofitting (anode replacement, valves, or external controls) can extend older tanks.
Full replacement suits persistent leaks, severe corrosion, or incompatible fuel lines.
Seek a licensed plumber for assessment.
Energy efficiency and warranty considerations
Consider energy efficiency and warranty status when deciding long-term fixes after a leak: higher-efficiency water heaters—whether modern tank models with improved insulation and controls or tankless units—reduce operating costs and may qualify for rebates.
Remaining warranty coverage can influence whether repairs, retrofits, or replacements are financially sensible. Verify warranty terms, documented maintenance, and eligible parts; compare lifecycle savings before committing to replacement.
Financing and insurance considerations for replacement
Warranty status and expected energy savings often shape whether a homeowner should repair or replace a leaking water heater. However, financial logistics and insurance coverage determine how that choice is paid for.
Evaluation should consider claim eligibility, deductible impact, and long-term cost versus savings. Options include:
- Homeowner’s insurance claim versus out-of-pocket replacement
- Energy-efficiency rebates and tax credits
- Financing plans and loan terms
Conclusion
When a water heater springs a leak, the homeowner must act like a lighthouse—steady, clear, and guiding each immediate step. Shut off power and water, identify the leak source, and apply temporary measures to limit damage while evaluating repair or replacement. Prioritize safety, document the situation for estimates, and consult a professional if corrosion or tank failure is suspected. Treat the incident promptly to prevent escalation and protect property and health.