How to Install Navien Tankless Water Heater: Step-By-Step DIY Guide With Troubleshooting
To install a Navien tankless water heater, start by planning your site, ensuring you have the necessary gas/electrical capacity, and obtaining any required permits. Mount the unit securely to the studs, maintaining proper clearances. Connect the cold and hot water lines, gas supply, venting, and condensate drains according to the manufacturer’s instructions and local codes. After conducting pressure and leak tests, commission the system by adjusting temperature and flow settings, and run diagnostics. Regular maintenance, including routine flushing and filter care, will help prevent future issues. Continue reading for detailed step-by-step procedures, troubleshooting tips, and maintenance advice.
Overview of Installing a Navien Tankless Water Heater
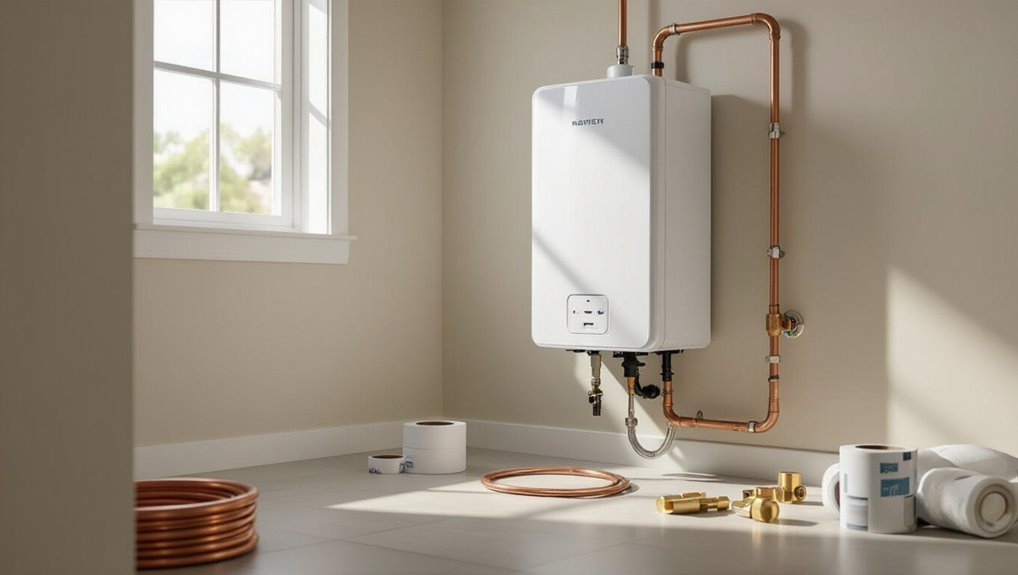
A Navien tankless water heater heats water on demand using a compact heat exchanger rather than storing hot water in a tank, increasing efficiency and reducing standby losses.
Installing one can improve energy use, provide endless hot water, and save space, but it also requires attention to proper venting, gas/electrical capacity, and water connections.
Homeowners should verify local permits and codes and consider hiring a licensed professional for gas, electrical, or complex plumbing work.
What a Navien tankless water heater is and how it works
Tankless units from Navien deliver on-demand hot water by instantly heating incoming cold water as it flows through a compact heat exchanger, eliminating the standby losses associated with traditional storage tanks.
The unit’s modulating burners, flow sensors, and electronic controls adjust output to demand.
Installation tasks in how to install navien tankless water heater include gas, water, venting, condensate, and electrical connections following manufacturer specs.
Benefits of installing a Navien unit in your home
Energy efficiency and space savings are among the primary advantages homeowners gain from installing a Navien unit: the on-demand heating design eliminates standby heat loss, often reduces natural gas or propane use, and frees up floor or closet space previously occupied by a storage tank.
Additional benefits include longer appliance lifespan, consistent hot water delivery, reduced utility bills, and potential increases in home resale value.
Required permits, codes, and when to hire a professional
Before beginning installation, homeowners should confirm local permitting and code requirements and determine whether professional involvement is required.
Required permits often cover plumbing, gas, and venting; inspections enforce compliance with NEC, UPC, and local amendments.
Complex gas connections, structural modifications, or unfamiliarity with codes warrant hiring a licensed plumber or HVAC technician to guarantee safety, proper venting, and warranty preservation.
Tools, Materials, and Safety Preparations
Before beginning installation, a concise inventory of tools and equipment should be assembled alongside model-specific parts and materials for the Navien unit.
Appropriate safety gear and precautions must be confirmed, and installers should verify gas type, water pressure, and electrical supply meet the heater’s specifications.
These preparations reduce risks and guarantee a smooth, code-compliant installation.
Tools and equipment checklist
A concise list of required tools, materials, and safety gear helps guarantee the Navien tankless water heater is installed efficiently and without unexpected delays.
The checklist focuses on essentials: cutting and joining water and gas lines, mounting, electrical connections, ventilation, and personal protection.
- Adjustable wrenches, pipe cutters, soldering or crimp tools
- Thread sealant, fittings, venting components
- Multimeter, voltage tester
- Gloves, goggles, respirator, fire extinguisher
Parts and materials specific to Navien models
Several Navien-specific components and materials are required to guarantee correct installation and peak performance of the tankless unit.
Recommended parts include manufacturer-approved venting, condensate neutralizer, isolation valves, and compatible fittings to preserve warranty and function.
Installers should source Navien OEM parts or verified equivalents and verify model-specific requirements in the manual.
- Venting kit (Navien-approved)
- Condensate neutralizer
- Isolation service valves
- Model-specific fittings and adapters
Safety gear and precautions before starting
Proper personal protective equipment and site preparations are essential to minimize risk and guarantee compliance with local codes when installing a Navien tankless water heater.
Wear gloves, safety glasses, and hearing protection; use a respirator for dusty areas.
Isolate power and gas, ventilate confined spaces, secure stable ladders, and clear the work area.
Keep a fire extinguisher and first aid kit nearby.
Verifying gas type, water pressure, and electrical requirements
Before any connections are made, the installer confirms the home’s fuel type, available water pressure, and electrical supply to ascertain compatibility with the Navien unit and to prevent hazardous mismatches. This includes checking the gas line labeling or meter for natural gas versus propane, measuring static and dynamic water pressure with a gauge, and verifying a dedicated 120V/240V circuit and proper grounding per the Navien model’s specifications and local code.
The installer records pressure readings, confirms gas BTU capacity, guarantees pipe sizing and regulator presence for propane, and verifies circuit amperage, breaker type, and GFCI/grounding requirements before proceeding.
Pre-Installation Planning and Site Preparation
Prior to installation, planning determines whether an indoor or outdoor Navien unit best suits the site, accounting for venting type, required clearances, and condensate routing.
The installer must verify correct gas line sizing and fuel type, confirm electrical supply and breaker placement, and map water line runs and drain locations.
These checks guarantee compliance with manufacturer specifications and local codes before work begins.
Choosing the optimal location for indoor vs outdoor units
Selecting the correct location for a Navien tankless water heater hinges on unit type, local codes, and service accessibility; indoor models require a dry, ventilated space with nearby gas and water lines, while outdoor units need unobstructed air flow, weather protection, and clearances for exhaust and intake.
Consider proximity to hot water fixtures to minimize lag, noise impacts, mounting surface strength, and easy access for maintenance.
Venting options and clearances for Navien models
When planning venting for a Navien tankless water heater, attention must focus on compatible vent types, proper clearances, and local code requirements to guarantee safe combustion air supply and exhaust removal.
Navien supports coaxial, concentric, and PVC options per model; maintain manufacturer-specified clearances from openings, combustibles, and service access.
Verify termination placement, slope, and condensate drainage to prevent backflow and corrosion.
Gas line sizing and fuel requirements
After confirming venting type, clearances, and termination locations, attention shifts to fuel delivery: correct gas line sizing and supply pressure determine whether a Navien tankless unit will operate at rated capacity.
Verify appliance BTU rating, available inlet pressure, and allowable pressure drop.
Use pipe sizing charts for natural gas or propane, minimize runs and fittings, and plan for future demand to avoid undersizing.
Electrical supply and breaker location
Several key electrical considerations determine safe, code-compliant operation of a Navien tankless water heater, including service amperage, dedicated circuit sizing, and breaker placement relative to the unit.
The installer verifies manufacturer amperage requirements, supplies a dedicated breaker and appropriately gauged conductors, locates the disconnect within sight or per code, and guarantees grounding and GFCI/AFCI protection where required by local electrical regulations.
Water line layout and drain/condensate routing
With electrical preparations confirmed, attention turns to planning the water line layout and condensate/drain routing to guarantee proper function and code compliance.
Map cold, hot, and recirculation lines to minimize bends and heat loss; size pipe and install isolation valves.
Route condensate to an appropriate drain or neutralizer per local code, slope piping for gravity flow, and protect against freezing and backflow.
Step-by-Step Installation Guide
The installation section proceeds through the practical tasks required to replace an old unit and prepare the site for a Navien tankless heater.
It covers removing the existing water heater, mounting the new unit, and fitting water supply lines and shutoff valves.
Final steps include gas connection with leak testing and installation of the appropriate venting or direct-vent components.
Removing the old water heater and preparing connections
Begin by shutting off power and water to the existing heater, then drain and disconnect it following local codes and manufacturer instructions.
Remove old fittings, flex lines, and venting; cap or remove gas and electrical connections per safety rules.
Clean mounting surface and inspect studs, pipe threads, and gas line integrity.
Install required isolation valves, pressure relief piping, and proper water and gas unions for final hookup.
Mounting the Navien unit to the wall
Position the Navien unit at the planned location and verify clearance requirements for service access, venting, and combustion air as specified in the installation manual.
Mark mounting hole locations using the unit’s template, ensuring studs or suitable anchors align.
Drill pilot holes, install heavy-duty anchors or lag screws, hang the unit securely, and confirm it is level and firmly seated before proceeding to piping and venting.
Installing water supply lines and shutoff valves
Prepare to connect the cold and hot water lines and install shutoff valves that allow isolation of the Navien unit for service.
Route appropriately sized supply piping (copper, PEX, or CPVC) to inlet and outlet, maintaining recommended clearances and slope.
Install full‑port ball valves on both lines, include union or flex connectors for serviceability, pressure test connections, and check for leaks before finishing.
Connecting the gas line and leak testing
Connect the gas line using correct-sized, code-compliant pipe or flex connector and verify all fittings and joints are tight before proceeding to leak testing.
Close all appliance valves, pressurize the gas line per local code, and apply a certified leak detector solution or electronic sniffer to each connection.
Repair any leaks, retest, and document pressure readings. Only restore service when zero leaks are confirmed.
Installing venting or direct-vent components
Begin by identifying the correct venting configuration for the Navien model—direct-vent (balanced) or concentric/sidewall—based on manufacturer specifications and local code.
Confirm required clearances, termination type, and component materials (stainless steel, PVC, or coaxial) before cutting or assembling any pieces.
Measure and mark runs; cut pipe squarely.
Use proper connectors, support intervals, seal joints with recommended gaskets or sealant, and slope horizontal runs toward the outdoors.
Connecting condensate drain and neutralizer (if applicable)
Installers should locate the condensate outlet and route the drain line to an approved disposal point or condensate neutralizer following local code and Navien’s specifications.
Use corrosion-resistant tubing, maintain continuous fall, and secure connections with clamps or solvent welds.
If condensate is acidic, install a neutralizer per manufacturer guidance and replace media periodically.
Test for leaks and proper drainage before completing installation.
Electrical wiring and grounding connections
With the condensate drain and neutralizer secured and tested, attention shifts to the electrical wiring and grounding connections required for safe operation.
A licensed electrician verifies voltage, installs a dedicated circuit and appropriately rated breaker, and connects the unit per manufacturer diagrams.
All wiring is secured, strain-relieved, and terminated to code.
A continuous equipment grounding conductor bonds the heater to the building ground.
Initial water fill, purging air, and pressure test
Open the cold-water supply, then slowly fill the Navien unit and connected system to avoid water hammer and to allow trapped air to migrate toward bleeder points.
Close isolation valves when full.
Open each downstream fixture one at a time to purge remaining air until consistent flow and water without sputtering appears.
Perform a static pressure test, confirm no leaks, and verify pressure meets manufacturer specifications.
Powering on and basic configuration of the Navien control panel
Before applying power, confirm all water, gas, and venting connections are complete and isolation valves remain closed; then connect the unit to its dedicated electrical supply per the wiring diagram and local code.
Power on the Navien using the main breaker, then open water isolation valves slowly.
Access the control panel, set language, clock, and temperature defaults, verify error-free startup, and record initial readings.
Commissioning and Performance Optimization
The system is configured by setting temperature, flow, and eco modes to match household demand and efficiency goals.
Initial hot-water tests confirm delivery at fixtures while technicians adjust gas and water parameters to guarantee stable, efficient operation.
Finally, error codes and normal-operation indicators are checked to verify the unit is functioning correctly before final handoff.
Setting temperature, flow, and eco features
Temperature, flow, and eco-mode settings determine both comfort and efficiency and must be calibrated during commissioning to match household demand and local conditions.
The installer adjusts outlet temperature limits, minimum activation flow, and eco-mode sensitivity via the control panel to prevent scalding, cycling, and energy waste.
Document final settings, note seasonal adjustments, and educate occupants on basic control use.
Running initial hot-water tests and verifying delivery
Begin by initiating a systematic sequence of hot-water draws at multiple fixtures to confirm delivery, responsiveness, and temperature stability under realistic household conditions.
Record arrival times, flow rates, and temperature at each tap.
Inspect for leaks, air pockets, and consistent burner operation or error codes during demand.
Document any anomalies, retest after bleeding lines, and verify simultaneous multi-fixture performance meets expectations.
Adjusting gas and water settings for optimal performance
Adjust gas and water settings methodically to balance safety, efficiency, and user comfort.
Technicians verify inlet pressure, adjust gas regulator within manufacturer limits, set maximum outlet temperature, and fine-tune flow rates to prevent fluctuation.
Check for stable combustion, no leaks, and proper venting.
Reassess after varied demand cycles, document settings, and instruct occupants on basic temperature controls and safety limits.
Verifying error codes and normal operation indicators
After gas and water settings are stabilized, the technician proceeds to verify error codes and normal operation indicators to confirm reliable commissioning and performance optimization.
The technician scans the display for stored or active codes, cross-references the manual, clears transient faults, and runs diagnostic cycles.
Normal indicators include steady burner ignition, correct flow rates, stable temperature, and absence of leaks or abnormal noises.
Troubleshooting Common Issues
The troubleshooting section outlines steps to identify and resolve frequent problems such as no or insufficient hot water, combustion or ignition failures, and displayed error codes with corresponding stepwise fixes.
It also covers diagnosing and repairing water leaks, pressure-related faults, venting defects, and condensation concerns.
Clear procedures and safety precautions are provided to guide corrective action and determine when professional service is required.
No hot water or insufficient hot water
When a Navien tankless water heater produces no hot water or only a trickle of warm water, the issue typically stems from fuel, water supply, or internal component failures.
Diagnosing the problem systematically—checking gas/electric supply, inlet water flow, error codes, and the unit’s filters and heat exchanger—quickly narrows likely causes and guides whether a simple homeowner action or professional service is required.
Inspect inlet shutoff valves, clean filters, confirm adequate flow, and review error codes for overheating or flow-sensor faults.
If basic resets and cleaning fail, schedule qualified service to test the heat exchanger, flow sensor, and control board.
Combustion or ignition failures
Several common combustion or ignition failures in Navien tankless water heaters manifest as repeated ignition attempts, flashing error codes, or a complete failure to light.
These issues are typically caused by interrupted fuel supply, inadequate air flow, blocked venting, faulty igniters, or control board errors.
Diagnosis focuses on verifying gas supply and pressure, checking venting and intake clearance, inspecting igniter and wiring, and confirming proper combustion air pathways.
Error codes common codes and stepwise fixes
Many Navien error codes point directly to specific faults—such as ignition failure (E031/E032), flame loss (E041), overheat (E012), or low-water-flow (E101)—and should be addressed with a clear, stepwise approach combining code lookup, visual and electrical checks, and targeted repairs.
- Read code, record conditions.
- Inspect vents, burners, wiring.
- Test sensors, solenoids, valves.
- Reset, retest, replace faulty components if persistent.
Water leaks and pressure-related problems
After addressing error codes and electrical or sensor faults, attention should shift to physical water issues, since leaks and pressure problems are among the most common causes of performance loss and damage in Navien tankless units.
Inspect inlet/outlet fittings, condensate and relief valves for drips. Verify supply pressure and flow rate against specifications.
Tighten or replace seals, clean filters, and test for stabilized pressure before resuming operation.
Venting problems and condensation issues
When venting is obstructed, improperly installed, or incompatible with the unit’s condensate drainage, Navien tankless heaters can exhibit flame instability, error codes, or premature shutdowns.
Technicians should inspect vent runs for blockages, correct pitch, and approved materials.
Condensate traps and drains must be intact and frost-protected.
Improper terminations, excessive backpressure, or corrosion require immediate correction to prevent performance loss and safety hazards.
Electrical faults and reset procedures
Diagnose electrical faults systematically to isolate wiring, supply, and control-board issues that cause error codes or complete shutdowns.
Inspect branch circuit breakers, ground connections, and terminal tightness. Verify proper voltage at the unit and replace blown fuses.
Clear stored fault codes per manual and perform a controlled reset.
If errors persist, document codes, disconnect power, and consult Navien support or a licensed electrician for board diagnostics.
Maintenance and Long-Term Care
The section outlines a practical maintenance schedule and specific tasks to keep the Navien tankless unit operating efficiently.
It summarizes step-by-step flushing and descaling, filter and anode rod replacement, and condensate component service.
It also covers seasonal checks and winterization measures to prevent freeze damage and prolong system life.
Routine maintenance schedule and tasks
Regular maintenance preserves performance and extends the service life of a Navien tankless water heater.
A concise schedule balances monthly, quarterly, and annual tasks to prevent issues and retain efficiency.
Recommended routine tasks include visual checks, filter cleaning, vent inspection, and system diagnostics to identify faults early and document service dates for warranty and longevity.
- Inspect exterior and connections monthly.
- Clean inlet filters quarterly.
- Check vents and combustion chamber quarterly.
- Run diagnostic self-checks annually.
Flushing and descaling procedures step-by-step
After routine inspections and filter care identify mineral buildup or reduced flow, flushing and descaling should follow to restore efficiency and prevent heat exchanger damage.
Isolate unit, close water and gas valves, attach hoses to service ports, circulate a vinegar or manufacturer-approved descaling solution with a pump for 45–60 minutes, then flush with clean water until clear.
Reassemble, restore supply, check for leaks and proper operation.
Replacing filters, anode rods, and condensate components
Inspecting and replacing filters, anode rods, and condensate components guarantees sustained performance and prevents premature failure of a Navien tankless water heater.
Routine filter checks remove debris; replace per manual intervals.
Inspect sacrificial anode rods for corrosion and replace when depleted to protect heat exchanger.
Verify condensate trap, drain lines, and neutralizer integrity; clear blockages and replace damaged parts to avoid acidic corrosion and drainage issues.
Seasonal checks and winterization tips
Several seasonal checks and timely winterization steps help prevent freeze damage and maintain efficiency in a Navien tankless water heater.
Inspect external venting, condensate drain, and insulation annually.
Flush the heat exchanger and clean inlet screens before cold months.
If temperatures drop below freezing, drain and depressurize system or circulate antifreeze per manufacturer guidelines.
Verify gas, electrical, and error codes after restart.
Cost Estimates, Timeframe, and When to Call a Pro
A basic DIY Navien tankless water heater installation typically lists costs for the unit, venting, fittings, and basic tools, and can take an experienced homeowner one to two days.
Complexities such as gas line upgrades, electrical work, or vent routing signal the need for a licensed plumber or HVAC technician.
Careful recordkeeping of receipts, model and serial numbers, and any professional work is necessary to preserve warranty coverage.
Typical DIY cost breakdown and time required
Typical DIY installation of a Navien tankless water heater ranges from straightforward to complex depending on gas line, venting, and plumbing changes; expect material costs of $300–$1,200 and 6–16 hours of labor for someone with intermediate skills.
| Item | Typical Cost/Time |
|---|---|
| Unit prep | $0–$200 / 1–2h |
| Venting | $50–$400 / 1–4h |
| Gas work | $50–$300 / 1–4h |
| Plumbing | $100–$400 / 2–6h |
| Misc/permits | $0–$100 / 0–1h |
Signs the job requires professional HVAC or plumbing services
Many installations can be handled by a competent DIYer, but clear indicators—complex gas-line upgrades, chasing shared venting through walls, significant water-pipe reconfigurations, or municipal permit requirements—signal that professional HVAC or plumbing services are necessary.
Call a pro when work risks safety, code compliance, or system performance: high gas pressures, asbestos/structural work, multi-unit venting, unexpected leaks, or tight deadlines requiring certified inspections.
Warranty considerations and documentation to keep
After recognizing situations that require professional intervention, attention turns to warranty coverage and the paperwork that preserves it. Installers and homeowners should understand what actions or omissions void the Navien warranty and which documents must be retained.
Keep purchase receipts, serial number records, installation invoices, and commissioning forms. Follow manufacturer maintenance schedules and use qualified technicians for covered repairs to avoid denial of claims.
Helpful Tips, Common Mistakes, and Best Practices
The section highlights key precautions for safe gas and vent connections, emphasizing correct fittings, leak testing, and clearances.
It outlines common installation mistakes to avoid, such as improper pipe sizing, inadequate condensate drainage, and poor electrical grounding.
It also offers efficiency and energy-saving recommendations, including proper temperature settings, regular maintenance, and insulation of hot water lines.
Tips for safe gas and vent connections
Because gas and vent connections are critical to both performance and safety, installers should follow strict procedures and local codes when working on a Navien tankless water heater.
Verify correct fuel type and line sizing, use approved fittings and sealants, test for leaks with a manometer or soapy water, guarantee proper vent slope and clearances, and secure joints to prevent corrosion, backflow, or combustion hazards.
Common installation mistakes to avoid
Avoiding common installation mistakes preserves system performance and prevents safety hazards; installers must prioritize correct sizing, clearances, and secure connections from the start.
Common errors include improper venting path, undersized gas supply, incorrect water line orientation, insufficient condensate drainage, poor electrical grounding, and neglecting manufacturer clearances.
Verifying mounting stability, leak testing joints, and following prescribed torque and sealing methods prevents failures and warranty voidance.
Efficiency and energy-saving recommendations
Good installation practices that prevent leaks and system damage also create the foundation for ideal efficiency. Once the heater is correctly sized, vented, and mounted, attention can shift to operational and maintenance measures that reduce energy use.
Recommend insulating hot and cold pipes, setting temperature to 120°F, using demand-activated recirculation controls, scheduling annual descaling, and correcting flow restrictions.
Monitor usage and repair drips promptly.
Resources and Reference Links
Official Navien manuals and installation guides can be accessed on the manufacturer’s website and provide model-specific specifications, wiring diagrams, and maintenance procedures.
Local permitting offices and building department websites list required permits, inspection steps, and applicable code references for installation.
Readers are encouraged to consult both sources before beginning work to guarantee compliance and safe operation.
Where to find official Navien manuals and installation guides
Where can installers and homeowners locate authoritative Navien documentation?
Official Navien manuals, installation guides, and technical sheets are hosted by Navien and authorized distributors. These sources provide model-specific instructions, venting diagrams, and warranty details.
- Navien official website — product support section.
- Navien PDF manual library.
- Authorized dealer portals.
- Navien technical support contact.
Local permitting resources and code references
After consulting Navien’s manuals and technical sheets, installers and homeowners should verify local permitting requirements and applicable codes before beginning installation.
Local building departments, state plumbing boards, and utility providers enforce distinct rules; documentation, inspection schedules, and approved venting or gas piping standards vary.
Reference official code editions and contact authorities for permit types, fees, and inspection checklists.
- Local building department
- State plumbing board
- Utility provider requirements
- Applicable code editions
Conclusion
While the guide outlines practical steps for installing a Navien tankless water heater, a curious theory persists: DIY installation reduces long-term costs without compromising safety. Investigations show this holds only when homeowners possess plumbing, gas, and electrical expertise and adhere strictly to code and manufacturer instructions. Otherwise, risks and hidden expenses grow. Readers are advised to weigh skills and local regulations objectively—when doubts arise, engaging a licensed professional guarantees safety, warranty protection, and peak performance.